ASTM E1647-16(2022)
(Practice)Standard Practice for Determining Contrast Sensitivity in Radiology
Standard Practice for Determining Contrast Sensitivity in Radiology
SIGNIFICANCE AND USE
5.1 The contrast sensitivity gauge measures contrast sensitivity independent of the imaging system spatial resolution limitations. The thickness recess dimensions of the contrast sensitivity gauge are large with respect to the unsharpness limitations of most imaging systems. Four levels of contrast sensitivity are measured: 4 %, 3 %, 2 %, and 1 %.
5.2 The contrast sensitivity gauge is intended for use in conjunction with a high-contrast resolution measuring gauge, such as Practice E2002, ISO 19232 – 5 Duplex Wire Image Quality Indicator7, or a line-pair gauge. Such gauges measure system unsharpness essentially independent of the imaging system's contrast sensitivity. Such measurements are appropriate for the qualification and performance monitoring of radiographic and radioscopic imaging systems with film, realtime devices, Computed Radiography (CR) and Digital Detector Arrays (DDA).
5.3 Radioscopic/radiographic system performance may be specified by combining the measured contrast sensitivity expressed as a percentage with the unsharpness expressed in millimetres of unsharpness. For the duplex wire image quality indicator, the unsharpness is equal to twice the wire diameter. For the line pair gauge, the unsharpness is equal to the reciprocal of the line-pair/mm value. As an example, an imaging system that exhibits 2 % contrast sensitivity and images the 0.1 mm paired wires of the duplex wire IQI (equivalent to imaging 5 line-pairs/millimeter resolution on a line-pair gauge) performs at a 2 %–0.2 mm sensitivity level. A standard method of evaluating overall radioscopic system performance is given in Practice E1411 and in EN 13068–1. A conversion table from duplex wire read out to lp/mm can be found in Practice E2002. For CR system performance evaluation, this contrast sensitivity gauge is used in Practice E2445.
SCOPE
1.1 This practice covers the design and material selection of a contrast sensitivity measuring gauge used to determine the minimum change in material thickness or density that may be imaged without regard to unsharpness limitations.
1.2 This practice is applicable to transmitted-beam radiographic imaging systems (film, radioscopy, computed radiography, and digital detector array image detectors) utilizing X-ray and gamma ray radiation sources.
1.3 The values stated in inch-pound units are to be regarded as standard. The SI units given in parentheses are for information only.
1.4 This standard does not purport to address all of the safety concerns, if any, associated with its use. It is the responsibility of the user of this standard to establish appropriate safety, health, and environmental practices and determine the applicability of regulatory limitations prior to use. For specific safety statements, see NIST/ANSI Handbook 114 Section 8, Code of Federal Regulations 21 CFR 1020.40 and 29 CFR 1910.96.
1.5 This international standard was developed in accordance with internationally recognized principles on standardization established in the Decision on Principles for the Development of International Standards, Guides and Recommendations issued by the World Trade Organization Technical Barriers to Trade (TBT) Committee.
General Information
- Status
- Published
- Publication Date
- 30-Nov-2022
- Technical Committee
- E07 - Nondestructive Testing
- Drafting Committee
- E07.01 - Radiography (X and Gamma) Method
Relations
- Effective Date
- 01-Apr-2024
- Effective Date
- 01-Feb-2024
- Effective Date
- 01-Dec-2023
- Effective Date
- 01-Dec-2023
- Effective Date
- 01-Dec-2019
- Effective Date
- 01-Apr-2019
- Effective Date
- 01-Apr-2019
- Effective Date
- 01-Apr-2019
- Effective Date
- 01-Apr-2019
- Effective Date
- 01-Mar-2019
- Effective Date
- 01-Feb-2018
- Effective Date
- 01-Jan-2018
- Effective Date
- 15-Jun-2017
- Effective Date
- 01-Apr-2017
- Effective Date
- 01-Apr-2017
Overview
ASTM E1647-16(2022) - Standard Practice for Determining Contrast Sensitivity in Radiology establishes procedures and criteria for assessing the contrast sensitivity of radiographic imaging systems using a dedicated contrast sensitivity gauge. This gauge is designed to measure the smallest change in material thickness or density that can be discerned in an image, evaluated independently of the system's spatial resolution or unsharpness.
This ASTM standard applies to transmitted-beam radiographic imaging systems, including X-ray and gamma ray devices operating with film, radioscopic, computed radiography (CR), and digital detector arrays (DDA).
Key Topics
- Contrast Sensitivity Gauge: The gauge features four recess depths corresponding to 1%, 2%, 3%, and 4% of the total gauge thickness. By identifying the shallowest recess reliably imaged, the contrast sensitivity of the system is determined.
- Independence from Unsharpness: The gauge's design ensures that contrast sensitivity measurements are not significantly influenced by spatial resolution limitations, allowing for clear separation of these two performance characteristics.
- Material and Design: The gauge is to be fabricated from materials with radiation absorption properties similar to the test object (metal groups and alloys are specified). The design and dimensional tolerances are outlined to guarantee consistency and repeatability across applications.
- Performance Level Expression: Imaging system performance is specified as a combination of measured contrast sensitivity (percentage) and unsharpness (millimeters). This dual measure supports comprehensive evaluation and comparison of system capabilities.
- Use with Other Gauges: For a complete performance evaluation, the contrast sensitivity gauge works alongside high-contrast resolution measuring devices (e.g., wire image quality indicators, line-pair gauges).
Applications
ASTM E1647-16(2022) is valuable for:
- Qualification and Monitoring: Used in the initial qualification and ongoing performance monitoring of radiographic and radioscopic imaging systems in industrial, security, and medical applications.
- System Comparison: Enables the consistent comparison of imaging system performance, supporting equipment validation, upgrades, and procurement decisions.
- System Troubleshooting: Early detection of declining contrast sensitivity can indicate emerging issues in imaging system performance, enabling proactive maintenance or recalibration.
- Diverse Imaging Technologies: Applicable across a wide range of imaging modalities, including traditional film, digital radiography, and real-time radioscopy, regardless of X-ray or gamma ray source.
- Material Versatility: Gauge material groupings ensure compatibility with a broad range of metals and alloys, from magnesium and aluminum to stainless steel, bronzes, and nickel-copper alloys.
Related Standards
For enhanced radiographic image quality control and system assessment, ASTM E1647-16(2022) can be used in conjunction with the following related standards:
- ASTM E2002: Practice for Determining Image Unsharpness and Basic Spatial Resolution in Radiography and Radioscopy.
- ISO 19232-5: Duplex Wire Image Quality Indicator for radiographic testing.
- ASTM E747: Practice for Design and Manufacture of Wire Image Quality Indicators.
- ASTM E2445: Practice for Performance Evaluation and Long-Term Stability of Computed Radiography Systems.
- ASTM E1411: Practice for Qualification of Radioscopic Systems.
- EN 13068-1: Radioscopic Testing – Part 1: Qualitative Measurement of Imaging Properties.
- NIST/ANSI Handbook 114, 21 CFR 1020.40, 29 CFR 1910.96: Safety requirements relevant to ionizing radiation sources.
Practical Value
Using ASTM E1647-16(2022) ensures that radiographic systems provide reliable, reproducible contrast sensitivity measurements critical for quality assurance and system benchmarking. This standard supports industry compliance, improves imaging reliability, and safeguards inspection accuracy in radiology and nondestructive testing applications.
Buy Documents
ASTM E1647-16(2022) - Standard Practice for Determining Contrast Sensitivity in Radiology
Get Certified
Connect with accredited certification bodies for this standard

BSI Group
BSI (British Standards Institution) is the business standards company that helps organizations make excellence a habit.

TÜV Rheinland
TÜV Rheinland is a leading international provider of technical services.

TÜV SÜD
TÜV SÜD is a trusted partner of choice for safety, security and sustainability solutions.
Sponsored listings
Frequently Asked Questions
ASTM E1647-16(2022) is a standard published by ASTM International. Its full title is "Standard Practice for Determining Contrast Sensitivity in Radiology". This standard covers: SIGNIFICANCE AND USE 5.1 The contrast sensitivity gauge measures contrast sensitivity independent of the imaging system spatial resolution limitations. The thickness recess dimensions of the contrast sensitivity gauge are large with respect to the unsharpness limitations of most imaging systems. Four levels of contrast sensitivity are measured: 4 %, 3 %, 2 %, and 1 %. 5.2 The contrast sensitivity gauge is intended for use in conjunction with a high-contrast resolution measuring gauge, such as Practice E2002, ISO 19232 – 5 Duplex Wire Image Quality Indicator7, or a line-pair gauge. Such gauges measure system unsharpness essentially independent of the imaging system's contrast sensitivity. Such measurements are appropriate for the qualification and performance monitoring of radiographic and radioscopic imaging systems with film, realtime devices, Computed Radiography (CR) and Digital Detector Arrays (DDA). 5.3 Radioscopic/radiographic system performance may be specified by combining the measured contrast sensitivity expressed as a percentage with the unsharpness expressed in millimetres of unsharpness. For the duplex wire image quality indicator, the unsharpness is equal to twice the wire diameter. For the line pair gauge, the unsharpness is equal to the reciprocal of the line-pair/mm value. As an example, an imaging system that exhibits 2 % contrast sensitivity and images the 0.1 mm paired wires of the duplex wire IQI (equivalent to imaging 5 line-pairs/millimeter resolution on a line-pair gauge) performs at a 2 %–0.2 mm sensitivity level. A standard method of evaluating overall radioscopic system performance is given in Practice E1411 and in EN 13068–1. A conversion table from duplex wire read out to lp/mm can be found in Practice E2002. For CR system performance evaluation, this contrast sensitivity gauge is used in Practice E2445. SCOPE 1.1 This practice covers the design and material selection of a contrast sensitivity measuring gauge used to determine the minimum change in material thickness or density that may be imaged without regard to unsharpness limitations. 1.2 This practice is applicable to transmitted-beam radiographic imaging systems (film, radioscopy, computed radiography, and digital detector array image detectors) utilizing X-ray and gamma ray radiation sources. 1.3 The values stated in inch-pound units are to be regarded as standard. The SI units given in parentheses are for information only. 1.4 This standard does not purport to address all of the safety concerns, if any, associated with its use. It is the responsibility of the user of this standard to establish appropriate safety, health, and environmental practices and determine the applicability of regulatory limitations prior to use. For specific safety statements, see NIST/ANSI Handbook 114 Section 8, Code of Federal Regulations 21 CFR 1020.40 and 29 CFR 1910.96. 1.5 This international standard was developed in accordance with internationally recognized principles on standardization established in the Decision on Principles for the Development of International Standards, Guides and Recommendations issued by the World Trade Organization Technical Barriers to Trade (TBT) Committee.
SIGNIFICANCE AND USE 5.1 The contrast sensitivity gauge measures contrast sensitivity independent of the imaging system spatial resolution limitations. The thickness recess dimensions of the contrast sensitivity gauge are large with respect to the unsharpness limitations of most imaging systems. Four levels of contrast sensitivity are measured: 4 %, 3 %, 2 %, and 1 %. 5.2 The contrast sensitivity gauge is intended for use in conjunction with a high-contrast resolution measuring gauge, such as Practice E2002, ISO 19232 – 5 Duplex Wire Image Quality Indicator7, or a line-pair gauge. Such gauges measure system unsharpness essentially independent of the imaging system's contrast sensitivity. Such measurements are appropriate for the qualification and performance monitoring of radiographic and radioscopic imaging systems with film, realtime devices, Computed Radiography (CR) and Digital Detector Arrays (DDA). 5.3 Radioscopic/radiographic system performance may be specified by combining the measured contrast sensitivity expressed as a percentage with the unsharpness expressed in millimetres of unsharpness. For the duplex wire image quality indicator, the unsharpness is equal to twice the wire diameter. For the line pair gauge, the unsharpness is equal to the reciprocal of the line-pair/mm value. As an example, an imaging system that exhibits 2 % contrast sensitivity and images the 0.1 mm paired wires of the duplex wire IQI (equivalent to imaging 5 line-pairs/millimeter resolution on a line-pair gauge) performs at a 2 %–0.2 mm sensitivity level. A standard method of evaluating overall radioscopic system performance is given in Practice E1411 and in EN 13068–1. A conversion table from duplex wire read out to lp/mm can be found in Practice E2002. For CR system performance evaluation, this contrast sensitivity gauge is used in Practice E2445. SCOPE 1.1 This practice covers the design and material selection of a contrast sensitivity measuring gauge used to determine the minimum change in material thickness or density that may be imaged without regard to unsharpness limitations. 1.2 This practice is applicable to transmitted-beam radiographic imaging systems (film, radioscopy, computed radiography, and digital detector array image detectors) utilizing X-ray and gamma ray radiation sources. 1.3 The values stated in inch-pound units are to be regarded as standard. The SI units given in parentheses are for information only. 1.4 This standard does not purport to address all of the safety concerns, if any, associated with its use. It is the responsibility of the user of this standard to establish appropriate safety, health, and environmental practices and determine the applicability of regulatory limitations prior to use. For specific safety statements, see NIST/ANSI Handbook 114 Section 8, Code of Federal Regulations 21 CFR 1020.40 and 29 CFR 1910.96. 1.5 This international standard was developed in accordance with internationally recognized principles on standardization established in the Decision on Principles for the Development of International Standards, Guides and Recommendations issued by the World Trade Organization Technical Barriers to Trade (TBT) Committee.
ASTM E1647-16(2022) is classified under the following ICS (International Classification for Standards) categories: 11.040.50 - Radiographic equipment. The ICS classification helps identify the subject area and facilitates finding related standards.
ASTM E1647-16(2022) has the following relationships with other standards: It is inter standard links to ASTM B166-24, ASTM E1316-24, ASTM E1255-23, ASTM E1411-23, ASTM E1316-19b, ASTM B161-05(2019), ASTM B164-03(2019), ASTM B166-19, ASTM B150/B150M-19, ASTM E1316-19, ASTM E1025-18, ASTM E1316-18, ASTM E1316-17a, ASTM B139/B139M-12(2017), ASTM B150/B150M-12(2017). Understanding these relationships helps ensure you are using the most current and applicable version of the standard.
ASTM E1647-16(2022) is available in PDF format for immediate download after purchase. The document can be added to your cart and obtained through the secure checkout process. Digital delivery ensures instant access to the complete standard document.
Standards Content (Sample)
This international standard was developed in accordance with internationally recognized principles on standardization established in the Decision on Principles for the
Development of International Standards, Guides and Recommendations issued by the World Trade Organization Technical Barriers to Trade (TBT) Committee.
Designation: E1647 − 16 (Reapproved 2022)
Standard Practice for
Determining Contrast Sensitivity in Radiology
This standard is issued under the fixed designation E1647; the number immediately following the designation indicates the year of
original adoption or, in the case of revision, the year of last revision.Anumber in parentheses indicates the year of last reapproval.A
superscript epsilon (´) indicates an editorial change since the last revision or reapproval.
1. Scope B161Specification for Nickel Seamless Pipe and Tube
B164Specification for Nickel-Copper Alloy Rod, Bar, and
1.1 Thispracticecoversthedesignandmaterialselectionof
Wire
a contrast sensitivity measuring gauge used to determine the
B166Specification for Nickel-Chromium-Aluminum Alloy,
minimum change in material thickness or density that may be
Nickel-Chromium-IronAlloys,Nickel-Chromium-Cobalt-
imaged without regard to unsharpness limitations.
Molybdenum Alloy, Nickel-Iron-Chromium-Tungsten
1.2 This practice is applicable to transmitted-beam radio-
Alloy, and Nickel-Chromium-Molybdenum-CopperAlloy
graphic imaging systems (film, radioscopy, computed
Rod, Bar, and Wire
radiography, and digital detector array image detectors) utiliz-
E747PracticeforDesign,ManufactureandMaterialGroup-
ing X-ray and gamma ray radiation sources.
ing Classification of Wire Image Quality Indicators (IQI)
1.3 Thevaluesstatedininch-poundunitsaretoberegarded
Used for Radiology
as standard.The SI units given in parentheses are for informa-
E1025Practice for Design, Manufacture, and Material
tion only.
Grouping Classification of Hole-Type Image Quality In-
1.4 This standard does not purport to address all of the
dicators (IQI) Used for Radiography
safety concerns, if any, associated with its use. It is the
E1255Practice for Radioscopy
responsibility of the user of this standard to establish appro-
E1316Terminology for Nondestructive Examinations
priate safety, health, and environmental practices and deter-
E1411Practice for Qualification of Radioscopic Systems
mine the applicability of regulatory limitations prior to use.
E1734Practice for Radioscopic Examination of Castings
For specific safety statements, see NIST/ANSI Handbook 114
E1742Practice for Radiographic Examination
Section 8, Code of Federal Regulations 21 CFR 1020.40 and
E2002Practice for Determining Image Unsharpness and
29 CFR 1910.96.
Basic Spatial Resolution in Radiography and Radioscopy
1.5 This international standard was developed in accor-
E2445Practice for Performance Evaluation and Long-Term
dance with internationally recognized principles on standard-
Stability of Computed Radiography Systems
ization established in the Decision on Principles for the
Development of International Standards, Guides and Recom-
2.2 Federal Standards:
mendations issued by the World Trade Organization Technical
21CFR 1020.40 Safety Requirements for Cabinet X-ray
Barriers to Trade (TBT) Committee.
Systems
29CFR 1910.96 Ionizing Radiation
2. Referenced Documents
2.3 NIST/ANSI Standards:
2.1 ASTM Standards:
NIST/ANSI Handbook 114General Safety Standard for
B139/B139MSpecification for Phosphor Bronze Rod, Bar,
Installations Using Non-Medical X-ray and Sealed
and Shapes
Gamma Ray Sources, Energies to 10 MeV
B150/B150MSpecification forAluminum Bronze Rod, Bar,
2.4 ISO Standard:
and Shapes
ISO 19232–5Duplex Wire Image Quality Indicator
This practice is under the jurisdiction of ASTM Committee E07 on Nonde-
structive Testing and is the direct responsibility of Subcommittee E07.01 on
Radiology (X and Gamma) Method. AvailablefromU.S.GovernmentPrintingOfficeSuperintendentofDocuments,
Current edition approved Dec. 1, 2022. Published December 2022. Originally 732 N. Capitol St., NW, Mail Stop: SDE, Washington, DC 20401, http://
approved in 1994. Last previous edition approved in 2016 as E1647–16. DOI: www.access.gpo.gov.
10.1520/E1647-16R22. AvailablefromAmericanSocietyforNondestructiveTesting(ASNT),P.O.Box
For referenced ASTM standards, visit the ASTM website, www.astm.org, or 28518, 1711Arlingate Ln., Columbus, OH 43228-0518, http://www.asnt.org.
contact ASTM Customer Service at service@astm.org. For Annual Book of ASTM Available from International Organization for Standardization (ISO), ISO
Standards volume information, refer to the standard’s Document Summary page on Central Secretariat, BIBC II, Chemin de Blandonnet 8, CP 401, 1214 Vernier,
the ASTM website. Geneva, Switzerland, http://www.iso.org.
Copyright © ASTM International, 100 Barr Harbor Drive, PO Box C700, West Conshohocken, PA 19428-2959. United States
E1647 − 16 (2022)
2.5 Other Standards: imaging system that exhibits 2% contrast sensitivity and
EN 462 – 5 Duplex Wire Image Quality Indicator images the 0.1 mm paired wires of the duplex wire IQI
(withdrawn, replaced by ISO 19232–5) (equivalent to imaging 5 line-pairs/millimeter resolution on a
EN13068–1Radioscopic Testing-Part 1: Qualitative Mea- line-pair gauge) performs at a 2%–0.2 mm sensitivity level.A
surement of Imaging Properties standard method of evaluating overall radioscopic system
performance is given in Practice E1411 and in EN13068–1.A
3. Terminology
conversion table from duplex wire read out to lp/mm can be
found in Practice E2002. For CR system performance
3.1 Definitions—Definitions of terms applicable to this test
evaluation, this contrast sensitivity gauge is used in Practice
method may be found in Terminology E1316.
E2445.
4. Summary of Practice
6. Contrast Sensitivity Gauge Construction and Material
4.1 It is often useful to evaluate the contrast sensitivity of a
Selection
penetrating radiation imaging system separate and apart from
6.1 Contrast sensitivity gauges shall be fabricated in accor-
unsharpness measurements. Conventional image quality indi-
cators (IQI’s), such as Test Method E747 wire and Practices dancewithFig.1,usingthedimensionsgiveninTable1,Table
2, and Table 3.
E1025 or E1742 plaque IQIs, combine the contrast sensitivity
and resolution measurements into an overall performance
6.2 The gauge shall preferably be fabricated from the
figure of merit, other methods such as included in Practice
examinationobjectmaterial.Otherwise,thefollowingmaterial
E2002 do not address contrast specifically. Such figures of
selection guidelines are to be used:
merit are often not adequate to detect subtle changes in
6.2.1 Materials are designated in eight groupings, in accor-
imaging system performance. For example, in a high contrast
dance with their penetrating radiation absorption characteris-
image, unsharpness can increase with almost no noticeable
tics: groups 03, 02, and 01 for light metals and groups 1
effect upon overall image quality. Similarly, in an application
through 5 for heavy metals.
in which the imaging system provides a very sharp image,
6.2.2 The light metal groups, magnesium (Mg), aluminum
contrast can fade with little noticeable effect upon the overall
(Al), and titanium (Ti), are identified as 03, 02, and 01,
image quality. These situations often develop and may go
respectively, for their predominant constituent. The materials
unnoticed until the system performance deteriorates below
are listed in order of increasing radiation absorption.
acceptable image quality limits.
6.2.3 The heavy metals group, steel, copper base, nickel
base, and other alloys, are identified as 1 through 5. The
5. Significance and Use
materials increase in radiation absorption with increasing
5.1 The contrast sensitivity gauge measures contrast sensi-
numerical designation.
tivity independent of the imaging system spatial resolution
6.2.4 Commontrade names or alloydesignationshavebeen
limitations. The thickness recess dimensions of the contrast
used for clarification of pertinent materials.
sensitivity gauge are large with respect to the unsharpness
6.3 The materials from which the contrast sensitivity gauge
limitations of most imaging systems. Four levels of contrast
is to be made is designated by group number. The gauge is
sensitivity are measured: 4%, 3%, 2%, and 1%.
applicabletoallmaterialsinthatgroup.Materialgroupingsare
5.2 The contrast sensitivity gauge is intended for use in
as follows:
conjunction with a high-contrast resolution measuring gauge,
6.3.1 Materials Group 03:
such as Practice E2002, ISO 19232–5 Duplex Wire Image
6.3.1.1 The gauge shall be made of magnesium or a mag-
Quality Indicator , or a line-pair gauge. Such gauges measure
nesium alloy, provided it is no more radio-opaque than
system unsharpness essentially independent of the imaging
unalloyedmagnesium,asdeterminedbythemethodoutlinedin
system’scontrastsensitivity.Suchmeasurementsareappropri-
6.4.
ate for the qualification and performance monitoring of radio-
graphic and radioscopic imaging systems with film, realtime
devices, Computed Radiography (CR) and Digital Detector
Arrays (DDA).
5.3 Radioscopic/radiographic system performance may be
specified by combining the measured contrast sensitivity ex-
pressed as a percentage with the unsharpness expressed in
millimetres of unsharpness. For the duplex wire image quality
indicator, the unsharpness is equal to twice the wire diameter.
For the line pair gauge, the unsharpness is equal to the
reciprocal of the line-pair/mm value. As an example, an
Available from British Standards Institute (BSI), 389 Chiswick High Rd.,
London W4 4AL, U.K., http://www.bsi-global.com.
The former version of the duplex wire gauge with the mark EN-462 may also
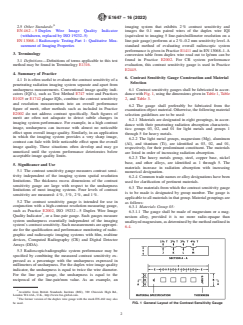
be used. FIG. 1 General Layout of the Contrast Sensitivity Gauge
E1647 − 16 (2022)
TABLE 1 Design of the Contrast Sensitivity Gauge
6.3.7 Materials Group 4:
Gauge J Recess K Recess L Recess M Recess
6.3.7.1 The gauge shall be made of 70 to 30 nickel-copper
Thickness 10
alloy (Monel ) (Class A or B of Specification B164)or
T 1%ofT 2%ofT 3%ofT 4%ofT
...


Questions, Comments and Discussion
Ask us and Technical Secretary will try to provide an answer. You can facilitate discussion about the standard in here.
Loading comments...