ASTM C430-17
(Test Method)Standard Test Method for Fineness of Hydraulic Cement by the 45-μm (No. 325) Sieve
Standard Test Method for Fineness of Hydraulic Cement by the 45-μm (No. 325) Sieve
ABSTRACT
This test method covers hydraulic cement fineness tests performed using a sieve. The sieve frame should be made of a circular metal matching the specified dimensions, fitted with either a stainless steel woven-wire sieve cloth or an electroformed forced nickel sieve sheet. Both the nozzle and sieve shall not be subjected to corrosion by water. The nozzle and pressure gauge should also conform to the specified dimensions. This test method also covers sieve calibration and cleaning procedures.
SCOPE
1.1 This test method covers the determination of the fineness of hydraulic cement by means of the 45-μm (No. 325) sieve.
1.2 The values stated in SI units are to be regarded as the standard. The inch-pound equivalents of SI units may be approximate.
1.3 This standard does not purport to address all of the safety concerns, if any, associated with its use. It is the responsibility of the user of this standard to establish appropriate safety, health, and environmental practices and determine the applicability of regulatory limitations prior to use.
1.4 This international standard was developed in accordance with internationally recognized principles on standardization established in the Decision on Principles for the Development of International Standards, Guides and Recommendations issued by the World Trade Organization Technical Barriers to Trade (TBT) Committee.
General Information
- Status
- Published
- Publication Date
- 30-Nov-2017
- Technical Committee
- C01 - Cement
- Drafting Committee
- C01.25 - Fineness
Relations
- Effective Date
- 01-Dec-2017
- Effective Date
- 01-Apr-2024
- Effective Date
- 01-Aug-2020
- Effective Date
- 01-Apr-2020
- Effective Date
- 15-Dec-2019
- Effective Date
- 15-Nov-2019
- Effective Date
- 01-Jun-2019
- Effective Date
- 01-Jan-2019
- Effective Date
- 01-Oct-2018
- Effective Date
- 01-Jul-2018
- Effective Date
- 01-Jan-2018
- Effective Date
- 15-Dec-2016
- Effective Date
- 15-Dec-2015
- Effective Date
- 01-Jul-2015
- Effective Date
- 01-Feb-2015
Overview
ASTM C430-17: Standard Test Method for Fineness of Hydraulic Cement by the 45-μm (No. 325) Sieve is a key international standard for determining the fineness of hydraulic cement using a specific test sieve. The regulated procedure ensures consistent, reliable, and reproducible results across laboratories, directly supporting the production and quality assurance of cement products. The standard outlines requirements for sieve construction, test apparatus, calibration, cleaning, and calculation of cement fineness using the 45-micron (No. 325) sieve.
Key Topics
- Fineness Measurement: The test method establishes procedures for quantitatively assessing the fineness of hydraulic cement based on residue retained on a 45-μm (No. 325) sieve.
- Apparatus Requirements: Details specifications for the sieve, including corrosion-resistant metal frame and either woven-wire stainless steel sieve cloth or an electroformed nickel sheet. The spray nozzle and pressure gauge are also described to guarantee test consistency.
- Calibration and Cleaning: Provides guidance on the frequency and methods for cleaning and recalibrating sieves, critical for maintaining test accuracy.
- Calculation of Results: The standard specifies formulas for determining the corrected percentage of cement passing through the sieve, including the role of correction factors.
- Precision and Bias: Establishes expected reproducibility of results between laboratories and the absence of a recognized reference material for bias.
Applications
The ASTM C430-17 standard is widely used in quality control laboratories, cement manufacturing plants, construction material testing centers, and research facilities. Practical applications include:
- Quality Control of Cement: Ensures that the physical fineness of cement meets specified requirements, which is essential for achieving the designed setting time and strength development in concrete structures.
- Product Certification: Serves as a reference for certifying the fineness of hydraulic cement in compliance with industry regulations and contractual specifications.
- Research and Development: Used in evaluating new formulations or additives aimed at optimizing cement performance and efficiency.
- Comparative Testing: Enables benchmarking of test results between different laboratories, ensuring consistency and reliability in cement testing and construction practices.
- Regulatory Compliance: Helps producers and users meet local and international requirements for construction project documentation and approvals.
Related Standards
Several other ASTM standards are closely associated with ASTM C430-17, supporting an integrated approach to hydraulic cement testing and terminology:
- ASTM C125 - Terminology Relating to Concrete and Concrete Aggregates
- ASTM C219 - Terminology Relating to Hydraulic Cement
- ASTM E11 - Specification for Woven Wire Test Sieve Cloth and Test Sieves
- ASTM E161 - Specification for Precision Electroformed Sieves
- ASTM E177 - Practice for Use of the Terms Precision and Bias in ASTM Test Methods
Summary
Complying with ASTM C430-17 is essential for stakeholders concerned with hydraulic cement fineness, including manufacturers, testing labs, and regulatory bodies. Adherence to the standard provides confidence in the quality and performance of cement, as well as supports consistent, reliable construction outcomes. For the latest version and official documentation, it is recommended to consult ASTM International directly.
Buy Documents
ASTM C430-17 - Standard Test Method for Fineness of Hydraulic Cement by the 45-μm (No. 325) Sieve
REDLINE ASTM C430-17 - Standard Test Method for Fineness of Hydraulic Cement by the 45-μm (No. 325) Sieve
Get Certified
Connect with accredited certification bodies for this standard

ICC Evaluation Service
Building products evaluation and certification.

QAI Laboratories
Building and construction product testing and certification.

Aboma Certification B.V.
Specialized in construction, metal, and transport sectors.
Sponsored listings
Frequently Asked Questions
ASTM C430-17 is a standard published by ASTM International. Its full title is "Standard Test Method for Fineness of Hydraulic Cement by the 45-μm (No. 325) Sieve". This standard covers: ABSTRACT This test method covers hydraulic cement fineness tests performed using a sieve. The sieve frame should be made of a circular metal matching the specified dimensions, fitted with either a stainless steel woven-wire sieve cloth or an electroformed forced nickel sieve sheet. Both the nozzle and sieve shall not be subjected to corrosion by water. The nozzle and pressure gauge should also conform to the specified dimensions. This test method also covers sieve calibration and cleaning procedures. SCOPE 1.1 This test method covers the determination of the fineness of hydraulic cement by means of the 45-μm (No. 325) sieve. 1.2 The values stated in SI units are to be regarded as the standard. The inch-pound equivalents of SI units may be approximate. 1.3 This standard does not purport to address all of the safety concerns, if any, associated with its use. It is the responsibility of the user of this standard to establish appropriate safety, health, and environmental practices and determine the applicability of regulatory limitations prior to use. 1.4 This international standard was developed in accordance with internationally recognized principles on standardization established in the Decision on Principles for the Development of International Standards, Guides and Recommendations issued by the World Trade Organization Technical Barriers to Trade (TBT) Committee.
ABSTRACT This test method covers hydraulic cement fineness tests performed using a sieve. The sieve frame should be made of a circular metal matching the specified dimensions, fitted with either a stainless steel woven-wire sieve cloth or an electroformed forced nickel sieve sheet. Both the nozzle and sieve shall not be subjected to corrosion by water. The nozzle and pressure gauge should also conform to the specified dimensions. This test method also covers sieve calibration and cleaning procedures. SCOPE 1.1 This test method covers the determination of the fineness of hydraulic cement by means of the 45-μm (No. 325) sieve. 1.2 The values stated in SI units are to be regarded as the standard. The inch-pound equivalents of SI units may be approximate. 1.3 This standard does not purport to address all of the safety concerns, if any, associated with its use. It is the responsibility of the user of this standard to establish appropriate safety, health, and environmental practices and determine the applicability of regulatory limitations prior to use. 1.4 This international standard was developed in accordance with internationally recognized principles on standardization established in the Decision on Principles for the Development of International Standards, Guides and Recommendations issued by the World Trade Organization Technical Barriers to Trade (TBT) Committee.
ASTM C430-17 is classified under the following ICS (International Classification for Standards) categories: 91.100.10 - Cement. Gypsum. Lime. Mortar. The ICS classification helps identify the subject area and facilitates finding related standards.
ASTM C430-17 has the following relationships with other standards: It is inter standard links to ASTM C430-08(2015), ASTM C219-24, ASTM C219-20a, ASTM C219-20, ASTM C125-19a, ASTM C219-19a, ASTM C219-19, ASTM C125-19, ASTM C125-18b, ASTM C125-18a, ASTM C125-18, ASTM C125-16, ASTM C125-15b, ASTM C125-15a, ASTM C125-15. Understanding these relationships helps ensure you are using the most current and applicable version of the standard.
ASTM C430-17 is available in PDF format for immediate download after purchase. The document can be added to your cart and obtained through the secure checkout process. Digital delivery ensures instant access to the complete standard document.
Standards Content (Sample)
This international standard was developed in accordance with internationally recognized principles on standardization established in the Decision on Principles for the
Development of International Standards, Guides and Recommendations issued by the World Trade Organization Technical Barriers to Trade (TBT) Committee.
Designation: C430 − 17
Standard Test Method for
Fineness of Hydraulic Cement by the 45-µm (No. 325) Sieve
This standard is issued under the fixed designation C430; the number immediately following the designation indicates the year of
original adoption or, in the case of revision, the year of last revision. A number in parentheses indicates the year of last reapproval. A
superscript epsilon (´) indicates an editorial change since the last revision or reapproval.
1. Scope* 4. Apparatus
1.1 This test method covers the determination of the fine-
4.1 Sieve:
ness of hydraulic cement by means of the 45-µm (No. 325)
4.1.1 Sieve Frame—The sieve frame shall be of metal not
sieve.
subject to corrosion by water and shall be circular, either 51 6
6 mm (2.0 6 0.25 in.) when woven-wire cloth is mounted in
1.2 The values stated in SI units are to be regarded as the
the frame or 76 6 6 mm (3.0 6 0.25 in.) in diameter when an
standard. The inch-pound equivalents of SI units may be
electroformed sheet is mounted in the frame. The depth of the
approximate.
sieve from the top of the frame to the cloth or sheet shall be 76
1.3 This standard does not purport to address all of the
66mm(3.0 60.25in.).Theframeshallhaveeithersidewalls
safety concerns, if any, associated with its use. It is the
of 89 6 6 mm (3.5 6 0.25 in.) in total height, or legs at least
responsibility of the user of this standard to establish appro-
12 mm (0.5 in.) in length, sufficient to allow air circulation
priate safety, health, and environmental practices and deter-
beneath the sieve cloth or electroformed sheet.
mine the applicability of regulatory limitations prior to use.
4.1.2 Sieve Cloth or Electroformed Sheet—The sieve frame
1.4 This international standard was developed in accor-
shallbefittedwitheithera45-µm(No.325)stainlesssteelAISI
dance with internationally recognized principles on standard-
Type 304 woven-wire sieve cloth, conforming to the require-
ization established in the Decision on Principles for the
ments of Specification E11 or a 45-µm electroformed rein-
Development of International Standards, Guides and Recom-
forced nickel sieve sheet conforming to the requirements of
mendations issued by the World Trade Organization Technical
Specification E161 with the exception that the number of
Barriers to Trade (TBT) Committee.
openings shall be 71 6 2 per linear centimetre (180 6 5 per
linear inch).
2. Referenced Documents
4.1.3 Cloth or Sheet Mounting:
2.1 ASTM Standards:
4.1.3.1 Woven-Wire Cloth Mounting—Type 304 stainless
C125 Terminology Relating to Concrete and Concrete Ag-
steel woven-type cloth shall be mounted in the frame without
gregates
distortion, looseness, or wrinkling. For a sieve fabricated by
C219 Terminology Relating to Hydraulic Cement
soldering the cloth to the frame, the joint shall be made smooth
E11 Specification for Woven Wire Test Sieve Cloth and Test
to prevent the cement from catching in the joints between the
Sieves
sieve cloth and the frame. Two-piece sieves shall clamp tightly
E161 Specification for Precision Electroformed Sieves
on the cloth to prevent the cement from catching in the joints
E177 Practice for Use of the Terms Precision and Bias in
between the sieve cloth and the frame.
ASTM Test Methods
4.1.3.2 Electroformed Sieve Sheet Mounting—
3. Terminology Electroformed reinforced nickel sieve sheet shall be mounted
in the frame without distortion, looseness, or wrinkling. The
3.1 Definitions:
joint between the sieve cloth and the frame shall be made
3.2 For definitions of terms used in this test method, refer to
smooth with a material impervious to water.
Terminology C125 and C219.
4.2 Spray Nozzle—The spray nozzle (Fig. 1) shall be con-
structed of metal not subject to corrosion by water and shall be
This test method is under the jurisdiction ofASTM Committee C01 on Cement
17.5mm(0.69in.)ininsidediameterwithacentralholedrilled
and is the direct responsibility of Subcommittee C01.25 on Fineness.
in line with the longitudinal axis, an intermediate row of eight
Current edition approved Dec. 1, 2017. Published December 2017. Originally
holes drilled 6 mm (0.23 in.) center-to-center at an angle of 5°
approved in 1959. Last previous edition approved in 2015 as C430 – 08 (2015).
DOI: 10.1520/C0430-17.
from the longitudinal axis, and an outer row of eight holes
For referenced ASTM standards, visit the ASTM website, www.astm.org, or
drilled 11 mm (0.44 in.) center-to-center at an angle of 10°
contact ASTM Customer Service at service@astm.org. For Annual Book of ASTM
from the longitudinal axis.All holes shall be 0.5 mm (0.02 in.)
Standards volume information, refer to the standard’s Document Summary page on
the ASTM website. in diameter. The spray nozzle shall have been checked within
*A Summary of Changes section appears at the end of this standard
Copyright © ASTM International, 100 Barr Harbor Drive, PO Box C700, West Conshohocken, PA 19428-2959. United States
C430 − 17
nozzle and wash for 1 min, moving the sieve with a circular
motion in a horizontal plane at the rate of one motion per
second in the spray. The bottom of the spray nozzle should
extend below the top of the sieve frame about 12 mm (0.5 in.).
Immediately upon removing the sieve from the spray, rinse
once with about 50 cm of distilled or deionized water, using
caution not to lose any of the residue, and then blot the lower
surface gently upon a damp cloth. Dry the sieve and residue in
an oven or over a hot plate (see Note 2), supporting the sieve
in such a manner that air may pass freely beneath it. Cool the
sieve; then brush the residue from the sieve and weigh on an
analytical balance capable of reproducing results within
0.0005 g.
NOTE2—Careshouldbetakennottoheatthesievehotenoughtosoften
the solder.
7. Cleaning of 45-µm (No. 325) Sieves
7.1 Frequency of Cleaning and Calibration—Sieves fitted
withwovenwiresieveclothshallbecleanedafternomorethan
five determinations. Sieves fitted with an electroformed rein-
forced sieve sheet having 71 openings per linear centimetre
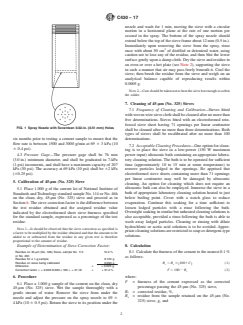
FIG. 1 Spray Nozzle with Sevente
...
This document is not an ASTM standard and is intended only to provide the user of an ASTM standard an indication of what changes have been made to the previous version. Because
it may not be technically possible to adequately depict all changes accurately, ASTM recommends that users consult prior editions as appropriate. In all cases only the current version
of the standard as published by ASTM is to be considered the official document.
Designation: C430 − 08 (Reapproved 2015) C430 − 17
Standard Test Method for
Fineness of Hydraulic Cement by the 45-μm (No. 325) Sieve
This standard is issued under the fixed designation C430; the number immediately following the designation indicates the year of
original adoption or, in the case of revision, the year of last revision. A number in parentheses indicates the year of last reapproval. A
superscript epsilon (´) indicates an editorial change since the last revision or reapproval.
1. Scope*
1.1 This test method covers the determination of the fineness of hydraulic cement by means of the 45-μm (No. 325) sieve.
1.2 The values stated in SI units are to be regarded as the standard. The inch-pound equivalents of SI units may be approximate.
1.3 This standard does not purport to address all of the safety concerns, if any, associated with its use. It is the responsibility
of the user of this standard to establish appropriate safety safety, health, and healthenvironmental practices and determine the
applicability of regulatory limitations prior to use.
1.4 This international standard was developed in accordance with internationally recognized principles on standardization
established in the Decision on Principles for the Development of International Standards, Guides and Recommendations issued
by the World Trade Organization Technical Barriers to Trade (TBT) Committee.
2. Referenced Documents
2.1 ASTM Standards:
C125 Terminology Relating to Concrete and Concrete Aggregates
C219 Terminology Relating to Hydraulic Cement
E11 Specification for Woven Wire Test Sieve Cloth and Test Sieves
E161 Specification for Precision Electroformed Sieves
E177 Practice for Use of the Terms Precision and Bias in ASTM Test Methods
3. Terminology
3.1 Definitions:
3.2 For definitions of terms used in this test method, refer to Terminology C125 and C219.
4. Apparatus
4.1 Sieve:
4.1.1 Sieve Frame—The sieve frame shall be of metal not subject to corrosion by water and shall be circular, either 51 6 6 mm
(2.0 6 0.25 in.) 0.25 in.) when woven-wire cloth is mounted in the frame or 76 6 6 mm (3.0 6 0.25 in.) in diameter when an
electroformed sheet is mounted in the frame. The depth of the sieve from the top of the frame to the cloth or sheet shall be 76 6
6 mm (3.0 6 0.25 in.). The frame shall have either side walls of 89 6 6 mm (3.5 6 0.25 in.) in total height, or legs at least 12
mm (0.5 in.) in length, sufficient to allow air circulation beneath the sieve cloth or electroformed sheet.
4.1.2 Sieve Cloth or Electroformed Sheet—The sieve frame shall be fitted with either a 45-μm (No. 325) stainless steel AISI
Type 304 woven-wire sieve cloth, conforming to the requirements of Specification E11 or a 45-μm electroformed reinforced nickel
sieve sheet conforming to the requirements of Specification E161 with the exception that the number of openings shall be 71 6
2 per linear centimetre (180 6 5 per linear inch).
4.1.3 Cloth or Sheet Mounting:
4.1.3.1 Woven-Wire Cloth Mounting—Type 304 stainless steel woven-type cloth shall be mounted in the frame without
distortion, looseness, or wrinkling. For a sieve fabricated by soldering the cloth to the frame, the joint shall be made smooth to
prevent the cement from catching in the joints between the sieve cloth and the frame. Two-piece sieves shall clamp tightly on the
cloth to prevent the cement from catching in the joints between the sieve cloth and the frame.
This test method is under the jurisdiction of ASTM Committee C01 on Cement and is the direct responsibility of Subcommittee C01.25 on Fineness.
Current edition approved Oct. 1, 2015Dec. 1, 2017. Published October 2015December 2017. Originally approved in 1959. Last previous edition approved in 20082015
as C430 – 08.C430 – 08 (2015). DOI: 10.1520/C0430-08R15.10.1520/C0430-17.
For referenced ASTM standards, visit the ASTM website, www.astm.org, or contact ASTM Customer Service at service@astm.org. For Annual Book of ASTM Standards
volume information, refer to the standard’s Document Summary page on the ASTM website.
*A Summary of Changes section appears at the end of this standard
Copyright © ASTM International, 100 Barr Harbor Drive, PO Box C700, West Conshohocken, PA 19428-2959. United States
C430 − 17
4.1.3.2 Electroformed Sieve Sheet Mounting—Electroformed reinforced nickel sieve sheet shall be mounted in the frame
without distortion, looseness, or wrinkling. The joint between the sieve cloth and the frame shall be made smooth with a material
impervious to water.
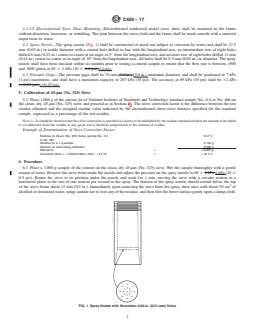
4.2 Spray Nozzle—The spray nozzle (Fig. 1) shall be constructed of metal not subject to corrosion by water and shall be 17.5
mm (0.69 in.) in inside diameter with a central hole drilled in line with the longitudinal axis, an intermediate row of eight holes
drilled 6 mm (0.23 in.) center-to-center at an angle of 5° from the longitudinal axis, and an outer row of eight holes drilled 11 mm
(0.44 in.) center-to-center at an angle of 10° from the longitudinal axis. All holes shall be 0.5 mm (0.02 in.) in diameter. The spray
nozzle shall have been checked within six months prior to testing a cement sample to ensure that the flow rate is between 1500
and 3000 g/min at 69 6 3 kPa (10 6 0.4 psi).0.4 psi).
4.3 Pressure Gage—The pressure gage shall be 76 mm (3.0 in.) (3.0 in.) minimum diameter, and shall be graduated in 7-kPa
(1-psi) increments, and shall have a maximum capacity of 207 kPa (30 psi). The accuracy at 69 kPa (10 psi) shall be 62 kPa
(60.25 psi).(60.25 psi).
5. Calibration of 45-μm (No. 325) Sieve
5.1 Place 1.000 g of the current lot of National Institute of Standards and Technology standard sample No. 114 or No. 46h on
the clean, dry, 45-μm (No. 325) sieve and proceed as in Section 56. The sieve correction factor is the difference between the test
residue obtained and the assigned residue value indicated by the electroformed sheet sieve fineness specified for the standard
sample, expressed as a percentage of the test residue.
NOTE 1—It should be observed that the sieve correction as specified is a factor to be multiplied by the residue obtained and that the amount to be added
to or subtracted from the residue in any given test is therefore proportional to the amount of residue.
Example of Determination of Sieve C
...



Questions, Comments and Discussion
Ask us and Technical Secretary will try to provide an answer. You can facilitate discussion about the standard in here.
Loading comments...