ASTM A688/A688M-24
(Specification)Standard Specification for Seamless and Welded Austenitic Stainless Steel Feedwater Heater Tubes
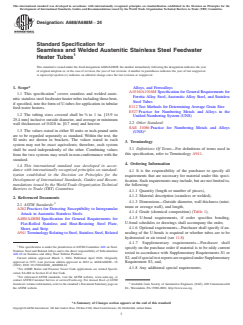
Standard Specification for Seamless and Welded Austenitic Stainless Steel Feedwater Heater Tubes
ABSTRACT
This specification covers standard requirements for welded austenitic stainless steel feedforward heater tubes including those bent, if specified, into the form of U-tubes for application in tubular feed-water heaters. All finished straight tubing or straight tubing ready for U-bending shall be furnished in the solution-annealed condition. The steel shall conform to the required chemical composition for carbon, phosphorus, chromium, molybdenum, nitrogen, and copper. The material shall also conform to tensile properties such as tensile strength, yield strength, and elongation. The steel shall undergo mechanical tests such as tension test, hardness test, reverse bend test, flattening test, flange test, pressure test, hydrostatic test, and air underwater test. Nondestructive test (electric test) shall be performed and corrosion resisting properties shall be determined for each sample tube.
SCOPE
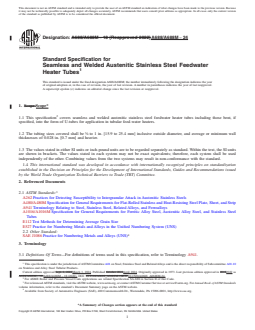
1.1 This specification2 covers seamless and welded austenitic stainless steel feedwater heater tubes including those bent, if specified, into the form of U-tubes for application in tubular feed-water heaters.
1.2 The tubing sizes covered shall be 5/8 to 1 in. [15.9 to 25.4 mm] inclusive outside diameter, and average or minimum wall thicknesses of 0.028 in. [0.7 mm] and heavier.
1.3 The values stated in either SI units or inch-pound units are to be regarded separately as standard. Within the text, the SI units are shown in brackets. The values stated in each system may not be exact equivalents; therefore, each system shall be used independently of the other. Combining values from the two systems may result in non-conformance with the standard.
1.4 This international standard was developed in accordance with internationally recognized principles on standardization established in the Decision on Principles for the Development of International Standards, Guides and Recommendations issued by the World Trade Organization Technical Barriers to Trade (TBT) Committee.
General Information
- Status
- Published
- Publication Date
- 29-Feb-2024
- Technical Committee
- A01 - Steel, Stainless Steel and Related Alloys
- Drafting Committee
- A01.10 - Stainless and Alloy Steel Tubular Products
Relations
- Effective Date
- 01-Mar-2024
- Effective Date
- 01-Mar-2024
- Effective Date
- 01-Mar-2024
Overview
ASTM A688/A688M-24 is the internationally recognized standard specification for seamless and welded austenitic stainless steel feedwater heater tubes. Developed by ASTM International, this standard sets forth the essential requirements for manufacturing, chemical composition, mechanical properties, testing, and quality assurance for stainless steel tubes used in feedwater heaters. These tubes are vital components in power generation and industrial heat exchanger applications, where durability, corrosion resistance, and precise dimensions are crucial.
ASTM A688/A688M-24 covers tubes in straight lengths and U-bent forms, intended primarily for tubular feedwater heaters. The specification covers both seamless and welded tube products and outlines their required solution-annealed condition to ensure optimal metallurgical stability and resistance against intergranular corrosion.
Key Topics
- Material Types: Applies to seamless and welded austenitic stainless steel tubes, including specific grades such as TP304, TP304L, TP316, TP316L, and others with defined chemical compositions.
- Dimensional Scope: Tubes with outside diameters from 5/8 to 1 inch (15.9 to 25.4 mm), and wall thicknesses of at least 0.028 inches (0.7 mm) or heavier.
- Manufacturing Requirements:
- Tubes must be solution-annealed for maximum corrosion resistance.
- Cold working processes apply for welded tubes to enhance mechanical strength.
- Stringent cleaning practices are required to prevent detrimental surface contamination.
- Mechanical Properties:
- Tensile strength, yield strength, and elongation defined by grade.
- Hardness limits tailored to specific grades.
- Testing and Inspection:
- Includes tension, hardness, flattening, reverse bend, flange, flaring (for seamless), and pressure tests.
- Nondestructive electric (eddy current) tests for defect detection.
- Corrosion resistance assessment per ASTM A262 practices for susceptibility to intergranular attack.
- Dimensional Tolerances: Detailed permissible variations for diameter, wall thickness, length, U-bend geometry, and end squareness.
Applications
ASTM A688/A688M-24 stainless steel tubes are engineered for demanding applications in industrial heat transfer equipment, especially in environments where:
- Feedwater Heaters: Utilized in power plants and industrial boilers for preheating feedwater, boosting efficiency, and reducing thermal stress.
- Heat Exchangers: Ideal where resistance to aggressive water chemistry and high temperatures is required.
- U-bent Tubes: Essential for compact, high-efficiency feedwater heater designs.
- Corrosive Environments: The austenitic stainless steels specified provide excellent resistance to corrosion, including intergranular and pitting attack.
These tubes are specified when operational reliability, long service life, and easy maintenance are priorities-common in the power generation, petrochemical, and processing industries.
Related Standards
To ensure product compatibility and meet regulatory requirements, ASTM A688/A688M-24 references additional standards, including:
- ASTM A1016/A1016M: General requirements for steel tubes
- ASTM A262: Practices for detecting susceptibility to intergranular attack in austenitic stainless steels
- ASTM A480/A480M: Specifications for flat-rolled stainless and heat-resisting steel plate, sheet, and strip
- ASTM E112: Test method for determining average grain size
- SAE J1086: Practice for numbering metals and alloys
Manufacturers and procurers should also refer to ASME Boiler and Pressure Vessel Codes for compliance in code-based applications.
Practical Value
Adopting ASTM A688/A688M-24 ensures that seamless and welded austenitic stainless steel feedwater heater tubes meet stringent global standards for performance, safety, and longevity. Compliance minimizes risk of tube failure, supports efficient heat transfer, and maintains regulatory and industry credibility in critical applications. This enables engineers, plant operators, and procurement specialists to specify, source, and validate tubing with confidence for their most demanding projects.
Buy Documents
ASTM A688/A688M-24 - Standard Specification for Seamless and Welded Austenitic Stainless Steel Feedwater Heater Tubes
REDLINE ASTM A688/A688M-24 - Standard Specification for Seamless and Welded Austenitic Stainless Steel Feedwater Heater Tubes
Get Certified
Connect with accredited certification bodies for this standard

Institut za varilstvo d.o.o. (Welding Institute)
Slovenia's leading welding institute since 1952. ISO 3834, EN 1090, pressure equipment certification, NDT personnel, welder qualification. Only IIW Au
Sponsored listings
Frequently Asked Questions
ASTM A688/A688M-24 is a technical specification published by ASTM International. Its full title is "Standard Specification for Seamless and Welded Austenitic Stainless Steel Feedwater Heater Tubes". This standard covers: ABSTRACT This specification covers standard requirements for welded austenitic stainless steel feedforward heater tubes including those bent, if specified, into the form of U-tubes for application in tubular feed-water heaters. All finished straight tubing or straight tubing ready for U-bending shall be furnished in the solution-annealed condition. The steel shall conform to the required chemical composition for carbon, phosphorus, chromium, molybdenum, nitrogen, and copper. The material shall also conform to tensile properties such as tensile strength, yield strength, and elongation. The steel shall undergo mechanical tests such as tension test, hardness test, reverse bend test, flattening test, flange test, pressure test, hydrostatic test, and air underwater test. Nondestructive test (electric test) shall be performed and corrosion resisting properties shall be determined for each sample tube. SCOPE 1.1 This specification2 covers seamless and welded austenitic stainless steel feedwater heater tubes including those bent, if specified, into the form of U-tubes for application in tubular feed-water heaters. 1.2 The tubing sizes covered shall be 5/8 to 1 in. [15.9 to 25.4 mm] inclusive outside diameter, and average or minimum wall thicknesses of 0.028 in. [0.7 mm] and heavier. 1.3 The values stated in either SI units or inch-pound units are to be regarded separately as standard. Within the text, the SI units are shown in brackets. The values stated in each system may not be exact equivalents; therefore, each system shall be used independently of the other. Combining values from the two systems may result in non-conformance with the standard. 1.4 This international standard was developed in accordance with internationally recognized principles on standardization established in the Decision on Principles for the Development of International Standards, Guides and Recommendations issued by the World Trade Organization Technical Barriers to Trade (TBT) Committee.
ABSTRACT This specification covers standard requirements for welded austenitic stainless steel feedforward heater tubes including those bent, if specified, into the form of U-tubes for application in tubular feed-water heaters. All finished straight tubing or straight tubing ready for U-bending shall be furnished in the solution-annealed condition. The steel shall conform to the required chemical composition for carbon, phosphorus, chromium, molybdenum, nitrogen, and copper. The material shall also conform to tensile properties such as tensile strength, yield strength, and elongation. The steel shall undergo mechanical tests such as tension test, hardness test, reverse bend test, flattening test, flange test, pressure test, hydrostatic test, and air underwater test. Nondestructive test (electric test) shall be performed and corrosion resisting properties shall be determined for each sample tube. SCOPE 1.1 This specification2 covers seamless and welded austenitic stainless steel feedwater heater tubes including those bent, if specified, into the form of U-tubes for application in tubular feed-water heaters. 1.2 The tubing sizes covered shall be 5/8 to 1 in. [15.9 to 25.4 mm] inclusive outside diameter, and average or minimum wall thicknesses of 0.028 in. [0.7 mm] and heavier. 1.3 The values stated in either SI units or inch-pound units are to be regarded separately as standard. Within the text, the SI units are shown in brackets. The values stated in each system may not be exact equivalents; therefore, each system shall be used independently of the other. Combining values from the two systems may result in non-conformance with the standard. 1.4 This international standard was developed in accordance with internationally recognized principles on standardization established in the Decision on Principles for the Development of International Standards, Guides and Recommendations issued by the World Trade Organization Technical Barriers to Trade (TBT) Committee.
ASTM A688/A688M-24 is classified under the following ICS (International Classification for Standards) categories: 23.040.10 - Iron and steel pipes. The ICS classification helps identify the subject area and facilitates finding related standards.
ASTM A688/A688M-24 has the following relationships with other standards: It is inter standard links to ASTM A688/A688M-18(2022), ASTM A1012-10(2021), ASTM A1016/A1016M-23. Understanding these relationships helps ensure you are using the most current and applicable version of the standard.
ASTM A688/A688M-24 is available in PDF format for immediate download after purchase. The document can be added to your cart and obtained through the secure checkout process. Digital delivery ensures instant access to the complete standard document.
Standards Content (Sample)
This international standard was developed in accordance with internationally recognized principles on standardization established in the Decision on Principles for the
Development of International Standards, Guides and Recommendations issued by the World Trade Organization Technical Barriers to Trade (TBT) Committee.
Designation: A688/A688M − 24
Standard Specification for
Seamless and Welded Austenitic Stainless Steel Feedwater
Heater Tubes
This standard is issued under the fixed designation A688/A688M; the number immediately following the designation indicates the year
of original adoption or, in the case of revision, the year of last revision. A number in parentheses indicates the year of last reapproval.
A superscript epsilon (´) indicates an editorial change since the last revision or reapproval.
1. Scope* Alloys, and Ferroalloys
2 A1016/A1016M Specification for General Requirements for
1.1 This specification covers seamless and welded auste-
Ferritic Alloy Steel, Austenitic Alloy Steel, and Stainless
nitic stainless steel feedwater heater tubes including those bent,
Steel Tubes
if specified, into the form of U-tubes for application in tubular
E112 Test Methods for Determining Average Grain Size
feed-water heaters.
E527 Practice for Numbering Metals and Alloys in the
1.2 The tubing sizes covered shall be ⁄8 to 1 in. [15.9 to
Unified Numbering System (UNS)
25.4 mm] inclusive outside diameter, and average or minimum
2.2 Other Standard:
wall thicknesses of 0.028 in. [0.7 mm] and heavier.
SAE J1086 Practice for Numbering Metals and Alloys
1.3 The values stated in either SI units or inch-pound units
(UNS)
are to be regarded separately as standard. Within the text, the
SI units are shown in brackets. The values stated in each
3. Terminology
system may not be exact equivalents; therefore, each system
3.1 Definitions Of Terms—For definitions of terms used in
shall be used independently of the other. Combining values
this specification, refer to Terminology A941.
from the two systems may result in non-conformance with the
standard.
4. Ordering Information
1.4 This international standard was developed in accor-
dance with internationally recognized principles on standard-
4.1 It is the responsibility of the purchaser to specify all
ization established in the Decision on Principles for the
requirements that are necessary for material under this speci-
Development of International Standards, Guides and Recom-
fication. Such requirements may include, but are not limited to,
mendations issued by the World Trade Organization Technical
the following:
Barriers to Trade (TBT) Committee.
4.1.1 Quantity (length or number of pieces),
4.1.2 Material description (seamless or welded),
2. Referenced Documents
4.1.3 Dimensions—Outside diameter, wall thickness (mini-
2.1 ASTM Standards:
mum or average wall), and length,
A262 Practices for Detecting Susceptibility to Intergranular
4.1.4 Grade (chemical composition) (Table 1),
Attack in Austenitic Stainless Steels
4.1.5 U-bend requirements, if order specifies bending,
A480/A480M Specification for General Requirements for
U-bend schedules or drawings shall accompany the order,
Flat-Rolled Stainless and Heat-Resisting Steel Plate,
4.1.6 Optional requirements—Purchaser shall specify if an-
Sheet, and Strip
nealing of the U-bends is required or whether tubes are to be
A941 Terminology Relating to Steel, Stainless Steel, Related
hydrotested or air tested (see 11.8)
4.1.7 Supplementary requirements—Purchaser shall
This specification is under the jurisdiction of ASTM Committee A01 on Steel,
specify on the purchase order if material is to be eddy current
Stainless Steel and Related Alloys and is the direct responsibility of Subcommittee
tested in accordance with Supplementary Requirements S1 or
A01.10 on Stainless and Alloy Steel Tubular Products.
S2, and if special test reports are required under Supplementary
Current edition approved March 1, 2024. Published April 2024. Originally
approved in 1973. Last previous edition approved in 2022 as A688/A688M – 18
Requirement S3, and,
(2022). DOI: 10.1520/A0688_A0688M-24.
4.1.8 Any additional special requirements.
For ASME Boiler and Pressure Vessel Code applications see related Specifi-
cation SA-688 in Section II of that Code.
For referenced ASTM standards, visit the ASTM website, www.astm.org, or
contact ASTM Customer Service at service@astm.org. For Annual Book of ASTM
Standards volume information, refer to the standard’s Document Summary page on Available from Society of Automotive Engineers (SAE), 400 Commonwealth
the ASTM website. Dr., Warrendale, PA 15096-0001, http://www.sae.org.
*A Summary of Changes section appears at the end of this standard
Copyright © ASTM International, 100 Barr Harbor Drive, PO Box C700, West Conshohocken, PA 19428-2959. United States
A688/A688M − 24
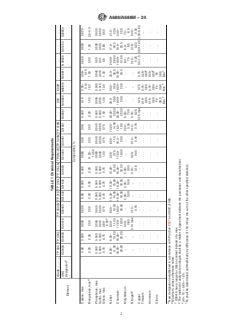
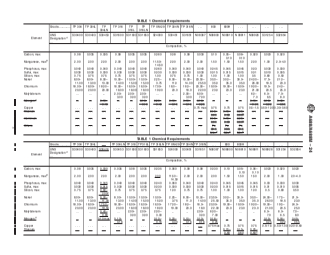
TABLE 1 Chemical Requirements
Grade. TP 304 TP 304L . . . TP 304LN TP 316 TP 316L TP 316LN TP XM-29 TP 304N TP 316N . . . 800 800H . . . . . . . . . . . .
UNS S30400 S30403 S30416 S30453 S31600 S31603 S31653 S24000 S30451 S31651 N08367 N08800 N08810 N08811 N08926 S31254 S32654
A
Designation
Element
....
Composition, %
Carbon, max 0.08 0.035 0.030 0.035 0.08 0.035 0.035 0.060 0.08 0.08 0.030 0.10 0.05– 0.06– 0.020 0.020 0.020
0.10 0.10
B
Manganese, max 2.00 2.00 2.00 2.00 2.00 2.00 2.00 11.50– 2.00 2.00 2.00 1.50 1.50 1.50 2.00 1.00 2.0–4.0
14.50
Phosphorus, max 0.040 0.040 0.045 0.040 0.040 0.040 0.040 0.060 0.040 0.040 0.040 0.045 0.045 0.045 0.03 0.030 0.030
Sulfur, max 0.030 0.030 0.015 0.030 0.030 0.030 0.030 0.030 0.030 0.030 0.030 0.015 0.015 0.015 0.01 0.010 0.005
Silicon, max 0.75 0.75 0.80– 0.75 0.75 0.75 0.75 1.00 0.75 0.75 1.00 1.00 1.00 1.00 0.5 0.80 0.50
C
2.00
Nickel 8.00– 8.00– 9.00– 8.00– 10.00– 10.00– 10.00– 2.25– 8.00– 10.00– 23.50– 30.0– 30.0– 30.0– 24.00– 17.5– 21.0–
11.00 13.00 11.00 13.00 14.00 15.00 15.00 3.75 11.0 14.00 25.50 35.0 35.0 35.0 26.00 18.5 23.0
Chromium 18.00– 18.00– 17.50– 18.00– 16.00– 16.00– 16.00– 17.00– 18.0– 16.0– 20.00– 19.00– 19.00– 19.00– 19.00– 19.5– 24.0–
20.00 20.00 19.50 20.00 18.00 18.00 18.00 19.00 20.0 18.0 22.00 23.0 23.0 23.0 21.00 20.5 25.0
Molybdenum . . 0.40– . 2.00– 2.00– 2.00– . . 2.00– 6.00– . . . 6.0– 6.0– 7.0–
0.80 3.00 3.00 3.00 3.00 7.00 7.0 6.5 8.0
D
Nitrogen . . 0.10 max 0.10– . . 0.10– 0.20– 0.10– 0.10– 0.18– . . . 0.15– 0.18– 0.45–
0.16 0.16 0.40 0.16 0.16 0.25 0.25 0.22 0.55
Copper . . . . . . . . . . . . . . . . . . . . . . . . . . . . . . 0.75 max 0.75 0.75 0.75 0.5–1.5 0.50–1.00 0.30–0.60
Titanium . . . . . . . . . . . . . . . . . . . . . . . . . . . . . . . . . 0.15– 0.15– 0.25– . . . . . . . . .
E
0.60 0.60 0.60
Aluminum . . . . . . . . . . . . . . . . . . . . . . . . . . . . . . . . . 0.15– 0.15– 0.25– . . . . . . . . .
E
0.60 0.60 0.60
Others . . . . . . . . . . . . . . . . . . . . . . . . . . . . . . . . . Fe Fe Fe . . . . . . . . .
39.5 39.5 39.5
F F F
Min. Min. Min.
A
New designation established in accordance with Practice E527 and SAE J1086.
B
Maximum, unless otherwise noted.
C
S30416 has a range for Silicon content instead of a max.
D
The method of analysis for nitrogen shall be a matter of agreement between the purchaser and manufacturer.
E
(Al + Ti) = 0.85 – 1.20.
F
Fe shall be determined arithmethically by difference of 100 minus the sum of the other specified elements.
A688/A688M − 24
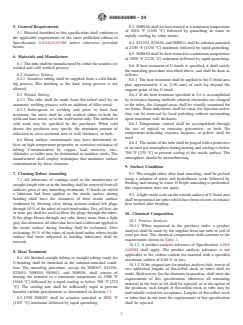
5. General Requirements 8.3 N08926 shall be heat-treated at a minimum temperature
of 2010 °F [1100 °C] followed by quenching in water or
5.1 Material furnished to this specification shall conform to
rapidly cooling by other means.
the applicable requirements of the latest published edition of
Specification A1016/A1016M unless otherwise provided 8.4 S31254, S32654, and N08811 shall be solution annealed
herein.
at 2100 °F [1150 °C] minimum followed by rapid quenching.
8.5 N08810 shall be heat-treated to a minimum temperature
6. Materials and Manufacture
of 2050 °F [1120 °C] minimum followed by rapid quenching.
6.1 The tube shall be manufactured by either the seamless or
8.6 If heat treatment of U-bends is specified, it shall satisfy
welded and cold worked process.
the annealing procedure described above, and shall be done as
6.2 Seamless Tubing:
follows:
6.2.1 Seamless tubing shall be supplied from a cold finish-
8.6.1 The heat treatment shall be applied to the U-bend area
ing process. Hot finishing as the final sizing process is not
plus approximately 6 in. [150 mm] of each leg beyond the
allowed.
tangent point of the U-bend.
8.6.2 If the heat treatment specified in 8.6 is accomplished
6.3 Welded Tubing:
by resistance-heating methods wherein electrodes are clamped
6.3.1 The tube shall be made from flat-rolled steel by an
to the tubes, the clamped areas shall be visually examined for
automatic welding process with no addition of filler metal.
arc burns. Burn indications shall be cause for rejection unless
6.3.2 Subsequent to welding and prior to final heat
they can be removed by local polishing without encroaching
treatment, the tubes shall be cold worked either in both the
upon minimum wall thickness.
weld and base metal, or in the weld metal only. The method of
cold work may be specified by the purchaser. When cold 8.6.3 Temperature control shall be accomplished through
the use of optical or emission pyrometers, or both. No
drawn, the purchaser may specify the minimum amount of
reduction in cross-sectional area or wall thickness, or both. temperature-indicating crayons, lacquers, or pellets shall be
used.
6.4 Many surface contaminants may have detrimental ef-
8.6.4 The inside of the tube shall be purged with a protective
fects on high temperature properties or corrosion resistance of
or an inert gas atmosphere during heating and cooling to below
tubing. Contamination by copper, lead, mercury, zinc,
700 °F [370 °C] to prevent scaling of the inside surface. The
chlorides, or sulfur may be detrimental to stainless steels. The
atmosphere should be noncarburizing.
manufacturer shall employ techniques that minimize surface
contamination by these elements.
9. Surface Condition
7. Cleaning Before Annealing 9.1 The straight tubes, after final annealing, shall be pickled
using a solution of nitric and hydrofluoric acids followed by
7.1 All lubricants of coatings used in the manufacture of
flushing and rinsing in water. If bright annealing is performed,
straight-length tube or in the bending shall be removed from all
this requirement does not apply.
surfaces prior to any annealing treatments. U-bends on which
a lubricant had been applied to the inside surface during
9.2 A light oxide scale on the outside surface of U-bend area
bending shall have the cleanness of their inside surface
shall be permitted for tubes which have been electric-resistance
confirmed by blowing close fitting acetone-soaked felt plugs
heat treated after bending.
through 10 % of the tubes of each bend radius. Dry, oil-free, air
or inert gas shall be used to blow the plugs through the tubes.
10. Chemical Composition
If the plugs blown through any tube shows more than a light
10.1 Product Analysis:
gray discoloration, all tubes that have had a lubricant applied to
10.1.1 When requested in the purchase order, a product
the inside surface during bending shall be recleaned. After
analysis shall be made by the supplier from one tube or coil of
recleaning 10 % of the tubes of each bend radius whose inside
steel per heat. The chemical composition shall conform to the
surface had been subjected to bending lubricants shall be
requirements shown in Table 1.
retested.
10.1.2 A product analysis tolerance of Specification A480/
A480M shall apply. The product analysis tolerance is not
8. Heat Treatment
applicable to the carbon content for material with a specified
8.1 All finished straight tubing or straight tubing ready for
maximum carbon of 0.04 % or less.
U-bending shall be furnished in the solution-annealed condi-
10.1.3 If the original test for product analysis fails, retests of
tion. The annealing procedure, except for N08367, S31254,
two additional lengths of flat-rolled stock or tubes shall be
S32654, N08810, N08811, and N08926, shall consist of
made. Both retests, for the elements in question, shall meet the
heating the material to a minimum temperature of 1900 °F
requirements of this specification; otherwise all remaining
[1040 °C] followed by a rapid cooling to below 700 °F [370
material in the heat or lot shall be rejected, or at the option of
°C]. The cooling rate shall be sufficiently rapid to prevent
the producer, each length of flat-rolled stock or tube may be
harmful carbide precipitation as determined in Section 13.
individually tested for acceptance. Lengths of flat-rolled stock
8.2 UNS N08367 shall be solution annealed at 2025 °F or tubes that do not meet the requirements of this specification
[1107 °C] minimum followed by rapid quenching. shall be rejected.
A688/A688M − 24
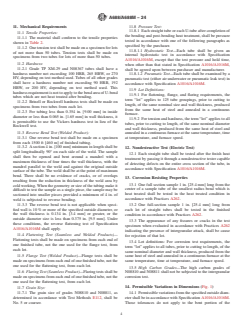
11. Mechanical Requirements 11.8 Pressure Test:
11.8.1 Each straight tube or each U-tube after completion of
11.1 Tensile Properties:
the bending and post-bending heat treatment, shall be pressure
11.1.1 The material shall conform to the tensile properties
tested in accordance with one of the following paragraphs as
shown in Table 2.
specified by the purchaser.
11.1.2 One tension test shall be made on a specimen for lots
11.8.1.1 Hydrostatic Test—Each tube shall be given an
of not more than 50 tubes. Tension tests shall be made on
internal hydrostatic test in accordance with Specification
specimens from two tubes for lots of more than 50 tubes.
A1016/A1016M, except that the test pressure and hold time,
11.2 Hardness:
when other than that stated in Specification A1016/A1016M,
11.2.1 Grade TP XM-29 and N08367 tubes shall have a
shall be agreed upon between purchaser and manufacturer.
hardness number not exceeding 100 HRB, 265 HBW, or 270
11.8.1.2 Pneumatic Test—Each tube shall be examined by a
HV, depending on test method used. Tubes of all other grades
pneumatic test (either air underwater or pneumatic leak test) in
shall have a hardness number not exceeding 90 HRB, 192
accordance with Specification A1016/A1016M.
HBW, or 200 HV, depending on test method used. This
11.9 Lot Definitions:
hardness requirement is not to apply to the bend area of U-bend
11.9.1 For flattening, flange, and flaring requirements, the
tubes which are not heat treated after bending.
term “lot” applies to 125 tube groupings, prior to cutting to
11.2.2 Brinell or Rockwell hardness tests shall be made on
length, of the same nominal size and wall thickness, produced
specimens from two tubes from each lot.
from the same heat of steel and annealed in a continuous
11.2.3 For tubing less than 0.354 in. [9.00 mm] in inside
furnace.
diameter or less than 0.065 in. [1.65 mm] in wall thickness, it
11.9.2 For tension and hardness, the term “lot” applies to all
is permissible to use the Vickers hardness test in lieu of the
tubes, prior to cutting to length, of the same nominal diameter
Rockwell test.
and wall thickness, produced from the same heat of steel and
11.3 Reverse Bend Test (Welded Product):
annealed in a continuous furnace at the same temperature, time
11.3.1 One reverse bend test shall be made on a specimen
at temperature, and furnace speed.
from each 1500 ft [460 m] of finished tubing.
11.3.2 A section 4 in. [100 mm] minimum in length shall be 12. Nondestructive Test (Electric Test)
split longitudinally 90° on each side of the weld. The sample
12.1 Each straight tube shall be tested after the finish heat
shall then be opened and bent around a mandrel with a
treatment by passing it through a nondestructive tester capable
maximum thickness of four times the wall thickness, with the
of detecting defects on the entire cross section of the tube, in
mandrel parallel to the weld and against the original outside
accordance with Specification A1016/A1016M.
surface of the tube. The weld shall be at the point of maximum
bend. There shall be no evidence of cracks, or of overlaps
13. Corrosion Resisting Properties
resulting from the reduction in thickness of the weld area by
13.1 One full section sample 1 in. [25.4 mm] long from the
cold working. When the geometry or size of the tubing make it
center of a sample tube of the smallest radius bend which is
difficult to test the sample as a single piece, the sample may be
heat treated shall be tested in the heat treated condition in
sectioned into smaller pieces provided a minimum of 4 in. of
accordance with Practices A262.
weld is subjected to reverse bending.
11.3.3 The reverse bend test is not applicable when spe
...
This document is not an ASTM standard and is intended only to provide the user of an ASTM standard an indication of what changes have been made to the previous version. Because
it may not be technically possible to adequately depict all changes accurately, ASTM recommends that users consult prior editions as appropriate. In all cases only the current version
of the standard as published by ASTM is to be considered the official document.
Designation: A688/A688M − 18 (Reapproved 2022) A688/A688M − 24
Standard Specification for
Seamless and Welded Austenitic Stainless Steel Feedwater
Heater Tubes
This standard is issued under the fixed designation A688/A688M; the number immediately following the designation indicates the year
of original adoption or, in the case of revision, the year of last revision. A number in parentheses indicates the year of last reapproval.
A superscript epsilon (´) indicates an editorial change since the last revision or reapproval.
1. Scope Scope*
1.1 This specification covers seamless and welded austenitic stainless steel feedwater heater tubes including those bent, if
specified, into the form of U-tubes for application in tubular feed-water heaters.
1.2 The tubing sizes covered shall be ⁄8 to 1 in. [15.9 to 25.4 mm] inclusive outside diameter, and average or minimum wall
thicknesses of 0.028 in. [0.7 mm] and heavier.
1.3 The values stated in either SI units or inch-pound units are to be regarded separately as standard. Within the text, the SI units
are shown in brackets. The values stated in each system may not be exact equivalents; therefore, each system shall be used
independently of the other. Combining values from the two systems may result in non-conformance with the standard.
1.4 This international standard was developed in accordance with internationally recognized principles on standardization
established in the Decision on Principles for the Development of International Standards, Guides and Recommendations issued
by the World Trade Organization Technical Barriers to Trade (TBT) Committee.
2. Referenced Documents
2.1 ASTM Standards:
A262 Practices for Detecting Susceptibility to Intergranular Attack in Austenitic Stainless Steels
A480/A480M Specification for General Requirements for Flat-Rolled Stainless and Heat-Resisting Steel Plate, Sheet, and Strip
A941 Terminology Relating to Steel, Stainless Steel, Related Alloys, and Ferroalloys
A1016/A1016M Specification for General Requirements for Ferritic Alloy Steel, Austenitic Alloy Steel, and Stainless Steel
Tubes
E112 Test Methods for Determining Average Grain Size
E527 Practice for Numbering Metals and Alloys in the Unified Numbering System (UNS)
2.2 Other Standard:
SAE J1086 Practice for Numbering Metals and Alloys (UNS)
3. Terminology
3.1 Definitions Of Terms—For definitions of terms used in this specification, refer to Terminology A941.
This specification is under the jurisdiction of ASTM Committee A01 on Steel, Stainless Steel and Related Alloys and is the direct responsibility of Subcommittee A01.10
on Stainless and Alloy Steel Tubular Products.
Current edition approved Sept. 1, 2022March 1, 2024. Published October 2022April 2024. Originally approved in 1973. Last previous edition approved in 20182022 as
A688/A688M – 18.A688/A688M – 18 (2022). DOI: 10.1520/A0688_A0688M-18R22.10.1520/A0688_A0688M-24.
For ASME Boiler and Pressure Vessel Code applications see related Specification SA-688 in Section II of that Code.
For referenced ASTM standards, visit the ASTM website, www.astm.org, or contact ASTM Customer Service at service@astm.org. For Annual Book of ASTM Standards
volume information, refer to the standard’s Document Summary page on the ASTM website.
Available from Society of Automotive Engineers (SAE), 400 Commonwealth Dr., Warrendale, PA 15096-0001, http://www.sae.org.
*A Summary of Changes section appears at the end of this standard
Copyright © ASTM International, 100 Barr Harbor Drive, PO Box C700, West Conshohocken, PA 19428-2959. United States
A688/A688M − 24
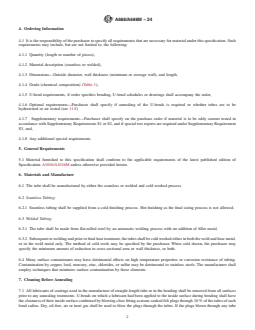
4. Ordering Information
4.1 It is the responsibility of the purchaser to specify all requirements that are necessary for material under this specification. Such
requirements may include, but are not limited to, the following:
4.1.1 Quantity (length or number of pieces),
4.1.2 Material description (seamless or welded),
4.1.3 Dimensions—Outside diameter, wall thickness (minimum or average wall), and length,
4.1.4 Grade (chemical composition) (Table 1),
4.1.5 U-bend requirements, if order specifies bending, U-bend schedules or drawings shall accompany the order,
4.1.6 Optional requirements—Purchaser shall specify if annealing of the U-bends is required or whether tubes are to be
hydrotested or air tested (see 11.8)
4.1.7 Supplementary requirements—Purchaser shall specify on the purchase order if material is to be eddy current tested in
accordance with Supplementary Requirements S1 or S2, and if special test reports are required under Supplementary Requirement
S3, and,
4.1.8 Any additional special requirements.
5. General Requirements
5.1 Material furnished to this specification shall conform to the applicable requirements of the latest published edition of
Specification A1016/A1016M unless otherwise provided herein.
6. Materials and Manufacture
6.1 The tube shall be manufactured by either the seamless or welded and cold worked process.
6.2 Seamless Tubing:
6.2.1 Seamless tubing shall be supplied from a cold finishing process. Hot finishing as the final sizing process is not allowed.
6.3 Welded Tubing:
6.3.1 The tube shall be made from flat-rolled steel by an automatic welding process with no addition of filler metal.
6.3.2 Subsequent to welding and prior to final heat treatment, the tubes shall be cold worked either in both the weld and base metal,
or in the weld metal only. The method of cold work may be specified by the purchaser. When cold drawn, the purchaser may
specify the minimum amount of reduction in cross-sectional area or wall thickness, or both.
6.4 Many surface contaminants may have detrimental effects on high temperature properties or corrosion resistance of tubing.
Contamination by copper, lead, mercury, zinc, chlorides, or sulfur may be detrimental to stainless steels. The manufacturer shall
employ techniques that minimize surface contamination by these elements.
7. Cleaning Before Annealing
7.1 All lubricants of coatings used in the manufacture of straight-length tube or in the bending shall be removed from all surfaces
prior to any annealing treatments. U-bends on which a lubricant had been applied to the inside surface during bending shall have
the cleanness of their inside surface confirmed by blowing close fitting acetone-soaked felt plugs through 10 % of the tubes of each
bend radius. Dry, oil-free, air or inert gas shall be used to blow the plugs through the tubes. If the plugs blown through any tube
A688/A688M − 24
TABLE 1 Chemical Requirements
Grade. TP 304 TP 304L TP TP 316 TP TP TP XM-29 TP 304N TP 316N . . . 800 800H . . . . . . . . . . . .
304LN 316L 316LN
UNS S30400 S30403 S30453 S31600 S31603 S31653 S24000 S30451 S31651 N08367 N08800 N08810 N08811 N08926 S31254 S32654
A
Element
Designation
....
Composition, %
Carbon, max 0.08 0.035 0.035 0.08 0.035 0.035 0.060 0.08 0.08 0.030 0.10 0.05– 0.06– 0.020 0.020 0.020
0.10 0.10
B
Manganese, max 2.00 2.00 2.00 2.00 2.00 2.00 11.50– 2.00 2.00 2.00 1.50 1.50 1.50 2.00 1.00 2.0–4.0
14.50
Phosphorus, max 0.040 0.040 0.040 0.040 0.040 0.040 0.060 0.040 0.040 0.040 0.045 0.045 0.045 0.03 0.030 0.030
Sulfur, max 0.030 0.030 0.030 0.030 0.030 0.030 0.030 0.030 0.030 0.030 0.015 0.015 0.015 0.01 0.010 0.005
Silicon, max 0.75 0.75 0.75 0.75 0.75 0.75 1.00 0.75 0.75 1.00 1.00 1.00 1.00 0.5 0.80 0.50
Nickel 8.00– 8.00– 8.00– 10.00– 10.00– 10.00– 2.25– 8.00– 10.00– 23.50– 30.0– 30.0– 30.0– 24.00– 17.5– 21.0–
11.00 13.00 13.00 14.00 15.00 15.00 3.75 11.0 14.00 25.50 35.0 35.0 35.0 26.00 18.5 23.0
Chromium 18.00– 18.00– 18.00– 16.00– 16.00– 16.00– 17.00– 18.0– 16.0– 20.00– 19.00– 19.00– 19.00– 19.00– 19.5– 24.0–
20.00 20.00 20.00 18.00 18.00 18.00 19.00 20.0 18.0 22.00 23.0 23.0 23.0 21.00 20.5 25.0
Molybdenum . . . 2.00– 2.00– 2.00– . . 2.00– 6.00– . . . 6.0– 6.0– 7.0–
3.00 3.00 3.00 3.00 7.00 7.0 6.5 8.0
C
Nitrogen . . 0.10– . . 0.10– 0.20– 0.10– 0.10– 0.18– . . . 0.15– 0.18– 0.45–
0.16 0.16 0.40 0.16 0.16 0.25 0.25 0.22 0.55
Copper . . . . . . . . . . . . . . . . . . . . . . . . . . . 0.75 max 0.75 0.75 0.75 0.5–1.5 0.50–1.00 0.30–0.60
Titanium . . . . . . . . . . . . . . . . . . . . . . . . . . . . . . 0.15– 0.15– 0.25– . . . . . . . . .
D
0.60 0.60 0.60
Aluminum . . . . . . . . . . . . . . . . . . . . . . . . . . . . . . 0.15– 0.15– 0.25– . . . . . . . . .
D
0.60 0.60 0.60
Others . . . . . . . . . . . . . . . . . . . . . . . . . . . . . . Fe Fe Fe . . . . . . . . .
39.5 39.5 39.5
E E E
Min. Min. Min.
TABLE 1 Chemical Requirements
Grade. TP 304 TP 304L . . . TP 304LN TP 316 TP 316L TP 316LN TP XM-29 TP 304N TP 316N . . . 800 800H . . . . . . . . . . . .
UNS S30400 S30403 S30416 S30453 S31600 S31603 S31653 S24000 S30451 S31651 N08367 N08800 N08810 N08811 N08926 S31254 S32654
A
Designation
Element
....
Composition, %
Carbon, max 0.08 0.035 0.030 0.035 0.08 0.035 0.035 0.060 0.08 0.08 0.030 0.10 0.05– 0.06– 0.020 0.020 0.020
0.10 0.10
B
Manganese, max 2.00 2.00 2.00 2.00 2.00 2.00 2.00 11.50– 2.00 2.00 2.00 1.50 1.50 1.50 2.00 1.00 2.0–4.0
14.50
Phosphorus, max 0.040 0.040 0.045 0.040 0.040 0.040 0.040 0.060 0.040 0.040 0.040 0.045 0.045 0.045 0.03 0.030 0.030
Sulfur, max 0.030 0.030 0.015 0.030 0.030 0.030 0.030 0.030 0.030 0.030 0.030 0.015 0.015 0.015 0.01 0.010 0.005
Silicon, max 0.75 0.75 0.80– 0.75 0.75 0.75 0.75 1.00 0.75 0.75 1.00 1.00 1.00 1.00 0.5 0.80 0.50
C
2.00
Nickel 8.00– 8.00– 9.00– 8.00– 10.00– 10.00– 10.00– 2.25– 8.00– 10.00– 23.50– 30.0– 30.0– 30.0– 24.00– 17.5– 21.0–
11.00 13.00 11.00 13.00 14.00 15.00 15.00 3.75 11.0 14.00 25.50 35.0 35.0 35.0 26.00 18.5 23.0
Chromium 18.00– 18.00– 17.50– 18.00– 16.00– 16.00– 16.00– 17.00– 18.0– 16.0– 20.00– 19.00– 19.00– 19.00– 19.00– 19.5– 24.0–
20.00 20.00 19.50 20.00 18.00 18.00 18.00 19.00 20.0 18.0 22.00 23.0 23.0 23.0 21.00 20.5 25.0
Molybdenum . . 0.40– . 2.00– 2.00– 2.00– . . 2.00– 6.00– . . . 6.0– 6.0– 7.0–
0.80 3.00 3.00 3.00 3.00 7.00 7.0 6.5 8.0
D
Nitrogen . . 0.10 max 0.10– . . 0.10– 0.20– 0.10– 0.10– 0.18– . . . 0.15– 0.18– 0.45–
0.16 0.16 0.40 0.16 0.16 0.25 0.25 0.22 0.55
Copper . . . . . . . . . . . . . . . . . . . . . . . . . . . . . . 0.75 max 0.75 0.75 0.75 0.5–1.5 0.50–1.00 0.30–0.60
Titanium . . . . . . . . . . . . . . . . . . . . . . . . . . . . . . . . . 0.15– 0.15– 0.25– . . . . . . . . .
E
0.60 0.60 0.60
A688/A688M − 24
Grade. TP 304 TP 304L . . . TP 304LN TP 316 TP 316L TP 316LN TP XM-29 TP 304N TP 316N . . . 800 800H . . . . . . . . . . . .
UNS S30400 S30403 S30416 S30453 S31600 S31603 S31653 S24000 S30451 S31651 N08367 N08800 N08810 N08811 N08926 S31254 S32654
A
Designation
Element
....
Composition, %
Aluminum . . . . . . . . . . . . . . . . . . . . . . . . . . . . . . . . . 0.15– 0.15– 0.25– . . . . . . . . .
E
0.60 0.60 0.60
Others . . . . . . . . . . . . . . . . . . . . . . . . . . . . . . . . . Fe Fe Fe . . . . . . . . .
39.5 39.5 39.5
F F F
Min. Min. Min.
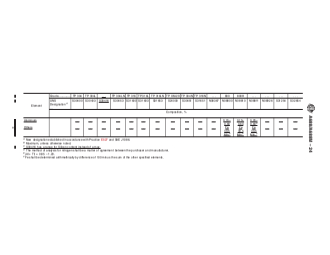
A
New designation established in accordance with Practice E527 and SAE J1086.
B
Maximum, unless otherwise noted.
C
S30416 has a range for Silicon content instead of a max.
D
The method of analysis for nitrogen shall be a matter of agreement between the purchaser and manufacturer.
E
(Al + Ti) = 0.85 – 1.20.
F
Fe shall be determined arithmethically by difference of 100 minus the sum of the other specified elements.
A688/A688M − 24
shows more than a light gray discoloration, all tubes that have had a lubricant applied to the inside surface during bending shall
be recleaned. After recleaning 10 % of the tubes of each bend radius whose inside surface had been subjected to bending lubricants
shall be retested.
8. Heat Treatment
8.1 All finished straight tubing or straight tubing ready for U-bending shall be furnished in the solution-annealed condition. The
annealing procedure, except for N08367, S31254, S32654, N08810, N08811, and N08926, shall consist of heating the material to
a minimum temperature of 1900 °F [1040 °C] followed by a rapid cooling to below 700 °F [370 °C]. The cooling rate shall be
sufficiently rapid to prevent harmful carbide precipitation as determined in Section 13.
8.2 UNS N08367 shall be solution annealed at 2025 °F [1107 °C] minimum followed by rapid quenching.
8.3 N08926 shall be heat-treated at a minimum temperature of 2010 °F [1100 °C] followed by quenching in water or rapidly
cooling by other means.
8.4 S31254, S32654, and N08811 shall be solution annealed at 2100 °F [1150 °C] minimum followed by rapid quenching.
8.5 N08810 shall be heat-treated to a minimum temperature of 2050 °F [1120 °C] minimum followed by rapid quenching.
8.6 If heat treatment of U-bends is specified, it shall satisfy the annealing procedure described above, and shall be done as follows:
8.6.1 The heat treatment shall be applied to the U-bend area plus approximately 6 in. [150 mm] of each leg beyond the tangent
point of the U-bend.
8.6.2 If the heat treatment specified in 8.6 is accomplished by resistance-heating methods wherein electrodes are clamped to the
tubes, the clamped areas shall be visually examined for arc burns. Burn indications shall be cause for rejection unless they can be
removed by local polishing without encroaching upon minimum wall thickness.
8.6.3 Temperature control shall be accomplished through the use of optical or emission pyrometers, or both. No temperature-
indicating crayons, lacquers, or pellets shall be used.
8.6.4 The inside of the tube shall be purged with a protective or an inert gas atmosphere during heating and cooling to below 700
°F [370 °C] to prevent scaling of the inside surface. The atmosphere should be noncarburizing.
9. Surface Condition
9.1 The straight tubes, after final annealing, shall be pickled using a solution of nitric and hydrofluoric acids followed by flushing
and rinsing in water. If bright annealing is performed, this requirement does not apply.
9.2 A light oxide scale on the outside surface of U-bend area shall be permitted for tubes which have been electric-resistance heat
treated after bending.
10. Chemical Composition
10.1 Product Analysis:
10.1.1 When requested in the purchase order, a product analysis shall be made by the supplier from one tube or coil of steel per
heat. The chemical composition shall conform to the requirements shown in Table 1.
10.1.2 A product analysis tolerance of Specification A480/A480M shall apply. The product analysis tolerance is not applicable to
the carbon content for material with a specified maximum carbon of 0.04 % or less.
10.1.3 If the original test for product analysis fails, retests of two additional lengths of flat-rolled stock or tubes shall be made.
Both retests, for the elements in question, shall meet the requirements of this specification; otherwise all remaining material in the
heat or lot shall be rejected, or at the option of the producer, each length of flat-rolled stock or tube may be individually tested
for acceptance. Lengths of flat-rolled stock or tubes that do not meet the requirements of this specification shall be rejected.
A688/A688M − 24
11. Mechanical Requirements
11.1 Tensile Properties:
11.1.1 The material shall conform to the tensile properties shown in Table 2.
11.1.2 One tension test shall be made on a specimen for lots of not more than 50 tubes. Tension tests shall be made on specimens
from two tubes for lots of more than 50 tubes.
11.2 Hardness:
11.2.1 Grade TP XM-29 and N08367 tubes shall have a hardness number not exceeding 100 HRB, 265 HBW, or 270 HV,
depending on test method used. Tubes of all other grades shall have a hardness number not exceeding 90 HRB, 192 HBW, or 200
HV, depending on test method used. This hardness requirement is not to apply to the bend area of U-bend tubes which are not heat
treated after bending.
11.2.2 Brinell or Rockwell hardness tests shall be made on specimens from two tubes from each lot.
11.2.3 For tubing less than 0.354 in. [9.00 mm] in inside diameter or less than 0.065 in. [1.65 mm] in wall thickness, it is
permissible to use the Vickers hardness test in lieu of the Rockwell test.
11.3 Reverse Bend Test (Welded Product):
11.3.1 One reverse bend test shall be made on a specimen from each 1500 ft [460 m] of finished tubing.
11.3.2 A section 4 in. [100 mm] minimum in length shall be split longitudinally 90° on each side of the weld. The sample shall
then be opened and bent around a mandrel with a maximum thickness of four times the wall thickness, with the mandrel parallel
to the weld and against the original outside surface of the tube. The weld shall be at the point of maximum bend. There shall be
no evidence of cracks, or of overlaps resulting from the reduction in thickness of the weld area by cold working. When the
geometry or size of the tubing make it difficult to test the sample as a single piece, the sample may be sectioned into smaller pieces
provided a minimum of 4 in. of weld is subjected to reverse bending.
11.3.3 The reverse bend test is not applicable when specified wall is 10 % or more of the specified outside diameter, or the wall
thickness is 0.134 in. [3.4 mm] or greater, or the outside diameter size is less than 0.375 in. [9.5 mm]. Under these conditions, the
reverse flattening test of Specification A1016/A1016M shall apply.
11.4 Flattening Test (Seamless and Welded Products)—Flattening tests shall be made on specimens from each end of one finished
tube, not the one used for the flange test, from each lot.
11.5 Flange Test (Welded Product)—
...
Questions, Comments and Discussion
Ask us and Technical Secretary will try to provide an answer. You can facilitate discussion about the standard in here.
Loading comments...