ASTM F1960-14a
(Specification)Standard Specification for Cold Expansion Fittings with PEX Reinforcing Rings for Use with Cross-linked Polyethylene (PEX) Tubing
Standard Specification for Cold Expansion Fittings with PEX Reinforcing Rings for Use with Cross-linked Polyethylene (PEX) Tubing
ABSTRACT
This specification covers cold expansion fittings and cross-linked (PEX) reinforcing rings for use with cross-linked polyethylene (PEX) plastic tubing in specific nominal diameters. These fittings are intended for use in residential and commercial, hot and cold, potable water distribution systems as well as sealed central heating, including under-floor-heating systems. The PEX reinforcing rings shall conform to the required density, degree of cross-linking, and stabilizer migration resistance.
SCOPE
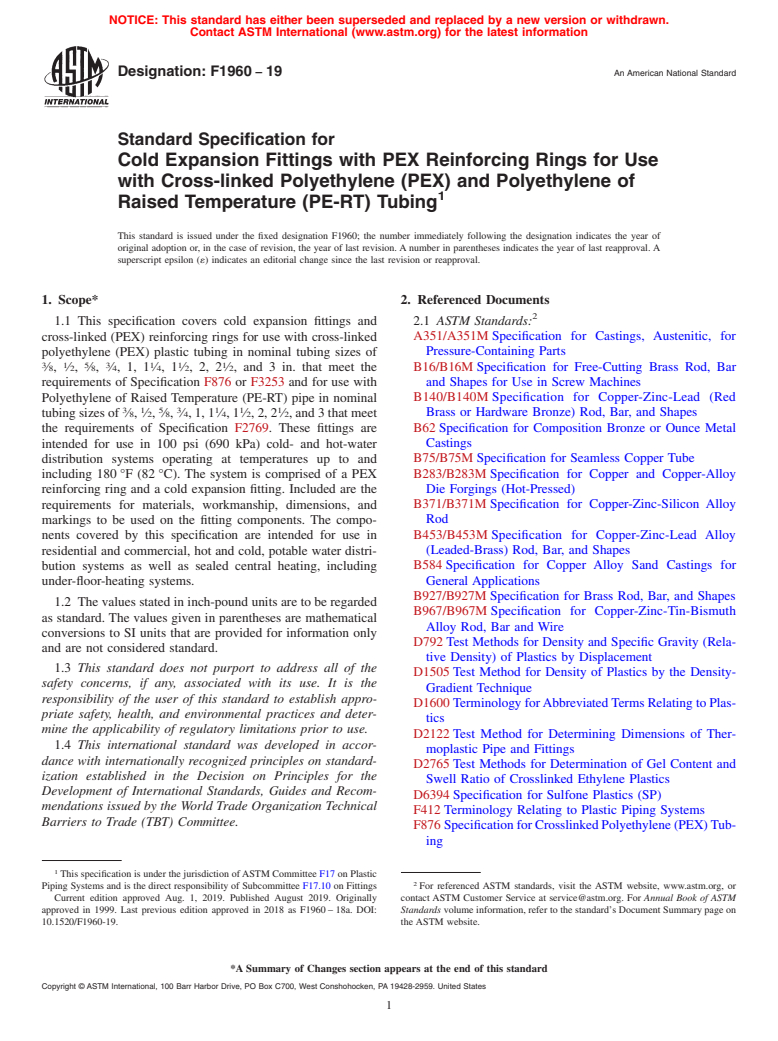
1.1 This specification covers cold expansion fittings and cross-linked (PEX) reinforcing rings for use with cross-linked polyethylene (PEX) plastic tubing in 3/8 , 1/2 , 5/8 , 3/4 , 1, 11/4 , 11/2 in. 2, 21/4 , and 3 in. nominal diameters that meet the requirements of Specifications F876 and F877. These fittings are intended for use in 100 psi (690 kPa) cold- and hot-water distribution systems operating at temperatures up to and including 180°F (82°C). The system is comprised of a PEX reinforcing ring and a cold expansion fitting. Included are the requirements for materials, workmanship, dimensions, and markings to be used on the fitting components. The components covered by this specification are intended for use in residential and commercial, hot and cold, potable water distribution systems as well as sealed central heating, including under-floor-heating systems.
1.2 The values stated in inch-pound units are to be regarded as standard. The values given in parentheses are mathematical conversions to SI units that are provided for information only and are not considered standard.
1.3 This standard does not purport to address all of the safety concerns, if any, associated with its use. It is the responsibility of the user of this standard to establish appropriate safety and health practices and determine the applicability of regulatory limitations prior to use.
General Information
Relations
Buy Standard
Standards Content (Sample)
NOTICE: This standard has either been superseded and replaced by a new version or withdrawn.
Contact ASTM International (www.astm.org) for the latest information
Designation:F1960 −14a
StandardSpecification for
Cold Expansion Fittings with PEX Reinforcing Rings for Use
with Cross-linked Polyethylene (PEX) Tubing
This standard is issued under the fixed designation F1960; the number immediately following the designation indicates the year of
original adoption or, in the case of revision, the year of last revision. A number in parentheses indicates the year of last reapproval. A
superscript epsilon (´) indicates an editorial change since the last revision or reapproval.
1. Scope* B140/B140M Specification for Copper-Zinc-Lead (Red
Brass or Hardware Bronze) Rod, Bar, and Shapes
1.1 This specification covers cold expansion fittings and
B62 Specification for Composition Bronze or Ounce Metal
cross-linked (PEX) reinforcing rings for use with cross-linked
Castings
3 1 5 3 1 1
polyethylene (PEX) plastic tubing in ⁄8, ⁄2, ⁄8, ⁄4,1,1 ⁄4,1 ⁄2
B75 Specification for Seamless Copper Tube
in. 2, 2 ⁄4, and 3 in. nominal diameters that meet the require-
B283 Specification for Copper and Copper-Alloy Die Forg-
ments of Specifications F876 and F877. These fittings are
ings (Hot-Pressed)
intended for use in 100 psi (690 kPa) cold- and hot-water
B371/B371M Specification for Copper-Zinc-Silicon Alloy
distribution systems operating at temperatures up to and
Rod
including 180°F (82°C). The system is comprised of a PEX
B453/B453M Specification for Copper-Zinc-Lead Alloy
reinforcing ring and a cold expansion fitting. Included are the
(Leaded-Brass) Rod, Bar, and Shapes
requirements for materials, workmanship, dimensions, and
B584 Specification for Copper Alloy Sand Castings for
markings to be used on the fitting components. The compo-
General Applications
nents covered by this specification are intended for use in
B927/B927M Specification for Brass Rod, Bar, and Shapes
residential and commercial, hot and cold, potable water distri-
B967/B967M Specification for Copper-Zinc-Tin-Bismuth
bution systems as well as sealed central heating, including
Alloy Rod, Bar and Wire
under-floor-heating systems.
D792 Test Methods for Density and Specific Gravity (Rela-
1.2 The values stated in inch-pound units are to be regarded
tive Density) of Plastics by Displacement
as standard. The values given in parentheses are mathematical
D1505 Test Method for Density of Plastics by the Density-
conversions to SI units that are provided for information only
Gradient Technique
and are not considered standard.
D1600 Terminology forAbbreviatedTerms Relating to Plas-
1.3 This standard does not purport to address all of the
tics
safety concerns, if any, associated with its use. It is the D2122 Test Method for Determining Dimensions of Ther-
responsibility of the user of this standard to establish appro-
moplastic Pipe and Fittings
priate safety and health practices and determine the applica- D2765 Test Methods for Determination of Gel Content and
bility of regulatory limitations prior to use.
Swell Ratio of Crosslinked Ethylene Plastics
D3035 SpecificationforPolyethylene(PE)PlasticPipe(DR-
2. Referenced Documents PR) Based on Controlled Outside Diameter
2 D6394 Specification for Sulfone Plastics (SP)
2.1 ASTM Standards:
F412 Terminology Relating to Plastic Piping Systems
A351/A351M Specification for Castings, Austenitic, for
F876 SpecificationforCrosslinkedPolyethylene(PEX)Tub-
Pressure-Containing Parts
ing
B16/B16M Specification for Free-Cutting Brass Rod, Bar
F877 SpecificationforCrosslinkedPolyethylene(PEX)Hot-
and Shapes for Use in Screw Machines
and Cold-Water Distribution Systems
2.2 ANSI Standard:
B1.20 Pipe Threads General Purpose
This specification is under the jurisdiction ofASTM Committee F17 on Plastic
B16.18 Cast Copper Alloy Solder Joint Pressure Fittings
Piping Systems and is the direct responsibility of Subcommittee F17.10 on Fittings
Current edition approved Nov. 15, 2014. Published January 2015. Originally B16.22 Wrought Copper and Copper Alloy Solder Joint
approved in 1999. Last previous edition approved in 2014 as F1960 – 14. DOI:
Pressure Fittings
10.1520/F1960-14A.
For referenced ASTM standards, visit the ASTM website, www.astm.org, or
contact ASTM Customer Service at service@astm.org. For Annual Book of ASTM
Standards volume information, refer to the standard’s Document Summary page on Available fromAmerican National Standards Institute (ANSI), 25 W. 43rd St.,
the ASTM website. 4th Floor, New York, NY 10036, http://www.ansi.org
*A Summary of Changes section appears at the end of this standard
Copyright © ASTM International, 100 Barr Harbor Drive, PO Box C700, West Conshohocken, PA 19428-2959. United States
F1960−14a
2.3 NSF Standards: the following line call out for additional properties
NSF 14 for Plastic Piping Components and Related Materi- (SP0113G20A30430).
als 5.1.2.2 Unreinforced Sulfone Plastic (SP)—Fittings shall be
NSF 61 for Drinking Water System Components-Health molded from sulfone plastic (SP) as specified in Specification
Effects D6394. The material shall be unreinforced polysulfone (group
01, class 1, grade 2), or polyphenylsulfone (group 3, class 1,
2.4 Manufacturers’ Standardization Society Standards:
grade 2.) Material may also be an unreinforced blend of these
SP-104 Wrought Copper Solder Joint Pressure Fittings
two materials with the polyphenylsulfone continuous phase
comprising 55 to 80% of the blend.
3. Terminology
5.1.2.3 Clean rework material of the same commercial
3.1 Definitions:
designation, generated for the manufacturer’s own production
3.1.1 Definitions are in accordance with Terminology F412
may be used by the same manufacturer, provided the fittings
and abbreviations are in accordance with Terminology D1600,
meet all of the requirements of this specification. Rework
unless otherwise indicated.
material shall not be introduced at a ratio exceeding 25%.
3.1.2 PEX reinforcing rings—cross-linked polyethylene
5.2 Reinforcing rings shall be made from PEX material
rings used to add contraction force around the cold expansion
meeting the performance requirements of 6.1.
fittings.
5.3 Stainless Steel—fittings shall be made from material
4. Classification
meetingtherequirementsofSpecificationA351/A351M,stain-
less steel UNS No. J92800.
4.1 This specification covers one class of cold expansion
fittings with PEX reinforcing rings suitable for use with PEX
5.4 Wrought Copper—Wrought copper fittings shall be
tubing that meets the requirements of Specifications F876 and
made from material meeting the requirements of Specification
F877.
B75 for one of the following coppers: copper UNS C10200,
C10300, C10800, or C12200.
5. Materials and Manufacture
6. General Requirements
5.1 Cold expansion fittings shall be made from one of the
following materials:
6.1 The following sections of Specification F877 constitute
5.1.1 Brass: a part of this specification.
5.1.1.1 Machined Brass—Machined brass fittings shall be
6.1.1 Requirements,
made from material meeting the requirements of one of the 6.1.2 Test Methods, and
following listed below:
6.1.3 Retest and Rejection.
Specification Alloy
6.2 In addition, when a section with a title identical to that
ASTM B16/B16M UNS C36000
referenced in 6.1, above, appears in this specification, it
ASTM B140/B140M UNS C31400
ASTM B371/B371M UNS C69300 contains additional requirements that supplement those appear-
Standard EN 12164 CW614N
ing in F877.
ASTM B453/B453M UNS C35300
ASTM B927/B927M UNS C27450, C27451
6.3 System Performance Requirements:
ASTM B967/B967M UNS C49260, C49340
6.3.1 General—All performance tests shall be performed on
5.1.1.2 Forged Brass—Forged brass fittings shall be made
assemblies of fittings, PEX reinforcing rings and PEX tubing.
from material meeting the requirements of Specification B283,
Fittings and reinforcing rings shall meet the material and
Copper Alloy UNS Nos. C27450, C27451, C35330, C36500,
dimensional requirements of this specification. PEX tubing
C37700, C46400, C48600, C49260, C49340, or C69300.
shall meet the requirements of Specifications F876 and F877.
5.1.1.3 Cast Copper Alloys—Cast copper alloy fittings shall
Assembly of test specimens shall be in accordance with 10.1.
be made from material meeting the requirements of Specifica-
Each assembly shall contain at least two joints. Use separate
tion B584, CopperAlloy UNS Nos. C84400, C83800, C87850
sets of assemblies for each performance test requirement.
orC89844orC89836orSpecificationB62,CopperAlloyUNS
6.3.2 Dimensions—Any randomly selected fitting or fittings
No. C83600, or Standard EN 1982, copper alloy EN Symbol
and PEX reinforcing rings shall be used to determine dimen-
CuSn4Zn6Pb3–C.
sions. Measurements shall be made in accordance with Test
5.1.2 Sulfone:
Method D2122, except determine diameter by making mea-
5.1.2.1 20 % Glass-Filled Polysulfone—Polysulfone fittings
surements at four locations spaced at approximately 45° apart
produced using glass reinforcement shall be molded from
around the circumference. Inspection and gauging of solder
polysulfone materials as specified in Specification D6394. The
joint ends shall be accordance with ANSI B16.18, ANSI
polymers shall consist of polysulfone and glass fiber and meet
B16.22, or Manufacturers’ Standardization Society SP-104.
7. Performance Requirements
Available from NSF International, P.O. Box 130140, 789 N. Dixboro Rd.,Ann
7.1 PEX Reinforcing Rings:
Arbor, MI 48113-0140, http://www.nsf.org.
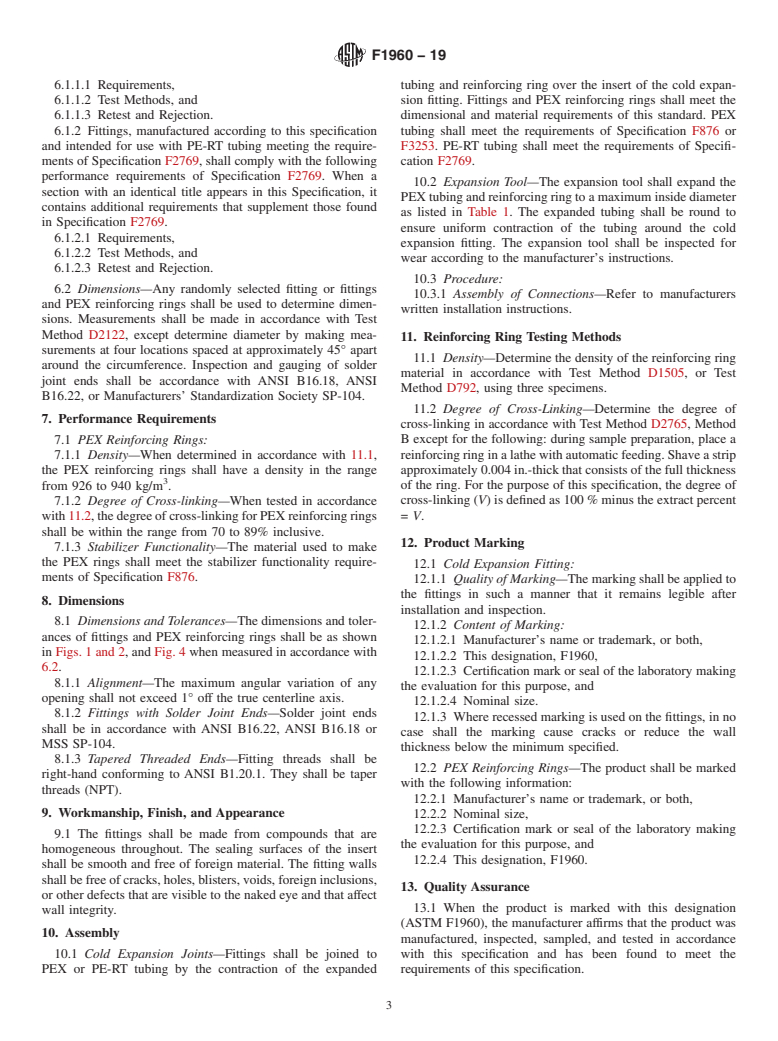
7.1.1 Density—When determined in accordance with 11.1,
AvailablefromManufacturersStandardizationSocietyoftheValveandFittings
the PEX reinforcing rings shall have a density in the range
Industry (MSS), 127 Park St., NE, Vienna, VA 22180-4602, http://www.mss-
hq.com. from 926 to 940 kg/m .
F1960−14a
7.1.2 Degree of Cross-linking—When tested in accordance 8.1.3 Tapered Threaded Ends—Fitting threads shall be
with11.2,thedegreeofcross-linkingforPEXreinforcingrings right-hand conforming to ANSI B1.20.1. They shall be taper
shall be within the range from 70 to 89% inclusive. threads (NPT).
7.1.3 Stabilizer Migration Resistance—When tested in ac-
9. Workmanship, Finish, and Appearance
cordance with 11.3, the time t , shall be at least 50% of the
time, t . 9.1 The fittings shall be made from compounds that are
homogeneous throughout. The sealing surfaces of the insert
8. Dimensions
shall be smooth and free of foreign material. The fitting walls
shallbefreeofcracks,holes,blisters,voids,foreigninclusions,
8.1 Dimensions and Tolerances—The dimensions and toler-
ances of fittings and PEX reinforcing rings shall be as shown or other defects that are visible to the naked eye and that affect
wall integrity.
in Figs. 1 and 2, and Fig. 4 when measured in accordance with
6.3.2.
10. Assembly
8.1.1 Alignment—The maximum angular variation of any
opening shall not exceed 1° off the true centerline axis. 10.1 Cold Expansion Joints—Fittings shall be joined to
8.1.2 Fittings with Solder Joint Ends—Solder joint ends PEX tubing by the contraction of the tubing and reinforcing
shall be in accordance with ANSI B16.22, ANSI B16.18 or ring over the insert of the cold expansion fitting. Fittings and
MSS SP-104. PEX reinforcing rings shall meet the dimensional and material
NOTE-BREAK ALL INTERNAL CORNERS .003
ALL DIAMETER CONCENTRICITY .005 TIR
Brass, Stainless Steel and Wrought Copper Dimensions
Min. Min.
Size AB C D E F G H I J
Wall ID
⁄8 in. 0.047 0.260 0.395 0.441 0.480 0.427 0.067 0.128 0.325 0.127 0.286
0.375 0.433 0.472 0.407 0.051 0.108 0.051 0.305 0.107 0.266
⁄2 in. 0.057 0.378 0.533 0.579 0.618 0.565 0.067 0.128 0.404 0.167 0.325
0.513 0.571 0.610 0.545 0.051 0.108 0.051 0.384 0.147 0.305
⁄8 in. 0.057 0.500 0.655 0.697 0.748 0.683 0.067 0.167 0.482 0.207 0.404
0.635 0.689 0.740 0.663 0.051 0.147 0.051 0.462 0.187 0.384
⁄4 in. 0.057 0.595 0.748 0.795 0.874 0.782 0.067 0.207 0.522 0.246 0.443
0.728 0.787 0.866 0.762 0.051 0.187 0.051 0.502 0.226 0.423
1 in. 0.072 0.795 0.985 1.032 1.110 0.998 0.067 0.246 0.640 0.285 0.561
0.965 1.024 1.102 0.978 0.051 0.226 0.051 0.620 0.265 0.541
1 ⁄4 in. 0.075 0.960 1.159 1.276 1.362 1.237 0.080 0.299 0.781 0.348 0.684
1.139 1.266 1.352 1.217 0.064 0.279 0.064 0.761 0.328 0.664
1 ⁄2 in. 0.095 1.084 1.324 1.382 1.494 1.349 0.093 0.351 0.919 0.408 0.805
1.304 1.374 1.486 1.329 0.077 0.331 0.077 0.899 0.388 0.785
2 in. 0.095 1.550 1.800 1.958 2.079 1.891 0.093 0.467 1.137 0.521 1.030
1.780 1.950 2.071 1.871 0.077 0.447 0.077 1.117 0.501 1.010
2 ⁄2 in. 0.105 1.990 2.280 2.430 2.585 2.430 0.155 0.610 1.520 0.610 1.350
2.260 2.410 2.565 2.410 0.135 0.590 0.160 1.480 0.590 1.310
3 in. 0.115 2.410 2.720 2.910 3.080 2.910 0.180 0.710 1.810 0.720 1.610
2.700 2.890 3.060 2.890 0.160 0.690 0.190 1.770 0.700 1.570
FIG. 1Brass and Stainless Steel and Wrought Copper Insert Dimensions and Tolerances
F1960−14a
NOTE-BREAK ALL INTERNAL CORNERS .003
ALL DIAMETER CONCENTRICITY .005 TIR
Sulfone Dimensions
Min. Min. Max Flash
Size AB CD E F G H I J
Wall ID and Mismatch
⁄8 in. 0.047 0.268 0.402 0.441 0.480 0.427 0.067 0.128 0.325 0.128 0.306
0.382 0.433 0.472 0.407 0.051 0.108 0.051 0.305 0.108 0.266 0.005
⁄2 in. 0.057 0.385 0.540 0.579 0.618 0.565 0.067 0.128 0.404 0.167 0.345
0.520 0.571 0.610 0.545 0.051 0.108 0.051 0.384 0.147 0.305 0.005
⁄8 in. 0.057 0.494 0.648 0.697 0.748 0.683 0.067 0.167 0.482 0.207 0.424
0.628 0.689 0.740 0.663 0.051 0.147 0.051 0.462 0.187 0.384 0.005
⁄4 in. 0.057 0.590 0.755 0.795 0.874 0.782 0.067 0.207 0.522 0.246 0.463
0.735 0.787 0.866 0.762 0.051 0.187 0.051 0.502 0.226 0.423 0.005
1 in. 0.072 0.788 0.992 1.032 1.110 0.998 0.067 0.246 0.640 0.286 0.581
0.972 1.024 1.102 0.978 0.051 0.226 0.051 0.620 0.266 0.541 0.005
1 ⁄4 in. 0.075 0.970 1.159 1.276 1.362 1.237 0.080 0.299 0.781 0.348 0.704
1.139 1.266 1.352 1.217 0.064 0.279 0.064 0.761 0.328 0.664 0.005
1 ⁄2 in. 0.095 1.084 1.328 1.382 1.494 1.349 0.093 0.351 0.919 0.408 0.825
1.308 1.374 1.486 1.329 0.077 0.331 0.077 0.899 0.388 0.785 0.005
2 0.128 1.484 1.800 1.958 2.079 1.891 0.093 0.467 1.137 0.521 1.050 0.005
1.780 1.950 2.071 1.871 0.077 0.447 0.077 1.117 0.501 1.010
2 ⁄2 in. 0.175 1.850 2.280 2.430 2.585 2.430 0.155 0.610 1.520 0.610 1.350 0.005
2.260 2.410 2.565 2.410 0.135 0.590 0.160 1.480 0.590 1.310
3 in. 0.210 2.220 2.720 2.910 3.080 2.910 0.180 0.710 1.810 0.720 1.610 0.005
2.700 2.890 3.060 2.890 0.160 0.690 0.190 1.770 0.700 1.570
FIG. 2Sulfone Insert Dimensions and Tolerances
FIG. 3Flash and Mismatch Created by Imperfection in Die Half Interfaces
requirements of this standard. PEX tubing shall meet the 10.2 Expansion Tool—The expansion tool shall expand the
requirements of Specification F876 or F877. PEXtubingandreinforcingringtoamaximuminsidediameter
F1960−14a
...
This document is not an ASTM standard and is intended only to provide the user of an ASTM standard an indication of what changes have been made to the previous version. Because
it may not be technically possible to adequately depict all changes accurately, ASTM recommends that users consult prior editions as appropriate. In all cases only the current version
of the standard as published by ASTM is to be considered the official document.
Designation: F1960 − 14 F1960 − 14a An American National Standard
Standard Specification for
Cold Expansion Fittings with PEX Reinforcing Rings for Use
with Cross-linked Polyethylene (PEX) Tubing
This standard is issued under the fixed designation F1960; the number immediately following the designation indicates the year of
original adoption or, in the case of revision, the year of last revision. A number in parentheses indicates the year of last reapproval. A
superscript epsilon (´) indicates an editorial change since the last revision or reapproval.
1. Scope*
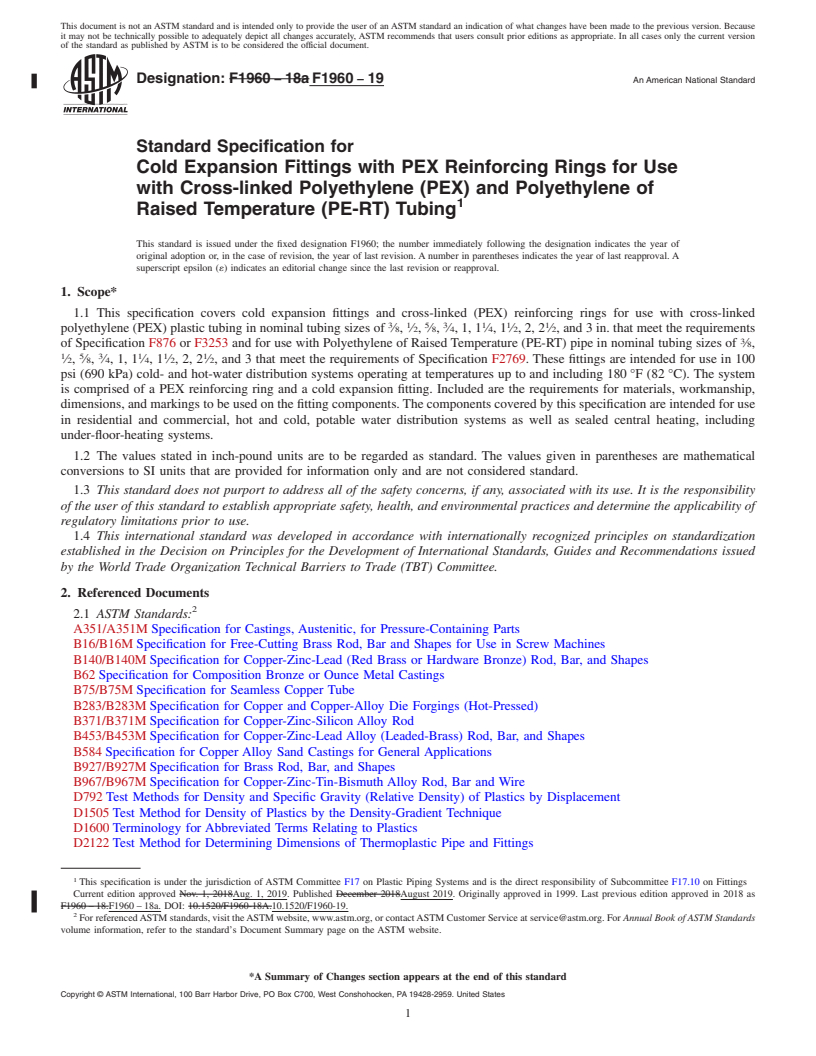
1.1 This specification covers cold expansion fittings and cross-linked (PEX) reinforcing rings for use with cross-linked
3 1 5 3 1 1 1
polyethylene (PEX) plastic tubing in ⁄8, ⁄2, ⁄8, ⁄4, 1, 1 ⁄4, 1 ⁄2 in. 2, 2 ⁄4, and 3 in. nominal diameters that meet the requirements
of Specifications F876 and F877. These fittings are intended for use in 100 psi (690 kPa) cold- and hot-water distribution systems
operating at temperatures up to and including 180°F (82°C). The system is comprised of a PEX reinforcing ring and a cold
expansion fitting. Included are the requirements for materials, workmanship, dimensions, and markings to be used on the fitting
components. The components covered by this specification are intended for use in residential and commercial, hot and cold,
potable water distribution systems as well as sealed central heating, including under-floor-heating systems.
1.2 The values stated in inch-pound units are to be regarded as standard. The values given in parentheses are mathematical
conversions to SI units that are provided for information only and are not considered standard.
1.3 This standard does not purport to address all of the safety concerns, if any, associated with its use. It is the responsibility
of the user of this standard to establish appropriate safety and health practices and determine the applicability of regulatory
limitations prior to use.
2. Referenced Documents
2.1 ASTM Standards:
A351/A351M Specification for Castings, Austenitic, for Pressure-Containing Parts
B16/B16M Specification for Free-Cutting Brass Rod, Bar and Shapes for Use in Screw Machines
B140/B140M Specification for Copper-Zinc-Lead (Red Brass or Hardware Bronze) Rod, Bar, and Shapes
B62 Specification for Composition Bronze or Ounce Metal Castings
B75 Specification for Seamless Copper Tube
B283 Specification for Copper and Copper-Alloy Die Forgings (Hot-Pressed)
B371/B371M Specification for Copper-Zinc-Silicon Alloy Rod
B453/B453M Specification for Copper-Zinc-Lead Alloy (Leaded-Brass) Rod, Bar, and Shapes
B584 Specification for Copper Alloy Sand Castings for General Applications
B927/B927M Specification for Brass Rod, Bar, and Shapes
B967/B967M Specification for Copper-Zinc-Tin-Bismuth Alloy Rod, Bar and Wire
D792 Test Methods for Density and Specific Gravity (Relative Density) of Plastics by Displacement
D1505 Test Method for Density of Plastics by the Density-Gradient Technique
D1600 Terminology for Abbreviated Terms Relating to Plastics
D2122 Test Method for Determining Dimensions of Thermoplastic Pipe and Fittings
D2765 Test Methods for Determination of Gel Content and Swell Ratio of Crosslinked Ethylene Plastics
D3035 Specification for Polyethylene (PE) Plastic Pipe (DR-PR) Based on Controlled Outside Diameter
D6394 Specification for Sulfone Plastics (SP)
F412 Terminology Relating to Plastic Piping Systems
F876 Specification for Crosslinked Polyethylene (PEX) Tubing
F877 Specification for Crosslinked Polyethylene (PEX) Hot- and Cold-Water Distribution Systems
This specification is under the jurisdiction of ASTM Committee F17 on Plastic Piping Systems and is the direct responsibility of Subcommittee F17.10 on Fittings
Current edition approved Aug. 1, 2014Nov. 15, 2014. Published October 2014January 2015. Originally approved in 1999. Last previous edition approved in 20122014
as F1960 – 12.F1960 – 14. DOI: 10.1520/F1960-14.10.1520/F1960-14A.
For referenced ASTM standards, visit the ASTM website, www.astm.org, or contact ASTM Customer Service at service@astm.org. For Annual Book of ASTM Standards
volume information, refer to the standard’s Document Summary page on the ASTM website.
*A Summary of Changes section appears at the end of this standard
Copyright © ASTM International, 100 Barr Harbor Drive, PO Box C700, West Conshohocken, PA 19428-2959. United States
F1960 − 14a
2.2 ANSI Standard:
B1.20 Pipe Threads General Purpose
B16.18 Cast Copper Alloy Solder Joint Pressure Fittings
B16.22 Wrought Copper and Copper Alloy Solder Joint Pressure Fittings
2.3 NSF Standards:
NSF 14 for Plastic Piping Components and Related Materials
NSF 61 for Drinking Water System Components-Health Effects
2.4 Manufacturers’ Standardization Society Standards:
SP-104 Wrought Copper Solder Joint Pressure Fittings
3. Terminology
3.1 Definitions:
3.1.1 Definitions are in accordance with Terminology F412 and abbreviations are in accordance with Terminology D1600,
unless otherwise indicated.
3.1.2 PEX reinforcing rings—cross-linked polyethylene rings used to add contraction force around the cold expansion fittings.
4. Classification
4.1 This specification covers one class of cold expansion fittings with PEX reinforcing rings suitable for use with PEX tubing
that meets the requirements of Specifications F876 and F877.
5. Materials and Manufacture
5.1 Cold expansion fittings shall be made from one of the following materials:
5.1.1 Brass:
5.1.1.1 Machined Brass—Machined brass fittings shall be made from material meeting the requirements of Specificationone
B140/B140M Copper Alloy UNS No. C31400,of the following listed below:
Specification Alloy
ASTM B16/B16M UNS C36000
ASTM B140/B140M UNS C31400
ASTM B371/B371M UNS C69300
Standard EN 12164 CW614N
ASTM B453/B453M UNS C35300
ASTM B927/B927M UNS C27450, C27451
ASTM B967/B967M UNS C49260, C49340
or Specification B16/B16M copper alloy UNS No. C36000, or Specification B371/B371M Copper Alloy UNS No. C69300, or
Standard EN 12164, copper alloy CW614N, or Copper Alloy UNS No. C35330, Copper Alloy UNS No. C27450 or Specifica-
tion B967/B967M copper alloy UNS No. C49260 or C49340.
5.1.1.2 Forged Brass—Forged brass fittings shall be made from material meeting the requirements of Specification B283,
Copper Alloy UNS Nos. C27450, C27451, C35330, C36500, C37700, C46400, C48600, C49260, C49340, or C69300.
5.1.1.3 Cast Copper Alloys—Cast copper alloy fittings shall be made from material meeting the requirements of Specification
B584, Copper Alloy UNS Nos. C84400, C83800, C87850 or C89844 or C89836 or Specification B62, Copper Alloy UNS No.
C83600, or Standard EN 1982, copper alloy EN Symbol CuSn4Zn6Pb3–C.
5.1.2 Sulfone:
5.1.2.1 20 % Glass-Filled Polysulfone—Polysulfone fittings produced using glass reinforcement shall be molded from
polysulfone materials as specified in Specification D6394. The polymers shall consist of polysulfone and glass fiber and meet the
following line call out for additional properties (SP0113G20A30430).
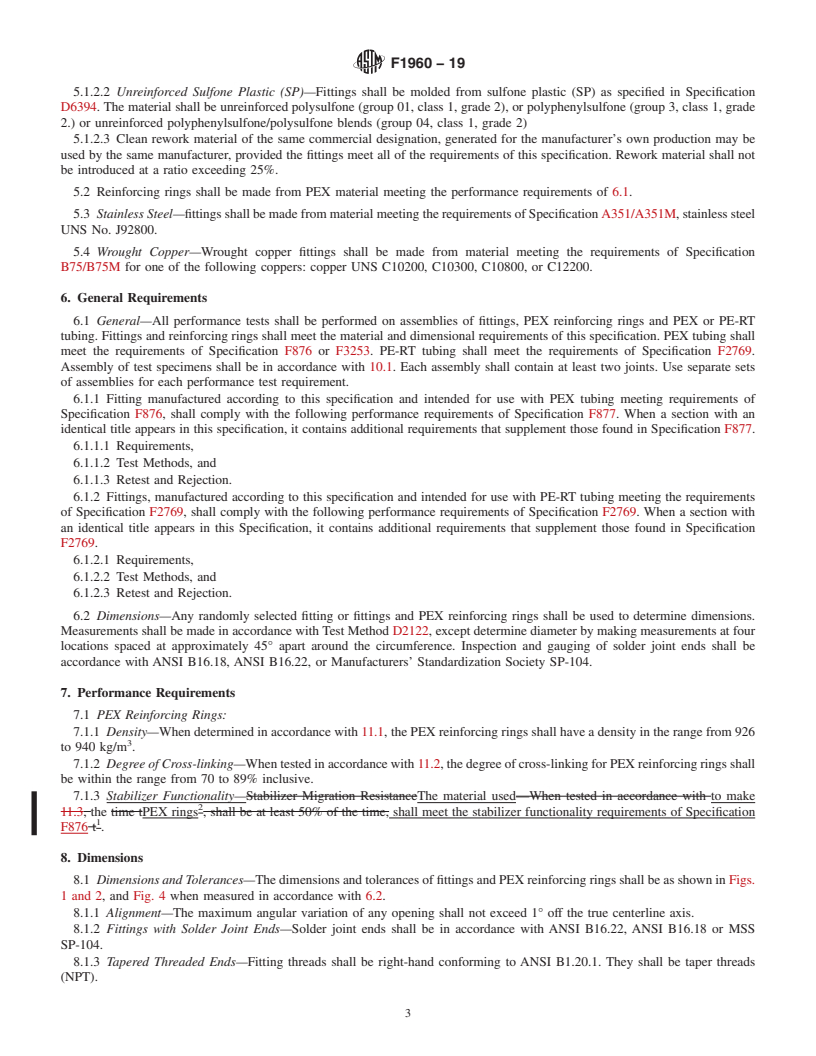
5.1.2.2 Unreinforced Sulfone Plastic (SP)—Fittings shall be molded from sulfone plastic (SP) as specified in Specification
D6394. The material shall be unreinforced polysulfone (group 01, class 1, grade 2), or polyphenylsulfone (group 3, class 1, grade
2.) Material may also be an unreinforced blend of these two materials with the polyphenylsulfone continuous phase comprising
55 to 80% of the blend.
5.1.2.3 Clean rework material of the same commercial designation, generated for the manufacturer’s own production may be
used by the same manufacturer, provided the fittings meet all of the requirements of this specification. Rework material shall not
be introduced at a ratio exceeding 25%.
5.2 Reinforcing rings shall be made from PEX material meeting the performance requirements of 6.1.
Available from American National Standards Institute (ANSI), 25 W. 43rd St., 4th Floor, New York, NY 10036, http://www.ansi.org
Available from NSF International, P.O. Box 130140, 789 N. Dixboro Rd., Ann Arbor, MI 48113-0140, http://www.nsf.org.
Available from Manufacturers Standardization Society of the Valve and Fittings Industry (MSS), 127 Park St., NE, Vienna, VA 22180-4602, http://www.mss-hq.com.
F1960 − 14a
5.3 Stainless Steel—fittings shall be made from material meeting the requirements of Specification A351/A351M, stainless steel
UNS No. J92800.
5.4 Wrought Copper—Wrought copper fittings shall be made from material meeting the requirements of Specification B75 for
one of the following coppers: copper UNS C10200, C10300, C10800, or C12200.
6. General Requirements
6.1 The following sections of Specification F877 constitute a part of this specification.
6.1.1 Requirements,
6.1.2 Test Methods, and
6.1.3 Retest and Rejection.
6.2 In addition, when a section with a title identical to that referenced in 6.1, above, appears in this specification, it contains
additional requirements that supplement those appearing in F877.
6.3 System Performance Requirements:
6.3.1 General—All performance tests shall be performed on assemblies of fittings, PEX reinforcing rings and PEX tubing.
Fittings and reinforcing rings shall meet the material and dimensional requirements of this specification. PEX tubing shall meet
the requirements of Specifications F876 and F877. Assembly of test specimens shall be in accordance with 10.1. Each assembly
shall contain at least two joints. Use separate sets of assemblies for each performance test requirement.
6.3.2 Dimensions—Any randomly selected fitting or fittings and PEX reinforcing rings shall be used to determine dimensions.
Measurements shall be made in accordance with Test Method D2122, except determine diameter by making measurements at four
locations spaced at approximately 45° apart around the circumference. Inspection and gauging of solder joint ends shall be
accordance with ANSI B16.18, ANSI B16.22, or Manufacturers’ Standardization Society SP-104.
7. Performance Requirements
7.1 PEX Reinforcing Rings:
7.1.1 Density—When determined in accordance with 11.1, the PEX reinforcing rings shall have a density in the range from 926
to 940 kg/m .
7.1.2 Degree of Cross-linking—When tested in accordance with 11.2, the degree of cross-linking for PEX reinforcing rings shall
be within the range from 70 to 89% inclusive.
2 1
7.1.3 Stabilizer Migration Resistance—When tested in accordance with 11.3, the time t , shall be at least 50% of the time, t .
8. Dimensions
8.1 Dimensions and Tolerances—The dimensions and tolerances of fittings and PEX reinforcing rings shall be as shown in Figs.
1 and 2, and Fig. 4 when measured in accordance with 6.3.2.
8.1.1 Alignment—The maximum angular variation of any opening shall not exceed 1° off the true centerline axis.
8.1.2 Fittings with Solder Joint Ends—Solder joint ends shall be in accordance with ANSI B16.22, ANSI B16.18 or MSS
SP-104.
8.1.3 Tapered Threaded Ends—Fitting threads shall be right-hand conforming to ANSI B1.20.1. They shall be taper threads
(NPT).
9. Workmanship, Finish, and Appearance
9.1 The fittings shall be made from compounds that are homogeneous throughout. The sealing surfaces of the insert shall be
smooth and free of foreign material. The fitting walls shall be free of cracks, holes, blisters, voids, foreign inclusions, or other
defects that are visible to the naked eye and that affect wall integrity.
10. Assembly
10.1 Cold Expansion Joints—Fittings shall be joined to PEX tubing by the contraction of the tubing and reinforcing ring over
the insert of the cold expansion fitting. Fittings and PEX reinforcing rings shall meet the dimensional and material requirements
of this standard. PEX tubing shall meet the requirements of Specification F876 or F877.
10.2 Expansion Tool—The expansion tool shall expand the PEX tubing and reinforcing ring to a maximum inside diameter as
listed in Table 1. The expanded tubing shall be round to ensure uniform contraction of the tubing around the cold expansion fitting.
The expansion tool shall be inspected for wear according to the manufacturer’s instructions.
10.3 Procedure:
10.3.1 Assembly of Connections—Refer to manufacturers written installation instructions.
11. Reinforcing Ring Testing Methods
11.1 Density—Determine the density of the reinforcing ring material in accordance with Test Method D1505, or Test Method
D792, using three specimens.
F1960 − 14a
NOTE-BREAK ALL INTERNAL CORNERS .003 min
ALL DIAMETER CONCENTRICITY .005 TIR
*Maximum width of dimension “G” allowed to transition to surface of dimension “B”
Brass, Stainless Steel and Wrought Copper Dimensions
Min. Min.
Size A B C D E F G H I J
Wall ID
min min min min min min min min min
min
max max max max max max max max max
⁄8 in. 0.047 0.260 0.395 0.441 0.480 0.427 0.067 0.128 . 0.325 0.127 0.286
⁄8 in. 0.047 0.260 0.395 0.441 0.480 0.427 0.067 0.128 0.325 0.127 0.286
0.375 0.433 0.472 0.407 0.051 0.108 0.051 0.305 0.107 0.266
⁄2 in. 0.057 0.378 0.533 0.579 0.618 0.565 0.067 0.128 . 0.404 0.167 0.325
⁄2 in. 0.057 0.378 0.533 0.579 0.618 0.565 0.067 0.128 0.404 0.167 0.325
0.513 0.571 0.610 0.545 0.051 0.108 0.051 0.384 0.147 0.305
⁄8 in. 0.057 0.500 0.655 0.697 0.748 0.683 0.067 0.167 . 0.482 0.207 0.404
⁄8 in. 0.057 0.500 0.655 0.697 0.748 0.683 0.067 0.167 0.482 0.207 0.404
0.635 0.689 0.740 0.663 0.051 0.147 0.051 0.462 0.187 0.384
⁄4 in. 0.057 0.595 0.748 0.795 0.874 0.782 0.067 0.207 . 0.522 0.246 0.443
⁄4 in. 0.057 0.595 0.748 0.795 0.874 0.782 0.067 0.207 0.522 0.246 0.443
0.728 0.787 0.866 0.762 0.051 0.187 0.051 0.502 0.226 0.423
1 in. 0.072 0.795 0.985 1.032 1.110 0.998 0.067 0.246 . 0.640 0.285 0.561
1 in. 0.072 0.795 0.985 1.032 1.110 0.998 0.067 0.246 0.640 0.285 0.561
0.965 1.024 1.102 0.978 0.051 0.226 0.051 0.620 0.265 0.541
1 ⁄4 in. 0.075 0.960 1.159 1.276 1.362 1.237 0.080 0.299 . 0.781 0.348 0.684
1 ⁄4 in. 0.075 0.960 1.159 1.276 1.362 1.237 0.080 0.299 0.781 0.348 0.684
1.139 1.266 1.352 1.217 0.064 0.279 0.064 0.761 0.328 0.664
1 ⁄2 in. 0.095 1.084 1.324 1.382 1.494 1.349 0.093 0.351 . 0.919 0.408 0.805
1 ⁄2 in. 0.095 1.084 1.324 1.382 1.494 1.349 0.093 0.351 0.919 0.408 0.805
1.304 1.374 1.486 1.329 0.077 0.331 0.077 0.899 0.388 0.785
2 in. 0.095 1.550 1.800 1.958 2.079 1.891 0.093 0.467 . 1.137 0.521 1.030
2 in. 0.095 1.550 1.800 1.958 2.079 1.891 0.093 0.467 1.137 0.521 1.030
1.780 1.950 2.071 1.871 0.077 0.447 0.077 1.117 0.501 1.010
2 ⁄2 in. 0.105 1.990 2.280 2.43
...
Questions, Comments and Discussion
Ask us and Technical Secretary will try to provide an answer. You can facilitate discussion about the standard in here.