ASTM D953-19
(Test Method)Standard Test Method for Pin-Bearing Strength of Plastics
Standard Test Method for Pin-Bearing Strength of Plastics
SIGNIFICANCE AND USE
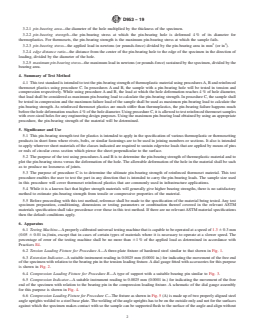
5.1 This pin-bearing strength test for plastics is intended to apply in the specification of various thermoplastic or thermosetting products in sheet form where rivets, bolts, or similar fastenings are to be used in joining members or sections. It also is intended to apply wherever sheet materials of the classes indicated are required to sustain edgewise loads that are applied by means of pins or rods of circular cross section which pierce the sheet perpendicular to the surface.
5.2 The purpose of the test using procedures A and B is to determine the pin-bearing strength of thermoplastic material and to plot the pin-bearing stress versus the deformation of the hole. The allowable deformation of the hole in the material shall be such as to produce no looseness of joints.
5.3 The purpose of procedure C is to determine the ultimate pin-bearing strength of reinforced thermoset material. This test procedure enables the user to test the part in any direction that is intended to carry the pin-bearing loads. The sample size used in this procedure will cover thermoset reinforced plastics that are commonly used in infrastructure applications.
5.4 While it is a known fact that higher strength materials will generally give higher bearing strengths, there is no satisfactory method to estimate pin-bearing strength from tensile or compressive properties of the material.
5.5 Before proceeding with this test method, reference shall be made to the specification of the material being tested. Any test specimen preparation, conditioning, dimensions or testing parameters or combination thereof covered in the relevant ASTM materials specification shall take precedence over those in this test method. If there are no relevant ASTM material specifications then the default conditions apply.
SCOPE
1.1 This test method covers the determination of the pin-bearing strength of rigid plastics in either sheet form, molded form, or in reinforced thermoset form. Procedures A and B are applicable for thermoplastic materials in tension loading and compression loading respectively. Procedure C is applicable for thermoset reinforced plastics. See the significance and use section (Section 5) for cautions in using this test standard.
1.2 Test data obtained by this test method is relevant and appropriate for use in quality control and engineering design.
1.3 The values stated in SI units are to be regarded as the standard. The values given in parentheses are for information only.
1.4 This standard does not purport to address all of the safety concerns, if any, associated with its use. It is the responsibility of the user of this standard to establish appropriate safety, health, and environmental practices and determine the applicability of regulatory limitations prior to use.
Note 1: This standard and ISO 12815 address the same subject matter, but differ in technical content.
1.5 This international standard was developed in accordance with internationally recognized principles on standardization established in the Decision on Principles for the Development of International Standards, Guides and Recommendations issued by the World Trade Organization Technical Barriers to Trade (TBT) Committee.
General Information
- Status
- Published
- Publication Date
- 31-Oct-2019
- Technical Committee
- D20 - Plastics
- Drafting Committee
- D20.18 - Reinforced Thermosetting Plastics
Relations
- Effective Date
- 01-Nov-2019
- Effective Date
- 01-Feb-2024
- Effective Date
- 01-Nov-2023
- Effective Date
- 01-Jan-2020
- Effective Date
- 01-Aug-2019
- Effective Date
- 15-Apr-2019
- Effective Date
- 01-Feb-2019
- Effective Date
- 01-Dec-2018
- Effective Date
- 01-Nov-2018
- Effective Date
- 15-Aug-2017
- Effective Date
- 01-Jun-2014
- Effective Date
- 01-May-2014
- Effective Date
- 01-May-2013
- Effective Date
- 01-May-2013
- Effective Date
- 15-Nov-2012
Overview
ASTM D953-19: Standard Test Method for Pin-Bearing Strength of Plastics outlines procedures for determining the pin-bearing strength of rigid plastics. Developed by ASTM International, this standard provides critical guidance for testing plastics subject to edgewise loads via circular pins, rivets, or bolts. The methodology applies to thermoplastics and reinforced thermoset plastics in sheet or molded forms, ensuring reliable design and quality control for joined plastic components.
Testing pin-bearing strength is essential in applications where plastic sheets must maintain structural integrity when penetrated by fasteners. Accurate measurement of this property helps engineers specify the correct materials for demanding load conditions and establish safe design limits.
Key Topics
Scope and Purpose
- Applies to thermoplastic and thermoset plastic sheets or moulded pieces used with rivets, bolts, or similar fastenings.
- Covers testing for both tension and compression loading in plastics.
- Includes a specialized procedure for reinforced thermoset materials, commonly used in infrastructure.
Methodology
- Procedures A and B are for thermoplastics:
- Procedure A: Tension loading.
- Procedure B: Compression loading.
- Procedure C is for reinforced thermoset plastics, allowing assessment in any intended load direction and for oversized holes.
- Measurements focus on the deformation of the bearing hole under load or the maximum load at failure.
- Procedures A and B are for thermoplastics:
Relevance to Quality Control and Design
- Test data is directly applicable for quality control and engineering design in the plastics industry.
- Results assist in ensuring joint reliability and correct material specification for load-bearing plastics.
Precision and Reporting
- Standard offers guidelines for test repeatability and result reporting.
- Specifies specimen conditioning, measurement practices, and calculation of key parameters such as pin-bearing strength and stress.
Applications
ASTM D953-19 is widely used across industries that require reliable joining of plastic component parts. Practical applications include:
Plastics Manufacturing
- Quality control for raw sheets and finished parts, ensuring products meet required mechanical properties.
Automotive and Aerospace
- Specification and assessment of plastic components used in assemblies where bolts, rivets, or other fasteners are used.
Construction and Infrastructure
- Testing of reinforced thermoset plastics employed in buildings, bridges, or other structures, verifying they can safely carry edgewise loads with pins or rods.
Product Design
- Material selection for components subjected to edge or shear loads, ensuring joints will not loosen or fail under service conditions.
Related Standards
ASTM D953-19 references several other key standards that complement and support accurate testing:
- ASTM D618: Conditioning plastics for testing.
- ASTM D883: Terminology relating to plastics.
- ASTM D5947: Testing methods for physical dimensions of solid plastics specimens.
- ASTM D7290: Evaluating material property characteristic values for polymeric composites in civil engineering.
- ASTM E4, E6, E177, E691: Additional standards for testing machine calibration, terminology, and interlaboratory test procedures.
- ISO 12815: Fibre-reinforced plastic composites - Determination of plain-pin bearing strength.
These standards help ensure consistency, accuracy, and international compatibility in testing and specifying plastics for load-bearing joints.
Keywords: pin-bearing strength, plastics, ASTM D953, reinforced thermoset plastics, thermoplastics, quality control, engineering design, edgewise load, mechanical testing, material specification, plastics standards
Buy Documents
ASTM D953-19 - Standard Test Method for Pin-Bearing Strength of Plastics
REDLINE ASTM D953-19 - Standard Test Method for Pin-Bearing Strength of Plastics
Get Certified
Connect with accredited certification bodies for this standard

Smithers Quality Assessments
US management systems and product certification.

DIN CERTCO
DIN Group product certification.
Sponsored listings
Frequently Asked Questions
ASTM D953-19 is a standard published by ASTM International. Its full title is "Standard Test Method for Pin-Bearing Strength of Plastics". This standard covers: SIGNIFICANCE AND USE 5.1 This pin-bearing strength test for plastics is intended to apply in the specification of various thermoplastic or thermosetting products in sheet form where rivets, bolts, or similar fastenings are to be used in joining members or sections. It also is intended to apply wherever sheet materials of the classes indicated are required to sustain edgewise loads that are applied by means of pins or rods of circular cross section which pierce the sheet perpendicular to the surface. 5.2 The purpose of the test using procedures A and B is to determine the pin-bearing strength of thermoplastic material and to plot the pin-bearing stress versus the deformation of the hole. The allowable deformation of the hole in the material shall be such as to produce no looseness of joints. 5.3 The purpose of procedure C is to determine the ultimate pin-bearing strength of reinforced thermoset material. This test procedure enables the user to test the part in any direction that is intended to carry the pin-bearing loads. The sample size used in this procedure will cover thermoset reinforced plastics that are commonly used in infrastructure applications. 5.4 While it is a known fact that higher strength materials will generally give higher bearing strengths, there is no satisfactory method to estimate pin-bearing strength from tensile or compressive properties of the material. 5.5 Before proceeding with this test method, reference shall be made to the specification of the material being tested. Any test specimen preparation, conditioning, dimensions or testing parameters or combination thereof covered in the relevant ASTM materials specification shall take precedence over those in this test method. If there are no relevant ASTM material specifications then the default conditions apply. SCOPE 1.1 This test method covers the determination of the pin-bearing strength of rigid plastics in either sheet form, molded form, or in reinforced thermoset form. Procedures A and B are applicable for thermoplastic materials in tension loading and compression loading respectively. Procedure C is applicable for thermoset reinforced plastics. See the significance and use section (Section 5) for cautions in using this test standard. 1.2 Test data obtained by this test method is relevant and appropriate for use in quality control and engineering design. 1.3 The values stated in SI units are to be regarded as the standard. The values given in parentheses are for information only. 1.4 This standard does not purport to address all of the safety concerns, if any, associated with its use. It is the responsibility of the user of this standard to establish appropriate safety, health, and environmental practices and determine the applicability of regulatory limitations prior to use. Note 1: This standard and ISO 12815 address the same subject matter, but differ in technical content. 1.5 This international standard was developed in accordance with internationally recognized principles on standardization established in the Decision on Principles for the Development of International Standards, Guides and Recommendations issued by the World Trade Organization Technical Barriers to Trade (TBT) Committee.
SIGNIFICANCE AND USE 5.1 This pin-bearing strength test for plastics is intended to apply in the specification of various thermoplastic or thermosetting products in sheet form where rivets, bolts, or similar fastenings are to be used in joining members or sections. It also is intended to apply wherever sheet materials of the classes indicated are required to sustain edgewise loads that are applied by means of pins or rods of circular cross section which pierce the sheet perpendicular to the surface. 5.2 The purpose of the test using procedures A and B is to determine the pin-bearing strength of thermoplastic material and to plot the pin-bearing stress versus the deformation of the hole. The allowable deformation of the hole in the material shall be such as to produce no looseness of joints. 5.3 The purpose of procedure C is to determine the ultimate pin-bearing strength of reinforced thermoset material. This test procedure enables the user to test the part in any direction that is intended to carry the pin-bearing loads. The sample size used in this procedure will cover thermoset reinforced plastics that are commonly used in infrastructure applications. 5.4 While it is a known fact that higher strength materials will generally give higher bearing strengths, there is no satisfactory method to estimate pin-bearing strength from tensile or compressive properties of the material. 5.5 Before proceeding with this test method, reference shall be made to the specification of the material being tested. Any test specimen preparation, conditioning, dimensions or testing parameters or combination thereof covered in the relevant ASTM materials specification shall take precedence over those in this test method. If there are no relevant ASTM material specifications then the default conditions apply. SCOPE 1.1 This test method covers the determination of the pin-bearing strength of rigid plastics in either sheet form, molded form, or in reinforced thermoset form. Procedures A and B are applicable for thermoplastic materials in tension loading and compression loading respectively. Procedure C is applicable for thermoset reinforced plastics. See the significance and use section (Section 5) for cautions in using this test standard. 1.2 Test data obtained by this test method is relevant and appropriate for use in quality control and engineering design. 1.3 The values stated in SI units are to be regarded as the standard. The values given in parentheses are for information only. 1.4 This standard does not purport to address all of the safety concerns, if any, associated with its use. It is the responsibility of the user of this standard to establish appropriate safety, health, and environmental practices and determine the applicability of regulatory limitations prior to use. Note 1: This standard and ISO 12815 address the same subject matter, but differ in technical content. 1.5 This international standard was developed in accordance with internationally recognized principles on standardization established in the Decision on Principles for the Development of International Standards, Guides and Recommendations issued by the World Trade Organization Technical Barriers to Trade (TBT) Committee.
ASTM D953-19 is classified under the following ICS (International Classification for Standards) categories: 83.080.01 - Plastics in general. The ICS classification helps identify the subject area and facilitates finding related standards.
ASTM D953-19 has the following relationships with other standards: It is inter standard links to ASTM D953-18, ASTM D883-24, ASTM D883-23, ASTM D883-20, ASTM D883-19c, ASTM D883-19a, ASTM D883-19, ASTM D883-18a, ASTM D883-18, ASTM D883-17, ASTM E4-14, ASTM E177-14, ASTM E691-13, ASTM E177-13, ASTM D883-12e1. Understanding these relationships helps ensure you are using the most current and applicable version of the standard.
ASTM D953-19 is available in PDF format for immediate download after purchase. The document can be added to your cart and obtained through the secure checkout process. Digital delivery ensures instant access to the complete standard document.
Standards Content (Sample)
This international standard was developed in accordance with internationally recognized principles on standardization established in the Decision on Principles for the
Development of International Standards, Guides and Recommendations issued by the World Trade Organization Technical Barriers to Trade (TBT) Committee.
Designation: D953 − 19
Standard Test Method for
Pin-Bearing Strength of Plastics
This standard is issued under the fixed designation D953; the number immediately following the designation indicates the year of
original adoption or, in the case of revision, the year of last revision.Anumber in parentheses indicates the year of last reapproval.A
superscript epsilon (´) indicates an editorial change since the last revision or reapproval.
This standard has been approved for use by agencies of the U.S. Department of Defense.
1. Scope* D5947Test Methods for Physical Dimensions of Solid
Plastics Specimens
1.1 This test method covers the determination of the pin-
D7290Practice for Evaluating Material Property Character-
bearing strength of rigid plastics in either sheet form, molded
isticValues for Polymeric Composites for Civil Engineer-
form, or in reinforced thermoset form. ProceduresAand B are
ing Structural Applications
applicable for thermoplastic materials in tension loading and
E4Practices for Force Verification of Testing Machines
compression loading respectively. Procedure C is applicable
E177Practice for Use of the Terms Precision and Bias in
for thermoset reinforced plastics. See the significance and use
ASTM Test Methods
section (Section 5) for cautions in using this test standard.
E6Terminology Relating to Methods of MechanicalTesting
1.2 Test data obtained by this test method is relevant and
E691Practice for Conducting an Interlaboratory Study to
appropriate for use in quality control and engineering design.
Determine the Precision of a Test Method
2.2 ISO Standards:
1.3 The values stated in SI units are to be regarded as the
standard. The values given in parentheses are for information ISO 12815 Fibre-reinforced plastic composites—
Determination of plain-pin bearing strength
only.
1.4 This standard does not purport to address all of the
3. Terminology
safety concerns, if any, associated with its use. It is the
3.1 Definitions—For definitions of technical terms used in
responsibility of the user of this standard to establish appro-
this test method and associated with plastics issues refer to
priate safety, health, and environmental practices and deter-
terminology contained in ASTM D883.
mine the applicability of regulatory limitations prior to use.
3.2 Definitions of Terms Specific to This Standard:
NOTE1—ThisstandardandISO12815addressthesamesubjectmatter,
3.2.1 pin-bearing area—the diameter of the hole multiplied
but differ in technical content.
by the thickness of the specimen.
1.5 This international standard was developed in accor-
3.2.2 pin-bearing strength—the pin-bearing stress at which
dance with internationally recognized principles on standard-
the pin-bearing hole is deformed 4% of its diameter for
ization established in the Decision on Principles for the
thermoplastics. For thermosets, the pin-bearing strength is the
Development of International Standards, Guides and Recom-
maximum pin-bearing stress at which the sample fails.
mendations issued by the World Trade Organization Technical
Barriers to Trade (TBT) Committee.
3.2.3 pin-bearing stress—the applied load in newtons (or
2 2
pounds-force) divided by the pin-bearing area in mm (or in ).
2. Referenced Documents
3.2.4 edge distance ratio—the distance from the center of
2.1 ASTM Standards:
the pin-bearing hole to the edge of the specimen in the
D618Practice for Conditioning Plastics for Testing
direction of loading, divided by the diameter of the hole.
D883Terminology Relating to Plastics
3.2.5 maximum pin-bearing stress—the maximum load in
newtons (or pounds-force) sustained by the specimen, divided
by the bearing area.
ThistestmethodisunderthejurisdictionofASTMCommitteeD20onPlastics
and is the direct responsibility of Subcommittee D20.18 on Reinforced Thermoset-
4. Summary of Test Method
ting Plastics.
Current edition approved Nov. 1, 2019. Published December 2019. Originally 4.1 This test standard is intended to test the pin-bearing
approved in 1948. Last previous edition approved in 2018 as D953-18. DOI:
strength of thermoplastic material using procedures A, B and
10.1520/D0953-19.
For referenced ASTM standards, visit the ASTM website, www.astm.org, or
contact ASTM Customer Service at service@astm.org. For Annual Book of ASTM Available fromAmerican National Standards Institute (ANSI), 25 W. 43rd St.,
Standards volume information, refer to the standard’s Document Summary page on 4th Floor, New York, NY 10036, http://www.ansi.org.
the ASTM website. Attention is also directed to Terminology E6.
*A Summary of Changes section appears at the end of this standard
Copyright © ASTM International, 100 Barr Harbor Drive, PO Box C700, West Conshohocken, PA 19428-2959. United States
D953 − 19
reinforced thermoset plastics using procedure C. In procedures no more than 61% of the applied load as determined in
A and B, the sample with a pin-bearing hole will be tested in accordance with Practices E4.
tensionandcompressionrespectively.WhileusingprocedureA
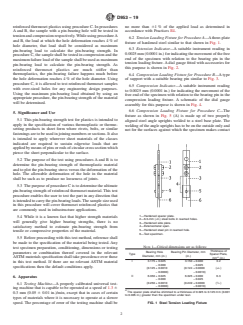
6.2 Tension Loading Fixture for ProcedureA—Athree-plate
and B, the load at which the hole deformation reaches 4% of
fixture of hardened steel similar to that shown in Fig. 1.
hole diameter, that load shall be considered as maximum
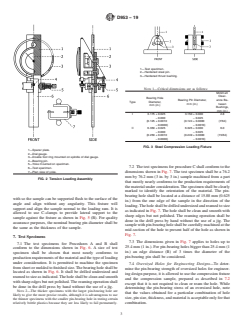
6.3 Extension Indicator—A suitable instrument reading in
pin-bearing load to calculate the pin-bearing strength. In
0.0025mm(0.0001in.)forindicatingthemovementofthefree
procedureC,thesampleshallbetestedincompressionandthe
end of the specimen with relation to the bearing pin in the
maximumfailureloadofthesampleshallbeusedasmaximum
tension loading fixture.Adial gauge fitted with accessories for
pin-bearing load to calculate the pin-bearing strength. As
this purpose is shown in Fig. 2.
reinforced thermoset plastics are much stiffer than
thermoplastics, the pin-bearing failure happens much before
6.4 Compression Loading Fixture for Procedure B—Atype
the hole deformation reaches 4% of the hole diameter. Using of support with a suitable bearing pin similar to Fig. 3.
procedure C, it is allowed to test reinforced thermoset samples
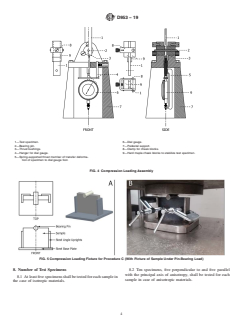
6.5 Compression Indicator—A suitable instrument reading
with over-sized holes for any engineering design purposes.
to 0.0025 mm (0.0001 in.) for indicating the movement of the
Using the maximum pin-bearing load obtained by using an
free end of the specimen with relation to the bearing pin in the
appropriate procedure, the pin-bearing strength of the material
compression loading fixture. A schematic of the dial gauge
will be determined.
assembly for this purpose is shown in Fig. 4.
6.6 Compression Loading Fixture for Procedure C—The
5. Significance and Use
fixture as shown in Fig. 5 (A) is made up of two properly
5.1 This pin-bearing strength test for plastics is intended to
aligned steel angle uprights welded to a steel base plate. The
apply in the specification of various thermoplastic or thermo-
weldingoftheangleuprightshastobeontheoutsideonlyand
setting products in sheet form where rivets, bolts, or similar
not for the surfaces against which the specimen makes contact
fasteningsaretobeusedinjoiningmembersorsections.Italso
is intended to apply wherever sheet materials of the classes
indicated are required to sustain edgewise loads that are
appliedbymeansofpinsorrodsofcircularcrosssectionwhich
pierce the sheet perpendicular to the surface.
5.2 The purpose of the test using procedures A and B is to
determine the pin-bearing strength of thermoplastic material
and to plot the pin-bearing stress versus the deformation of the
hole. The allowable deformation of the hole in the material
shall be such as to produce no looseness of joints.
5.3 ThepurposeofprocedureCistodeterminetheultimate
pin-bearingstrengthofreinforcedthermosetmaterial.Thistest
procedure enables the user to test the part in any direction that
isintendedtocarrythepin-bearingloads.Thesamplesizeused
in this procedure will cover thermoset reinforced plastics that
are commonly used in infrastructure applications.
1—Hardened spacer plate.
5.4 While it is a known fact that higher strength materials
2—6.3-mm (-in.) steel bolts in reamed holes.
will generally give higher bearing strengths, there is no
3—Hardened side plate.
4—Extensometer span.
satisfactory method to estimate pin-bearing strength from
5—Hardened steel pin in reamed hole.
tensile or compressive properties of the material.
6—Test specimen.
5.5 Before proceeding with this test method, reference shall
be made to the specification of the material being tested. Any
NOTE 1—Critical dimensions are as follows:
test specimen preparation, conditioning, dimensions or testing
Thickness of
Bearing Hole Bearing Pin Diameter, mm
parameters or combination thereof covered in the relevant
Type Spacer Plate,
Diameter, mm (in.) (in.)
A
ASTMmaterialsspecificationshalltakeprecedenceoverthose
mm (in.)
I 3.175 + 0.025 3.150 + 0.000 3.2
in this test method. If there are no relevant ASTM material
− 0.000 − 0.025
specifications then the default conditions apply.
(0.125 + 0.0010 (0.124 + 0.0000 ( ⁄8 )
− 0.0000) − 0.0010)
II 6.350 + 0.025 6.325 + 0.000 6.3
6. Apparatus
− 0.000 − 0.025
(0.250 + 0.0010 (0.249 + 0.0000 ( ⁄4 )
6.1 Testing Machine—A properly calibrated universal test-
− 0.0000) − 0.0010)
ing machine that is capable to be operated at a speed of 1.3 6
A
The spacer plate shall be shimmed to a thickness of 0.025 to 0.125 mm (0.001
0.3 mm (0.05 6 0.01 in.)/min, except that in cases of certain
to 0.005 in.) greater than the specimen under test.
types of materials where it is necessary to operate at a slower
speed. The percentage of error of the testing machine shall be FIG. 1 Steel Tension Loading Fixture
D953 − 19
1—Test specimen.
2—Hardened steel pin.
3—Hardened thrust bushing.
NOTE 1—Critical dimensions are as follows:
Minimum
Clear-
Bearing Hole
Bearing Pin Diameter, ance Be-
Type Diameter,
mm (in.) tween
mm (in.)
Bushings,
mm (in.)
I 3.175 + 0.025 3.150 + 0.000 2.8
− 0.000 − 0.025
(0.125 + 0.0010 (0.124 + 0.0000 (7/64)
− 0.0000) − 0.0010)
II 6.350 + 0.025 6.325 + 0.000 6.0
− 0.000 − 0.025
(0.250 + 0.0010 (0.249 + 0.0000 (15/64)
− 0.0000) − 0.0010)
FIG. 3 Steel Compression Loading Fixture
1—Spacer plate.
2—Dial gauge.
3—Double foot ring mounted on spindle of dial gauge.
4—Bearing pin.
5—Yoke mounted on specimen.
7.2 ThetestspecimensforprocedureCshallconformtothe
6—Test specimen.
7—Plan view of yoke.
dimensions shown in Fig. 7. The test specimen shall be a 76.2
mm by 76.2 mm (3 in. by 3 in.) sample machined from a part
FIG. 2 Tension Loading Assembly
that mostly nearly conforms to the production requirements of
thematerialunderconsideration.Thespecimenshallbeclearly
marked to identify the orientation of the material. The pin-
bearing hole shall be located at a distance of 15.88 mm (0.625
with so the sample can be supported flush to the surface of the
in.) from the one edge of the sample in the direction of the
angle and align without any angularity. This fixture will
loading.Theholeshallbedrilledundersizedandreamedtosize
support and align the sample normal to the loading ram. It is
as indicated in Fig. 7.The hole shall be clean and smooth with
allowed to use C-clamps to provide lateral support to the
sharp edges but not polished. The reaming operation shall be
sample against the fixture as shown in Fig. 5 (B). For quality
done in the drill press by hand without the use of a jig. The
assurance purposes, the nominal bearing pin diameter shall be
samplewithpin-bearingholeshallbecarefullymachinedatthe
the same as the thickness of the sample.
mid-section of the hole to present half of the hole as shown in
Fig. 7.
7. Test Specimens
7.3 The dimensions given in Fig. 7 applies to holes up to
7.1 The test specimens for Procedures A and B shall
25.4 mm (1 in.). For pin-bearing holes bigger than 25.4 mm (1
conform to the dimensions shown in Fig. 6. A size of test
in.) an edge distance (B) of 3 times the diameter of the
specimen shall be chosen that most nearly conforms to
pin-bearing pin shall be considered.
productionrequirementsofthematerialandthetypeofloading
under consideration. It is permitted to machine the specimen
7.4 Oversized Holes for Engineering Designs—To deter-
fromsheetormoldedtofinishedsize.Thebearingholeshallbe
mine the pin-bearing strength of oversized holes for engineer-
located as shown in Fig. 6. It shall be drilled undersized and
ingdesignpurpose,itisallowedtousethecompressionfixture
reamedtosizeasindicated.Theholeshallbecleanandsmooth
and the compression sample, prepared as described in 7.2
withsharpedgesbutnotpolished.Thereamingoperationshall
except that it is not required to clean or ream the hole. While
be done in the drill press by hand without the use of a jig.
determining the pin-bearing stress of an oversized hole, note
NOTE 2—The thicker specimens with the larger pin-bearing hole are
that the values obtained for a particular combination of hole
likely to give the more precise results, although it is advantageous to use
size,pinsize,thickness,andmaterialisacceptableonlyforthat
the thinner specimens with the smaller pin-bearing hole in testing certain
relatively brittle plastics because they are less likely to fail prematurely. combination.
D953 − 19
1—Test specimen. 6—Dial gauge.
2—Bearing pin. 7—Pedestal support.
3—Thrust bushings. 8—Clamp for cheek blocks.
4—Hanger for dial gauge. 9—Hard maple cheek blocks to stabilize test specimen.
5—Spring-supported thrust member of transfer deforma-
tion of specimen to dial gauge foot.
FIG. 4 Compression Loading Assembly
FIG. 5 Compression Loading Fixture for Procedure C (With Picture of Sample Under Pin-Bearing Load)
8. Number of Test Specimens 8.2 Ten specimens, five perpendicular to and five parallel
with the principal axis of anisotropy, shall be tested for each
8.1 Atleastfivespecimensshallbetestedforeachsamplein
sample in case of anisotropic materials.
the case of isotropic materials.
D953 − 19
A
Type Dimensions, mm (in.) Ream Hole
A BC D to
I 11.913±0.127 19.050± 0 .127 120.6 3.2 3.200±0.025
3 1
(0.469±0.005) (0.750±0.005) (4 ⁄4)( ⁄8 ) (0.126±0.001)
II 11.913±0.127 19.050±0.127 120.6 6.4 6.375±0.025
3 1
(0.469±0.005) (0.750±0.005) (4 ⁄4)( ⁄4 ) (0.251±0.001)
A
All fractional dimensions shall be held to ±0.40 mm ( ⁄64 in.) tolerance.
Edge distance ratio = B/hole diameter
FIG. 6 Dimensions of Pin-Bearing Strength Test Specimens
Dimensions, mm (in
...
This document is not an ASTM standard and is intended only to provide the user of an ASTM standard an indication of what changes have been made to the previous version. Because
it may not be technically possible to adequately depict all changes accurately, ASTM recommends that users consult prior editions as appropriate. In all cases only the current version
of the standard as published by ASTM is to be considered the official document.
Designation: D953 − 18 D953 − 19
Standard Test Method for
Pin-Bearing Strength of Plastics
This standard is issued under the fixed designation D953; the number immediately following the designation indicates the year of
original adoption or, in the case of revision, the year of last revision. A number in parentheses indicates the year of last reapproval. A
superscript epsilon (´) indicates an editorial change since the last revision or reapproval.
This standard has been approved for use by agencies of the U.S. Department of Defense.
1. Scope*
1.1 This test method covers the determination of the pin-bearing strength of rigid plastics in either sheet form, molded form,
or in reinforced thermoset form. Procedures A and B are applicable for thermoplastic materials in tension loading and compression
loading respectively. Procedure C is applicable for thermoset reinforced plastics. See the significance and use section (Section 5)
for cautions in using this test standard.
1.2 Test data obtained by this test method is relevant and appropriate for use in quality control and engineering design.
1.3 The values stated in SI units are to be regarded as the standard. The values given in parentheses are for information only.
1.4 This standard does not purport to address all of the safety concerns, if any, associated with its use. It is the responsibility
of the user of this standard to establish appropriate safety, health, and environmental practices and determine the applicability of
regulatory limitations prior to use.
NOTE 1—This standard and ISO 12815 address the same subject matter, but differ in technical content.
1.5 This international standard was developed in accordance with internationally recognized principles on standardization
established in the Decision on Principles for the Development of International Standards, Guides and Recommendations issued
by the World Trade Organization Technical Barriers to Trade (TBT) Committee.
2. Referenced Documents
2.1 ASTM Standards:
D618 Practice for Conditioning Plastics for Testing
D883 Terminology Relating to Plastics
D5947 Test Methods for Physical Dimensions of Solid Plastics Specimens
D7290 Practice for Evaluating Material Property Characteristic Values for Polymeric Composites for Civil Engineering
Structural Applications
E4 Practices for Force Verification of Testing Machines
E177 Practice for Use of the Terms Precision and Bias in ASTM Test Methods
E6 Terminology Relating to Methods of Mechanical Testing
E691 Practice for Conducting an Interlaboratory Study to Determine the Precision of a Test Method
2.2 ISO Standards:
ISO 12815 Fibre-reinforced plastic composites—Determination of plain-pin bearing strength
3. Terminology
3.1 Definitions—For definitions of technical terms used in this test method and associated with plastics issues refer to
terminology contained in ASTM D883.
3.2 Definitions of Terms Specific to This Standard:
This test method is under the jurisdiction of ASTM Committee D20 on Plastics and is the direct responsibility of Subcommittee D20.18 on Reinforced Thermosetting
Plastics.
Current edition approved Nov. 1, 2018Nov. 1, 2019. Published November 2018December 2019. Originally approved in 1948. Last previous edition approved in 20102018
as D953 - 10.D953 - 18. DOI: 10.1520/D0953-18.10.1520/D0953-19.
For referenced ASTM standards, visit the ASTM website, www.astm.org, or contact ASTM Customer Service at service@astm.org. For Annual Book of ASTM Standards
volume information, refer to the standard’s Document Summary page on the ASTM website.
Available from American National Standards Institute (ANSI), 25 W. 43rd St., 4th Floor, New York, NY 10036, http://www.ansi.org.
Attention is also directed to Terminology E6.
*A Summary of Changes section appears at the end of this standard
Copyright © ASTM International, 100 Barr Harbor Drive, PO Box C700, West Conshohocken, PA 19428-2959. United States
D953 − 19
3.2.1 pin-bearing area—the diameter of the hole multiplied by the thickness of the specimen.
3.2.2 pin-bearing strength—the pin-bearing stress at which the pin-bearing hole is deformed 4 % of its diameter for
thermoplastics. For thermosets, the pin-bearing strength is the maximum pin-bearing stress at which the sample fails.
2 2
3.2.3 pin-bearing stress—the applied load in newtons (or pounds-force) divided by the pin-bearing area in mm (or in ).
3.2.4 edge distance ratio—the distance from the center of the pin-bearing hole to the edge of the specimen in the direction of
loading, divided by the diameter of the hole.
3.2.5 maximum pin-bearing stress—the maximum load in newtons (or pounds-force) sustained by the specimen, divided by the
bearing area.
4. Summary of Test Method
4.1 This test standard is intended to test the pin-bearing strength of thermoplastic material using procedures A, B and reinforced
thermoset plastics using procedure C. In procedures A and B, the sample with a pin-bearing hole will be tested in tension and
compression respectively. While using procedure A and B, the load at which the hole deformation reaches 4 % of hole diameter,
that load shall be considered as maximum pin-bearing load to calculate the pin-bearing strength. In procedure C, the sample shall
be tested in compression and the maximum failure load of the sample shall be used as maximum pin-bearing load to calculate the
pin-bearing strength. As reinforced thermoset plastics are much stiffer than thermoplastics, the pin-bearing failure happens much
before the hole deformation reaches 4 % of the hole diameter. Using procedure C, it is allowed to test reinforced thermoset samples
with over-sized holes for any engineering design purposes. Using the maximum pin-bearing load obtained by using an appropriate
procedure, the pin-bearing strength of the material will be determined.
5. Significance and Use
5.1 This pin-bearing strength test for plastics is intended to apply in the specification of various thermoplastic or thermosetting
products in sheet form where rivets, bolts, or similar fastenings are to be used in joining members or sections. It also is intended
to apply wherever sheet materials of the classes indicated are required to sustain edgewise loads that are applied by means of pins
or rods of circular cross section which pierce the sheet perpendicular to the surface.
5.2 The purpose of the test using procedures A and B is to determine the pin-bearing strength of thermoplastic material and to
plot the pin-bearing stress versus the deformation of the hole. The allowable deformation of the hole in the material shall be such
as to produce no looseness of joints.
5.3 The purpose of procedure C is to determine the ultimate pin-bearing strength of reinforced thermoset material. This test
procedure enables the user to test the part in any direction that is intended to carry the pin-bearing loads. The sample size used
in this procedure will cover thermoset reinforced plastics that are commonly used in infrastructure applications.
5.4 While it is a known fact that higher strength materials will generally give higher bearing strengths, there is no satisfactory
method to estimate pin-bearing strength from tensile or compressive properties of the material.
5.5 Before proceeding with this test method, reference shall be made to the specification of the material being tested. Any test
specimen preparation, conditioning, dimensions or testing parameters or combination thereof covered in the relevant ASTM
materials specification shall take precedence over those in this test method. If there are no relevant ASTM material specifications
then the default conditions apply.
6. Apparatus
6.1 Testing Machine—A properly calibrated universal testing machine that is capable to be operated at a speed of 1.3 6 0.3 mm
(0.05 6 0.01 in.)/min, except that in cases of certain types of materials where it is necessary to operate at a slower speed. The
percentage of error of the testing machine shall be no more than 61 % of the applied load as determined in accordance with
Practices E4.
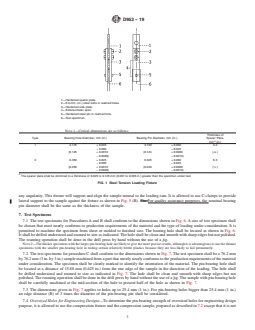
6.2 Tension Loading Fixture for Procedure A—A three-plate fixture of hardened steel similar to that shown in Fig. 1.
6.3 Extension Indicator—A suitable instrument reading in 0.0025 mm (0.0001 in.) for indicating the movement of the free end
of the specimen with relation to the bearing pin in the tension loading fixture. A dial gauge fitted with accessories for this purpose
is shown in Fig. 2.
6.4 Compression Loading Fixture for Procedure B—A type of support with a suitable bearing pin similar to Fig. 3.
6.5 Compression Indicator—A suitable instrument reading to 0.0025 mm (0.0001 in.) for indicating the movement of the free
end of the specimen with relation to the bearing pin in the compression loading fixture. A schematic of the dial gauge assembly
for this purpose is shown in Fig. 4.
6.6 Compression Loading Fixture for Procedure C—The fixture as shown in Fig. 5 (A) is made up of two properly aligned steel
angle uprights welded to a steel base plate. The welding of the angle uprights has to be on the outside only and not for the surfaces
against which the specimen makes contact with so the sample can be supported flush to the surface of the angle and align without
D953 − 19
1—Hardened spacer plate.
2—6.3-mm (-in.) steel bolts in reamed holes.
3—Hardened side plate.
4—Extensometer span.
5—Hardened steel pin in reamed hole.
6—Test specimen.
NOTE 1—Critical dimensions are as follows:
Thickness of
Type Bearing Hole Diameter, mm (in.) Bearing Pin Diameter, mm (in.) Spacer Plate,
A
mm (in.)
I 3.175 + 0.025 3.150 + 0.000 3.2
− 0.000 − 0.025
(0.125 + 0.0010 (0.124 + 0.0000 ( ⁄8 )
− 0.0000) − 0.0010)
II 6.350 + 0.025 6.325 + 0.000 6.3
− 0.000 − 0.025
(0.250 + 0.0010 (0.249 + 0.0000 ( ⁄4 )
− 0.0000) − 0.0010)
A
The spacer plate shall be shimmed to a thickness of 0.025 to 0.125 mm (0.001 to 0.005 in.) greater than the specimen under test.
FIG. 1 Steel Tension Loading Fixture
any angularity. This fixture will support and align the sample normal to the loading ram. It is allowed to use C-clamps to provide
lateral support to the sample against the fixture as shown in Fig. 5 (B). The For quality assurance purposes, the nominal bearing
pin diameter shall be the same as the thickness of the sample.
7. Test Specimens
7.1 The test specimens for Procedures A and B shall conform to the dimensions shown in Fig. 6. A size of test specimen shall
be chosen that most nearly conforms to production requirements of the material and the type of loading under consideration. It is
permitted to machine the specimen from sheet or molded to finished size. The bearing hole shall be located as shown in Fig. 6.
It shall be drilled undersized and reamed to size as indicated. The hole shall be clean and smooth with sharp edges but not polished.
The reaming operation shall be done in the drill press by hand without the use of a jig.
NOTE 2—The thicker specimens with the larger pin-bearing hole are likely to give the more precise results, although it is advantageous to use the thinner
specimens with the smaller pin-bearing hole in testing certain relatively brittle plastics because they are less likely to fail prematurely.
7.2 The test specimens for procedure C shall conform to the dimensions shown in Fig. 7. The test specimen shall be a 76.2 mm
by 76.2 mm (3 in. by 3 in.) sample machined from a part that mostly nearly conforms to the production requirements of the material
under consideration. The specimen shall be clearly marked to identify the orientation of the material. The pin-bearing hole shall
be located at a distance of 15.88 mm (0.625 in.) from the one edge of the sample in the direction of the loading. The hole shall
be drilled undersized and reamed to size as indicated in Fig. 7. The hole shall be clean and smooth with sharp edges but not
polished. The reaming operation shall be done in the drill press by hand without the use of a jig. The sample with pin-bearing hole
shall be carefully machined at the mid-section of the hole to present half of the hole as shown in Fig. 7.
7.3 The dimensions given in Fig. 7 applies to holes up to 25.4 mm (1 in.). For pin-bearing holes bigger than 25.4 mm (1 in.)
an edge distance (B) of 3 times the diameter of the pin-bearing pin shall be considered.
7.4 Oversized Holes for Engineering Designs—To determine the pin-bearing strength of oversized holes for engineering design
purpose, it is allowed to use the compression fixture and the compression sample, prepared as described in 7.2 except that it is not
D953 − 19
1—Spacer plate.
2—Dial gauge.
3—Double foot ring mounted on spindle of dial gauge.
4—Bearing pin.
5—Yoke mounted on specimen.
6—Test specimen.
7—Plan view of yoke.
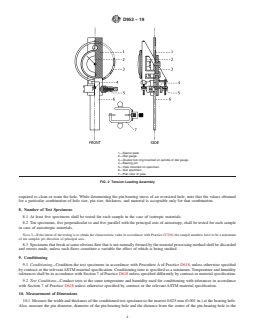
FIG. 2 Tension Loading Assembly
required to clean or ream the hole. While determining the pin-bearing stress of an oversized hole, note that the values obtained
for a particular combination of hole size, pin size, thickness, and material is acceptable only for that combination.
8. Number of Test Specimens
8.1 At least five specimens shall be tested for each sample in the case of isotropic materials.
8.2 Ten specimens, five perpendicular to and five parallel with the principal axis of anisotropy, shall be tested for each sample
in case of anisotropic materials.
NOTE 3—If the intent of the testing is to obtain the characteristic value in accordance with Practice D7290, the sample numbers have to be a minimum
of ten samples per direction of principal axis.
8.3 Specimens that break at some obvious flaw that is not naturally formed by the material processing method shall be discarded
and retests made, unless such flaws constitute a variable the effect of which is being studied.
9. Conditioning
9.1 Conditioning—Condition the test specimens in accordance with Procedure A of Practice D618, unless otherwise specified
by contract or the relevant ASTM material specification. Conditioning time is specified as a minimum. Temperature and humidity
tolerances shall be in accordance with Section 7 of Practice D618 unless specified differently by contract or material specification.
9.2 Test Conditions—Conduct tests at the same temperature and humidity used for conditioning with tolerances in accordance
with Section 7 of Practice D618 unless otherwise specified by contract or the relevant ASTM material specification.
10. Measurement of Dimensions
10.1 Measure the width and thickness of the conditioned test specimen to the nearest 0.025 mm (0.001 in.) at the bearing hole.
Also, measure the pin diameter, diameter of the pin-bearing hole and the distance from the center of the pin-bearing hole to the
D953 − 19
1—Test specimen.
2—Ha
...
Questions, Comments and Discussion
Ask us and Technical Secretary will try to provide an answer. You can facilitate discussion about the standard in here.
Loading comments...