ASTM B504-90(2011)
(Test Method)Standard Test Method for Measurement of Thickness of Metallic Coatings by the Coulometric Method
Standard Test Method for Measurement of Thickness of Metallic Coatings by the Coulometric Method
SIGNIFICANCE AND USE
Measurement of the thickness of a coating is essential to assessing its utility and cost.
The coulometric method destroys the coating over a very small (about 0.1 cm2) test area. Therefore its use is limited to applications where a bare spot at the test area is acceptable or the test piece may be destroyed.
SCOPE
1.1 This test method covers the determination of the thickness of metallic coatings by the coulometric method, also known as the anodic solution or electrochemical stripping method.
1.2 This standard does not purport to address all of the safety concerns, if any, associated with its use. It is the responsibility of the user of this standard to establish appropriate safety and health practices and determine the applicability of regulatory limitations prior to use.
General Information
Relations
Standards Content (Sample)
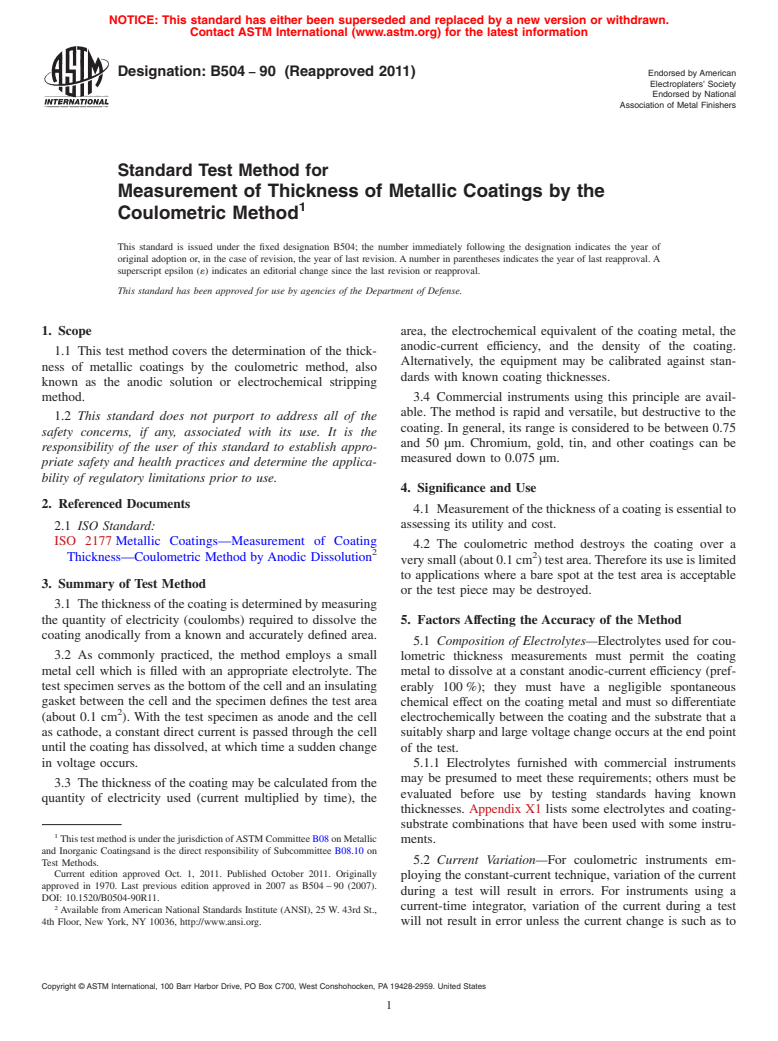
NOTICE: This standard has either been superseded and replaced by a new version or withdrawn.
Contact ASTM International (www.astm.org) for the latest information
Designation: B504 − 90 (Reapproved 2011) Endorsed by American
Electroplaters’ Society
Endorsed by National
Association of Metal Finishers
Standard Test Method for
Measurement of Thickness of Metallic Coatings by the
Coulometric Method
This standard is issued under the fixed designation B504; the number immediately following the designation indicates the year of
original adoption or, in the case of revision, the year of last revision. A number in parentheses indicates the year of last reapproval. A
superscript epsilon (´) indicates an editorial change since the last revision or reapproval.
This standard has been approved for use by agencies of the Department of Defense.
1. Scope area, the electrochemical equivalent of the coating metal, the
anodic-current efficiency, and the density of the coating.
1.1 This test method covers the determination of the thick-
Alternatively, the equipment may be calibrated against stan-
ness of metallic coatings by the coulometric method, also
dards with known coating thicknesses.
known as the anodic solution or electrochemical stripping
method. 3.4 Commercial instruments using this principle are avail-
able. The method is rapid and versatile, but destructive to the
1.2 This standard does not purport to address all of the
coating. In general, its range is considered to be between 0.75
safety concerns, if any, associated with its use. It is the
and 50 µm. Chromium, gold, tin, and other coatings can be
responsibility of the user of this standard to establish appro-
measured down to 0.075 µm.
priate safety and health practices and determine the applica-
bility of regulatory limitations prior to use.
4. Significance and Use
2. Referenced Documents
4.1 Measurement of the thickness of a coating is essential to
assessing its utility and cost.
2.1 ISO Standard:
ISO 2177 Metallic Coatings—Measurement of Coating
4.2 The coulometric method destroys the coating over a
Thickness—Coulometric Method by Anodic Dissolution
verysmall(about0.1cm )testarea.Thereforeitsuseislimited
to applications where a bare spot at the test area is acceptable
3. Summary of Test Method
or the test piece may be destroyed.
3.1 The thickness of the coating is determined by measuring
the quantity of electricity (coulombs) required to dissolve the 5. Factors Affecting the Accuracy of the Method
coating anodically from a known and accurately defined area.
5.1 Composition of Electrolytes—Electrolytes used for cou-
3.2 As commonly practiced, the method employs a small lometric thickness measurements must permit the coating
metal cell which is filled with an appropriate electrolyte. The
metal to dissolve at a constant anodic-current efficiency (pref-
test specimen serves as the bottom of the cell and an insulating erably 100 %); they must have a negligible spontaneous
gasket between the cell and the specimen defines the test area chemical effect on the coating metal and must so differentiate
(about 0.1 cm ). With the test specimen as anode and the cell electrochemically between the coating and the substrate that a
as cathode, a constant direct current is passed through the cell suitably sharp and large voltage change occurs at the end point
until the coating has dissolved, at which time a sudden change of the test.
in voltage occurs. 5.1.1 Electrolytes furnished with commercial instruments
may be presumed to meet these requirements; others must be
3.3 The thickness of the coating may be calculated from the
evaluated before use by testing standards having known
quantity of electricity used (current multiplied by time), the
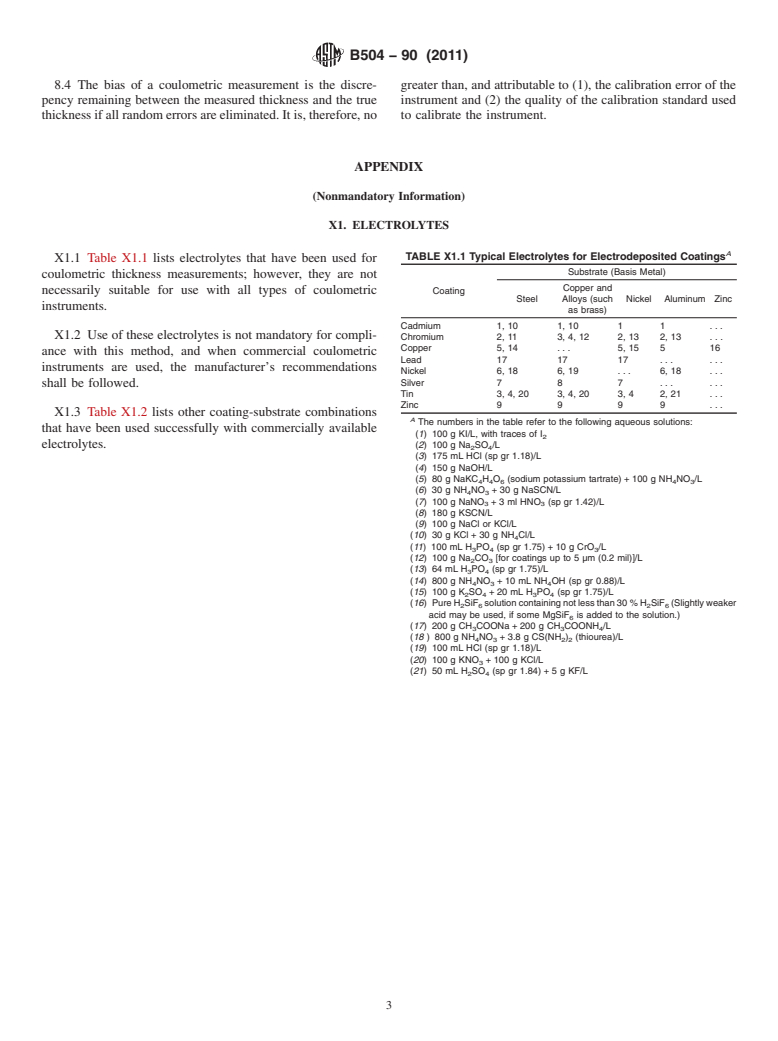
thicknesses. Appendix X1 lists some electrolytes and coating-
substrate combinations that have been used with some instru-
This test method is under the jurisdiction ofASTM Committee B08 on Metallic
ments.
and Inorganic Coatingsand is the direct responsibility of Subcommittee B08.10 on
5.2 Current Variation—For coulometric instruments em-
Test Methods.
Current edition approved Oct. 1, 2011. Published October 2011. Originally
ploying the constant-current technique, variation of the current
approved in 1970. Last previous edition approved in 2007 as B504 – 90 (2007).
during a test will result in errors. For instruments using a
DOI: 10.1520/B0504-90R11.
current-time integrator, variation of the current during a test
Available from American National Standards Institute (ANSI), 25 W. 43rd St.,
4th Floor, New York, NY 10036, http://www.ansi.org. will not result in error unless the current change is such as to
Copyright © ASTM International, 100 Barr Harbor Drive, PO Box C700, West Conshohocken, PA 19428-2959. United States
B504 − 90 (2011)
displace the anodic current density beyond the range of used, the manufacturer’s instructions shall be followed insofar
constant or 100 % anodic-current efficiency. as they are compatible with this test method.
5.3 AreaVariation—The accuracy of the thickness measure- 6.2 Calibration of Direct-Reading Instruments—Direct-
reading instruments shall be calibrated against standards hav-
ment will not be better than the accuracy with which the test
area is defined or known. Typically, this test area is defined by ing known coating thicknesses, and adjusted to produce correct
readings corresponding to the coating thicknesses of the
a flexible, insulating gasket. Area variation is usually mini-
standard.
mized by using as large an area as practical and by using a
constant pressure device. If excessive pressure is applied to
6.3 Calibration of Nondirect-Reading Instruments:
such a gasket, the test area may be altered undesirably.
6.3.1 Nondirect-reading instruments shall be calibrated
against standards having a known coating thickness by using a
5.4 Agitation—In most, but not all, coulometric thickness
calibration constant, C, calculated as follows:
measurements, a relatively high anodic-current density is
employedtoshortenthetesttime.Itisthennecessarytoagitate
C 5 coating thickness of the standards/instrument reading (1)
the electrolyte to maintain a constant anodic-current efficiency.
6.3.2 The instrument shall be adjusted so that where stan-
Where agitation is required, insufficient agitation may result in
dards having known coating thicknesses are tested, the correct
polarization of the specimen, thereby causing a premature and
thickness is obtained by multiplying the instrument reading by
false endpoint.
the calibration constant, C.
5.5 Alloying Between Coatings and Metallic Substrates—
6.4 Thickness Standards—The thickness standards shall
The measurement of a coating thickness by the coulometric
consist of the same type of coating and substrate as the
method implicitly assumes that a sharply defined interface
specimens to be measured, and they shall have an accuracy of
exists between the coating and the substrate. If an alloy layer
65 % or better.
exists between the coating and the substrate as, for example, in
the case of coatings applied by hot dipping, the coulometric
7. Procedure for Making Measurements
end-point may occur at some point within the alloy layer, thus
giving a high value of the thickness of the unalloyed coating. 7.1 If commercial equipment is used, the manufacturer’s
instructions shall be followed insofar as they are compatible
5.6 Purity of Coating—Impurities or additives that code-
with this test method.
positwith
...


Questions, Comments and Discussion
Ask us and Technical Secretary will try to provide an answer. You can facilitate discussion about the standard in here.