ASTM E1867-16
(Test Method)Standard Test Methods for Temperature Calibration of Dynamic Mechanical Analyzers
Standard Test Methods for Temperature Calibration of Dynamic Mechanical Analyzers
SIGNIFICANCE AND USE
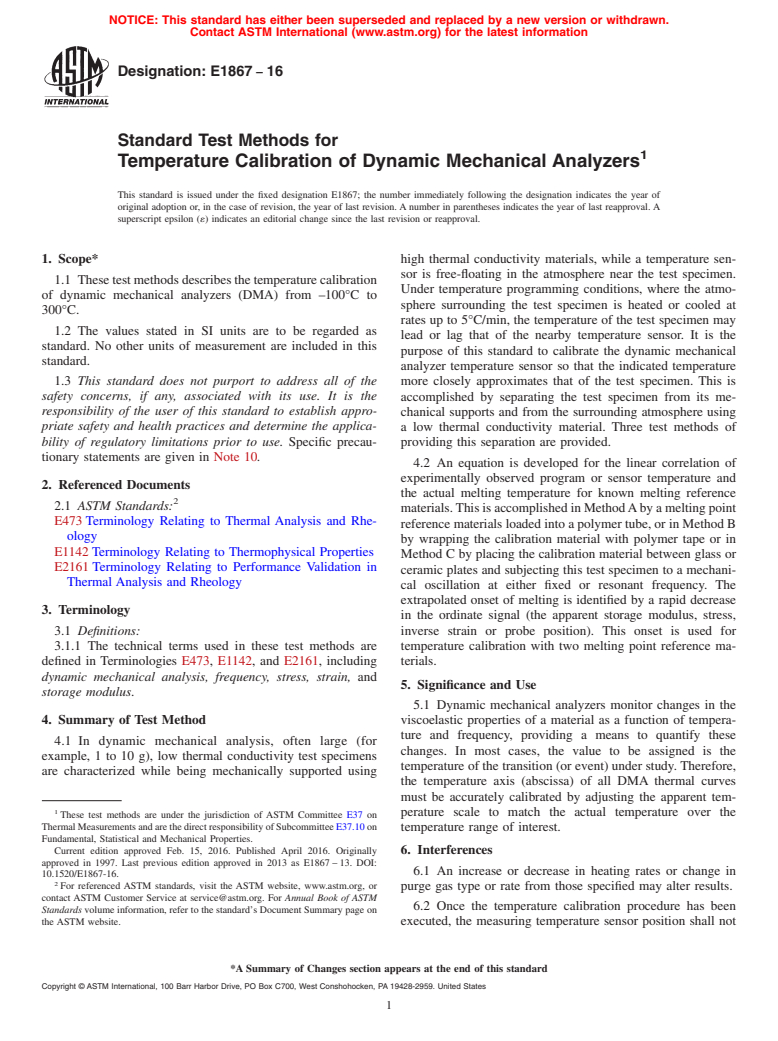
5.1 Dynamic mechanical analyzers monitor changes in the viscoelastic properties of a material as a function of temperature and frequency, providing a means to quantify these changes. In most cases, the value to be assigned is the temperature of the transition (or event) under study. Therefore, the temperature axis (abscissa) of all DMA thermal curves must be accurately calibrated by adjusting the apparent temperature scale to match the actual temperature over the temperature range of interest.
SCOPE
1.1 These test methods describes the temperature calibration of dynamic mechanical analyzers (DMA) from –100°C to 300°C.
1.2 The values stated in SI units are to be regarded as standard. No other units of measurement are included in this standard.
1.3 This standard does not purport to address all of the safety concerns, if any, associated with its use. It is the responsibility of the user of this standard to establish appropriate safety and health practices and determine the applicability of regulatory limitations prior to use. Specific precautionary statements are given in Note 10.
General Information
Relations
Buy Standard
Standards Content (Sample)
NOTICE: This standard has either been superseded and replaced by a new version or withdrawn.
Contact ASTM International (www.astm.org) for the latest information
Designation: E1867 − 16
Standard Test Methods for
1
Temperature Calibration of Dynamic Mechanical Analyzers
This standard is issued under the fixed designation E1867; the number immediately following the designation indicates the year of
original adoption or, in the case of revision, the year of last revision. A number in parentheses indicates the year of last reapproval. A
superscript epsilon (´) indicates an editorial change since the last revision or reapproval.
1. Scope* high thermal conductivity materials, while a temperature sen-
sor is free-floating in the atmosphere near the test specimen.
1.1 Thesetestmethodsdescribesthetemperaturecalibration
Under temperature programming conditions, where the atmo-
of dynamic mechanical analyzers (DMA) from –100°C to
sphere surrounding the test specimen is heated or cooled at
300°C.
rates up to 5°C/min, the temperature of the test specimen may
1.2 The values stated in SI units are to be regarded as
lead or lag that of the nearby temperature sensor. It is the
standard. No other units of measurement are included in this
purpose of this standard to calibrate the dynamic mechanical
standard.
analyzer temperature sensor so that the indicated temperature
1.3 This standard does not purport to address all of the
more closely approximates that of the test specimen. This is
safety concerns, if any, associated with its use. It is the accomplished by separating the test specimen from its me-
responsibility of the user of this standard to establish appro-
chanical supports and from the surrounding atmosphere using
priate safety and health practices and determine the applica- a low thermal conductivity material. Three test methods of
bility of regulatory limitations prior to use. Specific precau-
providing this separation are provided.
tionary statements are given in Note 10.
4.2 An equation is developed for the linear correlation of
experimentally observed program or sensor temperature and
2. Referenced Documents
the actual melting temperature for known melting reference
2
2.1 ASTM Standards:
materials.ThisisaccomplishedinMethodAbyameltingpoint
E473 Terminology Relating to Thermal Analysis and Rhe-
reference materials loaded into a polymer tube, or in Method B
ology
by wrapping the calibration material with polymer tape or in
E1142 Terminology Relating to Thermophysical Properties
Method C by placing the calibration material between glass or
E2161 Terminology Relating to Performance Validation in
ceramic plates and subjecting this test specimen to a mechani-
Thermal Analysis and Rheology
cal oscillation at either fixed or resonant frequency. The
extrapolated onset of melting is identified by a rapid decrease
3. Terminology
in the ordinate signal (the apparent storage modulus, stress,
3.1 Definitions: inverse strain or probe position). This onset is used for
3.1.1 The technical terms used in these test methods are temperature calibration with two melting point reference ma-
defined in Terminologies E473, E1142, and E2161, including terials.
dynamic mechanical analysis, frequency, stress, strain, and
5. Significance and Use
storage modulus.
5.1 Dynamic mechanical analyzers monitor changes in the
4. Summary of Test Method viscoelastic properties of a material as a function of tempera-
ture and frequency, providing a means to quantify these
4.1 In dynamic mechanical analysis, often large (for
changes. In most cases, the value to be assigned is the
example, 1 to 10 g), low thermal conductivity test specimens
temperature of the transition (or event) under study. Therefore,
are characterized while being mechanically supported using
the temperature axis (abscissa) of all DMA thermal curves
must be accurately calibrated by adjusting the apparent tem-
1
perature scale to match the actual temperature over the
These test methods are under the jurisdiction of ASTM Committee E37 on
ThermalMeasurementsandarethedirectresponsibilityofSubcommitteeE37.10on
temperature range of interest.
Fundamental, Statistical and Mechanical Properties.
Current edition approved Feb. 15, 2016. Published April 2016. Originally
6. Interferences
approved in 1997. Last previous edition approved in 2013 as E1867 – 13. DOI:
6.1 An increase or decrease in heating rates or change in
10.1520/E1867-16.
2
For referenced ASTM standards, visit the ASTM website, www.astm.org, or
purge gas type or rate from those specified may alter results.
contact ASTM Customer Service at service@astm.org. For Annual Book of ASTM
6.2 Once the temperature calibration procedure has been
Standards volume information, refer to the standard’s Document Summary page on
the ASTM website. executed, the measuring temperature sensor position shall not
*A Summary of Changes section appears at the end of this standard
Copyright © ASTM International, 100 Barr Harbor Drive, PO Box C700, West Conshohocken,
...
This document is not an ASTM standard and is intended only to provide the user of an ASTM standard an indication of what changes have been made to the previous version. Because
it may not be technically possible to adequately depict all changes accurately, ASTM recommends that users consult prior editions as appropriate. In all cases only the current version
of the standard as published by ASTM is to be considered the official document.
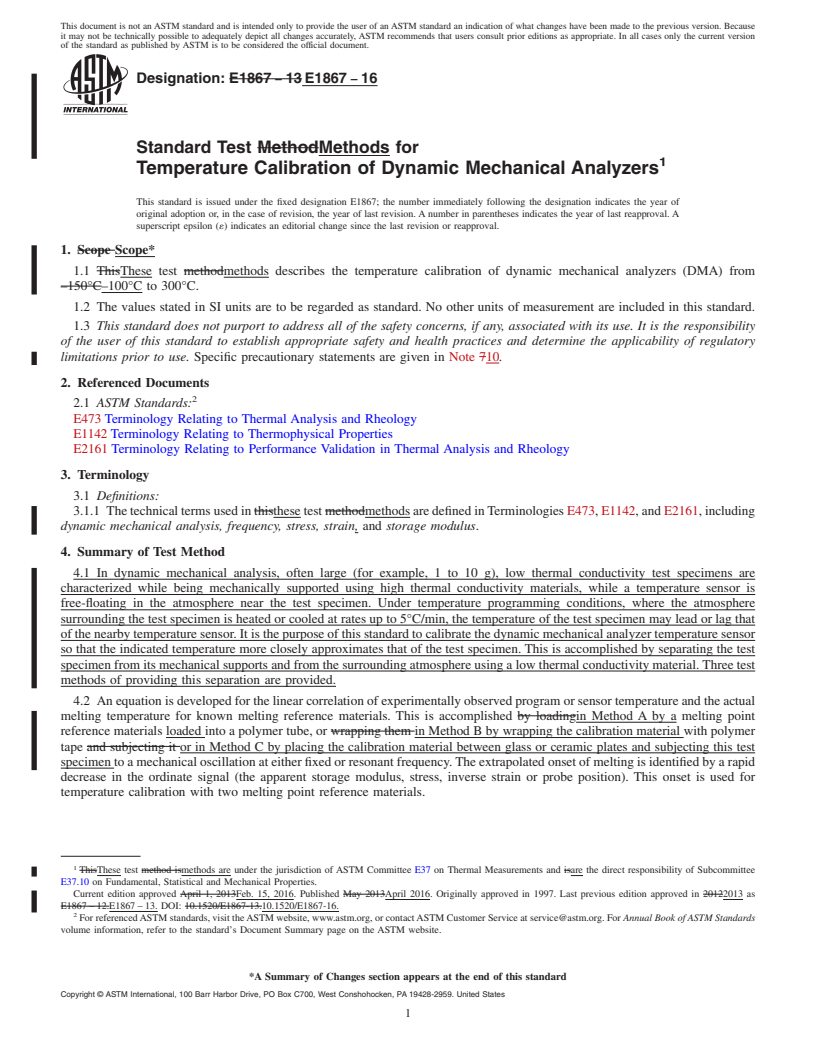
Designation: E1867 − 13 E1867 − 16
Standard Test MethodMethods for
1
Temperature Calibration of Dynamic Mechanical Analyzers
This standard is issued under the fixed designation E1867; the number immediately following the designation indicates the year of
original adoption or, in the case of revision, the year of last revision. A number in parentheses indicates the year of last reapproval. A
superscript epsilon (´) indicates an editorial change since the last revision or reapproval.
1. Scope Scope*
1.1 ThisThese test methodmethods describes the temperature calibration of dynamic mechanical analyzers (DMA) from
–150°C–100°C to 300°C.
1.2 The values stated in SI units are to be regarded as standard. No other units of measurement are included in this standard.
1.3 This standard does not purport to address all of the safety concerns, if any, associated with its use. It is the responsibility
of the user of this standard to establish appropriate safety and health practices and determine the applicability of regulatory
limitations prior to use. Specific precautionary statements are given in Note 710.
2. Referenced Documents
2
2.1 ASTM Standards:
E473 Terminology Relating to Thermal Analysis and Rheology
E1142 Terminology Relating to Thermophysical Properties
E2161 Terminology Relating to Performance Validation in Thermal Analysis and Rheology
3. Terminology
3.1 Definitions:
3.1.1 The technical terms used in thisthese test methodmethods are defined in Terminologies E473, E1142, and E2161, including
dynamic mechanical analysis, frequency, stress, strain, and storage modulus.
4. Summary of Test Method
4.1 In dynamic mechanical analysis, often large (for example, 1 to 10 g), low thermal conductivity test specimens are
characterized while being mechanically supported using high thermal conductivity materials, while a temperature sensor is
free-floating in the atmosphere near the test specimen. Under temperature programming conditions, where the atmosphere
surrounding the test specimen is heated or cooled at rates up to 5°C/min, the temperature of the test specimen may lead or lag that
of the nearby temperature sensor. It is the purpose of this standard to calibrate the dynamic mechanical analyzer temperature sensor
so that the indicated temperature more closely approximates that of the test specimen. This is accomplished by separating the test
specimen from its mechanical supports and from the surrounding atmosphere using a low thermal conductivity material. Three test
methods of providing this separation are provided.
4.2 An equation is developed for the linear correlation of experimentally observed program or sensor temperature and the actual
melting temperature for known melting reference materials. This is accomplished by loadingin Method A by a melting point
reference materials loaded into a polymer tube, or wrapping them in Method B by wrapping the calibration material with polymer
tape and subjecting it or in Method C by placing the calibration material between glass or ceramic plates and subjecting this test
specimen to a mechanical oscillation at either fixed or resonant frequency. The extrapolated onset of melting is identified by a rapid
decrease in the ordinate signal (the apparent storage modulus, stress, inverse strain or probe position). This onset is used for
temperature calibration with two melting point reference materials.
1
ThisThese test method ismethods are under the jurisdiction of ASTM Committee E37 on Thermal Measurements and isare the direct responsibility of Subcommittee
E37.10 on Fundamental, Statistical and Mechanical Properties.
Current edition approved April 1, 2013Feb. 15, 2016. Published May 2013April 2016. Originally approved in 1997. Last previous edition approved in 20122013 as
E1867 – 12.E1867 – 13. DOI: 10.1520/E1867-13.10.1520/E1867-16.
2
For referenced ASTM standards, visit the ASTM website, www.astm.org, or contact ASTM Customer Service at service@astm.org. For Annual Book of ASTM Standards
volume information, refer to the standard’s Document Summary page on the ASTM website.
*A Summary of Changes section appears at the end of this standard
Copyright © ASTM International, 100 Barr Harbor Drive, PO Box C700, West Conshohocken, PA 19428-2959. United States
1
---------------------- Page: 1 ----------------------
E1867 − 16
5. Significance and Use
5.1 Dynamic mechanical analyzers monitor changes in the viscoelastic properties of a material as a function of temperature and
frequency, providing a means to quantify these changes. In most cases, the value to
...


Questions, Comments and Discussion
Ask us and Technical Secretary will try to provide an answer. You can facilitate discussion about the standard in here.