ASTM D545-23
(Test Method)Standard Test Methods for Preformed Expansion Joint Fillers for Concrete Construction (Nonextruding and Resilient Types)
Standard Test Methods for Preformed Expansion Joint Fillers for Concrete Construction (Nonextruding and Resilient Types)
SIGNIFICANCE AND USE
3.1 The compression resistance perpendicular to the faces, the resistance to the extrusion during compression, and the ability to recover after release of the load are indicative of a joint filler's ability to continuously fill a concrete expansion joint and thereby prevent damage that might otherwise occur during thermal expansion. The asphalt content is a measure of the fiber-type joint filler's durability and life expectancy. In the case of cork-type fillers, the resistance to water absorption and resistance to boiling hydrochloric acid are relative measures of durability and life expectancy.
Note 2: The quality of the results produced by this standard are dependent on the competence of the personnel performing the procedure and the capability, calibration, and maintenance of the equipment used. Agencies that meet the criteria of Specification D3666 are generally considered capable of competent and objective testing, sampling, inspection, etc. Users of this standard are cautioned that compliance with Specification D3666 alone does not completely ensure reliable results. Reliable results depend on many factors; following the suggestions of Specification D3666 or some similar acceptable guideline provides a means of evaluating and controlling some of those factors.
SCOPE
1.1 These test methods cover the physical properties associated with preformed expansion joint fillers. The test methods include:
Property
Section
Expansion in Boiling Water
7.1
Recovery and Compression
7.2
Extrusion
7.3
Boiling in Hydrochloric Acid
7.4
Asphalt Content
7.5
Water Absorption
7.6
Density
7.7
Note 1: Specific test methods are applicable only to certain types of joint fillers, as stated herein.
1.2 The values stated in inch-pound units are to be regarded as standard. The values given in parentheses are mathematical conversions to SI units that are provided for information only and are not considered standard.
1.3 The text of this standard references notes and footnotes which provide explanatory material. These notes and footnotes (excluding those in tables and figures) shall not be considered as requirements of the standard.
1.4 This standard does not purport to address all of the safety concerns, if any, associated with its use. It is the responsibility of the user of this standard to establish appropriate safety, health, and environmental practices and determine the applicability of regulatory limitations prior to use.
1.5 This international standard was developed in accordance with internationally recognized principles on standardization established in the Decision on Principles for the Development of International Standards, Guides and Recommendations issued by the World Trade Organization Technical Barriers to Trade (TBT) Committee.
General Information
- Status
- Published
- Publication Date
- 30-Nov-2023
- Technical Committee
- D04 - Road and Paving Materials
- Drafting Committee
- D04.34 - Preformed Joint Fillers, Sealers and Sealing Systems
Relations
- Effective Date
- 01-Dec-2023
- Effective Date
- 01-Dec-2023
- Effective Date
- 01-Dec-2023
- Effective Date
- 01-Dec-2023
- Effective Date
- 01-Dec-2023
- Effective Date
- 01-Dec-2023
- Effective Date
- 01-Dec-2023
- Effective Date
- 01-Dec-2023
Overview
ASTM D545-23: Standard Test Methods for Preformed Expansion Joint Fillers for Concrete Construction (Nonextruding and Resilient Types) provides comprehensive test methods for evaluating the physical properties of preformed expansion joint fillers used in concrete. These materials are essential for accommodating thermal expansion and contraction in concrete structures, ensuring prolonged durability and minimizing cracking or damage. The standard is issued by ASTM International and is recognized in the construction and civil engineering sectors worldwide.
Preformed expansion joint fillers must exhibit key characteristics such as compression resistance, extrusion resistance, recovery after compression, low water absorption, and appropriate asphalt content (for fiber-based types). ASTM D545-23 standardizes test procedures to assess these properties, ensuring that only high-quality, resilient, and nonextruding joint fillers are used in construction applications.
Key Topics
The main physical properties tested under ASTM D545-23 include:
- Expansion in Boiling Water: Measures stability and performance of joint fillers (mainly cork types) after water exposure.
- Recovery and Compression: Evaluates the ability of fillers to recover their shape and resist loading without permanent deformation.
- Extrusion Resistance: Assesses the tendency of the filler to extend beyond joint crevices when compressed.
- Boiling in Hydrochloric Acid: Determines durability of cork-based fillers under aggressive chemical environments.
- Asphalt Content: Relevant for fiber-type fillers, this test measures durability and expected lifespan.
- Water Absorption: Low absorption rates indicate better material longevity and resistance to environmental factors.
- Density: Provides insights into the material’s composition and strength.
Note: Specific test methods are applicable only to certain types of joint fillers, such as cork, sponge rubber, bituminous, or fiber-based materials, as described in the standard.
Applications
ASTM D545-23 is widely used across sectors involved in:
- Concrete Roadways and Pavements: Expansion joints prevent cracking and surface damage from temperature changes and traffic loading.
- Bridges and Infrastructure Projects: Reliable joint fillers accommodate structural movement, maintaining integrity over time.
- Commercial and Industrial Flooring: Expansion joint fillers minimize maintenance by reducing the risk of spalling and joint failure.
- Airport Runways and Sidewalks: These environments require durable, nonextruding, and resilient joint fillers to withstand weather and mechanical stress.
By following ASTM D545-23, specifiers and contractors can ensure:
- Consistent product performance.
- Enhanced durability and service life of concrete structures.
- Compliance with national and international building standards.
- Improved safety and reduction of costly repairs.
Related Standards
For a comprehensive approach to quality assurance in concrete construction and materials testing, consider these relevant standards:
- ASTM D3666: Specification for Minimum Requirements for Agencies Testing and Inspecting Road and Paving Materials.
- ASTM D1037: Test Methods for Evaluating Properties of Wood-Base Fiber and Particle Panel Materials.
- ASTM E177: Practice for Use of the Terms Precision and Bias in ASTM Test Methods.
- ASTM E691: Practice for Conducting an Interlaboratory Study to Determine the Precision of a Test Method.
By integrating ASTM D545-23 with related standards, organizations achieve reliable, standardized, and globally recognized testing methods for expansion joint fillers in concrete construction.
Keywords: ASTM D545-23, preformed expansion joint fillers, concrete construction, nonextruding joint filler, resilient types, compression resistance, water absorption, asphalt content, extrusion resistance, concrete standards.
Buy Documents
ASTM D545-23 - Standard Test Methods for Preformed Expansion Joint Fillers for Concrete Construction (Nonextruding and Resilient Types)
REDLINE ASTM D545-23 - Standard Test Methods for Preformed Expansion Joint Fillers for Concrete Construction (Nonextruding and Resilient Types)
Get Certified
Connect with accredited certification bodies for this standard

ICC Evaluation Service
Building products evaluation and certification.

QAI Laboratories
Building and construction product testing and certification.

Aboma Certification B.V.
Specialized in construction, metal, and transport sectors.
Sponsored listings
Frequently Asked Questions
ASTM D545-23 is a standard published by ASTM International. Its full title is "Standard Test Methods for Preformed Expansion Joint Fillers for Concrete Construction (Nonextruding and Resilient Types)". This standard covers: SIGNIFICANCE AND USE 3.1 The compression resistance perpendicular to the faces, the resistance to the extrusion during compression, and the ability to recover after release of the load are indicative of a joint filler's ability to continuously fill a concrete expansion joint and thereby prevent damage that might otherwise occur during thermal expansion. The asphalt content is a measure of the fiber-type joint filler's durability and life expectancy. In the case of cork-type fillers, the resistance to water absorption and resistance to boiling hydrochloric acid are relative measures of durability and life expectancy. Note 2: The quality of the results produced by this standard are dependent on the competence of the personnel performing the procedure and the capability, calibration, and maintenance of the equipment used. Agencies that meet the criteria of Specification D3666 are generally considered capable of competent and objective testing, sampling, inspection, etc. Users of this standard are cautioned that compliance with Specification D3666 alone does not completely ensure reliable results. Reliable results depend on many factors; following the suggestions of Specification D3666 or some similar acceptable guideline provides a means of evaluating and controlling some of those factors. SCOPE 1.1 These test methods cover the physical properties associated with preformed expansion joint fillers. The test methods include: Property Section Expansion in Boiling Water 7.1 Recovery and Compression 7.2 Extrusion 7.3 Boiling in Hydrochloric Acid 7.4 Asphalt Content 7.5 Water Absorption 7.6 Density 7.7 Note 1: Specific test methods are applicable only to certain types of joint fillers, as stated herein. 1.2 The values stated in inch-pound units are to be regarded as standard. The values given in parentheses are mathematical conversions to SI units that are provided for information only and are not considered standard. 1.3 The text of this standard references notes and footnotes which provide explanatory material. These notes and footnotes (excluding those in tables and figures) shall not be considered as requirements of the standard. 1.4 This standard does not purport to address all of the safety concerns, if any, associated with its use. It is the responsibility of the user of this standard to establish appropriate safety, health, and environmental practices and determine the applicability of regulatory limitations prior to use. 1.5 This international standard was developed in accordance with internationally recognized principles on standardization established in the Decision on Principles for the Development of International Standards, Guides and Recommendations issued by the World Trade Organization Technical Barriers to Trade (TBT) Committee.
SIGNIFICANCE AND USE 3.1 The compression resistance perpendicular to the faces, the resistance to the extrusion during compression, and the ability to recover after release of the load are indicative of a joint filler's ability to continuously fill a concrete expansion joint and thereby prevent damage that might otherwise occur during thermal expansion. The asphalt content is a measure of the fiber-type joint filler's durability and life expectancy. In the case of cork-type fillers, the resistance to water absorption and resistance to boiling hydrochloric acid are relative measures of durability and life expectancy. Note 2: The quality of the results produced by this standard are dependent on the competence of the personnel performing the procedure and the capability, calibration, and maintenance of the equipment used. Agencies that meet the criteria of Specification D3666 are generally considered capable of competent and objective testing, sampling, inspection, etc. Users of this standard are cautioned that compliance with Specification D3666 alone does not completely ensure reliable results. Reliable results depend on many factors; following the suggestions of Specification D3666 or some similar acceptable guideline provides a means of evaluating and controlling some of those factors. SCOPE 1.1 These test methods cover the physical properties associated with preformed expansion joint fillers. The test methods include: Property Section Expansion in Boiling Water 7.1 Recovery and Compression 7.2 Extrusion 7.3 Boiling in Hydrochloric Acid 7.4 Asphalt Content 7.5 Water Absorption 7.6 Density 7.7 Note 1: Specific test methods are applicable only to certain types of joint fillers, as stated herein. 1.2 The values stated in inch-pound units are to be regarded as standard. The values given in parentheses are mathematical conversions to SI units that are provided for information only and are not considered standard. 1.3 The text of this standard references notes and footnotes which provide explanatory material. These notes and footnotes (excluding those in tables and figures) shall not be considered as requirements of the standard. 1.4 This standard does not purport to address all of the safety concerns, if any, associated with its use. It is the responsibility of the user of this standard to establish appropriate safety, health, and environmental practices and determine the applicability of regulatory limitations prior to use. 1.5 This international standard was developed in accordance with internationally recognized principles on standardization established in the Decision on Principles for the Development of International Standards, Guides and Recommendations issued by the World Trade Organization Technical Barriers to Trade (TBT) Committee.
ASTM D545-23 is classified under the following ICS (International Classification for Standards) categories: 91.100.50 - Binders. Sealing materials. The ICS classification helps identify the subject area and facilitates finding related standards.
ASTM D545-23 has the following relationships with other standards: It is inter standard links to ASTM D545-19, ASTM D7174-05(2022), ASTM D8139-23, ASTM D6506/D6506M-01(2018)e1, ASTM D1752-18(2023), ASTM D994/D994M-11(2022), ASTM D1751-23, ASTM D5249-10(2021). Understanding these relationships helps ensure you are using the most current and applicable version of the standard.
ASTM D545-23 is available in PDF format for immediate download after purchase. The document can be added to your cart and obtained through the secure checkout process. Digital delivery ensures instant access to the complete standard document.
Standards Content (Sample)
This international standard was developed in accordance with internationally recognized principles on standardization established in the Decision on Principles for the
Development of International Standards, Guides and Recommendations issued by the World Trade Organization Technical Barriers to Trade (TBT) Committee.
Designation: D545 − 23
Standard Test Methods for
Preformed Expansion Joint Fillers for Concrete
Construction (Nonextruding and Resilient Types)
This standard is issued under the fixed designation D545; the number immediately following the designation indicates the year of
original adoption or, in the case of revision, the year of last revision. A number in parentheses indicates the year of last reapproval. A
superscript epsilon (´) indicates an editorial change since the last revision or reapproval.
This standard has been approved for use by agencies of the U.S. Department of Defense.
1. Scope 2. Referenced Documents
2.1 ASTM Standards:
1.1 These test methods cover the physical properties asso-
D1037 Test Methods for Evaluating Properties of Wood-
ciated with preformed expansion joint fillers. The test methods
Base Fiber and Particle Panel Materials
include:
D3666 Specification for Minimum Requirements for Agen-
Property Section
cies Testing and Inspecting Road and Paving Materials
Expansion in Boiling Water 7.1
Recovery and Compression 7.2
E177 Practice for Use of the Terms Precision and Bias in
Extrusion 7.3
ASTM Test Methods
Boiling in Hydrochloric Acid 7.4
E691 Practice for Conducting an Interlaboratory Study to
Asphalt Content 7.5
Water Absorption 7.6
Determine the Precision of a Test Method
Density 7.7
3. Significance and Use
NOTE 1—Specific test methods are applicable only to certain types of
joint fillers, as stated herein.
3.1 The compression resistance perpendicular to the faces,
1.2 The values stated in inch-pound units are to be regarded the resistance to the extrusion during compression, and the
ability to recover after release of the load are indicative of a
as standard. The values given in parentheses are mathematical
joint filler’s ability to continuously fill a concrete expansion
conversions to SI units that are provided for information only
joint and thereby prevent damage that might otherwise occur
and are not considered standard.
during thermal expansion. The asphalt content is a measure of
1.3 The text of this standard references notes and footnotes
the fiber-type joint filler’s durability and life expectancy. In the
which provide explanatory material. These notes and footnotes
case of cork-type fillers, the resistance to water absorption and
(excluding those in tables and figures) shall not be considered
resistance to boiling hydrochloric acid are relative measures of
as requirements of the standard.
durability and life expectancy.
1.4 This standard does not purport to address all of the
NOTE 2—The quality of the results produced by this standard are
safety concerns, if any, associated with its use. It is the dependent on the competence of the personnel performing the procedure
and the capability, calibration, and maintenance of the equipment used.
responsibility of the user of this standard to establish appro-
Agencies that meet the criteria of Specification D3666 are generally
priate safety, health, and environmental practices and deter-
considered capable of competent and objective testing, sampling,
mine the applicability of regulatory limitations prior to use.
inspection, etc. Users of this standard are cautioned that compliance with
Specification D3666 alone does not completely ensure reliable results.
1.5 This international standard was developed in accor-
Reliable results depend on many factors; following the suggestions of
dance with internationally recognized principles on standard-
Specification D3666 or some similar acceptable guideline provides a
ization established in the Decision on Principles for the
means of evaluating and controlling some of those factors.
Development of International Standards, Guides and Recom-
mendations issued by the World Trade Organization Technical
4. Apparatus
Barriers to Trade (TBT) Committee.
4.1 Balance, for weighing joint fillers capable of weighing
test specimens within 0.01 g.
These test methods are under the jurisdiction of ASTM Committee D04 on
Road and Paving Materials and are the direct responsibility of Subcommittee
D04.34 on Preformed Joint Fillers, Sealers and Sealing Systems. For referenced ASTM standards, visit the ASTM website, www.astm.org, or
Current edition approved Dec. 1, 2023. Published December 2023. Originally contact ASTM Customer Service at service@astm.org. For Annual Book of ASTM
approved in 1939. Last previous edition approved in 2019 as D545 – 19. DOI: Standardsvolume information, refer to the standard’s Document Summary page on
10.1520/D0545-23. the ASTM website.
Copyright © ASTM International, 100 Barr Harbor Drive, PO Box C700, West Conshohocken, PA 19428-2959. United States
D545 − 23
4.2 Mechanical Convection Oven, capable of maintaining 6.3 Determine the thickness of each specimen to the nearest
220 6 5.0 °F (104 6 3 °C). 0.001 in. (0.03 mm).
4.3 Desiccator, of sufficient size to accommodate the test
7. Procedures
specimens.
7.1 Expansion in Boiling Water:
4.4 Vernier Caliper, for measuring length and width of
7.1.1 For self-expanding cork joint filler only, use five of the
specimens with accuracy within 60.01 in. (0.25 mm).
test specimens supplied by the manufacturer as described in
4.5 Dial Micrometer, or other measuring device, graduated
5.2. Determine the thickness of each specimen to the nearest
to read in 0.001 in. (0.02 mm) units.
0.001 in. (0.03 mm). Immerse the specimens in boiling water
for 1 h; remove and allow to cool to room temperature for
4.6 Extrusion Mold—Three-sided steel mold to confine
15 min. Measure the final thickness of each specimen to the
lateral movement of specimens under compression to one side
nearest 0.001 in. Calculate the expansion as follows:
only. Interior dimensions shall be 4 by 4 in. (102 by 102 mm)
with permissible variations in length and width of 60.015 in.
A
Expansion, %, of original thickness 5 × 100 (1)
(0.38 mm). Mold sides shall be of such height as to extend at
B
least 0.5 in. (13 mm) above the test specimens. A typical mold
1 where:
can be made from a steel base ⁄2 by 4 by 4 6 0.015 in. (13 by
A = thickness in inches after boiling in water, and
102 by 102 6 0.3 mm) and three bolted steel side plates ⁄4 in.
B = thickness in inches before boiling in water.
(6.35 mm) thick, extending approximately 1 ⁄2 in. (38 mm)
above the base plate, thus forming a three-sided, open-top box.
7.1.2 Prepare the test specimens for further testing as
described in 6.2.
4.7 Template—One steel template 4 by 4 in. (102 by
102 mm), machined from ⁄2 in. (12.7 mm) steel plate to fit the
7.2 Recovery and Compression:
extrusion mold. The template shall fit the mold
7.2.1 Test Specimen—For these tests, use one of the speci-
within −0.005 in. (0.13 mm) in length and width.
mens prepared and described in 6.1 and 6.2. For the cork,
1 1
sponge rubber, asphalt cork, and fiber joint fillers, make these
4.8 Metal Plate, 4 ⁄2 by 4 ⁄2 in. 6 0.1 in. (114 by 114 6
tests on material as received. If the cork filler fails to meet the
2.5 mm) with parallel faces machined from ⁄2 in. (12.7 mm)
specified requirements, make check tests on specimens that
steel plate.
have been immersed in water for 24 h and then air dried at
4.9 Compression Tester, either hydraulic or screw-type
ambient conditions for 24 h. Acceptance is based on the results
equipment with sufficient opening between upper and lower
of the check tests.
bearing surfaces to permit the use of verifying apparatus. The
7.2.2 Mounting—Place the test specimen on a flat metal
load applied to the test specimen shall be indicated with an
1 1 1
plate and center a 4 ⁄2 by 4 ⁄2 by ⁄2 in. (114 by 114 by 13 mm)
accuracy of 61.0 %. The upper bearing device shall be a
metal plate, ground to have plane parallel faces, on the top
spherically seated, hardened metal block firmly attached at the
surface of the specimen. Use a simple U-shaped bridge to
center of the upper head of the machine. The center of the
support a dial gage or other suitable measuring device reading
sphere shall lie at the center of the surface of the block in
to the nearest 0.001 in. (0.03 mm) above the center of the
contact with the specimen. The block shall be closely held in its
specimen. Place a hollow metal load transfer cylinder with
spherical seat, but free to tilt in any direction. Load shall be
slots for inserting the U-shaped bridge and an opening for
applied without shock at 0.05 in. (1.3 mm) per min.
reading the measuring device between the moving head of the
4.10 Extractor Apparatus, Soxhlet Extractor with thermo-
testing machine and the plate covering the specimen. A typical
statically controlled heating element.
mounting is shown in Fig. 1, but other suitable devices may be
used. Mount a spherical bearing block between the upper end
5. Sampling
of the cylinder and the moving head of the testing machine.
2 2
5.1 One representative sample approximately 2 ft /1000 ft
Center accurately both the hollow metal cylinder or other
of joint filler shall be obtained and properly packaged for safe
device and the spherical bearing block so that the load will be
transporting to the testing agency.
applied uniformly to the test specimen.
5.2 For self-expanding cork joint filler, a minimum of five
7.2.3 Measurement of Thickness—When the specimen has
1 1
4 ⁄2 by 4 ⁄2 in. (114 by 114 mm) square specimens properly
been mounted as described in 7.2.2 and is subjected only to the
1 1 1
banded and plastic wrapped at point of manufacture shall be
pressure of the dead weight of the 4 ⁄2 by 4 ⁄2 by ⁄2 in. (114 by
submitted for testing.
114 by 13 mm) metal plate, determine its thickness by means
of the measuring device. When the load-transferring apparatus
6. Preparation of Test Specimens
and spherical bearing block are placed on the test specimen,
6.1 For the joint fillers made of cork, sponge rubber, asphalt
some compression may result. Consider this reduction in
cork, or fiber, cut five specimens 4 by 4 in. (102 by 102 mm).
thickness as part of the 50 % reduction in thickness to be
Each specimen shall be freshly and squarely cut using a metal
applied.
plate as a cutting template, as described in 4.7.
7.2.4 Recovery—For the determination of the percentage of
6.2 For self-expanding cork only, after boiling the speci- recovery, give the specimen a single application of a load
mens in water as described in 7.1.1, air dry in ambient air 24 h. sufficient to compress it to 50 % of its thickness before test.
Then cut specimens to the size described in 6.1. Apply the load without shock and at such a rate that the
D545 − 23
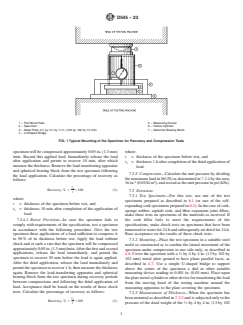
1 – Flat Metal Plate 5 – Measuring Device
2 – Specimen 6 – Hollow Cylinder
1 1 1
3 – Metal Plate 4 ⁄2 by 4 ⁄2 by ⁄2 in. (102 by 102 by 13 mm) 7 – Spherical Bearing Block
4 – U-Shaped Bridge
FIG. 1 Typical Mounting of the Specimen for Recovery and Compression Tests
specimen will be compressed approximately 0.05 in. (1.3 mm) where:
/min. Record this applied load. Immediately release the load
t = thickness of the specimen before test, and
after application and permit to recover 10 min, after which
t = thickness 1 h after completion of the third application of
measure the thickness. Remove the load-transferring apparatus
load.
and spherical bearing block from the test specimen following
7.2.5 Compression—Calculate the unit pressure by dividing
the load application. Calculate the percentage of recovery as
the maximum load in lbf (N) as determined in 7.2.4 by the area,
follows:
2 2
16 in. (0.0104 m ), and record as the unit pressure in psi (kPa).
t
Recovery, % 5 × 100 (2)
7.3 Extrusion:
t
7.3.1 Test Specimens—For this test, use one of the test
where:
specimens prepared as described in 6.1 (or one of the self-
t = thickness of the specimen before test, and
expanding cork specimens prepared in 6.2). In the case of cork,
t = thickness 10 min after completion of the application of
sponge rubber, asphalt cork, and fiber expansion joint fillers,
load.
make these tests on specimens of the materials as received. If
7.2.4.1 Retest Provision—In case the specimen fails to the cork filler fails to meet the requirements of the
comply with requirements of the specification, test a specimen specifications, make check tests on specimens that have been
in accordance with the following procedure. Give the test immersed in water for 24 h and subsequently air dried for 24 h.
specimen three applications of a load sufficient to compress it Base acceptance on the results of these check tests.
to 50 % of its thickness before test. Apply the load without
7.3.2 Mounting—Place the test specimen in a suitable steel
shock and at such a rate that the specimen will be compressed
mold so constructed as to confine the lateral movement of the
approximately 0.05 in. (1.3 mm)/min. After the first and second
specimen under compression to one side only, as described in
applications, release the load immediately, and permit the 1
4.6. Cover the specimen with a ⁄2 by 4 by 4 in. (13 by 102 by
specimen to recover 30 min before the load is ag
...
This document is not an ASTM standard and is intended only to provide the user of an ASTM standard an indication of what changes have been made to the previous version. Because
it may not be technically possible to adequately depict all changes accurately, ASTM recommends that users consult prior editions as appropriate. In all cases only the current version
of the standard as published by ASTM is to be considered the official document.
Designation: D545 − 19 D545 − 23
Standard Test Methods for
Preformed Expansion Joint Fillers for Concrete
Construction (Nonextruding and Resilient Types)
This standard is issued under the fixed designation D545; the number immediately following the designation indicates the year of
original adoption or, in the case of revision, the year of last revision. A number in parentheses indicates the year of last reapproval. A
superscript epsilon (´) indicates an editorial change since the last revision or reapproval.
This standard has been approved for use by agencies of the U.S. Department of Defense.
1. Scope
1.1 These test methods cover the physical properties associated with preformed expansion joint fillers. The test methods include:
Property Section
Expansion in Boiling Water 7.1
Recovery and Compression 7.2
Extrusion 7.3
Boiling in Hydrochloric Acid 7.4
Asphalt Content 7.5
Water Absorption 7.6
Density 7.7
NOTE 1—Specific test methods are applicable only to certain types of joint fillers, as stated herein.
1.2 The values stated in inch-pound units are to be regarded as standard. The values given in parentheses are mathematical
conversions to SI units that are provided for information only and are not considered standard.
1.3 The text of this standard references notes and footnotes which provide explanatory material. These notes and footnotes
(excluding those in tables and figures) shall not be considered as requirements of the standard.
1.4 This standard does not purport to address all of the safety concerns, if any, associated with its use. It is the responsibility
of the user of this standard to establish appropriate safety, health, and environmental practices and determine the applicability of
regulatory limitations prior to use.
1.5 This international standard was developed in accordance with internationally recognized principles on standardization
established in the Decision on Principles for the Development of International Standards, Guides and Recommendations issued
by the World Trade Organization Technical Barriers to Trade (TBT) Committee.
2. Referenced Documents
2.1 ASTM Standards:
D1037 Test Methods for Evaluating Properties of Wood-Base Fiber and Particle Panel Materials
These test methods are under the jurisdiction of ASTM Committee D04 on Road and Paving Materials and are the direct responsibility of Subcommittee D04.34 on
Preformed Joint Fillers, Sealers and Sealing Systems.
Current edition approved Nov. 1, 2019Dec. 1, 2023. Published November 2019December 2023. Originally approved in 1939. Last previous edition approved in 20142019
as D545 – 14.D545 – 19. DOI: 10.1520/D0545-19.10.1520/D0545-23.
For referenced ASTM standards, visit the ASTM website, www.astm.org, or contact ASTM Customer Service at service@astm.org. For Annual Book of ASTM
Standardsvolume information, refer to the standard’s Document Summary page on the ASTM website.
Copyright © ASTM International, 100 Barr Harbor Drive, PO Box C700, West Conshohocken, PA 19428-2959. United States
D545 − 23
D3666 Specification for Minimum Requirements for Agencies Testing and Inspecting Road and Paving Materials
E177 Practice for Use of the Terms Precision and Bias in ASTM Test Methods
E691 Practice for Conducting an Interlaboratory Study to Determine the Precision of a Test Method
3. Significance and Use
3.1 The compression resistance perpendicular to the faces, the resistance to the extrusion during compression, and the ability to
recover after release of the load are indicative of a joint filler’s ability to continuously fill a concrete expansion joint and thereby
prevent damage that might otherwise occur during thermal expansion. The asphalt content is a measure of the fiber-type joint
filler’s durability and life expectancy. In the case of cork-type fillers, the resistance to water absorption and resistance to boiling
hydrochloric acid are relative measures of durability and life expectancy.
NOTE 2—The quality of the results produced by this standard are dependent on the competence of the personnel performing the procedure and the
capability, calibration, and maintenance of the equipment used. Agencies that meet the criteria of Specification D3666 are generally considered capable
of competent and objective testing, sampling, inspection, etc. Users of this standard are cautioned that compliance with Specification D3666 alone does
not completely ensure reliable results. Reliable results depend on many factors; following the suggestions of Specification D3666 or some similar
acceptable guideline provides a means of evaluating and controlling some of those factors.
4. Apparatus
4.1 Balance, for weighing joint fillers capable of weighing test specimens within 0.01 g.
4.2 Mechanical Convection Oven, capable of maintaining 220 6 5.0 °F (104 6 3 °C).
4.3 Desiccator, of sufficient size to accommodate the test specimens.
4.4 Vernier Caliper, for measuring length and width of specimens with accuracy within 60.01 in. (0.25 mm).
4.5 Dial Micrometer, or other measuring device, graduated to read in 0.001-in. (0.02-mm) 0.001 in. (0.02 mm) units.
4.6 Extrusion Mold—Three-sided steel mold to confine lateral movement of specimens under compression to one side only.
Interior dimensions shall be 4 by 4 in. (102 by 102 mm) with permissible variations in length and width of 60.015 in. (0.38 mm).
Mold sides shall be of such height as to extend at least 0.5 in. (13 mm) above the test specimens. A typical mold can be made from
1 1
a steel base ⁄2 by 4 by 4 6 0.015 in. (13 by 102 by 102 6 0.3 mm) and three bolted steel side plates ⁄4 in. (6.35 mm) thick,
extending approximately 1 ⁄2 in. (38 mm) above the base plate, thus forming a three-sided, open-top box.
4.7 Template—One steel template 4 by 4 in. (102 by 102 mm), machined from ⁄2-in. (12.7-mm) in. (12.7 mm) steel plate to fit
the extrusion mold. The template shall fit the mold within −0.005 in. (0.13 mm) in length and width.
1 1 1
4.8 Metal Plate, 4 ⁄2 by 4 ⁄2 in. 6 0.1 in. (114 by 114 6 2.5 mm) with parallel faces machined from ⁄2-in. (12.7-mm) in. (12.7
mm) steel plate.
4.9 Compression Tester, either hydraulic-hydraulic or screw-type equipment with sufficient opening between upper- and
lower-bearing upper and lower bearing surfaces to permit the use of verifying apparatus. The load applied to the test specimen shall
be indicated with an accuracy of 61.0 %. The upper-bearing upper bearing device shall be a spherically seated, hardened metal
block firmly attached at the center of the upper head of the machine. The center of the sphere shall lie at the center of the surface
of the block in contact with the specimen. The block shall be closely held in its spherical seat, but free to tilt in any direction. Load
shall be applied without shock at 0.05 in. (1.3 mm) per min.
4.10 Extractor Apparatus, Soxhlet Extractor with thermostatically controlled heating element.
5. Sampling
2 2
5.1 One representative sample approximately 2 ft /1000 ft of joint filler shall be obtained and properly packaged for safe
transporting to the testing agency.
D545 − 23
1 1
5.2 For self-expanding cork joint filler, a minimum of five 4 ⁄2 by 4 ⁄2-in. in. (114 by 114-mm) 114 mm) square specimens properly
banded and plastic wrapped at point of manufacture shall be submitted for testing.
6. Preparation of Test Specimens
6.1 For the joint fillers made of cork, sponge rubber, bituminousasphalt cork, or fiber, cut five specimens 4 by 4 in. (102 by 102
mm). Each specimen shall be freshly and squarely cut using a metal plate as a cutting template, as described in 4.7.
6.2 For self-expanding cork only, after boiling the specimens in water as described in 7.1.1, air dry in ambient air 24 h. Then cut
specimens to the size described in 6.1.
6.3 Determine the thickness of each specimen to the nearest 0.001 in. (0.03 mm).
7. Procedures
7.1 Expansion in Boiling Water:
7.1.1 For self-expanding cork joint filler only, use five of the test specimens supplied by the manufacturemanufacturer as described
in 5.2. Determine the thickness of each specimen to the nearest 0.001 in. (0.03 mm). Immerse the specimens in boiling water for
1 h; remove and allow to cool to room temperature for 15 min. Measure the final thickness of each specimen to the nearest 0.001
in. Calculate the expansion as follows:
A
Expansion, %, of original thickness 5 ×100 (1)
B
where:
A = thickness in inches after boiling in water, and
B = thickness in inches before boiling in water.
7.1.2 Prepare the test specimens for further testing as described in 6.2.
7.2 Recovery and Compression:
7.2.1 Test Specimen—For these tests, use one of the specimens prepared and described in 6.1 and 6.2. For the cork, sponge rubber,
bituminousasphalt cork, and fiber joint fillers, make these tests on material as received. If the cork filler fails to meet the specified
requirements, make check tests on specimens that have been immersed in water for 24 h and then air dried at ambient conditions
for 24 h. Acceptance is based on the results of the check tests.
1 1 1
7.2.2 Mounting—Place the test specimen on a flat metal plate and center a 4 ⁄2 by 4 ⁄2 by ⁄2-in. in. (114 by 114 by 13-mm) 13 mm)
metal plate, ground to have plane parallel faces, on the top surface of the specimen. Use a simple U-shaped bridge to support a
dial gage or other suitable measuring device reading to the nearest 0.001 in. (0.03 mm) above the center of the specimen. Place
a hollow metal load transfer cylinder with slots for inserting the U-shaped bridge and an opening for reading the measuring device
between the moving head of the testing machine and the plate covering the specimen. A typical mounting is shown in Fig. 1, but
other suitable devices may be used. Mount a spherical bearing block between the upper end of the cylinder and the moving head
of the testing machine. Center accurately both the hollow metal cylinder or other device and the spherical bearing block so that
the load will be applied uniformly to the test specimen.
7.2.3 Measurement of Thickness—When the specimen has been mounted as described in 7.2.2 and is subjected only to the pressure
1 1 1
of the dead weight of the 4 ⁄2 by 4 ⁄2 by ⁄2-in. in. (114 by 114 by 13-mm) 13 mm) metal plate, determine its thickness by means
of the measuring device. When the load-transferring apparatus and spherical bearing block are placed on the test specimen, some
compression may result. Consider this reduction in thickness as part of the 50 % reduction in thickness to be applied.
7.2.4 Recovery—For the determination of the percentage of recovery, give the specimen a single application of a load sufficient
to compress it to 50 % of its thickness before test. Apply the load without shock and at such a rate that the specimen will be
compressed approximately 0.05 in. (1.3 mm)⁄min. /min. Record this applied load. Immediately release the load after application
D545 − 23
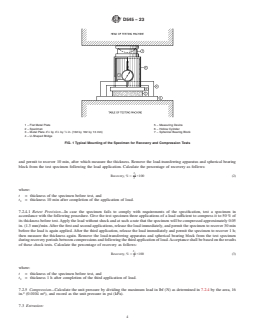
1 – Flat Metal Plate 5 – Measuring Device
2 – Specimen 6 – Hollow Cylinder
1 1 1
3 – Metal Plate 4 ⁄2 by 4 ⁄2 by ⁄2 in. (102 by 102 by 13 mm) 7 – Spherical Bearing Block
4 – U-Shaped Bridge
FIG. 1 Typical Mounting of the Specimen for Recovery and Compression Tests
and permit to recover 10 min, after which measure the thickness. Remove the load-transferring apparatus and spherical bearing
block from the test specimen following the load application. Calculate the percentage of recovery as follows:
t
Recovery, %5 ×100 (2)
t
where:
t = thickness of the specimen before test, and
t = thickness 10 min after completion of the application of load.
7.2.4.1 Retest Provision—In case the specimen fails to comply with requirements of the specification, test a specimen in
accordance with the following procedure. Give the test specimen three applications of a load sufficient to compress it to 50 % of
its thickness before test. Apply the load without shock and at such a rate that the specimen will be compressed approximately 0.05
in. (1.3 mm)/min. After the first and second applications, release the load immediately, and permit the specimen to recover 30 min
before the load is again applied. After the third application, release the load immediately and permit the specimen to recover 1 h;
then measure the thickness again. Remove the load-transferring apparatus and spherical bearing block from the test specimen
during recovery periods between compressions and following the third application of load. Acceptance shall be based on the results
of these check tests. Calculate the percentage of recovery as follows:
t
Recovery, %5 ×100 (3)
t
where:
t = thickness of the specimen before test, and
t = thickness 1 h after completion of the third application of load.
7.2.5 Compression—Calculate the unit pressure by dividing the maximum load in lbf (N) as determined in 7.2.4 by the area, 16
2 2
in. (0.0104 m ), and record as the unit pressure in psi (kPa).
7.3 Extrusion:
D545 − 23
7.3.1 Test Specimens—For this test, use one of the test specimens prepared as described in 6
...
Questions, Comments and Discussion
Ask us and Technical Secretary will try to provide an answer. You can facilitate discussion about the standard in here.
Loading comments...