ASTM B751-19
(Specification)Standard Specification for General Requirements for Nickel and Nickel Alloy Welded Tube
Standard Specification for General Requirements for Nickel and Nickel Alloy Welded Tube
ABSTRACT
This general specification contains the mandatory requirements to the ASTM standards listed herein for longitudinally welded tubular products made from nickel and nickel alloys. In case of conflict, the requirements listed in the particular product specification takes precedence over those listed here.
SCOPE
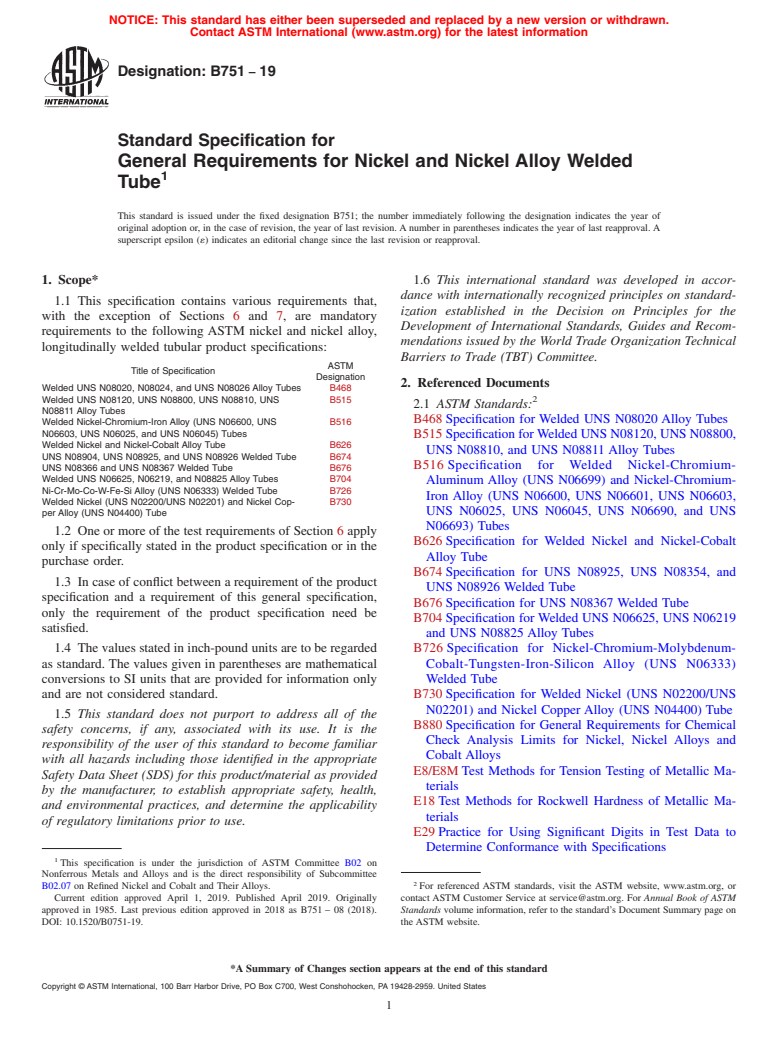
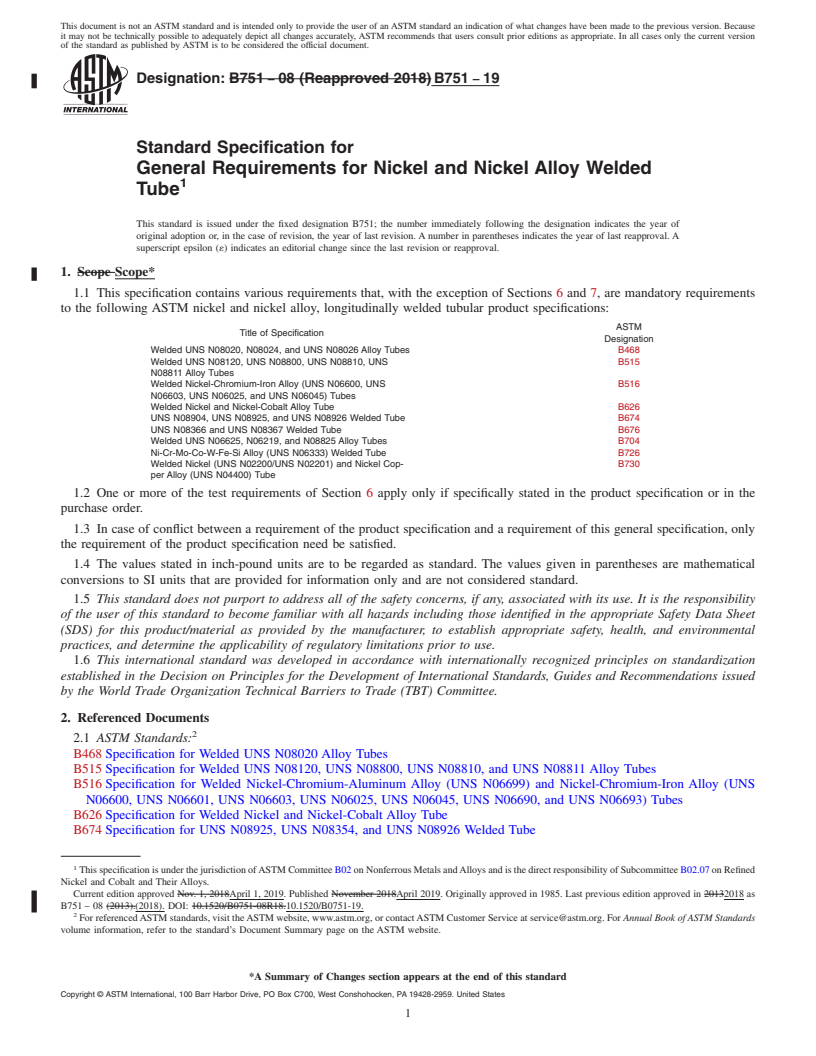
1.1 This specification contains various requirements that, with the exception of Sections 6 and 7, are mandatory requirements to the following ASTM nickel and nickel alloy, longitudinally welded tubular product specifications:
Title of Specification
ASTM
Designation
Welded UNS N08020, N08024, and UNS N08026 Alloy Tubes
B468
Welded UNS N08120, UNS N08800, UNS N08810, UNS N08811 Alloy Tubes
B515
Welded Nickel-Chromium-Iron Alloy (UNS N06600, UNS N06603, UNS N06025, and UNS N06045) Tubes
B516
Welded Nickel and Nickel-Cobalt Alloy Tube
B626
UNS N08904, UNS N08925, and UNS N08926 Welded Tube
B674
UNS N08366 and UNS N08367 Welded Tube
B676
Welded UNS N06625, N06219, and N08825 Alloy Tubes
B704
Ni-Cr-Mo-Co-W-Fe-Si Alloy (UNS N06333) Welded Tube
B726
Welded Nickel (UNS N02200/UNS N02201) and Nickel Copper Alloy (UNS N04400) Tube
B730
1.2 One or more of the test requirements of Section 6 apply only if specifically stated in the product specification or in the purchase order.
1.3 In case of conflict between a requirement of the product specification and a requirement of this general specification, only the requirement of the product specification need be satisfied.
1.4 The values stated in inch-pound units are to be regarded as standard. The values given in parentheses are mathematical conversions to SI units that are provided for information only and are not considered standard.
1.5 This standard does not purport to address all of the safety concerns, if any, associated with its use. It is the responsibility of the user of this standard to become familiar with all hazards including those identified in the appropriate Safety Data Sheet (SDS) for this product/material as provided by the manufacturer, to establish appropriate safety, health, and environmental practices, and determine the applicability of regulatory limitations prior to use.
1.6 This international standard was developed in accordance with internationally recognized principles on standardization established in the Decision on Principles for the Development of International Standards, Guides and Recommendations issued by the World Trade Organization Technical Barriers to Trade (TBT) Committee.
General Information
Relations
Buy Standard
Standards Content (Sample)
NOTICE: This standard has either been superseded and replaced by a new version or withdrawn.
Contact ASTM International (www.astm.org) for the latest information
Designation:B751 −19
Standard Specification for
General Requirements for Nickel and Nickel Alloy Welded
1
Tube
This standard is issued under the fixed designation B751; the number immediately following the designation indicates the year of
original adoption or, in the case of revision, the year of last revision. A number in parentheses indicates the year of last reapproval. A
superscript epsilon (´) indicates an editorial change since the last revision or reapproval.
1. Scope* 1.6 This international standard was developed in accor-
dance with internationally recognized principles on standard-
1.1 This specification contains various requirements that,
ization established in the Decision on Principles for the
with the exception of Sections 6 and 7, are mandatory
Development of International Standards, Guides and Recom-
requirements to the following ASTM nickel and nickel alloy,
mendations issued by the World Trade Organization Technical
longitudinally welded tubular product specifications:
Barriers to Trade (TBT) Committee.
ASTM
Title of Specification
Designation
2. Referenced Documents
Welded UNS N08020, N08024, and UNS N08026 Alloy Tubes B468
Welded UNS N08120, UNS N08800, UNS N08810, UNS B515 2
2.1 ASTM Standards:
N08811 Alloy Tubes
B468 Specification for Welded UNS N08020 Alloy Tubes
Welded Nickel-Chromium-Iron Alloy (UNS N06600, UNS B516
N06603, UNS N06025, and UNS N06045) Tubes
B515 Specification forWelded UNS N08120, UNS N08800,
Welded Nickel and Nickel-Cobalt Alloy Tube B626
UNS N08810, and UNS N08811 Alloy Tubes
UNS N08904, UNS N08925, and UNS N08926 Welded Tube B674
B516 Specification for Welded Nickel-Chromium-
UNS N08366 and UNS N08367 Welded Tube B676
Welded UNS N06625, N06219, and N08825 Alloy Tubes B704
Aluminum Alloy (UNS N06699) and Nickel-Chromium-
Ni-Cr-Mo-Co-W-Fe-Si Alloy (UNS N06333) Welded Tube B726
Iron Alloy (UNS N06600, UNS N06601, UNS N06603,
Welded Nickel (UNS N02200/UNS N02201) and Nickel Cop- B730
UNS N06025, UNS N06045, UNS N06690, and UNS
per Alloy (UNS N04400) Tube
N06693) Tubes
1.2 One or more of the test requirements of Section 6 apply
B626 Specification for Welded Nickel and Nickel-Cobalt
only if specifically stated in the product specification or in the
Alloy Tube
purchase order.
B674 Specification for UNS N08925, UNS N08354, and
1.3 In case of conflict between a requirement of the product
UNS N08926 Welded Tube
specification and a requirement of this general specification,
B676 Specification for UNS N08367 Welded Tube
only the requirement of the product specification need be
B704 Specification for Welded UNS N06625, UNS N06219
satisfied.
and UNS N08825 Alloy Tubes
1.4 The values stated in inch-pound units are to be regarded B726 Specification for Nickel-Chromium-Molybdenum-
as standard. The values given in parentheses are mathematical Cobalt-Tungsten-Iron-Silicon Alloy (UNS N06333)
conversions to SI units that are provided for information only Welded Tube
and are not considered standard. B730 Specification for Welded Nickel (UNS N02200/UNS
N02201) and Nickel Copper Alloy (UNS N04400) Tube
1.5 This standard does not purport to address all of the
B880 Specification for General Requirements for Chemical
safety concerns, if any, associated with its use. It is the
Check Analysis Limits for Nickel, Nickel Alloys and
responsibility of the user of this standard to become familiar
Cobalt Alloys
with all hazards including those identified in the appropriate
E8/E8M Test Methods for Tension Testing of Metallic Ma-
Safety Data Sheet (SDS) for this product/material as provided
terials
by the manufacturer, to establish appropriate safety, health,
E18 Test Methods for Rockwell Hardness of Metallic Ma-
and environmental practices, and determine the applicability
terials
of regulatory limitations prior to use.
E29 Practice for Using Significant Digits in Test Data to
Determine Conformance with Specifications
1
This specification is under the jurisdiction of ASTM Committee B02 on
Nonferrous Metals and Alloys and is the direct responsibility of Subcommittee
2
B02.07 on Refined Nickel and Cobalt and Their Alloys. For referenced ASTM standards, visit the ASTM website, www.astm.org, or
Current edition approved April 1, 2019. Published April 2019. Originally contact ASTM Customer Service at service@astm.org. For Annual Book of ASTM
approved in 1985. Last previous edition approved in 2018 as B751 – 08 (2018). Standards volume information, refer to the standard’s Document Summary page on
DOI: 10.1520/B0751-19. the ASTM website.
*A Summary of Changes section appears at the end of this standard
Copyright © ASTM International, 100 Barr Harbor Drive, PO Box C700, West Conshohocken, PA 19428-2959. United States
1
---------------------- Page: 1 ----------------------
B751−19
E39 Methods for Chemical Analysis of Nickel (Withdrawn shallnotdeviatefromthenominaldiameterb
...
This document is not an ASTM standard and is intended only to provide the user of an ASTM standard an indication of what changes have been made to the previous version. Because
it may not be technically possible to adequately depict all changes accurately, ASTM recommends that users consult prior editions as appropriate. In all cases only the current version
of the standard as published by ASTM is to be considered the official document.
Designation: B751 − 08 (Reapproved 2018) B751 − 19
Standard Specification for
General Requirements for Nickel and Nickel Alloy Welded
1
Tube
This standard is issued under the fixed designation B751; the number immediately following the designation indicates the year of
original adoption or, in the case of revision, the year of last revision. A number in parentheses indicates the year of last reapproval. A
superscript epsilon (´) indicates an editorial change since the last revision or reapproval.
1. Scope Scope*
1.1 This specification contains various requirements that, with the exception of Sections 6 and 7, are mandatory requirements
to the following ASTM nickel and nickel alloy, longitudinally welded tubular product specifications:
ASTM
Title of Specification
Designation
Welded UNS N08020, N08024, and UNS N08026 Alloy Tubes B468
Welded UNS N08120, UNS N08800, UNS N08810, UNS B515
N08811 Alloy Tubes
Welded Nickel-Chromium-Iron Alloy (UNS N06600, UNS B516
N06603, UNS N06025, and UNS N06045) Tubes
Welded Nickel and Nickel-Cobalt Alloy Tube B626
UNS N08904, UNS N08925, and UNS N08926 Welded Tube B674
UNS N08366 and UNS N08367 Welded Tube B676
Welded UNS N06625, N06219, and N08825 Alloy Tubes B704
Ni-Cr-Mo-Co-W-Fe-Si Alloy (UNS N06333) Welded Tube B726
Welded Nickel (UNS N02200/UNS N02201) and Nickel Cop- B730
per Alloy (UNS N04400) Tube
1.2 One or more of the test requirements of Section 6 apply only if specifically stated in the product specification or in the
purchase order.
1.3 In case of conflict between a requirement of the product specification and a requirement of this general specification, only
the requirement of the product specification need be satisfied.
1.4 The values stated in inch-pound units are to be regarded as standard. The values given in parentheses are mathematical
conversions to SI units that are provided for information only and are not considered standard.
1.5 This standard does not purport to address all of the safety concerns, if any, associated with its use. It is the responsibility
of the user of this standard to become familiar with all hazards including those identified in the appropriate Safety Data Sheet
(SDS) for this product/material as provided by the manufacturer, to establish appropriate safety, health, and environmental
practices, and determine the applicability of regulatory limitations prior to use.
1.6 This international standard was developed in accordance with internationally recognized principles on standardization
established in the Decision on Principles for the Development of International Standards, Guides and Recommendations issued
by the World Trade Organization Technical Barriers to Trade (TBT) Committee.
2. Referenced Documents
2
2.1 ASTM Standards:
B468 Specification for Welded UNS N08020 Alloy Tubes
B515 Specification for Welded UNS N08120, UNS N08800, UNS N08810, and UNS N08811 Alloy Tubes
B516 Specification for Welded Nickel-Chromium-Aluminum Alloy (UNS N06699) and Nickel-Chromium-Iron Alloy (UNS
N06600, UNS N06601, UNS N06603, UNS N06025, UNS N06045, UNS N06690, and UNS N06693) Tubes
B626 Specification for Welded Nickel and Nickel-Cobalt Alloy Tube
B674 Specification for UNS N08925, UNS N08354, and UNS N08926 Welded Tube
1
This specification is under the jurisdiction of ASTM Committee B02 on Nonferrous Metals and Alloys and is the direct responsibility of Subcommittee B02.07 on Refined
Nickel and Cobalt and Their Alloys.
Current edition approved Nov. 1, 2018April 1, 2019. Published November 2018April 2019. Originally approved in 1985. Last previous edition approved in 20132018 as
B751 – 08 (2013).(2018). DOI: 10.1520/B0751-08R18.10.1520/B0751-19.
2
For referenced ASTM standards, visit the ASTM website, www.astm.org, or contact ASTM Customer Service at service@astm.org. For Annual Book of ASTM Standards
volume information, refer to the standard’s Document Summary page on the ASTM website.
*A Summary of Changes section appears at the end of this standard
Copyright © ASTM International, 100 Barr Harbor Drive, PO Box C700, West Conshohocken, PA 19428-2959. United States
1
---------------------- Page: 1 ----------------------
B751 − 19
B676 Specification for UNS N08367 Welded Tube
B704 Specification for Welded UNS N06625, UNS N06219 and UNS N08825 Alloy Tubes
B726 Specification for Nickel-Chromium-Molybdenum-Cobalt-Tungsten-Iron-Silicon Alloy (UNS N06333) Welded Tube
B730 Specification for Welded Nickel (UNS N02200/UNS N02201) and Nickel Copper Alloy (UNS N04400) Tube
B880 Specification for General Requirements for Chemical Check Analysis Limi
...


Questions, Comments and Discussion
Ask us and Technical Secretary will try to provide an answer. You can facilitate discussion about the standard in here.