ASTM E997-14
(Test Method)Standard Test Method for Evaluating Glass Breakage Probability Under the Influence of Uniform Static Loads by Proof Load Testing
Standard Test Method for Evaluating Glass Breakage Probability Under the Influence of Uniform Static Loads by Proof Load Testing
SIGNIFICANCE AND USE
5.1 Glass specimens to be tested shall be mounted in a standard test frame with four sides supported, or in a test frame designed to represent specific glazing conditions.
5.2 Loads on glass in windows, curtain walls, and doors may vary greatly in magnitude, direction, and duration. Any design load (wind, snow, etc.) that can reasonably be applied to the test specimens or transformed into an equivalent uniform design load can be considered. Load transformation techniques are addressed in the literature (1, 2, 3).3
5.3 The strength of glass varies with many different factors including surface condition, load duration, geometry, relative humidity, and temperature (4). A thorough understanding of those strength variations is required to interpret results of this test method.
SCOPE
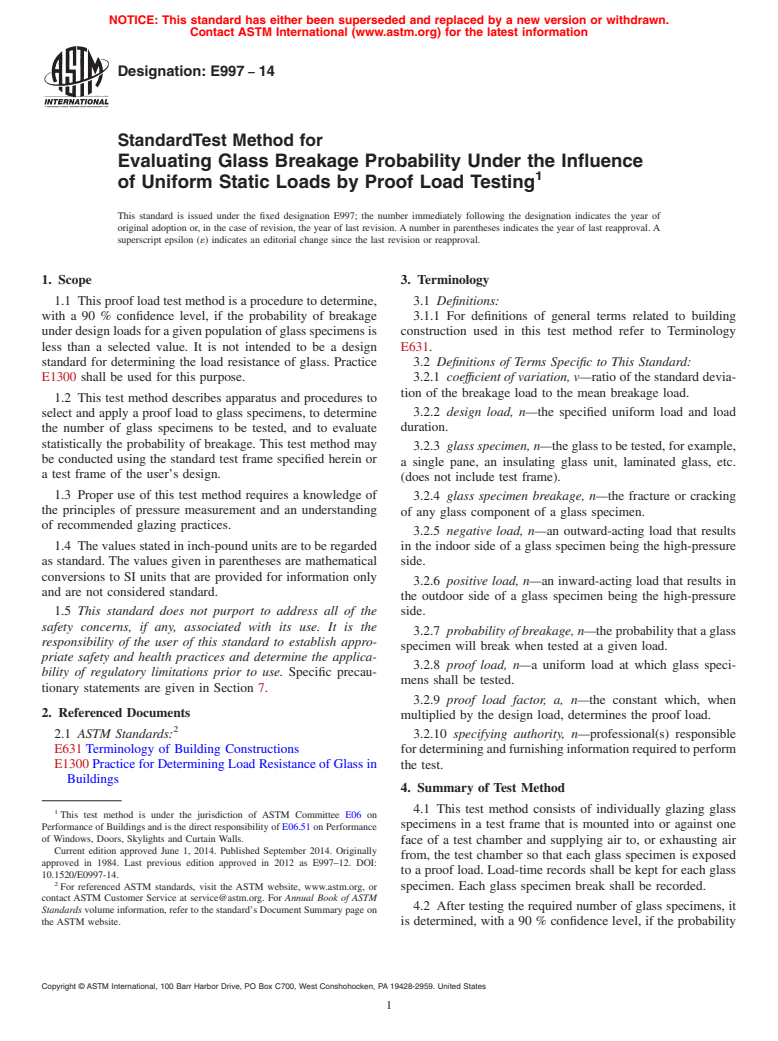
1.1 This proof load test method is a procedure to determine, with a 90 % confidence level, if the probability of breakage under design loads for a given population of glass specimens is less than a selected value. It is not intended to be a design standard for determining the load resistance of glass. Practice E1300 shall be used for this purpose.
1.2 This test method describes apparatus and procedures to select and apply a proof load to glass specimens, to determine the number of glass specimens to be tested, and to evaluate statistically the probability of breakage. This test method may be conducted using the standard test frame specified herein or a test frame of the user's design.
1.3 Proper use of this test method requires a knowledge of the principles of pressure measurement and an understanding of recommended glazing practices.
1.4 The values stated in inch-pound units are to be regarded as standard. The values given in parentheses are mathematical conversions to SI units that are provided for information only and are not considered standard.
1.5 This standard does not purport to address all of the safety concerns, if any, associated with its use. It is the responsibility of the user of this standard to establish appropriate safety and health practices and determine the applicability of regulatory limitations prior to use. Specific precautionary statements are given in Section 7.
General Information
Relations
Buy Standard
Standards Content (Sample)
NOTICE: This standard has either been superseded and replaced by a new version or withdrawn.
Contact ASTM International (www.astm.org) for the latest information
Designation:E997 −14
StandardTest Method for
Evaluating Glass Breakage Probability Under the Influence
1
of Uniform Static Loads by Proof Load Testing
This standard is issued under the fixed designation E997; the number immediately following the designation indicates the year of
original adoption or, in the case of revision, the year of last revision.Anumber in parentheses indicates the year of last reapproval.A
superscript epsilon (´) indicates an editorial change since the last revision or reapproval.
1. Scope 3. Terminology
1.1 Thisproofloadtestmethodisaproceduretodetermine, 3.1 Definitions:
with a 90 % confidence level, if the probability of breakage 3.1.1 For definitions of general terms related to building
underdesignloadsforagivenpopulationofglassspecimensis construction used in this test method refer to Terminology
less than a selected value. It is not intended to be a design E631.
standard for determining the load resistance of glass. Practice 3.2 Definitions of Terms Specific to This Standard:
E1300 shall be used for this purpose. 3.2.1 coeffıcient of variation, v—ratio of the standard devia-
tion of the breakage load to the mean breakage load.
1.2 This test method describes apparatus and procedures to
3.2.2 design load, n—the specified uniform load and load
select and apply a proof load to glass specimens, to determine
duration.
the number of glass specimens to be tested, and to evaluate
statistically the probability of breakage. This test method may
3.2.3 glass specimen, n—theglasstobetested,forexample,
be conducted using the standard test frame specified herein or
a single pane, an insulating glass unit, laminated glass, etc.
a test frame of the user’s design.
(does not include test frame).
1.3 Proper use of this test method requires a knowledge of
3.2.4 glass specimen breakage, n—the fracture or cracking
the principles of pressure measurement and an understanding
of any glass component of a glass specimen.
of recommended glazing practices.
3.2.5 negative load, n—an outward-acting load that results
1.4 The values stated in inch-pound units are to be regarded in the indoor side of a glass specimen being the high-pressure
as standard. The values given in parentheses are mathematical side.
conversions to SI units that are provided for information only
3.2.6 positive load, n—an inward-acting load that results in
and are not considered standard.
the outdoor side of a glass specimen being the high-pressure
1.5 This standard does not purport to address all of the side.
safety concerns, if any, associated with its use. It is the
3.2.7 probability of breakage, n—theprobabilitythataglass
responsibility of the user of this standard to establish appro-
specimen will break when tested at a given load.
priate safety and health practices and determine the applica-
3.2.8 proof load, n—a uniform load at which glass speci-
bility of regulatory limitations prior to use. Specific precau-
mens shall be tested.
tionary statements are given in Section 7.
3.2.9 proof load factor, a, n—the constant which, when
2. Referenced Documents
multiplied by the design load, determines the proof load.
2
2.1 ASTM Standards:
3.2.10 specifying authority, n—professional(s) responsible
E631Terminology of Building Constructions fordeterminingandfurnishinginformationrequiredtoperform
E1300PracticeforDeterminingLoadResistanceofGlassin
the test.
Buildings
4. Summary of Test Method
4.1 This test method consists of individually glazing glass
1
This test method is under the jurisdiction of ASTM Committee E06 on
specimens in a test frame that is mounted into or against one
Performance of Buildings and is the direct responsibility of E06.51 on Performance
of Windows, Doors, Skylights and Curtain Walls.
face of a test chamber and supplying air to, or exhausting air
Current edition approved June 1, 2014. Published September 2014. Originally
from, the test chamber so that each glass specimen is exposed
approved in 1984. Last previous edition approved in 2012 as E997–12. DOI:
to a proof load. Load-time records shall be kept for each glass
10.1520/E0997-14.
2
For referenced ASTM standards, visit the ASTM website, www.astm.org, or specimen. Each glass specimen break shall be recorded.
contact ASTM Customer Service at service@astm.org. For Annual Book of ASTM
4.2 After testing the required number of glass specimens, it
Standards volume information, refer to the standard’s Document Summary page on
the ASTM website. is determined, with a 90 % confidence level, if the probability
Copyright © ASTM International, 100 Barr Harbor Drive, PO Box C700, West Conshohocken, PA 19428-2959. United States
1
---------------------- Page: 1 ----------------------
E997−14
of breakage under design loads for the given population of method, considerable energy and hazard are involved. In cases
glassspecimensislessthana
...
This document is not an ASTM standard and is intended only to provide the user of an ASTM standard an indication of what changes have been made to the previous version. Because
it may not be technically possible to adequately depict all changes accurately, ASTM recommends that users consult prior editions as appropriate. In all cases only the current version
of the standard as published by ASTM is to be considered the official document.
Designation: E997 − 12 E997 − 14
Standard Test Method for
Structural Performance of Glass in Exterior Windows,
Curtain Walls, and Doors Evaluating Glass Breakage
Probability Under the Influence of Uniform Static Loads by
1
Destructive MethodsProof Load Testing
This standard is issued under the fixed designation E997; the number immediately following the designation indicates the year of
original adoption or, in the case of revision, the year of last revision. A number in parentheses indicates the year of last reapproval. A
superscript epsilon (´) indicates an editorial change since the last revision or reapproval.
1. Scope
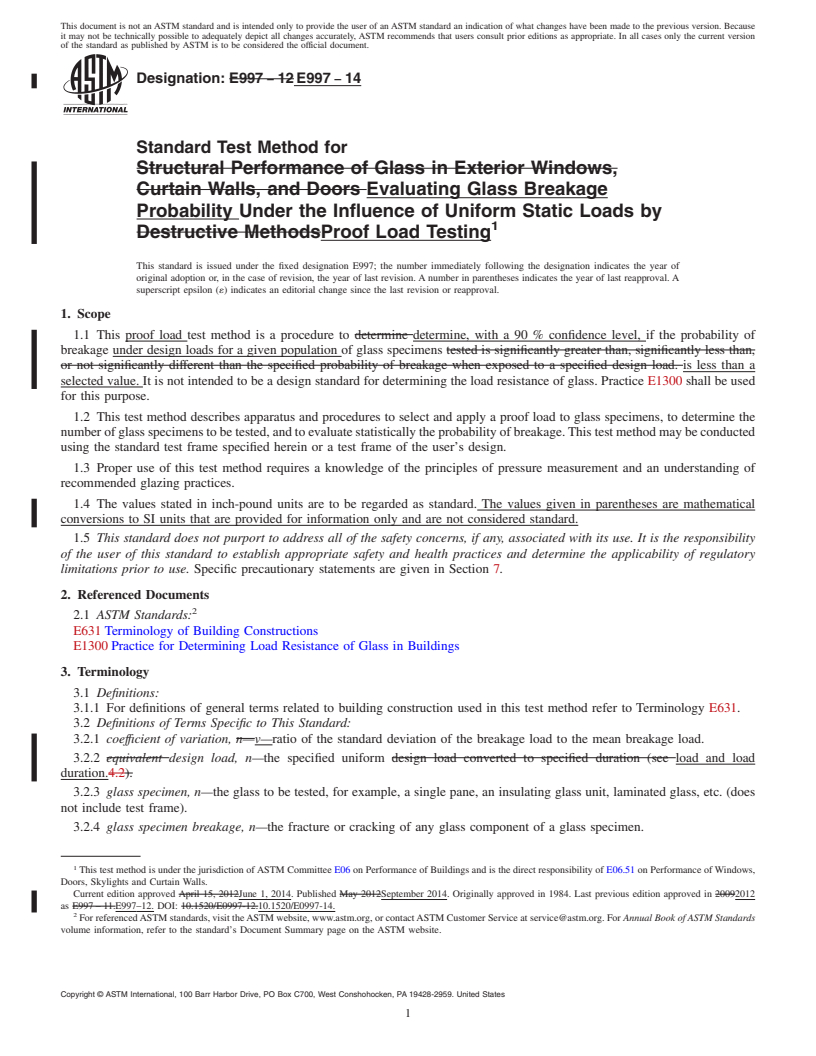
1.1 This proof load test method is a procedure to determine determine, with a 90 % confidence level, if the probability of
breakage under design loads for a given population of glass specimens tested is significantly greater than, significantly less than,
or not significantly different than the specified probability of breakage when exposed to a specified design load. is less than a
selected value. It is not intended to be a design standard for determining the load resistance of glass. Practice E1300 shall be used
for this purpose.
1.2 This test method describes apparatus and procedures to select and apply a proof load to glass specimens, to determine the
number of glass specimens to be tested, and to evaluate statistically the probability of breakage. This test method may be conducted
using the standard test frame specified herein or a test frame of the user’s design.
1.3 Proper use of this test method requires a knowledge of the principles of pressure measurement and an understanding of
recommended glazing practices.
1.4 The values stated in inch-pound units are to be regarded as standard. The values given in parentheses are mathematical
conversions to SI units that are provided for information only and are not considered standard.
1.5 This standard does not purport to address all of the safety concerns, if any, associated with its use. It is the responsibility
of the user of this standard to establish appropriate safety and health practices and determine the applicability of regulatory
limitations prior to use. Specific precautionary statements are given in Section 7.
2. Referenced Documents
2
2.1 ASTM Standards:
E631 Terminology of Building Constructions
E1300 Practice for Determining Load Resistance of Glass in Buildings
3. Terminology
3.1 Definitions:
3.1.1 For definitions of general terms related to building construction used in this test method refer to Terminology E631.
3.2 Definitions of Terms Specific to This Standard:
3.2.1 coeffıcient of variation, n—v—ratio of the standard deviation of the breakage load to the mean breakage load.
3.2.2 equivalent design load, n—the specified uniform design load converted to specified duration (see load and load
duration.4.2).
3.2.3 glass specimen, n—the glass to be tested, for example, a single pane, an insulating glass unit, laminated glass, etc. (does
not include test frame).
3.2.4 glass specimen breakage, n—the fracture or cracking of any glass component of a glass specimen.
1
This test method is under the jurisdiction of ASTM Committee E06 on Performance of Buildings and is the direct responsibility of E06.51 on Performance of Windows,
Doors, Skylights and Curtain Walls.
Current edition approved April 15, 2012June 1, 2014. Published May 2012September 2014. Originally approved in 1984. Last previous edition approved in 20092012
as E997 – 11.E997–12. DOI: 10.1520/E0997-12.10.1520/E0997-14.
2
For referenced ASTM standards, visit the ASTM website, www.astm.org, or contact ASTM Customer Service at service@astm.org. For Annual Book of ASTM Standards
volume information, refer to the standard’s Document Summary page on the ASTM website.
Copyright © ASTM International, 100 Barr Harbor Drive, PO Box C700, West Conshohocken, PA 19428-2959. United States
1
---------------------- Page: 1 ----------------------
E997 − 14
3.2.5 negative load, n—an outward-acting load that results in the indoor side of a glass specimen being the high-pressure side.
3.2.6 positive load, n—an inward-acting load that results in the outdoor side of a glass specimen being the high-pressure side.
3.2.7 probability of breakage, n—the probability that a glass specimen will break when tested at a given load. General industry
practice is to express the probability of breakage as lites per 1000 lites.
3.2.8 proof load, n—a magnitude of uniform load at which glass specimens shall be tested.
3.2.9 proof load factor, a, n—the constant which, when multiplied by t
...


Questions, Comments and Discussion
Ask us and Technical Secretary will try to provide an answer. You can facilitate discussion about the standard in here.