ASTM B555-86(2023)
(Guide)Standard Guide for Measurement of Electrodeposited Metallic Coating Thicknesses by Dropping Test
Standard Guide for Measurement of Electrodeposited Metallic Coating Thicknesses by Dropping Test
SIGNIFICANCE AND USE
4.1 The thickness of a metal coating is often critical to its performance.
4.2 This procedure is useful for an approximate determination when the best possible accuracy is not required. For more reliable determinations, the following methods are available: Test Methods B487, B499, B504, and B568.
4.3 This test assumes that the rate of dissolution of the coating by the corrosive reagent under the specified conditions is always the same.
SCOPE
1.1 This guide covers the use of the dropping test to measure the thickness of electrodeposited zinc, cadmium, copper, and tin coatings.
Note 1: Under most circumstances this method of measuring coating thicknesses is not as reliable or as convenient to use as an appropriate coating thickness gauge (see Test Methods B499, B504, and B568).
1.2 This standard does not purport to address all of the safety concerns, if any, associated with its use. It is the responsibility of the user of this standard to establish appropriate safety, health, and environmental practices and determine the applicability of regulatory limitations prior to use.
1.3 This international standard was developed in accordance with internationally recognized principles on standardization established in the Decision on Principles for the Development of International Standards, Guides and Recommendations issued by the World Trade Organization Technical Barriers to Trade (TBT) Committee.
General Information
- Status
- Published
- Publication Date
- 31-Oct-2023
- Technical Committee
- B08 - Metallic and Inorganic Coatings
- Drafting Committee
- B08.10 - Test Methods
Relations
- Effective Date
- 01-Nov-2023
Overview
ASTM B555-86(2023), Standard Guide for Measurement of Electrodeposited Metallic Coating Thicknesses by Dropping Test, provides a guidance framework for evaluating the thickness of electrodeposited metallic coatings using the dropping test method. Developed by ASTM International, this guide is widely referenced in quality assurance processes where the thickness of coatings like zinc, cadmium, copper, and tin is essential to product performance but ultra-precise measurement is not required.
The dropping test method offers an approximate measurement by applying a corrosive solution to the coated surface and timing its penetration to the substrate. While this approach is less accurate than other methods, it is useful for quick or preliminary assessments on metallic surfaces.
Key Topics
Purpose and Use
- Ensures that metallic coatings meet minimum thickness requirements for durability, corrosion resistance, and performance.
- Useful when moderate accuracy is sufficient and rapid results are needed.
Suitable for Specific Metals
- Intended for zinc, cadmium, copper, and tin electrodeposited coatings.
- Not generally recommended for alloy coatings or coatings with significant impurities.
Method Description
- A controlled flow of corrosive reagent is applied dropwise onto the inclined coated surface.
- The elapsed time until the substrate is exposed is measured.
- The coating thickness is estimated by multiplying the time by a thickness factor.
Influencing Variables
- Cleanliness of the test surface
- Consistency and concentration of the test solution
- Dropping rate and drop size
- Test temperature and solution drainage
- Presence of alloy layers or impurities
Limitations
- Not as reliable or convenient as more advanced methods (e.g., magnetic, X-ray, coulometric).
- Operator judgment and strict test condition control are necessary for acceptable repeatability.
Applications
Quality Control in Electroplating
- Provides a quick method for confirming that protective coatings meet minimal specifications in manufacturing and finishing lines.
- Especially useful in environments where high-volume inspection is required but ultra-precise measurements are not critical.
Field Assessments
- Can be employed for on-site evaluation of coating thicknesses without the need for specialized laboratory equipment.
Preliminary Testing
- Suitable as a screening method before more precise testing with devices such as coating thickness gauges.
Industry Sectors
- Used in automotive, aerospace, electronics, and hardware manufacturing where surface protection is vital.
Related Standards
- ASTM B487: Test Method for Measurement of Metal and Oxide Coating Thickness by Microscopical Examination of Cross Section.
- ASTM B499: Test Method for Measurement of Coating Thicknesses by the Magnetic Method: Nonmagnetic Coatings on Magnetic Basis Metals.
- ASTM B504: Test Method for Measurement of Thickness of Metallic Coatings by the Coulometric Method.
- ASTM B568: Test Method for Measurement of Coating Thickness by X-Ray Spectrometry.
- ASTM D1193: Specification for Reagent Water.
Practical Value
The ASTM B555 dropping test is an efficient way to estimate metallic coating thickness where rapid, on-site, or non-laboratory evaluation meets project needs. While best for approximate thicknesses, it helps manufacturers and inspectors ensure coatings satisfy essential performance and protection functions. For strict accuracy and reliability requirements, more advanced ASTM methods should be considered.
Using established international principles, ASTM B555 supports consistency in test practices across industries and helps minimize technical barriers to trade through global standardization in coating thickness measurement.
Keywords: ASTM B555, dropping test, electrodeposited coating thickness, metallic coatings, zinc coating, cadmium coating, copper coating, tin coating, quality control, coating measurement methods.
Buy Documents
ASTM B555-86(2023) - Standard Guide for Measurement of Electrodeposited Metallic Coating Thicknesses by Dropping Test
Get Certified
Connect with accredited certification bodies for this standard

DVS-ZERT GmbH
German welding certification society.

CARES (UK Certification Authority for Reinforcing Steels)
UK certification for reinforcing steels and construction.

EWF/IIW (European/International Welding Federation)
International welding personnel certification.
Sponsored listings
Frequently Asked Questions
ASTM B555-86(2023) is a guide published by ASTM International. Its full title is "Standard Guide for Measurement of Electrodeposited Metallic Coating Thicknesses by Dropping Test". This standard covers: SIGNIFICANCE AND USE 4.1 The thickness of a metal coating is often critical to its performance. 4.2 This procedure is useful for an approximate determination when the best possible accuracy is not required. For more reliable determinations, the following methods are available: Test Methods B487, B499, B504, and B568. 4.3 This test assumes that the rate of dissolution of the coating by the corrosive reagent under the specified conditions is always the same. SCOPE 1.1 This guide covers the use of the dropping test to measure the thickness of electrodeposited zinc, cadmium, copper, and tin coatings. Note 1: Under most circumstances this method of measuring coating thicknesses is not as reliable or as convenient to use as an appropriate coating thickness gauge (see Test Methods B499, B504, and B568). 1.2 This standard does not purport to address all of the safety concerns, if any, associated with its use. It is the responsibility of the user of this standard to establish appropriate safety, health, and environmental practices and determine the applicability of regulatory limitations prior to use. 1.3 This international standard was developed in accordance with internationally recognized principles on standardization established in the Decision on Principles for the Development of International Standards, Guides and Recommendations issued by the World Trade Organization Technical Barriers to Trade (TBT) Committee.
SIGNIFICANCE AND USE 4.1 The thickness of a metal coating is often critical to its performance. 4.2 This procedure is useful for an approximate determination when the best possible accuracy is not required. For more reliable determinations, the following methods are available: Test Methods B487, B499, B504, and B568. 4.3 This test assumes that the rate of dissolution of the coating by the corrosive reagent under the specified conditions is always the same. SCOPE 1.1 This guide covers the use of the dropping test to measure the thickness of electrodeposited zinc, cadmium, copper, and tin coatings. Note 1: Under most circumstances this method of measuring coating thicknesses is not as reliable or as convenient to use as an appropriate coating thickness gauge (see Test Methods B499, B504, and B568). 1.2 This standard does not purport to address all of the safety concerns, if any, associated with its use. It is the responsibility of the user of this standard to establish appropriate safety, health, and environmental practices and determine the applicability of regulatory limitations prior to use. 1.3 This international standard was developed in accordance with internationally recognized principles on standardization established in the Decision on Principles for the Development of International Standards, Guides and Recommendations issued by the World Trade Organization Technical Barriers to Trade (TBT) Committee.
ASTM B555-86(2023) is classified under the following ICS (International Classification for Standards) categories: 25.220.40 - Metallic coatings. The ICS classification helps identify the subject area and facilitates finding related standards.
ASTM B555-86(2023) has the following relationships with other standards: It is inter standard links to ASTM B555-86(2018). Understanding these relationships helps ensure you are using the most current and applicable version of the standard.
ASTM B555-86(2023) is available in PDF format for immediate download after purchase. The document can be added to your cart and obtained through the secure checkout process. Digital delivery ensures instant access to the complete standard document.
Standards Content (Sample)
This international standard was developed in accordance with internationally recognized principles on standardization established in the Decision on Principles for the
Development of International Standards, Guides and Recommendations issued by the World Trade Organization Technical Barriers to Trade (TBT) Committee.
Designation: B555 − 86 (Reapproved 2023)
Standard Guide for
Measurement of Electrodeposited Metallic Coating
Thicknesses by Dropping Test
This standard is issued under the fixed designation B555; the number immediately following the designation indicates the year of
original adoption or, in the case of revision, the year of last revision. A number in parentheses indicates the year of last reapproval. A
superscript epsilon (´) indicates an editorial change since the last revision or reapproval.
1. Scope 3. Summary of Guide
1.1 This guide covers the use of the dropping test to 3.1 A dropping test consists of applying dropwise a corro-
measure the thickness of electrodeposited zinc, cadmium, sive solution, at a constant rate, to the electroplated surface,
copper, and tin coatings. and measuring the time required to penetrate the coating and
expose the substrate; this time is proportional to the coating
NOTE 1—Under most circumstances this method of measuring coating
thickness.
thicknesses is not as reliable or as convenient to use as an appropriate
coating thickness gauge (see Test Methods B499, B504, and B568).
4. Significance and Use
1.2 This standard does not purport to address all of the
4.1 The thickness of a metal coating is often critical to its
safety concerns, if any, associated with its use. It is the
performance.
responsibility of the user of this standard to establish appro-
priate safety, health, and environmental practices and deter-
4.2 This procedure is useful for an approximate determina-
mine the applicability of regulatory limitations prior to use.
tion when the best possible accuracy is not required. For more
1.3 This international standard was developed in accor-
reliable determinations, the following methods are available:
dance with internationally recognized principles on standard-
Test Methods B487, B499, B504, and B568.
ization established in the Decision on Principles for the
4.3 This test assumes that the rate of dissolution of the
Development of International Standards, Guides and Recom-
coating by the corrosive reagent under the specified conditions
mendations issued by the World Trade Organization Technical
is always the same.
Barriers to Trade (TBT) Committee.
5. Factors Affecting the Accuracy
2. Referenced Documents
5.1 The following factors will affect the accuracy of a
2.1 ASTM Standards:
coating thickness measurement made by this method:
B487 Test Method for Measurement of Metal and Oxide
5.1.1 Cleanliness of Surface—Any foreign material on the
Coating Thickness by Microscopical Examination of
surface to be tested, including lacquer, grease, corrosion
Cross Section
products, and conversion coatings, will interfere with the test
B499 Test Method for Measurement of Coating Thicknesses
and must be removed. Tarnish and conversion coatings can
by the Magnetic Method: Nonmagnetic Coatings on
often be removed by mild burnishing with a soft, clean pencil
Magnetic Basis Metals
eraser.
B504 Test Method for Measurement of Thickness of Metal-
5.1.2 Concentration of Test Solution—Variation from the
lic Coatings by the Coulometric Method
stated concentrations will introduce an error unless the thick-
B568 Test Method for Measurement of Coating Thickness
ness factor is adjusted accordingly. Test solutions cannot be
by X-Ray Spectrometry
reused.
D1193 Specification for Reagent Water
5.1.3 Temperature—The thickness factor for a given
solution, being a function of the temperature, must be known
for the temperature at which the test is made. Specimens to be
This guide is under the jurisdiction of ASTM Committee B08 on Metallic and
tested should be allowed to reach room temperature before
Inorganic Coatings and is the direct responsibility of Subcommittee B08.10 on Test
testing.
Methods.
5.1.4 Dropping Rate—The thickness factor is also a func-
Current edition approved Nov. 1, 2023. Published November 2023. Originally
approved in 1971. Last previous edition approved in 2018 as B555 – 86 (2018).
tion of the dropping rate. The thickness factors given in Section
DOI: 10.1520/B0555-86R23.
For referenced ASTM standards, visit the ASTM website, www.astm.org, or
contact ASTM Customer Service at service@astm.org. For Annual Book of ASTM Such tests were described by Hull, R. O., and Strausser, P., Monthly Review,
Standards volume information, refer to the standard’s Document Summary page on American Electroplaters Society, MRAEA, Vol 22, 1935, p. 9, and by Brenner, A.,
the ASTM website. Proceedings, American Electroplaters Society, AEPPB, Vol 27, 1939, p. 204.
Copyright © ASTM International, 100 Barr Harbor Drive, PO Box C700, West Conshohocken, PA 19428-2959. United States
B555 − 86 (2023)
10 are for a dropping rate of 100 drops/min and will remain “pure” coatings. The thickness factors listed in Section 10 are
valid for the range of 95 drops ⁄min to 105 drops ⁄min. expected to vary with gross variations in the composition of the
5.1.5 Solution Drainage—The thickness factors given in coating, as might result from codeposition of an alloying
Section 10 are valid only if the test solution is rapidly drained component. The specific effects, on the thickness factors, of
off, as from a flat surface inclined 45° from the horizontal. The impurities or of inclusions from brighteners or other addition
test cannot be made on a horizontal surface or at a location that agents can be appreciable. Uncertainty from these sources may
does not permit rapid drainage. be minimized by standardizing the test method against
5.1.6 Drop Size—Variation in drop size may alter the standards, prepared from the same type of plating solution, the
penetration rate. The tip of the dropping apparatus should thicknesses of which have been determined by other methods.
conform to the dimensions given in Fig. 1 and should be kept
6. Apparatus
clean.
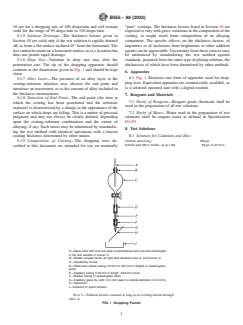
6.1 Fig. 1 illustrates one form of apparatus used for drop-
5.1.7 Alloy Layer—The presence of an alloy layer at the
ping tests. Equivalent apparatus are commercially available, as
coating-substrate interface may obscure the end point and
is a solenoid operated unit with a digital readout.
introduce an uncertainty as to the amount of alloy included in
the thickness measurement.
7. Rea
...


Questions, Comments and Discussion
Ask us and Technical Secretary will try to provide an answer. You can facilitate discussion about the standard in here.
Loading comments...