ASTM C886-21
(Test Method)Standard Test Method for Scleroscope Hardness Testing of Carbon and Graphite Materials
Standard Test Method for Scleroscope Hardness Testing of Carbon and Graphite Materials
SIGNIFICANCE AND USE
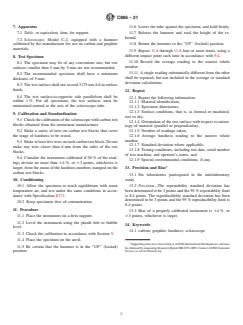
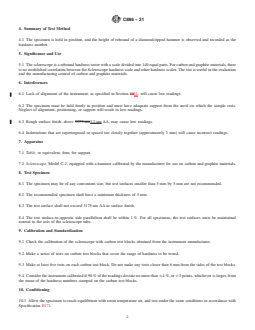
5.1 The scleroscope is a rebound hardness tester with a scale divided into 140 equal parts. For carbon and graphite materials, there is no established correlation between the Scleroscope hardness scale and other hardness scales. The test is useful in the evaluation and the manufacturing control of carbon and graphite materials.
SCOPE
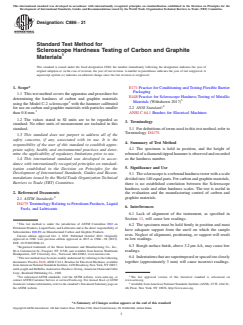
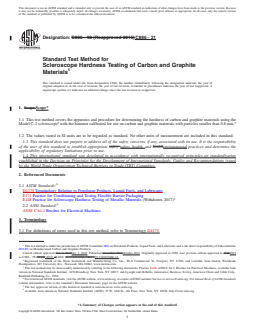
1.1 This test method covers the apparatus and procedure for determining the hardness of carbon and graphite materials using the Model C-2 scleroscope2 with the hammer calibrated for use on carbon and graphite materials with particles smaller than 0.8 mm.3
1.2 The values stated in SI units are to be regarded as standard. No other units of measurement are included in this standard.
1.3 This standard does not purport to address all of the safety concerns, if any, associated with its use. It is the responsibility of the user of this standard to establish appropriate safety, health, and environmental practices and determine the applicability of regulatory limitations prior to use.
1.4 This international standard was developed in accordance with internationally recognized principles on standardization established in the Decision on Principles for the Development of International Standards, Guides and Recommendations issued by the World Trade Organization Technical Barriers to Trade (TBT) Committee.
General Information
- Status
- Published
- Publication Date
- 30-Sep-2021
- Technical Committee
- D02 - Petroleum Products, Liquid Fuels, and Lubricants
- Drafting Committee
- D02.F0 - Manufactured Carbon and Graphite Products
Relations
- Refers
ASTM D4175-23a - Standard Terminology Relating to Petroleum Products, Liquid Fuels, and Lubricants - Effective Date
- 15-Dec-2023
- Refers
ASTM D4175-23e1 - Standard Terminology Relating to Petroleum Products, Liquid Fuels, and Lubricants - Effective Date
- 01-Jul-2023
- Effective Date
- 01-Sep-2008
- Effective Date
- 01-Apr-2007
- Effective Date
- 15-Nov-1994
- Refers
ASTM E448-82(1997)e1 - Standard Practice for Scleroscope Hardness Testing of Metallic Materials - Effective Date
- 30-Jul-1982
- Refers
ASTM E448-82(1997)e2 - Standard Practice for Scleroscope Hardness Testing of Metallic Materials - Effective Date
- 30-Jul-1982
- Refers
ASTM E448-82(2002)e1 - Standard Practice for Scleroscope Hardness Testing of Metallic Materials - Effective Date
- 30-Jul-1982
Overview
ASTM C886-21 specifies the standard test method for scleroscope hardness testing of carbon and graphite materials. Developed by ASTM International, this standard outlines the apparatus and procedures for measuring the rebound hardness of carbon and graphite using the Model C-2 scleroscope. The method is particularly relevant for manufacturing control and quality evaluation of materials where particle size is smaller than 0.8 mm. The scleroscope provides hardness values on its unique scale, which does not directly correlate with other hardness scales.
This standard establishes consistent and reproducible testing protocols, helping industries maintain product reliability in carbon and graphite components.
Key Topics
Scope and Applicability
- Applies to hardness testing of carbon and graphite with particles <0.8 mm.
- Specifies the exclusive use of SI units for reporting.
Test Method Summary
- Uses a diamond-tipped hammer in a calibrated scleroscope to deliver hardness readings based on rebound height.
- The scleroscope scale is divided into 140 equal parts.
Equipment and Calibration
- Requires the use of Model C-2 scleroscope, calibrated specifically for carbon and graphite materials.
- Calibration is verified using standardized carbon test blocks within the expected range of hardness.
Specimen Requirements
- Test surfaces larger than 5 mm x 5 mm and minimum thickness of 5 mm.
- Surface finish should not exceed 3.2 μm AA to ensure accurate readings.
- Proper positioning and alignment are critical for precision.
Reporting and Quality Control
- Details to record include material identification, test surface orientation, number of readings, average and standard deviation, and testing conditions.
- Emphasizes the need for repeatability and reproducibility, with recommended procedures for averaging and outlier handling.
Applications
ASTM C886-21 is widely used in industries that manufacture and utilize carbon and graphite materials, such as:
Manufacturing Quality Control
- Enables manufacturers to monitor and control the quality and consistency of carbon and graphite parts.
- Facilitates comparison between production batches to ensure product specifications are met.
Material Evaluation
- Used in research and development for evaluating the mechanical properties of new carbon and graphite formulations.
- Supports ongoing product improvement initiatives.
Supplier Compliance
- Provides a standardized method for suppliers to demonstrate material compliance during procurement processes.
Electrical Components
- Relevant for testing brush materials used in electrical machines, ensuring reliability and performance.
This test method improves confidence in material performance, supporting critical industries such as energy, electronics, metallurgy, and aerospace.
Related Standards
ASTM C886-21 is part of a family of international standards supporting the characterization and application of carbon and graphite materials. Related documents include:
- ASTM D4175 - Terminology Relating to Petroleum Products, Liquid Fuels, and Lubricants
- ASTM E171 - Practice for Conditioning and Testing Flexible Barrier Packaging
- ANSI C 64.1 - Brushes for Electrical Machines
- ASTM Practice E448 (historical reference) - Scleroscope Hardness Testing of Metallic Materials
For the most current and comprehensive requirements, users should consult the latest editions of these documents.
Keywords: ASTM C886-21, scleroscope hardness, carbon materials, graphite testing, rebound hardness tester, material evaluation, manufacturing control, quality assurance, SI units, calibration
Buy Documents
ASTM C886-21 - Standard Test Method for Scleroscope Hardness Testing of Carbon and Graphite Materials
REDLINE ASTM C886-21 - Standard Test Method for Scleroscope Hardness Testing of Carbon and Graphite Materials
Get Certified
Connect with accredited certification bodies for this standard

ECOCERT
Organic and sustainability certification.

Eurofins Food Testing Global
Global leader in food, environment, and pharmaceutical product testing.

Intertek Bangladesh
Intertek certification and testing services in Bangladesh.
Sponsored listings
Frequently Asked Questions
ASTM C886-21 is a standard published by ASTM International. Its full title is "Standard Test Method for Scleroscope Hardness Testing of Carbon and Graphite Materials". This standard covers: SIGNIFICANCE AND USE 5.1 The scleroscope is a rebound hardness tester with a scale divided into 140 equal parts. For carbon and graphite materials, there is no established correlation between the Scleroscope hardness scale and other hardness scales. The test is useful in the evaluation and the manufacturing control of carbon and graphite materials. SCOPE 1.1 This test method covers the apparatus and procedure for determining the hardness of carbon and graphite materials using the Model C-2 scleroscope2 with the hammer calibrated for use on carbon and graphite materials with particles smaller than 0.8 mm.3 1.2 The values stated in SI units are to be regarded as standard. No other units of measurement are included in this standard. 1.3 This standard does not purport to address all of the safety concerns, if any, associated with its use. It is the responsibility of the user of this standard to establish appropriate safety, health, and environmental practices and determine the applicability of regulatory limitations prior to use. 1.4 This international standard was developed in accordance with internationally recognized principles on standardization established in the Decision on Principles for the Development of International Standards, Guides and Recommendations issued by the World Trade Organization Technical Barriers to Trade (TBT) Committee.
SIGNIFICANCE AND USE 5.1 The scleroscope is a rebound hardness tester with a scale divided into 140 equal parts. For carbon and graphite materials, there is no established correlation between the Scleroscope hardness scale and other hardness scales. The test is useful in the evaluation and the manufacturing control of carbon and graphite materials. SCOPE 1.1 This test method covers the apparatus and procedure for determining the hardness of carbon and graphite materials using the Model C-2 scleroscope2 with the hammer calibrated for use on carbon and graphite materials with particles smaller than 0.8 mm.3 1.2 The values stated in SI units are to be regarded as standard. No other units of measurement are included in this standard. 1.3 This standard does not purport to address all of the safety concerns, if any, associated with its use. It is the responsibility of the user of this standard to establish appropriate safety, health, and environmental practices and determine the applicability of regulatory limitations prior to use. 1.4 This international standard was developed in accordance with internationally recognized principles on standardization established in the Decision on Principles for the Development of International Standards, Guides and Recommendations issued by the World Trade Organization Technical Barriers to Trade (TBT) Committee.
ASTM C886-21 is classified under the following ICS (International Classification for Standards) categories: 71.100.99 - Other products of the chemical industry. The ICS classification helps identify the subject area and facilitates finding related standards.
ASTM C886-21 has the following relationships with other standards: It is inter standard links to ASTM D4175-23a, ASTM D4175-23e1, ASTM E448-82(2008), ASTM E171-94(2007), ASTM E171-94(2002), ASTM E448-82(1997)e1, ASTM E448-82(1997)e2, ASTM E448-82(2002)e1. Understanding these relationships helps ensure you are using the most current and applicable version of the standard.
ASTM C886-21 is available in PDF format for immediate download after purchase. The document can be added to your cart and obtained through the secure checkout process. Digital delivery ensures instant access to the complete standard document.
Standards Content (Sample)
This international standard was developed in accordance with internationally recognized principles on standardization established in the Decision on Principles for the
Development of International Standards, Guides and Recommendations issued by the World Trade Organization Technical Barriers to Trade (TBT) Committee.
Designation: C886 − 21
Standard Test Method for
Scleroscope Hardness Testing of Carbon and Graphite
Materials
This standard is issued under the fixed designation C886; the number immediately following the designation indicates the year of
original adoption or, in the case of revision, the year of last revision. A number in parentheses indicates the year of last reapproval. A
superscript epsilon (´) indicates an editorial change since the last revision or reapproval.
1. Scope* E171 Practice for Conditioning and Testing Flexible Barrier
Packaging
1.1 This test method covers the apparatus and procedure for
E448 Practice for Scleroscope Hardness Testing of Metallic
determining the hardness of carbon and graphite materials
2 Materials (Withdrawn 2017)
using the Model C-2 scleroscope with the hammer calibrated
2.2 ANSI Standard:
for use on carbon and graphite materials with particles smaller
ANSI C 64.1 Brushes for Electrical Machines
than 0.8 mm.
1.2 The values stated in SI units are to be regarded as
3. Terminology
standard. No other units of measurement are included in this
3.1 For definitions of terms used in this test method, refer to
standard.
Terminology D4175.
1.3 This standard does not purport to address all of the
safety concerns, if any, associated with its use. It is the
4. Summary of Test Method
responsibility of the user of this standard to establish appro-
4.1 The specimen is held in position, and the height of
priate safety, health, and environmental practices and deter-
reboundofadiamond-tippedhammerisobservedandrecorded
mine the applicability of regulatory limitations prior to use.
as the hardness number.
1.4 This international standard was developed in accor-
dance with internationally recognized principles on standard-
5. Significance and Use
ization established in the Decision on Principles for the
Development of International Standards, Guides and Recom-
5.1 Thescleroscopeisareboundhardnesstesterwithascale
mendations issued by the World Trade Organization Technical
dividedinto140equalparts.Forcarbonandgraphitematerials,
Barriers to Trade (TBT) Committee.
there is no established correlation between the Scleroscope
hardness scale and other hardness scales. The test is useful in
2. Referenced Documents
the evaluation and the manufacturing control of carbon and
graphite materials.
2.1 ASTM Standards:
D4175 Terminology Relating to Petroleum Products, Liquid
6. Interferences
Fuels, and Lubricants
6.1 Lack of alignment of the instrument, as specified in
Section 11, will cause low readings.
This test method is under the jurisdiction of ASTM Committee D02 on
6.2 The specimen must be held firmly in position and must
Petroleum Products, Liquid Fuels, and Lubricants and is the direct responsibility of
have adequate support from the anvil on which the sample
Subcommittee D02.F0 on Manufactured Carbon and Graphite Products.
rests. Neglect of alignment, positioning, or support will result
Current edition approved Oct. 1, 2021. Published October 2021. Originally
approved in 1988. Last previous edition approved in 2015 as C886 – 98 (2015).
in low readings.
DOI: 10.1520/C0886-21.
2 6.3 Rough surface finish, above 3.2 µmAA, may cause low
Registered trademark of the Shore Instrument and Manufacturing Co., Inc.,
80-A Commercial St., Freeport, NY 11520, and available from Instron Worldwide
readings.
Headquarters, 825 University Ave., Norwood, MA 02062, www.instron.com.
3 6.4 Indentationsthataresuperimposedorspacedtooclosely
This test method may be more readily understood by referring to the following
documents: Practice E448,ANSI C 64.1, Brushes for Electrical Machines, available
together (approximately 3 mm) will cause incorrect readings.
fromAmericanNationalStandardsInstitute,1430Broadway,NewYork,NY10017,
andLysaghtandDeBellis,IndentationHardnessTesting,AmericanChainandCable
Corp., Reinhold Publishing Co., 1969.
4 5
For referenced ASTM standards, visit the ASTM website, www.astm.org, or The last approved version of this historical standard is referenced on
contact ASTM Customer Service at service@astm.org. For Annual Book of ASTM www.astm.org.
Standards volume information, refer to the standard’s Document Summary page on Available from American National Standards Institute (ANSI), 25 W. 43rd St.,
the ASTM website. 4th Floor, New York, NY 10036, http://www.ansi.org.
*A Summary of Changes section appears at the end of this standard
Copyright © ASTM International, 100 Barr Harbor Drive, PO Box C700, West Conshohocken, PA 19428-2959. United States
C886 − 21
7. Apparatus 11.6 Lower the tube against the specimen, and hold firmly.
7.1 Table, or equivalent, firm, for support. 11.7 Release the hammer and read the height of the re-
bound.
7.2 Scleroscope, Model C-2, equipped with a hammer
calibrated
...
This document is not an ASTM standard and is intended only to provide the user of an ASTM standard an indication of what changes have been made to the previous version. Because
it may not be technically possible to adequately depict all changes accurately, ASTM recommends that users consult prior editions as appropriate. In all cases only the current version
of the standard as published by ASTM is to be considered the official document.
Designation: C886 − 98 (Reapproved 2015) C886 − 21
Standard Test Method for
Scleroscope Hardness Testing of Carbon and Graphite
Materials
This standard is issued under the fixed designation C886; the number immediately following the designation indicates the year of
original adoption or, in the case of revision, the year of last revision. A number in parentheses indicates the year of last reapproval. A
superscript epsilon (´) indicates an editorial change since the last revision or reapproval.
1. Scope Scope*
1.1 This test method covers the apparatus and procedure for determining the hardness of carbon and graphite materials using the
2 3
Model C-2 scleroscope with the hammer calibrated for use on carbon and graphite materials with particles smaller than 0.8 mm.
1.2 The values stated in SI units are to be regarded as standard. No other units of measurement are included in this standard.
1.3 This standard does not purport to address all of the safety concerns, if any, associated with its use. It is the responsibility
of the user of this standard to establish appropriate safety safety, health, and healthenvironmental practices and determine the
applicability of regulatory limitations prior to use.
1.4 This international standard was developed in accordance with internationally recognized principles on standardization
established in the Decision on Principles for the Development of International Standards, Guides and Recommendations issued
by the World Trade Organization Technical Barriers to Trade (TBT) Committee.
2. Referenced Documents
2.1 ASTM Standards:
D4175 Terminology Relating to Petroleum Products, Liquid Fuels, and Lubricants
E171 Practice for Conditioning and Testing Flexible Barrier Packaging
E448 Practice for Scleroscope Hardness Testing of Metallic Materials (Withdrawn 2017)
2.2 ANSI Standard:
ANSI C 64.1 Brushes for Electrical Machines
3. Terminology
3.1 For definitions of terms used in this test method, refer to Terminology D4175.
This test method is under the jurisdiction of ASTM Committee D02 on Petroleum Products, Liquid Fuels, and Lubricants and is the direct responsibility of Subcommittee
D02.F0 on Manufactured Carbon and Graphite Products.
Current edition approved Oct. 1, 2015Oct. 1, 2021. Published December 2015October 2021. Originally approved in 1988. Last previous edition approved in 20102015
ɛ1
as C886 – 98 (2010)(2015). . DOI: 10.1520/C0886-98R15.10.1520/C0886-21.
Registered trademark of the Shore Instrument and Manufacturing Co., Inc., 80-A Commercial St., Freeport, NY 11520, and available from Instron Worldwide
Headquarters, 825 University Ave., Norwood, MA 02062, www.instron.com.
This test method may be more readily understood by referring to the following documents: Practice E448, ANSI C 64.1, Brushes for Electrical Machines, available from
American National Standards Institute, 1430 Broadway, New York, NY 10017, and Lysaght and DeBellis, Indentation Hardness Testing, American Chain and Cable Corp.,
Reinhold Publishing Co., 1969.
For referenced ASTM standards, visit the ASTM website, www.astm.org, or contact ASTM Customer Service at service@astm.org. For Annual Book of ASTM Standards
volume information, refer to the standard’s Document Summary page on the ASTM website.
The last approved version of this historical standard is referenced on www.astm.org.
Available from American National Standards Institute (ANSI), 25 W. 43rd St., 4th Floor, New York, NY 10036, http://www.ansi.org.
*A Summary of Changes section appears at the end of this standard
Copyright © ASTM International, 100 Barr Harbor Drive, PO Box C700, West Conshohocken, PA 19428-2959. United States
C886 − 21
4. Summary of Test Method
4.1 The specimen is held in position, and the height of rebound of a diamond-tipped hammer is observed and recorded as the
hardness number.
5. Significance and Use
5.1 The scleroscope is a rebound hardness tester with a scale divided into 140 equal parts. For carbon and graphite materials, there
is no established correlation between the Scleroscope hardness scale and other hardness scales. The test is useful in the evaluation
and the manufacturing control of carbon and graphite materials.
6. Interferences
6.1 Lack of alignment of the instrument, as specified in Section 1011, will cause low readings.
6.2 The specimen must be held firmly in position and must have adequate support from the anvil on which the sample rests.
Neglect of alignment, positioning, or support will result in low readings.
6.3 Rough surface finish, above 3175-nm3.2 μm AA, may cause low readings.
6.4 Indentations that are superimposed or spaced too closely together (approximately 3 mm) will cause incorrect readings.
7. Apparatus
7.1 Table, or equivalent, firm, for support.
7.2 Scleroscope, Model C-2, equipped with a hammer calibrated by the manufacturer for use on carbon and graphite materials.
8. Test
...



Questions, Comments and Discussion
Ask us and Technical Secretary will try to provide an answer. You can facilitate discussion about the standard in here.
Loading comments...