ASTM G209-14(2022)
(Practice)Standard Practice for Detecting mu-phase in Wrought Nickel-Rich, Chromium, Molybdenum-Bearing Alloys
Standard Practice for Detecting mu-phase in Wrought Nickel-Rich, Chromium, Molybdenum-Bearing Alloys
SIGNIFICANCE AND USE
4.1 These test methods describe laboratory tests to determine the presence of mu-phase in Wrought Nickel-Rich, Chromium, and Molybdenum-Bearing Alloys through comparison of microstructure observed for etched metallographic specimens to a glossary of photomicrographs displaying the presence and absence of mu-phase in the microstructure. The presence of mu-phase in the microstructure may significantly reduce the corrosion resistance, strength, toughness and ductility of Wrought Nickel-Rich, Chromium, and Molybdenum-Bearing Alloys.
SCOPE
1.1 This practice incorporates etching and metallographic examination of Wrought Nickel-Rich, Chromium, Molybdenum-Bearing Alloys such as, but not limited to, UNS N06686 and UNS N10276.
1.2 Microstructures have a strong influence on properties and successful application of metals and alloys. The presence of mu-phase in the microstructure may significantly reduce the corrosion resistance of Wrought Nickel-Rich, Chromium, and Molybdenum-Bearing Alloys.
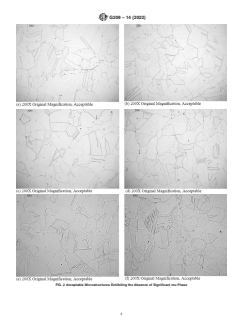
1.3 This practice may be used to determine the presence of mu-phase in Wrought Nickel-Rich, Chromium, and Molybdenum-Bearing Alloys through comparison of microstructure observed for etched metallographic specimens to a glossary of photomicrographs displaying the presence and absence of mu-phase in the microstructure.
1.4 The values stated in SI units are to be regarded as standard. The values given in parentheses after SI units are provided for information only and are not considered standard.
1.5 This standard does not purport to address all of the safety concerns, if any, associated with its use. It is the responsibility of the user of this standard to establish appropriate safety, health, and environmental practices and determine the applicability of regulatory limitations prior to use.
1.6 This international standard was developed in accordance with internationally recognized principles on standardization established in the Decision on Principles for the Development of International Standards, Guides and Recommendations issued by the World Trade Organization Technical Barriers to Trade (TBT) Committee.
General Information
- Status
- Published
- Publication Date
- 30-Sep-2022
- Technical Committee
- G01 - Corrosion of Metals
- Drafting Committee
- G01.05 - Laboratory Corrosion Tests
Relations
- Effective Date
- 01-Jun-2015
- Effective Date
- 01-Nov-2014
- Effective Date
- 01-Oct-2009
- Effective Date
- 01-Oct-2008
- Effective Date
- 01-Jul-2007
- Effective Date
- 01-Jul-2007
- Effective Date
- 01-Mar-2006
- Effective Date
- 10-May-2003
- Effective Date
- 10-Jan-2003
- Effective Date
- 10-Dec-2001
- Effective Date
- 10-Dec-2001
- Effective Date
- 10-Dec-2001
- Effective Date
- 10-Dec-2001
- Effective Date
- 10-Apr-2001
- Effective Date
- 10-Apr-2001
Overview
ASTM G209-14(2022), "Standard Practice for Detecting mu-phase in Wrought Nickel-Rich, Chromium, Molybdenum-Bearing Alloys," provides a systematic laboratory approach for identifying the presence of mu-phase in nickel-rich alloys that also contain chromium and molybdenum. Through metallographic specimen preparation, etching, and microstructure comparison, this standard supports quality assurance and materials selection processes for industries where corrosion resistance and mechanical integrity are critical.
Mu-phase is a brittle, rhombohedral intermetallic phase that can form in certain nickel-based alloys, especially after exposure to high temperatures. Its presence may significantly degrade corrosion resistance, reduce strength, toughness, and ductility, potentially leading to premature material failure in demanding applications.
Key Topics
Sample Preparation:
- Procedures for cutting, mounting, grinding, and polishing specimens to generate a surface suitable for metallographic examination.
- Emphasis on maintaining consistent sample orientations and representative cross-sections for reliable microstructural analysis.
Etching Methods:
- Guidelines for electrolytic etching, using prescribed reagents and techniques to reveal microstructural features.
- Recommendations for etchant selection and process parameters to ensure clear differentiation of phases.
Metallographic Examination:
- Instructions for visual and photographic examination of etched specimens at 200× magnification.
- Comparison of observed microstructures with photomicrograph references to identify the presence or absence of mu-phase.
Evaluation Criteria:
- Determination of acceptability based on microstructure, with clear criteria for rejection when significant mu-phase is identified.
- Requirements for comprehensive reporting, including documentation of sample source, orientation, processing steps, and evaluation results.
Health and Safety:
- Reminder that the standard does not address specific safety concerns and that appropriate health, safety, and environmental practices must be established by the user.
Applications
ASTM G209-14(2022) is essential in industries where the long-term performance of wrought nickel-rich, chromium, and molybdenum-bearing alloys is a priority, including:
- Chemical Process Equipment: Ensures materials meet corrosion resistance requirements by detecting detrimental mu-phase, crucial for stability in harsh chemical environments.
- Oil & Gas Industry: Applied in the assessment of materials for components exposed to aggressive media or high temperatures, helping prevent material failure due to loss of mechanical properties.
- Power Generation: Supports the selection and verification of heat-resistant alloys in turbines, reactors, and other high-temperature equipment.
- Materials Certification and Quality Control: Provides procedures for acceptance testing and verification of alloy batches, protecting end users against substandard materials.
- Metallurgical Research: Assists in alloy development by enabling controlled assessment of microstructural changes due to processing or operational exposure.
Using ASTM G209-14(2022) increases confidence in alloy performance, extends service life, and prevents costly failures by identifying microstructural threats before deployment.
Related Standards
Several ASTM standards complement or reference this practice, enhancing its applicability within metallographic and corrosion testing contexts:
- ASTM D1193: Specification for Reagent Water
- ASTM E3: Guide for Preparation of Metallographic Specimens
- ASTM E7: Terminology Relating to Metallography
- ASTM E1245: Practice for Determining Inclusion or Second-Phase Constituent Content of Metals by Automatic Image Analysis
- ASTM E1268: Practice for Assessing the Degree of Banding or Orientation of Microstructures
- ASTM G193: Terminology and Acronyms Relating to Corrosion
These related standards ensure consistency and reliability in sample preparation, terminology, and evaluation, supporting robust applications of ASTM G209-14(2022) in international materials testing and quality frameworks.
Buy Documents
ASTM G209-14(2022) - Standard Practice for Detecting mu-phase in Wrought Nickel-Rich, Chromium, Molybdenum-Bearing Alloys
Get Certified
Connect with accredited certification bodies for this standard

Element Materials Technology
Materials testing and product certification.

Inštitut za kovinske materiale in tehnologije
Institute of Metals and Technology. Materials testing, metallurgical analysis, NDT.
Sponsored listings
Frequently Asked Questions
ASTM G209-14(2022) is a standard published by ASTM International. Its full title is "Standard Practice for Detecting mu-phase in Wrought Nickel-Rich, Chromium, Molybdenum-Bearing Alloys". This standard covers: SIGNIFICANCE AND USE 4.1 These test methods describe laboratory tests to determine the presence of mu-phase in Wrought Nickel-Rich, Chromium, and Molybdenum-Bearing Alloys through comparison of microstructure observed for etched metallographic specimens to a glossary of photomicrographs displaying the presence and absence of mu-phase in the microstructure. The presence of mu-phase in the microstructure may significantly reduce the corrosion resistance, strength, toughness and ductility of Wrought Nickel-Rich, Chromium, and Molybdenum-Bearing Alloys. SCOPE 1.1 This practice incorporates etching and metallographic examination of Wrought Nickel-Rich, Chromium, Molybdenum-Bearing Alloys such as, but not limited to, UNS N06686 and UNS N10276. 1.2 Microstructures have a strong influence on properties and successful application of metals and alloys. The presence of mu-phase in the microstructure may significantly reduce the corrosion resistance of Wrought Nickel-Rich, Chromium, and Molybdenum-Bearing Alloys. 1.3 This practice may be used to determine the presence of mu-phase in Wrought Nickel-Rich, Chromium, and Molybdenum-Bearing Alloys through comparison of microstructure observed for etched metallographic specimens to a glossary of photomicrographs displaying the presence and absence of mu-phase in the microstructure. 1.4 The values stated in SI units are to be regarded as standard. The values given in parentheses after SI units are provided for information only and are not considered standard. 1.5 This standard does not purport to address all of the safety concerns, if any, associated with its use. It is the responsibility of the user of this standard to establish appropriate safety, health, and environmental practices and determine the applicability of regulatory limitations prior to use. 1.6 This international standard was developed in accordance with internationally recognized principles on standardization established in the Decision on Principles for the Development of International Standards, Guides and Recommendations issued by the World Trade Organization Technical Barriers to Trade (TBT) Committee.
SIGNIFICANCE AND USE 4.1 These test methods describe laboratory tests to determine the presence of mu-phase in Wrought Nickel-Rich, Chromium, and Molybdenum-Bearing Alloys through comparison of microstructure observed for etched metallographic specimens to a glossary of photomicrographs displaying the presence and absence of mu-phase in the microstructure. The presence of mu-phase in the microstructure may significantly reduce the corrosion resistance, strength, toughness and ductility of Wrought Nickel-Rich, Chromium, and Molybdenum-Bearing Alloys. SCOPE 1.1 This practice incorporates etching and metallographic examination of Wrought Nickel-Rich, Chromium, Molybdenum-Bearing Alloys such as, but not limited to, UNS N06686 and UNS N10276. 1.2 Microstructures have a strong influence on properties and successful application of metals and alloys. The presence of mu-phase in the microstructure may significantly reduce the corrosion resistance of Wrought Nickel-Rich, Chromium, and Molybdenum-Bearing Alloys. 1.3 This practice may be used to determine the presence of mu-phase in Wrought Nickel-Rich, Chromium, and Molybdenum-Bearing Alloys through comparison of microstructure observed for etched metallographic specimens to a glossary of photomicrographs displaying the presence and absence of mu-phase in the microstructure. 1.4 The values stated in SI units are to be regarded as standard. The values given in parentheses after SI units are provided for information only and are not considered standard. 1.5 This standard does not purport to address all of the safety concerns, if any, associated with its use. It is the responsibility of the user of this standard to establish appropriate safety, health, and environmental practices and determine the applicability of regulatory limitations prior to use. 1.6 This international standard was developed in accordance with internationally recognized principles on standardization established in the Decision on Principles for the Development of International Standards, Guides and Recommendations issued by the World Trade Organization Technical Barriers to Trade (TBT) Committee.
ASTM G209-14(2022) is classified under the following ICS (International Classification for Standards) categories: 77.040.30 - Chemical analysis of metals. The ICS classification helps identify the subject area and facilitates finding related standards.
ASTM G209-14(2022) has the following relationships with other standards: It is inter standard links to ASTM E7-15, ASTM E7-14, ASTM E7-03(2009), ASTM E1245-03(2008), ASTM E3-01(2007)e1, ASTM E3-01(2007), ASTM D1193-06, ASTM E7-03, ASTM E1245-03, ASTM E1268-99, ASTM E1268-01, ASTM E7-00, ASTM E7-01, ASTM E3-95, ASTM E3-01. Understanding these relationships helps ensure you are using the most current and applicable version of the standard.
ASTM G209-14(2022) is available in PDF format for immediate download after purchase. The document can be added to your cart and obtained through the secure checkout process. Digital delivery ensures instant access to the complete standard document.
Standards Content (Sample)
This international standard was developed in accordance with internationally recognized principles on standardization established in the Decision on Principles for the
Development of International Standards, Guides and Recommendations issued by the World Trade Organization Technical Barriers to Trade (TBT) Committee.
Designation: G209 − 14 (Reapproved 2022)
Standard Practice for
Detecting mu-phase in Wrought Nickel-Rich, Chromium,
Molybdenum-Bearing Alloys
This standard is issued under the fixed designation G209; the number immediately following the designation indicates the year of
original adoption or, in the case of revision, the year of last revision.Anumber in parentheses indicates the year of last reapproval.A
superscript epsilon (´) indicates an editorial change since the last revision or reapproval.
1. Scope 2. Referenced Documents
1.1 This practice incorporates etching and metallographic 2.1 ASTM Standards:
examination of Wrought Nickel-Rich, Chromium, D1193Specification for Reagent Water
Molybdenum-BearingAlloys such as, but not limited to, UNS E3Guide for Preparation of Metallographic Specimens
N06686 and UNS N10276. E7Terminology Relating to Metallography
E1245Practice for Determining the Inclusion or Second-
1.2 Microstructures have a strong influence on properties
Phase Constituent Content of Metals byAutomatic Image
and successful application of metals and alloys. The presence
Analysis
ofmu-phaseinthemicrostructuremaysignificantlyreducethe
E1268Practice for Assessing the Degree of Banding or
corrosion resistance of Wrought Nickel-Rich, Chromium, and
Orientation of Microstructures
Molybdenum-Bearing Alloys.
G193Terminology and Acronyms Relating to Corrosion
1.3 This practice may be used to determine the presence of
mu-phase in Wrought Nickel-Rich, Chromium, and 3. Terminology
Molybdenum-Bearing Alloys through comparison of micro-
3.1 Definitions:
structure observed for etched metallographic specimens to a
3.1.1 The terminology used herein, if not specifically de-
glossary of photomicrographs displaying the presence and
fined otherwise, shall be in accordance with Terminology
absence of mu-phase in the microstructure.
G193. Definitions provided herein and not given in Terminol-
1.4 The values stated in SI units are to be regarded as ogy G193 are limited only to this practice.
standard. The values given in parentheses after SI units are 3.1.2 For metallographic definitions used in this practice,
providedforinformationonlyandarenotconsideredstandard. refer to Terminology E7.
3.1.3 For evaluation of inclusions, secondary phases and
1.5 This standard does not purport to address all of the
banding, if desired, refer to Practices E1245 and E1268.
safety concerns, if any, associated with its use. It is the
3.2 Definitions of Terms Specific to This Standard:
responsibility of the user of this standard to establish appro-
3.2.1 mu-phase (µ), n—rhombohedral phase which may
priate safety, health, and environmental practices and deter-
occur in Nickel-Rich, Chromium, Molybdenum-Bearing Al-
mine the applicability of regulatory limitations prior to use.
loysandmayoccurascoarse,irregularplatelets,whichformat
1.6 This international standard was developed in accor-
high temperature.
dance with internationally recognized principles on standard-
ization established in the Decision on Principles for the
4. Significance and Use
Development of International Standards, Guides and Recom-
4.1 These test methods describe laboratory tests to deter-
mendations issued by the World Trade Organization Technical
mine the presence of mu-phase in Wrought Nickel-Rich,
Barriers to Trade (TBT) Committee.
Chromium, and Molybdenum-Bearing Alloys through com-
parison of microstructure observed for etched metallographic
This practice is under the jurisdiction ofASTM Committee G01 on Corrosion
of Metals and is the direct responsibility of Subcommittee G01.05 on Laboratory
Corrosion Tests. For referenced ASTM standards, visit the ASTM website, www.astm.org, or
Current edition approved Oct. 1, 2022. Published October 2022. Originally contact ASTM Customer Service at service@astm.org. For Annual Book of ASTM
approved in 2012. Last previous edition approved in 2018 as G209–14 (2018). Standards volume information, refer to the standard’s Document Summary page on
DOI: 10.1520/G0209-14R22. the ASTM website.
Copyright © ASTM International, 100 Barr Harbor Drive, PO Box C700, West Conshohocken, PA 19428-2959. United States
G209 − 14 (2022)
5.2 Coarse Grinding—Use a 120 grit silicon carbide (SiC)
wet-belt or disk grinder and light contact pressure to obtain a
plane surface free from deep grooves. In addition to producing
a flat surface, this procedure removes burred edges or other
mechanical damage which may have occurred during section-
ing.
5.3 Mounting—Toensureflatness,andfacilitatehandling,it
is recommended that specimens be mounted in phenolic,
acrylic or cold-setting epoxy resins. Epoxy resins involve the
blending of a liquid or powder resin in a suitable hardener to
initiate an exothermic reaction to promote hardening and
curing at room temperature.This usually requires an overnight
operation.However,anadvantageofepoxyisthatthemountis
semitransparent and permits observation of all sides of the
specimen during each phase of the preparation. (The advan-
tages and use of acrylic mounting resin are similar to epoxy.)
Compression molding techniques may be used with phenolic
powders to produce the standard 31.7mm (1 ⁄4in.) diameter
mounts.Phenolicmountsareconvenientwhentimeconstraints
FIG. 1 Method of Designing Location of Area Shown in Photomi-
crograph (Guide E3) do not permit an overnight cold-setting operation.
5.4 Fine Grinding and Polishing—Rotating discs flushed
with running water are recommended with successively finer
specimens to a glossary of photomicrographs displaying the grit papers of 220grit, 320grit, 400grit, and 600 grit SiC. (A
presence and absence of mu-phase in the microstructure. The lighttomediumamountofpressureisexertedonthespecimen
presence of mu-phase in the microstructure may significantly to minimize the depth of deformation). Best results are
reduce the corrosion resistance, strength, toughness and duc- obtainedonthe600SiCpaperbygrindingthespecimentwice.
tility of Wrought Nickel-Rich, Chromium, and Molybdenum- Specimens shall be rotated 90 degrees after each step until the
Bearing Alloys. abrasive scratches from the preceding grit have been removed.
In each step, the grinding time shall be increased to twice as
5. Sample Preparation and Etching
long as that required to remove previous scratches. This
ensures removal of disturbed metal from the previous step.
5.1 Sectioning:
Considerable care shall be used in the fine grinding stage to
5.1.1 The selection of test specimens for metallographic
prevent the formation of artifacts. See Guide E3 for automated
examination is extremely important because, if their interpre-
method.
tationistobeofvalue,thespecimensmustberepresentativeof
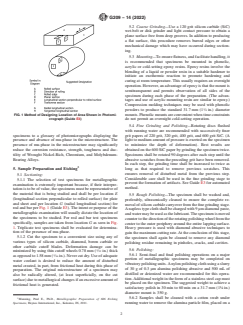
the material that is being studied and shall be per location E
5.5 Rough Polishing—The specimen shall be washed and,
(longitudinal section perpendicular to rolled surface) for plate
preferably, ultrasonically cleaned to ensure the complete re-
and sheet and per location G (radial longitudinal section) for
movalofsiliconcarbidecarryoverfromthefinegrindingstage.
rod and bar per Fig. 1 (Guide E3).The intent or purpose of the
Anaplesstypeclothshallbechargedwith9µmdiamondpaste,
metallographic examination will usually dictate the location of
andwatermaybeusedasthelubricant.Thespecimenismoved
the specimens to be studied. For rod and bar test specimens
countertothedirectionoftherotatingpolishingwheelfromthe
specifically, samples are taken from location G as seen in Fig.
center to the outer periphery around the entire lapping surface.
1. Triplicate test specimens shall be evaluated for determina-
Heavy pressure is used with diamond abrasive techniques to
tion of the presence of mu-phase.
gainthemaximumcuttingrate.Attheconclusionofthisstage,
5.1.2 Cut the specimen to a convenient size using any of
the specimen shall again be cleaned to remove any diamond
various types of silicon carbide, diamond, boron carbide or
polishing residue remaining in pinholes, cracks, and cavities.
other carbide cutoff blades. Deformation damage can be
5.6 Polishing:
minimized by using thin cutoff wheels 0.78 mm ( ⁄32 in.) thick
5.6.1 Semi-final and final polishing operations on a major
asopposedto1.58mm( ⁄16in.).Nevercutdry.Useofadequate
portion of metallographic specimens may be completed on
water coolant is desired to reduce the amount of disturbed
vibratorypolishingunits.Anylonpolishingclothusingaslurry
metal created, in part, from frictional heat during this phase of
of 30 g of 0.3 µm alumina polishing abrasive and 500 mL of
preparation. The original microstructure of a specimen may
distilled or deionized water are recommended for this opera-
also be radically altered, (at least superficially, on the cut
tion.Additionalweightintheformofastainlesssteelcapmust
surface)duetometallurgicalchangesifanexcessiveamountof
be placed on the specimen. The suggested weight to achieve a
frictional heat is generated.
satisfactory polish in 30min to 60min on a 31.7mm (1¼in.)
diameter mount is 350 g.
5.6.2 S
...


Questions, Comments and Discussion
Ask us and Technical Secretary will try to provide an answer. You can facilitate discussion about the standard in here.
Loading comments...