ASTM A578/A578M-17(2023)
(Specification)Standard Specification for Straight-Beam Ultrasonic Examination of Rolled Steel Plates for Special Applications
Standard Specification for Straight-Beam Ultrasonic Examination of Rolled Steel Plates for Special Applications
ABSTRACT
This procedure covers the standard and acceptance standards for straight-beam, pulse-echo, ultrasonic examination of rolled carbon and alloy steel plates. The amplitude linearity of the apparatus to be used shall be checked by positioning the transducer over the depth resolution notch in the IIW or similar block. The inspection shall be performed in an area free of operations that interfere with proper performance of the test. The test shall be performed either by direct contact, immersion, or liquid column coupling. Grid scanning shall be conducted along a continuous perpendicular line on the center. All discontinuities causing complete loss of reflection shall be recorded.
SCOPE
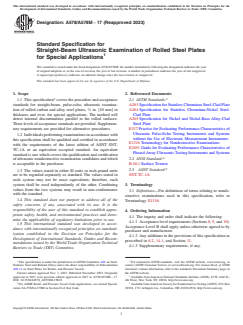
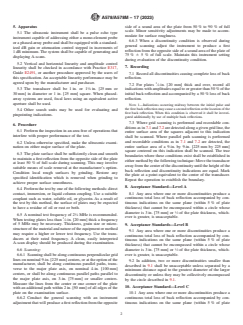
1.1 This specification2 covers the procedure and acceptance standards for straight-beam, pulse-echo, ultrasonic examination of rolled carbon and alloy steel plates, 3/8 in. [10 mm] in thickness and over, for special applications. The method will detect internal discontinuities parallel to the rolled surfaces. Three levels of acceptance standards are provided. Supplementary requirements are provided for alternative procedures.
1.2 Individuals performing examinations in accordance with this specification shall be qualified and certified in accordance with the requirements of the latest edition of ASNT SNT-TC-1A or an equivalent accepted standard. An equivalent standard is one which covers the qualification and certification of ultrasonic nondestructive examination candidates and which is acceptable to the purchaser.
1.3 The values stated in either SI units or inch-pound units are to be regarded separately as standard. The values stated in each system may not be exact equivalents; therefore, each system shall be used independently of the other. Combining values from the two systems may result in non-conformance with the standard.
1.4 This standard does not purport to address all of the safety concerns, if any, associated with its use. It is the responsibility of the user of this standard to establish appropriate safety, health, and environmental practices and determine the applicability of regulatory limitations prior to use.
1.5 This international standard was developed in accordance with internationally recognized principles on standardization established in the Decision on Principles for the Development of International Standards, Guides and Recommendations issued by the World Trade Organization Technical Barriers to Trade (TBT) Committee.
General Information
- Status
- Published
- Publication Date
- 31-Oct-2023
- Technical Committee
- A01 - Steel, Stainless Steel and Related Alloys
- Drafting Committee
- A01.11 - Steel Plates for Boilers and Pressure Vessels
Relations
- Effective Date
- 01-Nov-2023
- Effective Date
- 01-Feb-2024
- Effective Date
- 01-Sep-2023
- Effective Date
- 01-Nov-2023
- Referred By
ASTM A264-12(2019) - Standard Specification for Stainless Chromium-Nickel Steel-Clad Plate - Effective Date
- 01-Nov-2023
- Effective Date
- 01-Nov-2023
- Effective Date
- 01-Nov-2023
- Effective Date
- 01-Nov-2023
- Effective Date
- 01-Nov-2023
- Effective Date
- 01-Nov-2023
- Effective Date
- 01-Nov-2023
- Referred By
ASTM A265-12(2019) - Standard Specification for Nickel and Nickel-Base Alloy-Clad Steel Plate - Effective Date
- 01-Nov-2023
- Effective Date
- 01-Nov-2023
- Effective Date
- 01-Nov-2023
- Effective Date
- 01-Nov-2023
Overview
ASTM A578/A578M-17(2023) Standard Specification for Straight-Beam Ultrasonic Examination of Rolled Steel Plates for Special Applications defines procedures and acceptance criteria for straight-beam, pulse-echo ultrasonic testing of rolled carbon and alloy steel plates with thicknesses of 10 mm (3/8 in.) and above. Developed and maintained by ASTM International, this standard ensures reliable detection of internal discontinuities parallel to rolled surfaces, which is crucial in safety-critical industries such as construction, power generation, and transportation.
This specification outlines equipment requirements, test conditions, scanning methods, operator certification, and reporting responsibilities. Three levels of acceptance standards address various quality requirements, while supplementary provisions allow for alternative procedures and stricter criteria as needed.
Key Topics
Ultrasonic Examination Method
The standard covers straight-beam, pulse-echo ultrasonic testing, either by direct contact, immersion, or through a liquid column. Instruments must display clear A-scan results and be verified for amplitude linearity and sensitivity.Plate Thickness and Coverage
Testing is applicable to rolled steel plates of 10 mm (3/8 in.) and greater. Scanning is performed using grid or parallel path patterns, ensuring comprehensive inspection of the plate surfaces.Acceptance Levels
Three acceptance levels (A, B, C) are provided, with Level B as the default unless otherwise specified. Each level sets out specific criteria for allowable discontinuities and required scanning coverage.Operator Qualification
Personnel must be qualified and certified according to ASNT SNT-TC-1A or an equivalent recognized standard, ensuring consistency and competency.Reporting and Marking
All relevant findings, parameters, and testing details must be clearly reported and documented. Accepted plates are marked according to the applicable acceptance level.International and Regulatory Alignment
The standard was developed per international standardization principles and may be referenced for compliance with technical barriers to trade (TBT) as established by the World Trade Organization.
Applications
Pressure Vessel Manufacturing
Ensures that steel plates used in pressure vessels are free of harmful internal flaws, supporting the integrity of boilers, tanks, and similar components.Structural and Bridge Steel
Applied in the inspection of steel plates for buildings, bridges, and critical infrastructure, promoting safety and long-term durability.Shipbuilding and Offshore
Used in the production of vessel hulls and offshore platforms, where the detection of subsurface discontinuities is essential for reliability in harsh environments.Heavy Equipment and Industrial Machinery
Suitable for the manufacture of large-scale machinery, where material soundness directly affects operational safety.Materials Acceptance and Quality Control
Supports manufacturers and purchasers in verifying that supplied rolled steel meets rigorous quality benchmarks, reducing risk of failure in service.
Related Standards
- ASTM A263 – Specification for Stainless Chromium Steel-Clad Plate
- ASTM A264 – Specification for Stainless Chromium-Nickel Steel-Clad Plate
- ASTM A265 – Specification for Nickel and Nickel-Base Alloy-Clad Steel Plate
- ASTM E317 – Practice for Evaluating Performance Characteristics of Ultrasonic Pulse-Echo Testing Instruments
- ASTM E2491 – Guide for Evaluating Performance Characteristics of Phased-Array Ultrasonic Testing Instruments
- ASTM E1316 – Terminology for Nondestructive Examinations
- ANSI B46.1 – Surface Texture
- ASNT SNT-TC-1A – Personnel Qualification and Certification in Nondestructive Testing
ASTM A578/A578M is also referenced in codes such as the ASME Boiler and Pressure Vessel Code for ultrasonic examination requirements in high-pressure service applications.
Keywords: ASTM A578, straight-beam ultrasonic examination, rolled steel plates, nondestructive testing, pulse-echo ultrasonic, acceptance standards, steel plate inspection, pressure vessel steel, ultrasonic testing standard.
Buy Documents
ASTM A578/A578M-17(2023) - Standard Specification for Straight-Beam Ultrasonic Examination of Rolled Steel Plates for Special Applications
Get Certified
Connect with accredited certification bodies for this standard

Element Materials Technology
Materials testing and product certification.

Inštitut za kovinske materiale in tehnologije
Institute of Metals and Technology. Materials testing, metallurgical analysis, NDT.
Sponsored listings
Frequently Asked Questions
ASTM A578/A578M-17(2023) is a technical specification published by ASTM International. Its full title is "Standard Specification for Straight-Beam Ultrasonic Examination of Rolled Steel Plates for Special Applications". This standard covers: ABSTRACT This procedure covers the standard and acceptance standards for straight-beam, pulse-echo, ultrasonic examination of rolled carbon and alloy steel plates. The amplitude linearity of the apparatus to be used shall be checked by positioning the transducer over the depth resolution notch in the IIW or similar block. The inspection shall be performed in an area free of operations that interfere with proper performance of the test. The test shall be performed either by direct contact, immersion, or liquid column coupling. Grid scanning shall be conducted along a continuous perpendicular line on the center. All discontinuities causing complete loss of reflection shall be recorded. SCOPE 1.1 This specification2 covers the procedure and acceptance standards for straight-beam, pulse-echo, ultrasonic examination of rolled carbon and alloy steel plates, 3/8 in. [10 mm] in thickness and over, for special applications. The method will detect internal discontinuities parallel to the rolled surfaces. Three levels of acceptance standards are provided. Supplementary requirements are provided for alternative procedures. 1.2 Individuals performing examinations in accordance with this specification shall be qualified and certified in accordance with the requirements of the latest edition of ASNT SNT-TC-1A or an equivalent accepted standard. An equivalent standard is one which covers the qualification and certification of ultrasonic nondestructive examination candidates and which is acceptable to the purchaser. 1.3 The values stated in either SI units or inch-pound units are to be regarded separately as standard. The values stated in each system may not be exact equivalents; therefore, each system shall be used independently of the other. Combining values from the two systems may result in non-conformance with the standard. 1.4 This standard does not purport to address all of the safety concerns, if any, associated with its use. It is the responsibility of the user of this standard to establish appropriate safety, health, and environmental practices and determine the applicability of regulatory limitations prior to use. 1.5 This international standard was developed in accordance with internationally recognized principles on standardization established in the Decision on Principles for the Development of International Standards, Guides and Recommendations issued by the World Trade Organization Technical Barriers to Trade (TBT) Committee.
ABSTRACT This procedure covers the standard and acceptance standards for straight-beam, pulse-echo, ultrasonic examination of rolled carbon and alloy steel plates. The amplitude linearity of the apparatus to be used shall be checked by positioning the transducer over the depth resolution notch in the IIW or similar block. The inspection shall be performed in an area free of operations that interfere with proper performance of the test. The test shall be performed either by direct contact, immersion, or liquid column coupling. Grid scanning shall be conducted along a continuous perpendicular line on the center. All discontinuities causing complete loss of reflection shall be recorded. SCOPE 1.1 This specification2 covers the procedure and acceptance standards for straight-beam, pulse-echo, ultrasonic examination of rolled carbon and alloy steel plates, 3/8 in. [10 mm] in thickness and over, for special applications. The method will detect internal discontinuities parallel to the rolled surfaces. Three levels of acceptance standards are provided. Supplementary requirements are provided for alternative procedures. 1.2 Individuals performing examinations in accordance with this specification shall be qualified and certified in accordance with the requirements of the latest edition of ASNT SNT-TC-1A or an equivalent accepted standard. An equivalent standard is one which covers the qualification and certification of ultrasonic nondestructive examination candidates and which is acceptable to the purchaser. 1.3 The values stated in either SI units or inch-pound units are to be regarded separately as standard. The values stated in each system may not be exact equivalents; therefore, each system shall be used independently of the other. Combining values from the two systems may result in non-conformance with the standard. 1.4 This standard does not purport to address all of the safety concerns, if any, associated with its use. It is the responsibility of the user of this standard to establish appropriate safety, health, and environmental practices and determine the applicability of regulatory limitations prior to use. 1.5 This international standard was developed in accordance with internationally recognized principles on standardization established in the Decision on Principles for the Development of International Standards, Guides and Recommendations issued by the World Trade Organization Technical Barriers to Trade (TBT) Committee.
ASTM A578/A578M-17(2023) is classified under the following ICS (International Classification for Standards) categories: 77.040.20 - Non-destructive testing of metals. The ICS classification helps identify the subject area and facilitates finding related standards.
ASTM A578/A578M-17(2023) has the following relationships with other standards: It is inter standard links to ASTM A578/A578M-17, ASTM E1316-24, ASTM E1316-23b, ASTM A737/A737M-17, ASTM A264-12(2019), ASTM A841/A841M-17, ASTM A671/A671M-20, ASTM A204/A204M-17(2022), ASTM A832/A832M-17, ASTM A299/A299M-17(2022), ASTM B432-19, ASTM A265-12(2019), ASTM A736/A736M-17, ASTM A225/A225M-17(2022), ASTM A537/A537M-20. Understanding these relationships helps ensure you are using the most current and applicable version of the standard.
ASTM A578/A578M-17(2023) is available in PDF format for immediate download after purchase. The document can be added to your cart and obtained through the secure checkout process. Digital delivery ensures instant access to the complete standard document.
Standards Content (Sample)
This international standard was developed in accordance with internationally recognized principles on standardization established in the Decision on Principles for the
Development of International Standards, Guides and Recommendations issued by the World Trade Organization Technical Barriers to Trade (TBT) Committee.
Designation: A578/A578M − 17 (Reapproved 2023)
Standard Specification for
Straight-Beam Ultrasonic Examination of Rolled Steel Plates
for Special Applications
This standard is issued under the fixed designation A578/A578M; the number immediately following the designation indicates the year
of original adoption or, in the case of revision, the year of last revision. A number in parentheses indicates the year of last reapproval.
A superscript epsilon (´) indicates an editorial change since the last revision or reapproval.
This standard has been approved for use by agencies of the U.S. Department of Defense.
1. Scope 2. Referenced Documents
2 3
1.1 This specification covers the procedure and acceptance 2.1 ASTM Standards:
standards for straight-beam, pulse-echo, ultrasonic examina- A263 Specification for Stainless Chromium Steel-Clad Plate
tion of rolled carbon and alloy steel plates, ⁄8 in. [10 mm] in A264 Specification for Stainless Chromium-Nickel Steel-
thickness and over, for special applications. The method will Clad Plate
detect internal discontinuities parallel to the rolled surfaces. A265 Specification for Nickel and Nickel-Base Alloy-Clad
Three levels of acceptance standards are provided. Supplemen- Steel Plate
tary requirements are provided for alternative procedures. E317 Practice for Evaluating Performance Characteristics of
Ultrasonic Pulse-Echo Testing Instruments and Systems
1.2 Individuals performing examinations in accordance with
without the Use of Electronic Measurement Instruments
this specification shall be qualified and certified in accordance
E1316 Terminology for Nondestructive Examinations
with the requirements of the latest edition of ASNT SNT-
E2491 Guide for Evaluating Performance Characteristics of
TC-1A or an equivalent accepted standard. An equivalent
Phased-Array Ultrasonic Testing Instruments and Systems
standard is one which covers the qualification and certification
of ultrasonic nondestructive examination candidates and which 2.2 ANSI Standard:
B 46.1 Surface Texture
is acceptable to the purchaser.
1.3 The values stated in either SI units or inch-pound units 2.3 ASNT Standard:
SNT-TC-1A
are to be regarded separately as standard. The values stated in
each system may not be exact equivalents; therefore, each
system shall be used independently of the other. Combining
3. Terminology
values from the two systems may result in non-conformance
3.1 Definitions—For definitions of terms relating to nonde-
with the standard.
structive examinations used in this specification, refer to
1.4 This standard does not purport to address all of the
Terminology E1316.
safety concerns, if any, associated with its use. It is the
responsibility of the user of this standard to establish appro-
4. Ordering Information
priate safety, health, and environmental practices and deter-
4.1 The inquiry and order shall indicate the following:
mine the applicability of regulatory limitations prior to use.
4.1.1 Acceptance level requirements (Sections 8, 9, and 10).
1.5 This international standard was developed in accor-
Acceptance Level B shall apply unless otherwise agreed to by
dance with internationally recognized principles on standard-
purchaser and manufacturer.
ization established in the Decision on Principles for the
4.1.2 Any additions to the provisions of this specification as
Development of International Standards, Guides and Recom-
prescribed in 6.2, 14.1, and Section 11.
mendations issued by the World Trade Organization Technical
4.1.3 Supplementary requirements, if any.
Barriers to Trade (TBT) Committee.
1 3
This specification is under the jurisdiction of ASTM Committee A01 on Steel, For referenced ASTM standards, visit the ASTM website, www.astm.org, or
Stainless Steel and Related Alloys and is the direct responsibility of Subcommittee contact ASTM Customer Service at service@astm.org. For Annual Book of ASTM
A01.11 on Steel Plates for Boilers and Pressure Vessels. Standards volume information, refer to the standard’s Document Summary page on
Current edition approved Nov. 1, 2023. Published November 2023. Originally the ASTM website.
approved in 1967. Last previous edition approved in 2017 as A578/A578M – 17. Available from American National Standards Institute (ANSI), 25 W. 43rd St.,
DOI: 10.1520/A0578_A0578M-17R23. 4th Floor, New York, NY 10036, http://www.ansi.org.
2 5
For ASME Boiler and Pressure Vessel Code applications, see related Specifi- Available from American Society for Nondestructive Testing (ASNT), P.O. Box
cation SA-578/SA-578M in Section II of that Code. 28518, 1711 Arlingate Ln., Columbus, OH 43228-0518, http://www.asnt.org.
Copyright © ASTM International, 100 Barr Harbor Drive, PO Box C700, West Conshohocken, PA 19428-2959. United States
A578/A578M − 17 (2023)
5. Apparatus side of a sound area of the plate from 50 % to 90 % of full
scale. Minor sensitivity adjustments may be made to accom-
5.1 The ultrasonic instrument shall be a pulse echo type
modate for surface roughness.
instrument capable of addressing either a mono-element probe
6.6.3 When a discontinuity condition is observed during
or a phased-array probe and shall be equipped with a standard-
general scanning adjust the instrument to produce a first
ized dB gain or attenuation control stepped in increments of
reflection from the opposite side of a sound area of the plate of
1 dB minimum. The system shall be capable of generating and
75 % 6 5 % of full scale. Maintain this instrument setting
displaying A-scans.
during evaluation of the discontinuity condition.
5.2 Vertical and horizontal linearity and amplitude control
7. Recording
linearity shall be checked in accordance with Practice E317,
Guide E2491, or another procedure approved by the users of
7.1 Record all discontinuities causing complete loss of back
this specification. An acceptable linearity performance may be reflection.
agreed upon by the manufacturer and purchaser.
7.2 For plates ⁄4 in. [20 mm] thick and over, record all
5.3 The transducer shall be 1 in. or 1 ⁄8 in. [25 mm or indications with amplitudes equal to or greater than 50 % of the
30 mm] in diameter or 1 in. [25 mm] square. When phased- initial back reflection and accompanied by a 50 % loss of back
array systems are used, focal laws using an equivalent active reflection.
aperture shall be used.
NOTE 1—Indications occurring midway between the initial pulse and
the first back reflection may cause a second reflection at the location of the
5.4 Other search units may be used for evaluating and
first back reflection. When this condition is observed it shall be investi-
pinpointing indications.
gated additionally by use of multiple back reflections.
7.3 Where grid scanning is performed and recordable con-
6. Procedure
ditions as in 7.1 and 7.2 are detected along a given grid line, the
6.1 Perform the inspection in an area free of operations that
entire surface area of the squares adjacent to this indication
interfere with proper performance of the test.
shall be scanned. Where parallel path scanning is performed
and recordable conditions as in 7.1 and 7.2 are detected, the
6.2 Unless otherwise specified, make the ultrasonic exami-
entire surface area of a 9-in. by 9-in. [225 mm by 225 mm]
nation on either major surface of the plate.
square centered on this indication shall be scanned. The true
6.3 The plate surface shall be sufficiently clean and smooth
boundaries where these conditions exist shall be established in
to maintain a first reflection from the opposite side of the plate
either method by the following technique: Move the transducer
at least 50 % of full scale during scanning. This may involve
away from the center of the discontinuity until the height of the
suitable means of scale removal at the manufacturer’s option.
back reflection and discontinuity indications are equal. Mark
Condition local rough surfaces by grinding. Restore any
the plate at a point equivalent to the center of the transducer.
specified identification which is removed when grinding to
Repeat the operation to establish the boundary.
achieve proper surface smoothness.
8. Acceptance Standard—Level A
6.4 Perform the test by one of the following methods: direct
8.1 Any area where one or more discontinuities produce a
contact, immersion, or liquid column coupling. Use a suitable
continuous total loss of back reflection accompanied by con-
couplant such as water, soluble oil, or glycerin. As a result of
tinuous indications on the same plane (within 5 % of plate
the test by this method, the surface of plates may be expected
thickness) that cannot be encompassed within a circle whose
to have a residue of oil or rust or both.
diameter is 3 in. [75 mm] or ⁄2 of the plate thickness, which-
6.5 A nominal test frequency of 2 ⁄4 MHz is recommended.
ever is greater, is unacceptable.
When testing plates less than ⁄4 in. [20 mm] thick a frequency
of 5 MHz may be necessary. Thickness, grain size or micro-
9. Acceptance Standards—Level B
structure of the material and nature of the equipment or method
9.1 Any area where one or more discontinuities produce a
may require a higher or lower test frequency. Use the trans-
continuous total loss of back reflection accompanied by con-
ducers at their rated frequency. A clean, easily interpreted
tinuous indications on the same plane (within 5 % of plate
A-scan display should be produced during the examination.
thickness) that cannot be encompassed within a circle whose
6.6 Scanning: diameter is 3 in. [75 mm] or ⁄2 of the plate thickness, which-
ever is greater, is unacceptable.
6.6.1 Scanning shall be along continuous perpendicular grid
lines on nominal 9-in. [225 mm] centers, or at the option of the
9.2 In addition, two or more discontinuities smaller than
manufacturer, shall be along continuous parallel paths, trans-
described in 9.1 shall be unacceptable unless separated by a
verse to the major plate axis, on nominal 4-in. [100 mm]
minimum distance equal to the greatest diameter of the larger
centers, or shall be along continuous parallel paths parallel to
discontinuity or unless they may be collectively encompassed
the major plate axis, on 3-in. [75 mm] or smaller centers.
by the circle described in 9.1.
Measure the lines from the center or one corner of the plate
10. Acceptance Standard—Level C
with an additional path within 2 in. [50 mm] of all edges of the
plate on the examination surface. 10.1 Any area where one or more discontinuities produce a
6.6.2 Conduct the general scanning with an instrument continuous total loss of back reflection accompanied by con-
adjustment that will produce a first reflection from the opposite tinuous indications on the same plane (within 5 % of plate
A578/A578M − 17 (2023)
thickness) that cannot be encompassed within a 1-in. [25 mm] at the place of manufacture prior to shipment, unless otherwise
diameter circle is unacceptable. specified, and shall be conducted without interfering unneces-
sarily with the manufacturer’s operations.
11. Report
11.1 Unless otherwise agreed to by the purchaser and the 13. Rehearing
manufacturer, the manufacturer shall report the following data:
13.1 The manufacturer reserves the right to discuss reject-
11.1.1 All recordable indications listed in Section 7 on a
able ultrasonically tested plate with the purchaser with the
sketch of the plate with sufficient data to relate the geometry
object of possible repair of the
...


Questions, Comments and Discussion
Ask us and Technical Secretary will try to provide an answer. You can facilitate discussion about the standard in here.
Loading comments...