ASTM F2251-13(2023)
(Test Method)Standard Test Method for Thickness Measurement of Flexible Packaging Material
Standard Test Method for Thickness Measurement of Flexible Packaging Material
SIGNIFICANCE AND USE
4.1 This test method provides a means for measuring a thickness dimension. Accurate measurement of thickness can be critical to meeting specifications and characterizing process, product, and material performance.
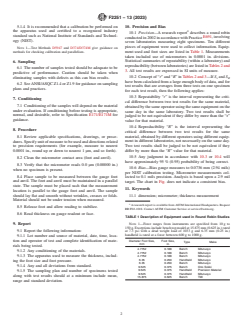
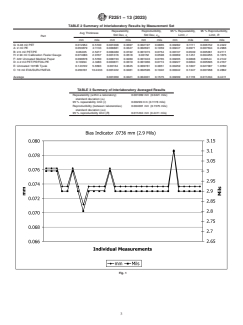
4.2 This test method does not address acceptability criteria. These need to be jointly determined by the user and producer of the product. Repeatability and reproducibility of measurement is shown in the Precision and Bias section. Attention should be given to the inherent variability of materials being measured as this can affect measurement outcome.
SCOPE
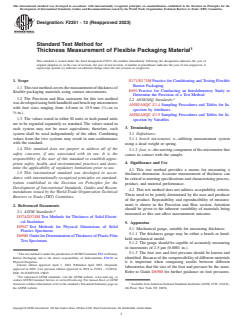
1.1 This test method covers the measurement of thickness of flexible packaging materials using contact micrometers.
1.2 The Precision and Bias statement for this test method was developed using both handheld and bench top micrometers with foot sizes ranging from 4.8 mm to 15.9 mm (3/16 in. to 5/8 in.).
1.3 The values stated in either SI units or inch-pound units are to be regarded separately as standard. The values stated in each system may not be exact equivalents; therefore, each system shall be used independently of the other. Combining values from the two systems may result in non-conformance with the standard.
1.4 This standard does not purport to address all of the safety concerns, if any, associated with its use. It is the responsibility of the user of this standard to establish appropriate safety, health, and environmental practices and determine the applicability of regulatory limitations prior to use.
1.5 This international standard was developed in accordance with internationally recognized principles on standardization established in the Decision on Principles for the Development of International Standards, Guides and Recommendations issued by the World Trade Organization Technical Barriers to Trade (TBT) Committee.
General Information
- Status
- Published
- Publication Date
- 31-Mar-2023
- Technical Committee
- F02 - Primary Barrier Packaging
- Drafting Committee
- F02.20 - Physical Properties
Relations
- Effective Date
- 01-Oct-2023
- Refers
ASTM E171/E171M-11(2020) - Standard Practice for Conditioning and Testing Flexible Barrier Packaging - Effective Date
- 01-May-2020
- Refers
ASTM E171/E171M-11(2015) - Standard Practice for Conditioning and Testing Flexible Barrier Packaging - Effective Date
- 01-Oct-2015
- Effective Date
- 01-May-2013
- Refers
ASTM E171/E171M-11 - Standard Practice for Conditioning and Testing Flexible Barrier Packaging - Effective Date
- 15-Nov-2011
- Effective Date
- 01-Nov-2011
- Effective Date
- 01-Nov-2008
- Effective Date
- 01-Oct-2008
- Effective Date
- 01-Mar-2007
- Effective Date
- 01-Apr-2006
- Effective Date
- 01-Nov-2005
- Effective Date
- 01-Dec-2003
- Effective Date
- 10-Jul-2003
- Effective Date
- 10-Aug-2002
- Effective Date
- 10-Oct-2001
Overview
ASTM F2251-13(2023) is the internationally recognized standard test method for the thickness measurement of flexible packaging materials using contact micrometers. Developed and maintained by ASTM International, this standard provides a reliable and reproducible method for determining material thickness - a critical parameter for the specification, quality control, and performance characterization of flexible packaging films and related products. Adherence to this standard ensures that measurements are consistent across laboratories and production environments, enabling dependable comparisons and process control.
Key Topics
- Scope of the Method: ASTM F2251-13(2023) covers procedures for measuring the thickness of flexible packaging materials with contact micrometers, including both bench top and handheld devices with various foot sizes.
- Precision and Bias: The standard provides detailed guidance on ensuring repeatability and reproducibility, accounting for typical sources of variation and measurement uncertainty between laboratories and operators.
- Calibration and Apparatus Requirements: Specifications for the measuring apparatus are included, such as appropriate gauge types, foot sizes, and foot pressures. Calibration to a recognized industry standard, such as NIST, is recommended for consistent results.
- Sample Conditioning and Handling: The importance of proper conditioning, handling, and positioning of the sample to avoid measurement errors due to wrinkles, tension, or improper alignment.
- Reporting Requirements: Comprehensive reporting guidelines, including test conditions, instrument details, and statistical results, to support traceable and verifiable measurements.
Applications
The thickness measurement of flexible packaging materials is essential in a variety of industries where flexible films, laminates, and papers are used. Key applications include:
- Quality Control in Manufacturing: Ensuring that materials meet required thickness specifications and manufacturing tolerances for products such as food packaging films, medical pouches, and barrier laminates.
- Product Development: Characterizing new materials or evaluating alternative suppliers by comparing thickness measurements under standardized conditions.
- Regulatory Compliance: Demonstrating conformity to international standards for thickness in supply chains or product certifications.
- Process Monitoring: Detecting production shifts or machinery wear by tracking thickness variations in real time.
- Supplier and Customer Agreements: Providing a common basis for product specifications and acceptance criteria between producers and users.
Consistent application of ASTM F2251-13(2023) supports product performance, shelf life, and end-user satisfaction across the flexible packaging industry.
Related Standards
For comprehensive quality assurance and method alignment, consider the following related standards:
- ASTM D374/D374M: Test Methods for Thickness of Solid Electrical Insulation.
- ASTM D5947: Test Methods for Physical Dimensions of Solid Plastics Specimens.
- ASTM D6988: Guide for Determination of Thickness of Plastic Film Test Specimens.
- ASTM E171/E171M: Practice for Conditioning and Testing Flexible Barrier Packaging.
- ASTM E691: Practice for Conducting an Interlaboratory Study to Determine the Precision of a Test Method.
- ANSI/ASQC Z1.4 and Z1.9: Sampling Procedures and Tables for Inspection by Attributes and Variables.
These documents provide additional guidance on sample conditioning, calibration, precision studies, and sampling practices relevant to thickness measurement and flexible packaging materials.
By following ASTM F2251-13(2023), organizations can achieve accurate, consistent, and internationally recognized methods for measuring the thickness of flexible packaging materials, thereby supporting quality, compliance, and competitive product development.
Buy Documents
ASTM F2251-13(2023) - Standard Test Method for Thickness Measurement of Flexible Packaging Material
Get Certified
Connect with accredited certification bodies for this standard

BRCGS (Brand Reputation Compliance Global Standards)
Global food safety and quality standards owner.
Sponsored listings
Frequently Asked Questions
ASTM F2251-13(2023) is a standard published by ASTM International. Its full title is "Standard Test Method for Thickness Measurement of Flexible Packaging Material". This standard covers: SIGNIFICANCE AND USE 4.1 This test method provides a means for measuring a thickness dimension. Accurate measurement of thickness can be critical to meeting specifications and characterizing process, product, and material performance. 4.2 This test method does not address acceptability criteria. These need to be jointly determined by the user and producer of the product. Repeatability and reproducibility of measurement is shown in the Precision and Bias section. Attention should be given to the inherent variability of materials being measured as this can affect measurement outcome. SCOPE 1.1 This test method covers the measurement of thickness of flexible packaging materials using contact micrometers. 1.2 The Precision and Bias statement for this test method was developed using both handheld and bench top micrometers with foot sizes ranging from 4.8 mm to 15.9 mm (3/16 in. to 5/8 in.). 1.3 The values stated in either SI units or inch-pound units are to be regarded separately as standard. The values stated in each system may not be exact equivalents; therefore, each system shall be used independently of the other. Combining values from the two systems may result in non-conformance with the standard. 1.4 This standard does not purport to address all of the safety concerns, if any, associated with its use. It is the responsibility of the user of this standard to establish appropriate safety, health, and environmental practices and determine the applicability of regulatory limitations prior to use. 1.5 This international standard was developed in accordance with internationally recognized principles on standardization established in the Decision on Principles for the Development of International Standards, Guides and Recommendations issued by the World Trade Organization Technical Barriers to Trade (TBT) Committee.
SIGNIFICANCE AND USE 4.1 This test method provides a means for measuring a thickness dimension. Accurate measurement of thickness can be critical to meeting specifications and characterizing process, product, and material performance. 4.2 This test method does not address acceptability criteria. These need to be jointly determined by the user and producer of the product. Repeatability and reproducibility of measurement is shown in the Precision and Bias section. Attention should be given to the inherent variability of materials being measured as this can affect measurement outcome. SCOPE 1.1 This test method covers the measurement of thickness of flexible packaging materials using contact micrometers. 1.2 The Precision and Bias statement for this test method was developed using both handheld and bench top micrometers with foot sizes ranging from 4.8 mm to 15.9 mm (3/16 in. to 5/8 in.). 1.3 The values stated in either SI units or inch-pound units are to be regarded separately as standard. The values stated in each system may not be exact equivalents; therefore, each system shall be used independently of the other. Combining values from the two systems may result in non-conformance with the standard. 1.4 This standard does not purport to address all of the safety concerns, if any, associated with its use. It is the responsibility of the user of this standard to establish appropriate safety, health, and environmental practices and determine the applicability of regulatory limitations prior to use. 1.5 This international standard was developed in accordance with internationally recognized principles on standardization established in the Decision on Principles for the Development of International Standards, Guides and Recommendations issued by the World Trade Organization Technical Barriers to Trade (TBT) Committee.
ASTM F2251-13(2023) is classified under the following ICS (International Classification for Standards) categories: 55.040 - Packaging materials and accessories. The ICS classification helps identify the subject area and facilitates finding related standards.
ASTM F2251-13(2023) has the following relationships with other standards: It is inter standard links to ASTM D374/D374M-23, ASTM E171/E171M-11(2020), ASTM E171/E171M-11(2015), ASTM E691-13, ASTM E171/E171M-11, ASTM E691-11, ASTM D6988-08, ASTM E691-08, ASTM D6988-07, ASTM D5947-06, ASTM E691-05, ASTM D6988-03, ASTM D5947-03, ASTM D5947-02, ASTM D5947-96. Understanding these relationships helps ensure you are using the most current and applicable version of the standard.
ASTM F2251-13(2023) is available in PDF format for immediate download after purchase. The document can be added to your cart and obtained through the secure checkout process. Digital delivery ensures instant access to the complete standard document.
Standards Content (Sample)
This international standard was developed in accordance with internationally recognized principles on standardization established in the Decision on Principles for the
Development of International Standards, Guides and Recommendations issued by the World Trade Organization Technical Barriers to Trade (TBT) Committee.
Designation: F2251 − 13 (Reapproved 2023)
Standard Test Method for
Thickness Measurement of Flexible Packaging Material
This standard is issued under the fixed designation F2251; the number immediately following the designation indicates the year of
original adoption or, in the case of revision, the year of last revision. A number in parentheses indicates the year of last reapproval. A
superscript epsilon (´) indicates an editorial change since the last revision or reapproval.
1. Scope E171/E171M Practice for Conditioning and Testing Flexible
Barrier Packaging
1.1 This test method covers the measurement of thickness of
E691 Practice for Conducting an Interlaboratory Study to
flexible packaging materials using contact micrometers.
Determine the Precision of a Test Method
1.2 The Precision and Bias statement for this test method 3
2.2 ANSI/ASQ Standards:
was developed using both handheld and bench top micrometers
ANSI/ASQC Z1.4 Sampling Procedures and Tables for In-
with foot sizes ranging from 4.8 mm to 15.9 mm ( ⁄16 in. to
spection by Attributes
⁄8 in.).
ANSI/ASQC Z1.9 Sampling Procedures and Tables for In-
1.3 The values stated in either SI units or inch-pound units
spection by Variables
are to be regarded separately as standard. The values stated in
3. Terminology
each system may not be exact equivalents; therefore, each
system shall be used independently of the other. Combining
3.1 Definitions:
values from the two systems may result in non-conformance
3.1.1 bench micrometer, n—tabletop measurement system
with the standard.
using a dead weight or spring.
1.4 This standard does not purport to address all of the
3.1.2 foot, n—the moving component of the micrometer that
safety concerns, if any, associated with its use. It is the
comes in contact with the sample.
responsibility of the user of this standard to establish appro-
4. Significance and Use
priate safety, health, and environmental practices and deter-
mine the applicability of regulatory limitations prior to use.
4.1 This test method provides a means for measuring a
1.5 This international standard was developed in accor-
thickness dimension. Accurate measurement of thickness can
dance with internationally recognized principles on standard-
be critical to meeting specifications and characterizing process,
ization established in the Decision on Principles for the
product, and material performance.
Development of International Standards, Guides and Recom-
4.2 This test method does not address acceptability criteria.
mendations issued by the World Trade Organization Technical
These need to be jointly determined by the user and producer
Barriers to Trade (TBT) Committee.
of the product. Repeatability and reproducibility of measure-
ment is shown in the Precision and Bias section. Attention
2. Referenced Documents
should be given to the inherent variability of materials being
2.1 ASTM Standards:
measured as this can affect measurement outcome.
D374/D374M Test Methods for Thickness of Solid Electri-
cal Insulation
5. Apparatus
D5947 Test Methods for Physical Dimensions of Solid
5.1 Mechanical gauge, suitable for measuring thickness:
Plastics Specimens
5.1.1 The thickness gauge may be either a bench or hand-
D6988 Guide for Determination of Thickness of Plastic Film
held mechanical model.
Test Specimens
5.1.2 The gauge should be capable of accurately measuring
in increments of 2.5 μm (0.0001 in.).
5.1.3 The foot size and foot pressure should be known and
This test method is under the jurisdiction of ASTM Committee F02 on Primary
identified. Because of the compressibility of different materials
Barrier Packaging and is the direct responsibility of Subcommittee F02.20 on
Physical Properties.
it is important when comparing results between different
Current edition approved April 1, 2023. Published April 2023. Originally
laboratories that the size of the foot and pressure be the same.
approved in 2003. Last previous edition approved in 2018 as F2251 – 13(2018).
Refer to Guide D6988 for further guidance on foot pressures.
DOI: 10.1520/F2251-13R23.
For referenced ASTM standards, visit the ASTM website, www.astm.org, or
contact ASTM Customer Service at service@astm.org. For Annual Book of ASTM
Standards volume information, refer to the standard’s Document Summary page on Available from American National Standards Instititute (ANSI) 25 W. 43rd St.,
the ASTM website. 4th Floor, New York, NY 10036.
Copyright © ASTM International, 100 Barr Harbor Drive, PO Box C700, West Conshohocken, PA 19428-2959. United States
F2251 − 13 (2023)
5.1.4 It is recommended that a calibration be performed on 10. Precision and Bias
the apparatus used and certified to a recognized industry
10.1 Precision—A research report describes a round robin
standard such as National Institute of Standards and Technol-
conducted in 2002 in accordance with Practice E691, involving
ogy (NIST).
seven laboratories measuring eight specimens. Ten different
pieces of equipment were used to collect information. Equip-
NOTE 1—Test Methods D5947 and D374/D374M give guidance on
ment used and foot sizes are listed in Table 1. Measurements
methods for checking calibration and parallelism.
taken included use of micrometers in 0.0001 in. divisions.
6. Sampling Statistical summaries of repeatability (within a laboratory) and
reproducibility (between laboratories) are listed in Tables 2 and
6.1 The number of samples tested should be adequate to be
3. All test results are expressed in SI units of measure.
predictive of performance. Caution should be taken when
10.2 Concept of “r” and “R” in Tables 2 and 3—If S and S
r R
eliminating samples with defects as this can bias results.
have been calculated from a large enough body of data, and for
6.2 See ANSI/ASQC Z1.4 or Z1.9 for guidance on sampling
test results that are averages from three tests on one specimen
plans and practices.
for each test result, then the following applies:
10.3 Repeatability “r” is the interval representing the criti-
7. Conditioning
cal difference between two test results for the same material,
7.1 Conditioning of the samples wil
...


Questions, Comments and Discussion
Ask us and Technical Secretary will try to provide an answer. You can facilitate discussion about the standard in here.
Loading comments...