Standard Test Methods for Cone Penetration of Lubricating Grease

SIGNIFICANCE AND USE
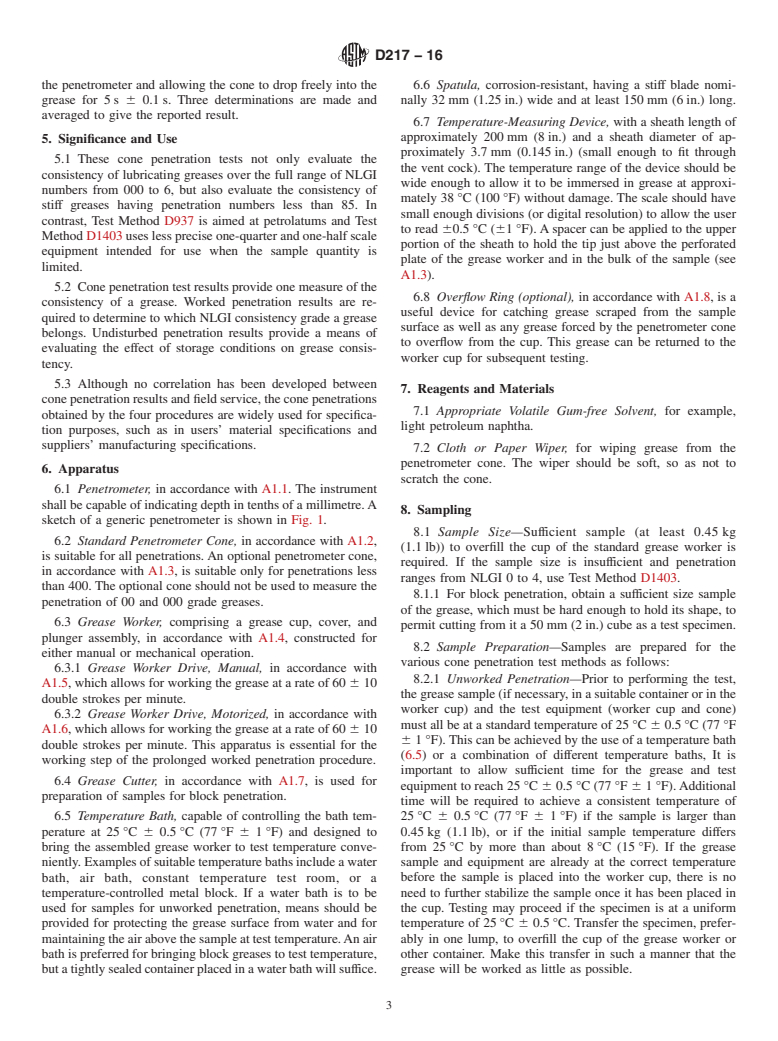
These cone penetration tests not only evaluate the consistency of lubricating greases over the full range of NLGI numbers from 000 to 6, but also evaluate the consistency of stiff greases having penetration numbers less than 85. In contrast, Test Method D 937 is aimed at petrolatums and Test Method D 1403 uses less precise one-quarter and one-half scale equipment intended for use when the sample quantity is limited.
Cone penetration test results provide one measure of the consistency of a grease. Worked penetration results are required to determine to which NLGI consistency grade a grease belongs. Undisturbed penetration results provide a means of evaluating the effect of storage conditions on grease consistency.
Although no correlation has been developed between cone penetration results and field service, the cone penetrations obtained by the four procedures are widely used for specification purposes, such as in users' material specifications and suppliers' manufacturing specifications.
SCOPE
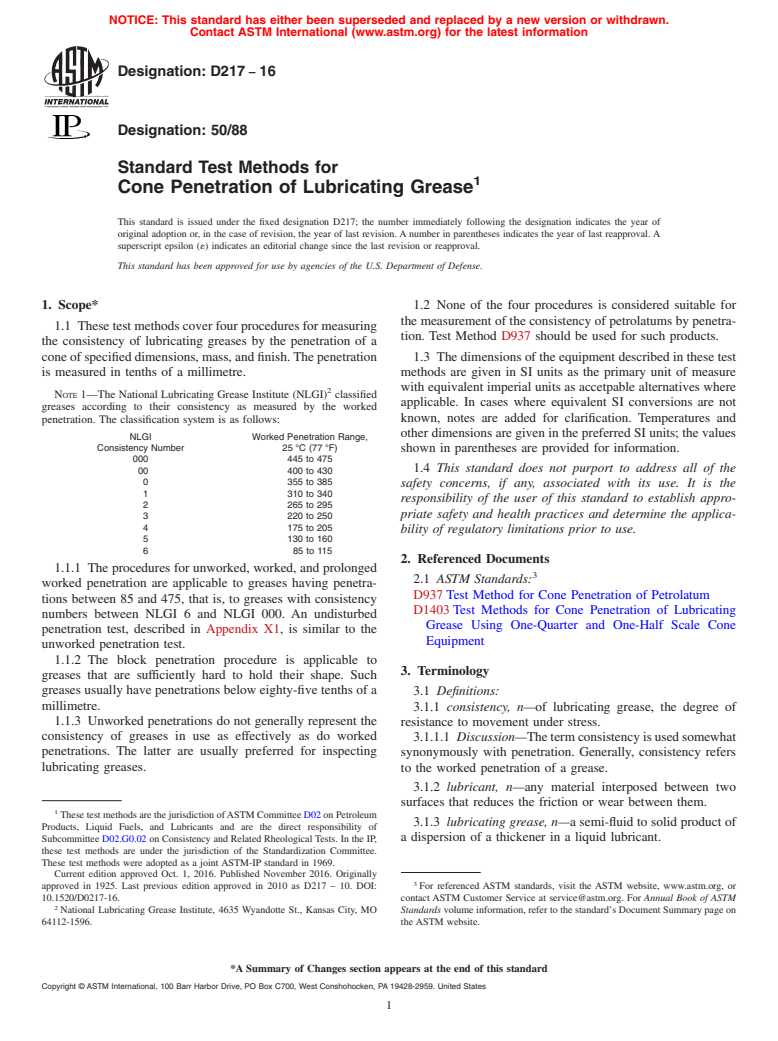
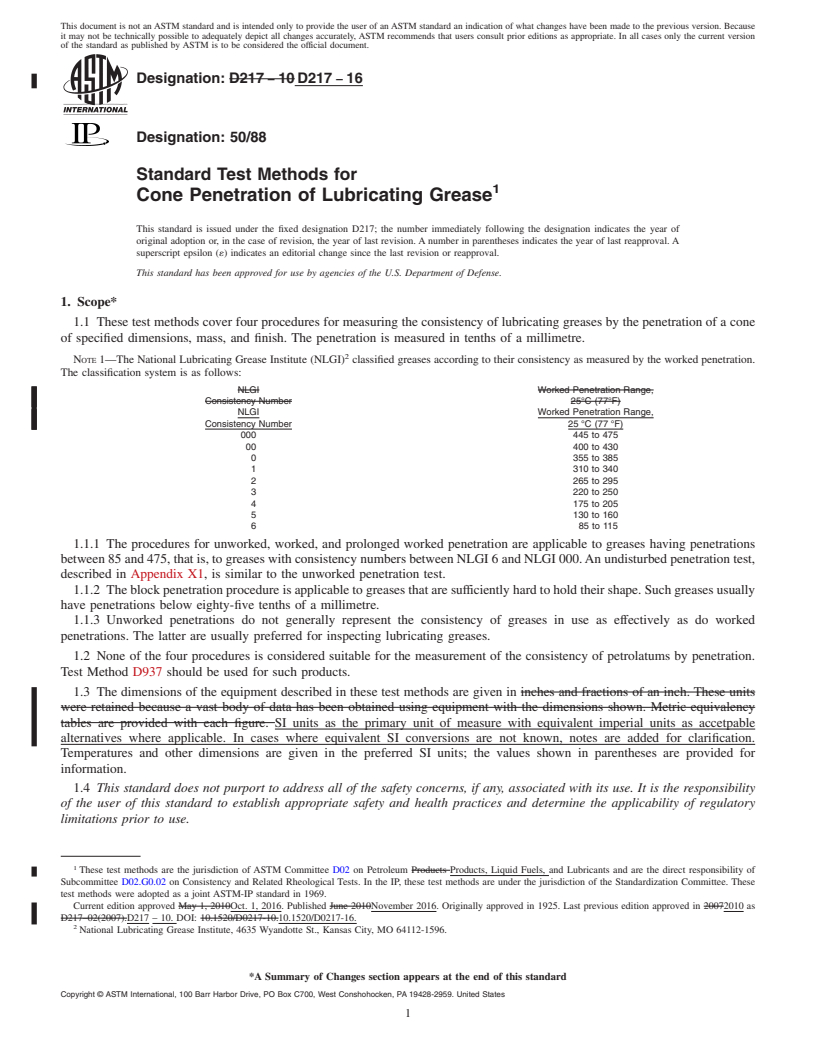
1.1 These test methods cover four procedures for measuring the consistency of lubricating greases by the penetration of a cone of specified dimensions, mass, and finish. The penetration is measured in tenths of a millimetre.
1.1.1 The procedures for unworked, worked, and prolonged worked penetration are applicable to greases having penetrations between 85 and 475, that is, to greases with consistency numbers between NLGI 6 and NLGI 000. An undisturbed penetration test, described in Appendix X1, is similar to the unworked penetration test.
1.1.2 The block penetration procedure is applicable to greases that are sufficiently hard to hold their shape. Such greases usually have penetrations below eighty-five tenths of a millimetre.
1.2 None of the four procedures is considered suitable for the measurement of the consistency of petrolatums by penetration. Test Method D 937 should be used for such products.
1.3 The dimensions of the equipment described in these test methods are given in inches and fractions of an inch. These units were retained because a vast body of data has been obtained using equipment with the dimensions shown. Metric equivalency tables are provided with each figure. Temperatures and other dimensions are given in the preferred SI units; the values shown in parentheses are provided for information.
1.4 This standard does not purport to address all of the safety concerns, if any, associated with its use. It is the responsibility of the user of this standard to establish appropriate safety and health practices and determine the applicability of regulatory limitations prior to use.

General Information

Status
Historical
Publication Date
31-Oct-2007
Current Stage
Ref Project

Relations

Buy Standard

Standard
ASTM D217-02(2007) - Standard Test Methods for Cone Penetration of Lubricating Grease
English language
14 pages
sale 15% off
Preview
sale 15% off
Preview
Standard
REDLINE ASTM D217-02(2007) - Standard Test Methods for Cone Penetration of Lubricating Grease
English language
14 pages
sale 15% off
Preview
sale 15% off
Preview

Standards Content (Sample)


NOTICE: This standard has either been superseded and replaced by a new version or withdrawn.
Contact ASTM International (www.astm.org) for the latest information.
Designation:D217–02 (Reapproved 2007)
Designation: 50/88
Standard Test Methods for
Cone Penetration of Lubricating Grease
This standard is issued under the fixed designation D217; the number immediately following the designation indicates the year of
original adoption or, in the case of revision, the year of last revision. A number in parentheses indicates the year of last reapproval. A
superscript epsilon (´) indicates an editorial change since the last revision or reapproval.
This standard has been approved for use by agencies of the Department of Defense.
1. Scope 1.3 The dimensions of the equipment described in these test
methods are given in inches and fractions of an inch. These
1.1 These test methods cover four procedures for measuring
units were retained because a vast body of data has been
the consistency of lubricating greases by the penetration of a
obtained using equipment with the dimensions shown. Metric
cone of specified dimensions, mass, and finish.The penetration
equivalency tables are provided with each figure.Temperatures
is measured in tenths of a millimetre.
and other dimensions are given in the preferred SI units; the
NOTE 1—The National Lubricating Grease Institute (NLGI) classified
values shown in parentheses are provided for information.
greases according to their consistency as measured by the worked
1.4 This standard does not purport to address all of the
penetration. The classification system is as follows:
safety concerns, if any, associated with its use. It is the
NLGI Worked Penetration Range,
responsibility of the user of this standard to establish appro-
Consistency Number 25°C (77°F)
000 445 to 475
priate safety and health practices and determine the applica-
00 400 to 430
bility of regulatory limitations prior to use.
0 355 to 385
1 310 to 340
2. Referenced Documents
2 265 to 295
3 220 to 250
2.1 ASTM Standards:
4 175 to 205
D937 Test Method for Cone Penetration of Petrolatum
5 130 to 160
6 85to115 D1403 Test Methods for Cone Penetration of Lubricating
Grease Using One-Quarter and One-Half Scale Cone
1.1.1 The procedures for unworked, worked, and prolonged
Equipment
worked penetration are applicable to greases having penetra-
tions between 85 and 475, that is, to greases with consistency
3. Terminology
numbers between NLGI 6 and NLGI 000. An undisturbed
3.1 Definitions:
penetration test, described in Appendix X1, is similar to the
3.1.1 consistency, n—of lubricating grease, the degree of
unworked penetration test.
resistance to movement under stress.
1.1.2 The block penetration procedure is applicable to
3.1.1.1 Discussion—The term consistency is used some-
greases that are sufficiently hard to hold their shape. Such
what synonymously with penetration. Generally, consistency
greases usually have penetrations below eighty-five tenths of a
refers to the worked penetration of a grease.
millimetre.
3.1.2 lubricant, n—any material interposed between two
1.2 None of the four procedures is considered suitable for
surfaces that reduces the friction or wear between them.
the measurement of the consistency of petrolatums by penetra-
3.1.3 lubricating grease, n—a semi-fluid to solid product of
tion. Test Method D937 should be used for such products.
a dispersion of a thickener in a liquid lubricant.
3.1.3.1 Discussion—Thedispersionofthethickenerformsa
These test methods are the jurisdiction ofASTM Committee D02 on Petroleum
two-phase system and immobilizes the liquid lubricant by
Products and Lubricants and are the direct responsibility of Subcommittee
surface tension and other physical forces. Other ingredients are
D02.G0.02 on Consistency and Related Rheological Tests. In the IP, these test
commonly included to impart special properties.
methods are under the jurisdiction of the Standardization Committee. These test
methods were adopted as a joint ASTM-IP standard in 1969.
Current edition approved Nov. 1, 2007. Published January 2008. Originally
approved in 1925. Last previous edition approved in 2002 as D217–02. DOI:
For referenced ASTM standards, visit the ASTM website, www.astm.org, or
10.1520/D0217-02R07. contact ASTM Customer Service at service@astm.org. For Annual Book of ASTM
National Lubricating Grease Institute, 4635 Wyandotte St., Kansas City, MO Standards volume information, refer to the standard’s Document Summary page on
64112-1596. the ASTM website.
Copyright © ASTM International, 100 Barr Harbor Drive, PO Box C700, West Conshohocken, PA 19428-2959, United States.
D217–02 (2007)
to measure the depth to which the standard cone falls into the
grease.
3.2.4 prolonged worked penetration, n—of lubricating
grease, the penetration of a sample after it has been worked
more than 60 double strokes in a standard grease worker at a
temperature of 15 to 30°C (59 to 86°F).
3.2.4.1 Discussion—After the prescribed number of double
strokes, the worker and contents are brought to 25°C (77°F),
workedanadditional60doublestrokes,andpenetratedwithout
delay.
3.2.5 unworked penetration, n—of lubricating grease, the
penetration at 25°C (77°F) of a sample that has received only
minimum disturbance in transferring to a grease worker cup or
dimensionally equivalent rigid container.
3.2.6 worked penetration, n—of lubricating grease, the
penetration at 25°C (77°F), without delay, of a sample after 60
double strokes in a standard grease worker.
3.2.7 working, n—of lubricating grease, the subjection of a
sample to the shearing action of the standard grease worker.
4. Summary of Test Method
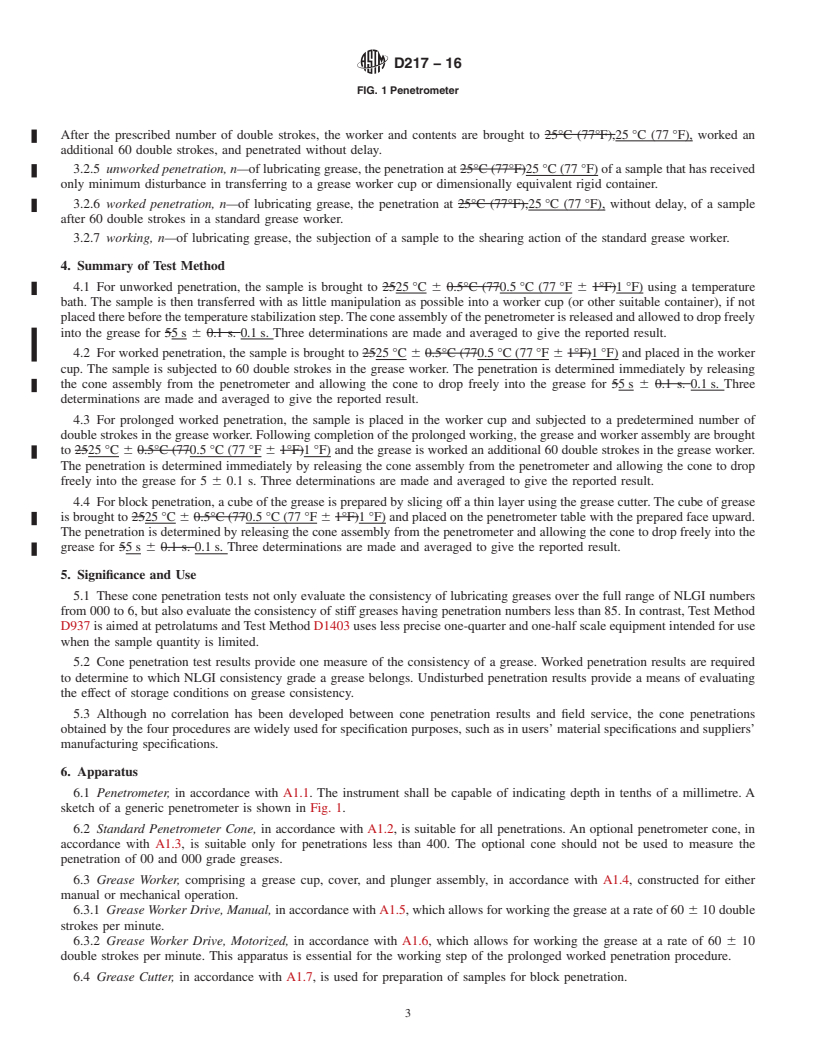
4.1 For unworked penetration, the sample is brought to 25
60.5°C(77 61°F)inaworkercuporothersuitablecontainer.
The cone assembly of the penetrometer is released and allowed
to drop freely into the grease for 5 6 0.1 s. Three determina-
tions are made and averaged to give the reported result.
4.2 For worked penetration, the sample is brought to 25 6
0.5°C (77 6 1°F) and placed in the worker cup. The sample is
FIG. 1 Penetrometer
subjected to 60 double strokes in the grease worker. The
penetration is determined immediately by releasing the cone
assembly from the penetrometer and allowing the cone to drop
3.1.4 penetrometer, n—an instrument that measures the
freely into the grease for 5 6 0.1 s. Three determinations are
consistencyorhardnessofsemiliquidtosemisolidmaterialsby
made and averaged to give the reported result.
measuring the depth to which a specified cone or needle under
4.3 For prolonged worked penetration, the sample is placed
a given force falls into the material.
in the worker cup and subjected to a predetermined number of
3.1.4.1 Discussion—In this test method, either a standard
double strokes in the grease worker. Following completion of
penetrometer 6.2 or an optional penetrometer coneA1.3 can be
the prolonged working, the grease and worker assembly are
used to determine the consistency of lubricating greases. The
brought to 25 6 0.5°C (77 6 1°F) and the grease is worked an
penetration force is determined by the mass of the cone and the
additional 60 double strokes in the grease worker. The pen-
shaft.
etration is determined immediately by releasing the cone
3.1.5 thickener, n—in lubricating grease, a substance com-
assembly from the penetrometer and allowing the cone to drop
posed of finely divided particles dispersed in a liquid lubricant
freely into the grease for 5 6 0.1 s. Three determinations are
to form the product’s structure.
made and averaged to give the reported result.
3.1.5.1 Discussion—The thickener can be fibers (such as
4.4 For block penetration, a cube of the grease is prepared
various metallic soaps) or plates or spheres (such as certain
by slicing off a thin layer using the grease cutter. The cube of
non-soap thickeners) which are insoluble or, at most, only very
grease is brought to 25 6 0.5°C (77 6 1°F) and placed on the
slightly soluble in the liquid lubricant. The general require-
penetrometer table with the prepared face upward. The pen-
ments are that the solid particles be extremely small, uniformly
etration is determined by releasing the cone assembly from the
dispersed, and capable of forming a relatively stable, gel-like
penetrometer and allowing the cone to drop freely into the
structure with the liquid lubricant.
grease for 5 6 0.1 s. Three determinations are made and
3.2 Definitions of Terms Specific to This Standard:
averaged to give the reported result.
3.2.1 block penetration, n—of lubricating grease, the pen-
etrationat25°C(77°F)determinedonthefreshlypreparedface
5. Significance and Use
of a cube cut from a sample that is sufficiently hard to hold its
shape. 5.1 These cone penetration tests not only evaluate the
3.2.2 penetration, n—of lubricating grease, the depth that consistency of lubricating greases over the full range of NLGI
the standard cone (see A1.1), enters the sample when released numbers from 000 to 6, but also evaluate the consistency of
to fall under its own weight for 5 s. stiff greases having penetration numbers less than 85. In
3.2.3 penetrometer, n—an instrument (see Fig. 1) designed contrast, Test Method D937 is aimed at petrolatums and Test
D217–02 (2007)
Method D1403 uses less precise one-quarter and one-half scale portion of the sheath to hold the tip just above the perforated
equipment intended for use when the sample quantity is plate of the grease worker and in the bulk of the sample (see
limited. A1.3).
6.8 Overflow Ring (optional), in accordance with A1.8,isa
5.2 Cone penetration test results provide one measure of the
useful device for catching grease scraped from the sample
consistency of a grease. Worked penetration results are re-
surface as well as any grease forced by the penetrometer cone
quired to determine to which NLGI consistency grade a grease
to overflow from the cup. This grease can be returned to the
belongs. Undisturbed penetration results provide a means of
worker cup for subsequent testing.
evaluating the effect of storage conditions on grease consis-
tency.
7. Reagents and Materials
5.3 Although no correlation has been developed between
7.1 Appropriate Volatile Gum-free Solvent, for example,
cone penetration results and field service, the cone penetrations
light petroleum naphtha.
obtained by the four procedures are widely used for specifica-
7.2 Cloth or Paper Wiper, for wiping grease from the
tion purposes, such as in users’ material specifications and
penetrometer cone. The wiper should be soft, so as not to
suppliers’ manufacturing specifications.
scratch the cone.
6. Apparatus
8. Sampling
6.1 Penetrometer, in accordance with A1.1. The instrument
8.1 Sample Size—Sufficient sample (at least 0.4 kg (1 lb))
shall be capable of indicating depth in tenths of a millimetre.A
for worked and prolonged worked penetrations and 1.2 kg (3
sketch of a generic penetrometer is shown in Fig. 1.
lb)forunworkedpenetrationsexpectedover200)tooverfillthe
6.2 Standard Penetrometer Cone, in accordance with A1.2, cup of the standard grease worker is required. If the sample
is suitable for all penetrations.An optional penetrometer cone, size is insufficient and penetration ranges from NLGI 0 to 4,
in accordance with A1.3, is suitable only for penetrations less use Test Method D1403. If the full-scale penetration value
than 400. The optional cone should not be used to measure the calculated in Test Method D1403 is above 200, at least three
penetration of 00 and 000 grade greases. times the amount needed to fill the one-quarter or one-half
scale worker cup is required.
6.3 Grease Worker, comprising a grease cup, cover, and
8.1.1 For block penetration, obtain a sufficient size sample
plunger assembly, in accordance with A1.4, constructed for
of the grease, which must be hard enough to hold its shape, to
either manual or mechanical operation.
permit cutting from it a 50-mm (2-in.) cube as a test specimen.
6.3.1 Grease Worker Drive, Manual, in accordance with
8.2 Sample Preparation—Samples are prepared for the
A1.5, which allows for working the grease at a rate of 60 6 10
various cone penetration test methods as follows:
double strokes per minute.
8.2.1 Unworked Penetration—Place the empty grease
6.3.2 Grease Worker Drive, Motorized, in accordance with
workercup,ordimensionallyequivalentrigidcontainer,andan
A1.6, which allows for working the grease at a rate of 60 6 10
appropriate amount of the sample in a metal container in the
double strokes per minute. This apparatus is essential for the
temperature bath maintained at 25 6 0.5°C for sufficient time
working step of the prolonged worked penetration procedure.
tobringthetemperatureofthesampleandtheworkercupto25
6.4 Grease Cutter, in accordance with A1.7, is used for
6 0.5°C (77 6 1°F). If the initial sample temperature differs
preparation of samples for block penetration.
from 25°C by more than about 8°C (15°F), or if an alternative
6.5 Temperature Bath, either a water bath or an air bath
method of bringing the sample to 25°C is used, allow sufficient
capable of controlling the bath temperature at 25 6 0.5°C (77
additional time to ensure that the specimen is at 25 6 0.5°C
6 1°F) and designed to bring the assembled grease worker to
before proceeding. Also, if the sample is larger than 0.4 kg (1
test temperature conveniently. If a water bath is to be used for
lb), allow sufficient additional time to ensure that the specimen
samples for unworked penetration, means should be provided
is at 25 6 0.5°C. Testing may proceed if the specimen is at a
for protecting the grease surface from water and for maintain-
uniform temperature of 25 6 0.5°C. Transfer the specimen,
ing the air above the sample at test temperature.An air bath is
preferably in one lump, to overfill the cup of the grease worker
preferred for bringing block greases to test temperature, but a
or other container. Make this transfer in such a manner that the
tightly sealed container placed in a water bath will suffice. A
grease will be worked as little as possible. Jar the cup to drive
constant-temperature test room may be used instead of the
out trapped air and pack the grease with the spatula, with as
temperature bath.
little manipulation as possible, to obtain a cupful without air
6.6 Spatula, corrosion-resistant, having a stiff blade nomi-
pockets. Scrape off the excess grease extending over the rim,
nally 32 mm (1.25 in.) wide and at least 150 mm (6 in.) long.
creating a flat surface, by moving the blade of the spatula, held
6.7 Temperature-Measuring Device, with a sheath length of inclined toward the direction of motion at an angle of approxi-
approximately 200 mm (8 in.) and a sheath diameter of mately 45°, across the rim of the cup (Fig. 2). Do not perform
approximately 3.7 mm (0.145 in.) (small enough to fit through any further leveling or smoothing of the surface throug
...


This document is not anASTM standard and is intended only to provide the user of anASTM standard an indication of what changes have been made to the previous version. Because
it may not be technically possible to adequately depict all changes accurately, ASTM recommends that users consult prior editions as appropriate. In all cases only the current version
of the standard as published by ASTM is to be considered the official document.
An American National Standard
Designation:D217–97 Designation:D217–02 (Reapproved 2007)
Designation: 50/88
Standard Test Methods for
Cone Penetration of Lubricating Grease
This standard is issued under the fixed designation D 217; the number immediately following the designation indicates the year of
original adoption or, in the case of revision, the year of last revision. A number in parentheses indicates the year of last reapproval. A
superscript epsilon (e) indicates an editorial change since the last revision or reapproval. These test methods were adopted as a joint
ASTM-IP
This standard in 1969. These test methods have has been adoptedapproved for use by government agencies to replace Method 311 of
the Department of Federal Test Method Standard No. 791 b. Defense.
1. Scope
1.1 These test methods cover four procedures for measuring the consistency of lubricating greases by the penetration of a cone
of specified dimensions, mass, and finish. The penetration is measured in tenths of a millimetre.
NOTE 1—The National Lubricating Grease Institute (NLGI) (NLGI) classified greases according to their consistency as measured by the worked
penetration. The classification system is as follows:
NLGI Worked Penetration Range,
Consistency Number 25°C (77°F)
000 445 to 475
00 400 to 430
0 355 to 385
1 310 to 340
2 265 to 295
3 220 to 250
4 175 to 205
5 130 to 160
6 85 to 115
1.1.1 The procedures for unworked, worked, and prolonged worked penetration are applicable to greases having penetrations
between 85 and 475, that is, to greases with consistency numbers between NLGI 6 and NLGI 000.An undisturbed penetration test,
described in Appendix X1, is similar to the unworked penetration test.
1.1.2 The block penetration procedure is applicable to greases that are sufficiently hard to hold their shape. Such greases usually
have penetrations below eighty-five tenths of a millimetre.
1.2 None of the four procedures is considered suitable for the measurement of the consistency of petrolatums by penetration.
Test Method D 937 should be used for such products.
1.3 The dimensions of the equipment described in these test methods are given in inches and fractions of an inch. These units
were retained because a vast body of data has been obtained using equipment with the dimensions shown. Metric equivalency
tables are provided with each figure. Temperatures and other dimensions are given in the preferred SI units; the values shown in
parentheses are provided for information.
1.4 This standard does not purport to address all of the safety concerns, if any, associated with its use. It is the responsibility
of the user of this standard to establish appropriate safety and health practices and determine the applicability of regulatory
limitations prior to use.
These test methods are the jurisdiction of ASTM Committee D-2 on Petroleum Products and Lubricants and the IP Standardization Committee and are the direct
responsibility of Subcommittee D02.G on Lubricating Grease.
Current edition approved Nov. 10, 1997. Published September 1998. Originally published as D217–25T. Last previous edition D217–94.
These test methods are the jurisdiction of ASTM Committee D02 on Petroleum Products and Lubricants and are the direct responsibility of Subcommittee D02.G0.02
on Consistency and Related Rheological Tests. In the IP, these test methods are under the jurisdiction of the Standardization Committee. These test methods were adopted
as a joint ASTM-IP standard in 1969.
Current edition approved Nov. 1, 2007. Published January 2008. Originally approved in 1925. Last previous edition approved in 2002 as D 217–02.
National Lubricating Grease Institute, 4635 Wyandotte St., Kansas City, MO 64112-1596.
Copyright © ASTM International, 100 Barr Harbor Drive, PO Box C700, West Conshohocken, PA 19428-2959, United States.
D217–02 (2007)
2. Referenced Documents
2.1 ASTM Standards:
D 937 Test Method for Cone Penetration of Petrolatum
D 1403 Test Methods for Cone Penetration of Lubricating Grease Using One-Quarter and One-Half Scale Cone Equipment
3. Terminology
3.1 Definitions:
3.1.1 consistency, n—of lubricating grease, the degree of resistance to movement under stress.
3.1.1.1 Discussion—The term consistency is used somewhat synonymously with penetration. Generally, consistency refers to
the worked penetration of a grease.
3.1.2 lubricant, n—any material interposed between two surfaces that reduces the friction or wear between them.
3.1.3 lubricating grease, n—a semi-fluid to solid product of a dispersion of a thickener in a liquid lubricant.
3.1.1.1
3.1.3.1 Discussion—The dispersion of the thickener forms a two-phase system and immobilizes the liquid lubricant by surface
tension and other physical forces. Other ingredients are commonly included to impart special properties.
3.1.2
3.1.4 penetrometer, n—an instrument that measures the consistency or hardness of semiliquid to semisolid materials by
measuring the depth to which a specified cone or needle under a given force falls into the material.
3.1.2.1
3.1.4.1 Discussion—In this test method, either a standard penetrometer 6.2 or an optional penetrometer coneA1.3 can be used
to determine the consistency of lubricating greases. The penetration force is determined by the mass of the cone and the shaft.
3.1.3
3.1.5 thickener, n—inlubricatinggrease,asubstancecomposedoffinelydividedparticlesdispersedinaliquidlubricanttoform
the product’s structure.
3.1.3.1Discussion—The thickener can be fibers (such as various metallic soaps) or plates or spheres (such as certain non-soap
thickeners) which are insoluble or, at most, only very slightly soluble in the liquid lubricant. The general requirements are that the
solidparticlesbeextremelysmall,uniformlydispersed,andcapableofformingarelativelystable,gel-likestructurewiththeliquid
lubricant.
3.1.4lubricant, n—any material interposed between two surfaces that reduces the friction or wear between them.
3.1.5consistency, n—of lubricating grease, the degree of resistance to movement under stress.
3.1.5.1 Discussion—The term consistency is used somewhat synonymously with penetration. Generally, consistency refers to
the worked penetration of a grease. —The thickener can be fibers (such as various metallic soaps) or plates or spheres (such as
certain non-soap thickeners) which are insoluble or, at most, only very slightly soluble in the liquid lubricant. The general
requirements are that the solid particles be extremely small, uniformly dispersed, and capable of forming a relatively stable,
gel-like structure with the liquid lubricant.
3.2 Definitions of Terms Specific to This Standard:
3.2.1 penetrometerblock penetration, n—an instrument (see Fig. 1) designed to measure the depth to which the standard cone
falls into the grease. —of lubricating grease, the penetration at 25°C (77°F) determined on the freshly prepared face of a cube cut
from a sample that is sufficiently hard to hold its shape.
3.2.2 penetration, n—of lubricating grease, the depth that the standard cone (seeA1.1), enters the sample when released to fall
under its own weight for 5 s.
3.2.3 unworked penetrationpenetrometer, n—of lubricating grease, the penetration at 25°C (77°F) of a sample that has received
only minimum disturbance in transferring to a grease worker cup or dimensionally equivalent rigid container. —an instrument (see
Fig. 1) designed to measure the depth to which the standard cone falls into the grease.
3.2.4 workingprolonged worked penetration, n—of lubricating grease, the subjection of a sample to the shearing action of the
standard grease worker. —of lubricating grease, the penetration of a sample after it has been worked more than 60 double strokes
in a standard grease worker at a temperature of 15 to 30°C (59 to 86°F).
3.2.4.1 Discussion—Aftertheprescribednumberofdoublestrokes,theworkerandcontentsarebroughtto25°C(77°F),worked
an additional 60 double strokes, and penetrated without delay.
3.2.5 worked penetrationunworked penetration, n—of lubricating grease, the penetration at 25°C (77°F), without delay, of a
sample after 60 double strokes in a standard grease worker. —of lubricating grease, the penetration at 25°C (77°F) of a sample
that has received only minimum disturbance in transferring to a grease worker cup or dimensionally equivalent rigid container.
3.2.6 prolonged worked penetrationworked penetration, n—of lubricating grease, the penetration of a sample after it has been
worked more than 60 double strokes in a standard grease worker at a temperature of 15 to 30°C (59 to 86°F).
3.2.6.1Discussion—After the prescribed number of double strokes, the worker and contents are brought to 25°C (77°F), worked
an additional 60 double strokes, and penetrated without delay. —of lubricating grease, the penetration at 25°C (77°F), without
For referencedASTM standards, visit theASTM website, www.astm.org, or contactASTM Customer Service at service@astm.org. For Annual Book of ASTM Standards
, Vol 05.01.volume information, refer to the standard’s Document Summary page on the ASTM website.
D217–02 (2007)
FIG. 1 Penetrometer
delay, of a sample after 60 double strokes in a standard grease worker.
3.2.7 block penetrationworking, n—of lubricating grease, the penetration at 25°C (77°F) determined on the freshly prepared
face of a cube cut from a sample that is sufficiently hard to hold its shape. —of lubricating grease, the subjection of a sample to
the shearing action of the standard grease worker.
4. Summary of Test MethodsMethod
4.1 For unworked penetration, the sample is brought to 25 6 0.5°C (77 6 1°F) in a worker cup or other suitable container. The
cone assembly of the penetrometer is released and allowed to drop freely into the grease for 5 6 0.1 s. Three determinations are
made and averaged to give the reported result.
4.2 For worked penetration, the sample is brought to 25 6 0.5°C (77 6 1°F) and placed in the worker cup. The sample is
subjected to 60 double strokes in the grease worker. The penetration is determined immediately by releasing the cone assembly
from the penetrometer and allowing the cone to drop freely into the grease for 5 6 0.1 s. Three determinations are made and
averaged to give the reported result.
4.3 For prolonged worked penetration, the sample is placed in the worker cup and subjected to a predetermined number of
double strokes in the grease worker. Following completion of the prolonged working, the grease and worker assembly are brought
to 25 6 0.5°C (77 6 1°F) and the grease is worked an additional 60 double strokes in the grease worker. The penetration is
determinedimmediatelybyreleasingtheconeassemblyfromthepenetrometerandallowingtheconetodropfreelyintothegrease
for 5 6 0.1 s. Three determinations are made and averaged to give the reported result.
4.4 For block penetration, a cube of the grease is prepared by slicing off a thin layer using the grease cutter. The cube of grease
is brought to 25 6 0.5°C (77 6 1°F) and placed on the penetrometer table with the prepared face upward. The penetration is
determined by releasing the cone assembly from the penetrometer and allowing the cone to drop freely into the grease for 5 6 0.1
s. Three determinations are made and averaged to give the reported result.
5. Significance and Use
5.1 These cone penetration tests not only evaluate the consistency of lubricating greases over the full range of NLGI numbers
from 000 to 6, but also evaluate the consistency of stiff greases having penetration numbers less than 85. In contrast, Test Method
D 937 is aimed at petrolatums and Test Method D 1403 uses less precise one-quarter and one-half scale equipment intended for
use when the sample quantity is limited.
D217–02 (2007)
5.2 Cone penetration test results provide one measure of the consistency of a grease. Worked penetration results are required
to determine to which NLGI consistency grade a grease belongs. Undisturbed penetration results provide a means of evaluating
the effect of storage conditions on grease consistency.
5.3 Although no correlation has been developed between cone penetration results and field service, the cone penetrations
obtained by the four procedures are widely used for specification purposes, such as in users’ material specifications and suppliers’
manufacturing specifications.
6. Apparatus
6.1 Penetrometer, in accordance with A1.1. The instrument shall be capable of indicating depth in tenths of a millimetre. A
sketch of a generic penetrometer is shown in Fig. 1.
6.2 Standard Penetrometer Cone , in accordance with A1.2, is suitable for all penetrations. An optional penetrometer cone, in
accordance with A1.3, is suitable only for penetrations less than 400. The optional cone should not be used to measure the
penetration of 00 and 000 grade greases.
6.3 Grease Worker, comprising a grease cup, cover, and plunger assembly, in accordance with A1.4, constructed for either
manual or mechanical operation.
6.3.1 Grease Worker Drive, Manual , in accordance withA1.5, which allows for working the grease at a rate of 60 6 10 double
strokes per minute.
6.3.2 Grease Worker Drive, Motorized , in accordance with A1.6, which allows for working the grease at a rate of 60 6 10
double strokes per minute. This apparatus is essential for the working step of the prolonged worked penetration procedure.
6.4 Grease Cutter, in accordance with A1.7, is used for preparation of samples for block penetration.
6.5 Temperature Bath, either a water bath or an air bath capable of controlling the bath temperature at 25 6 0.5°C (77 6 1°F)
and designed to bring the assembled grease worker to test temperature conveniently. If a water bath is to be used for samples for
unworked penetration, means should be provided for protecting the grease surface from water and for maintaining the air above
the sample at test temperature.An air bath is preferred for bringing block greases to test temperature, but a tightly sealed container
placed in a water bath will suffice. A constant-temperature test room may be used instead of the temperature bath.
6.6 Spatula, corrosion-resistant, having a stiff blade nominally 32 mm (1.25 in.) wide and at least 150 mm (6 in.) long.
6.7 Temperature-Measuring Device , with a sheath length of approximately 200 mm (8 in.) and a sheath diameter of
approximately 3.7 mm (0.145 in.) (small enough to fit through the vent cock).The temperature rang
...

Questions, Comments and Discussion

Ask us and Technical Secretary will try to provide an answer. You can facilitate discussion about the standard in here.