ASTM B931-23
(Test Method)Standard Test Method for Metallographically Estimating the Observed Case Depth of Ferrous Powder Metallurgy (PM) Parts
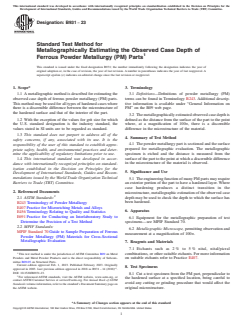
Standard Test Method for Metallographically Estimating the Observed Case Depth of Ferrous Powder Metallurgy (PM) Parts
SIGNIFICANCE AND USE
5.1 The engineering function of many PM parts may require an exterior portion of the part to have a hardened layer. Where case hardening produces a distinct transition in the microstructure, metallographic estimation of the observed case depth may be used to check the depth to which the surface has been hardened.
SCOPE
1.1 A metallographic method is described for estimating the observed case depth of ferrous powder metallurgy (PM) parts. This method may be used for all types of hardened cases where there is a discernible difference between the microstructure of the hardened surface and that of the interior of the part.
1.2 With the exception of the values for grit size for which the U.S. standard designation is the industry standard, the values stated in SI units are to be regarded as standard.
1.3 This standard does not purport to address all of the safety concerns, if any, associated with its use. It is the responsibility of the user of this standard to establish appropriate safety, health, and environmental practices and determine the applicability of regulatory limitations prior to use.
1.4 This international standard was developed in accordance with internationally recognized principles on standardization established in the Decision on Principles for the Development of International Standards, Guides and Recommendations issued by the World Trade Organization Technical Barriers to Trade (TBT) Committee.
General Information
- Status
- Published
- Publication Date
- 31-Jan-2023
- Technical Committee
- B09 - Metal Powders and Metal Powder Products
- Drafting Committee
- B09.05 - Structural Parts
Relations
- Effective Date
- 01-Nov-2023
- Effective Date
- 01-Apr-2022
- Effective Date
- 01-Oct-2018
- Effective Date
- 01-Oct-2017
- Effective Date
- 01-Oct-2017
- Effective Date
- 01-Jul-2016
- Effective Date
- 01-Jun-2015
- Effective Date
- 15-Nov-2013
- Effective Date
- 15-Nov-2013
- Effective Date
- 15-Nov-2013
- Effective Date
- 15-Nov-2013
- Effective Date
- 01-Nov-2013
- Effective Date
- 15-Aug-2013
- Effective Date
- 01-May-2013
- Effective Date
- 15-Jul-2012
Overview
ASTM B931-23, Standard Test Method for Metallographically Estimating the Observed Case Depth of Ferrous Powder Metallurgy (PM) Parts, provides a reliable metallographic procedure for estimating the observed case depth in ferrous PM components. This method is specifically designed to determine the depth to which a PM part’s surface has been hardened, where case hardening processes create a discernible microstructural transition between the outer case and the inner core.
The standard is essential for manufacturers and users of powder metallurgy parts where case hardening is critical to their engineering performance. Accurate estimation of case depth is fundamental for quality assurance, process control, and compliance with component requirements.
Key Topics
- Metallographic Method: Describes procedures for preparing PM parts, etching, and identifying the microstructural boundary between case and core using optical microscopy, typically at 100x magnification.
- Sample Preparation: Emphasizes careful cutting, mounting, and polishing of specimens to avoid altering the original microstructure. References best practices for grinding and polishing, and cleanliness is vital for accurate results.
- Case Depth Measurement: Defines the observed case depth as the distance from the surface to the transition point where the microstructure noticeably changes. This point should be agreed upon by both producer and purchaser.
- Etchants and Equipment: Recommends etchants such as nital or nital/picral combinations, and the use of a metallographic microscope for evaluation.
- Reporting Results: Specifies required reporting details, including material type, etchant used, location of measurement, and measured case depth to the nearest 0.1 mm.
- Precision and Repeatability: Discusses statistical considerations, including repeatability of results and the necessity for sound laboratory practices in line with referenced ASTM documents.
Applications
- Quality Control: Ensures outside suppliers and in-house teams consistently produce case-hardened PM components meeting design specifications.
- Process Validation: Verifies the effectiveness of case hardening processes (e.g., carburizing, nitriding, induction hardening) by observing the resulting microstructure.
- Failure Analysis: Helps determine if insufficient or uneven case depth contributed to part failure, supporting corrective action.
- Design Verification: Confirms that finished PM parts align with engineering requirements for wear resistance, fatigue strength, and performance under service conditions.
- Material Development: Assists research and development teams in evaluating new PM materials or heat-treat procedures by providing consistent case depth measurement.
Related Standards
ASTM B931-23 references several essential standards for terminology, sample preparation, and metallographic techniques, including:
- ASTM B243 - Terminology of Powder Metallurgy
- ASTM E177 - Practice for Use of the Terms Precision and Bias in ASTM Test Methods
- ASTM E407 - Practice for Microetching Metals and Alloys
- ASTM E456 - Terminology Relating to Quality and Statistics
- ASTM E691 - Practice for Conducting an Interlaboratory Study to Determine the Precision of a Test Method
- MPIF Standard 70 - Guide to Sample Preparation of Ferrous Powder Metallurgy Materials for Cross-Sectional Metallographic Evaluation
Practical Value
Adhering to ASTM B931-23 supports consistent and accurate case depth estimation in ferrous PM parts, enhancing product reliability and enabling compliance with international standards. Its systematic metallographic assessment strengthens supplier relationships and underpins quality documentation. Suitable for a wide range of PM components, the standard is a critical tool in both production environments and R&D labs seeking to optimize their hardening processes and material performance.
Keywords: ASTM B931-23, case depth measurement, powder metallurgy, PM parts, metallographic method, case hardening, ferrous components, microstructural analysis, quality control, surface hardening, metallography.
Buy Documents
ASTM B931-23 - Standard Test Method for Metallographically Estimating the Observed Case Depth of Ferrous Powder Metallurgy (PM) Parts
REDLINE ASTM B931-23 - Standard Test Method for Metallographically Estimating the Observed Case Depth of Ferrous Powder Metallurgy (PM) Parts
Get Certified
Connect with accredited certification bodies for this standard

Element Materials Technology
Materials testing and product certification.

Inštitut za kovinske materiale in tehnologije
Institute of Metals and Technology. Materials testing, metallurgical analysis, NDT.
Sponsored listings
Frequently Asked Questions
ASTM B931-23 is a standard published by ASTM International. Its full title is "Standard Test Method for Metallographically Estimating the Observed Case Depth of Ferrous Powder Metallurgy (PM) Parts". This standard covers: SIGNIFICANCE AND USE 5.1 The engineering function of many PM parts may require an exterior portion of the part to have a hardened layer. Where case hardening produces a distinct transition in the microstructure, metallographic estimation of the observed case depth may be used to check the depth to which the surface has been hardened. SCOPE 1.1 A metallographic method is described for estimating the observed case depth of ferrous powder metallurgy (PM) parts. This method may be used for all types of hardened cases where there is a discernible difference between the microstructure of the hardened surface and that of the interior of the part. 1.2 With the exception of the values for grit size for which the U.S. standard designation is the industry standard, the values stated in SI units are to be regarded as standard. 1.3 This standard does not purport to address all of the safety concerns, if any, associated with its use. It is the responsibility of the user of this standard to establish appropriate safety, health, and environmental practices and determine the applicability of regulatory limitations prior to use. 1.4 This international standard was developed in accordance with internationally recognized principles on standardization established in the Decision on Principles for the Development of International Standards, Guides and Recommendations issued by the World Trade Organization Technical Barriers to Trade (TBT) Committee.
SIGNIFICANCE AND USE 5.1 The engineering function of many PM parts may require an exterior portion of the part to have a hardened layer. Where case hardening produces a distinct transition in the microstructure, metallographic estimation of the observed case depth may be used to check the depth to which the surface has been hardened. SCOPE 1.1 A metallographic method is described for estimating the observed case depth of ferrous powder metallurgy (PM) parts. This method may be used for all types of hardened cases where there is a discernible difference between the microstructure of the hardened surface and that of the interior of the part. 1.2 With the exception of the values for grit size for which the U.S. standard designation is the industry standard, the values stated in SI units are to be regarded as standard. 1.3 This standard does not purport to address all of the safety concerns, if any, associated with its use. It is the responsibility of the user of this standard to establish appropriate safety, health, and environmental practices and determine the applicability of regulatory limitations prior to use. 1.4 This international standard was developed in accordance with internationally recognized principles on standardization established in the Decision on Principles for the Development of International Standards, Guides and Recommendations issued by the World Trade Organization Technical Barriers to Trade (TBT) Committee.
ASTM B931-23 is classified under the following ICS (International Classification for Standards) categories: 77.160 - Powder metallurgy. The ICS classification helps identify the subject area and facilitates finding related standards.
ASTM B931-23 has the following relationships with other standards: It is inter standard links to ASTM E407-23, ASTM E456-13a(2022)e1, ASTM B243-18, ASTM E456-13A(2017)e1, ASTM E456-13A(2017)e3, ASTM B243-16, ASTM E407-07(2015)e1, ASTM E456-13ae2, ASTM E456-13a, ASTM E456-13ae1, ASTM E456-13ae3, ASTM B243-13, ASTM E456-13, ASTM E691-13, ASTM B243-12. Understanding these relationships helps ensure you are using the most current and applicable version of the standard.
ASTM B931-23 is available in PDF format for immediate download after purchase. The document can be added to your cart and obtained through the secure checkout process. Digital delivery ensures instant access to the complete standard document.
Standards Content (Sample)
This international standard was developed in accordance with internationally recognized principles on standardization established in the Decision on Principles for the
Development of International Standards, Guides and Recommendations issued by the World Trade Organization Technical Barriers to Trade (TBT) Committee.
Designation: B931 − 23
Standard Test Method for
Metallographically Estimating the Observed Case Depth of
Ferrous Powder Metallurgy (PM) Parts
This standard is issued under the fixed designation B931; the number immediately following the designation indicates the year of
original adoption or, in the case of revision, the year of last revision. A number in parentheses indicates the year of last reapproval. A
superscript epsilon (´) indicates an editorial change since the last revision or reapproval.
1. Scope* 3. Terminology
1.1 A metallographic method is described for estimating the 3.1 Definitions—Definitions of powder metallurgy (PM)
observed case depth of ferrous powder metallurgy (PM) parts. terms can be found in Terminology B243. Additional descrip-
This method may be used for all types of hardened cases where tive information is available under “General Information on
there is a discernible difference between the microstructure of PM” on the B09 web page.
the hardened surface and that of the interior of the part.
3.2 The metallographically estimated observed case depth is
1.2 With the exception of the values for grit size for which defined as the distance from the surface of the part to the point
the U.S. standard designation is the industry standard, the where, at a magnification of 100×, there is a discernible
values stated in SI units are to be regarded as standard. difference in the microstructure of the material.
1.3 This standard does not purport to address all of the
4. Summary of Test Method
safety concerns, if any, associated with its use. It is the
4.1 The powder metallurgy part is sectioned and the surface
responsibility of the user of this standard to establish appro-
prepared for metallographic evaluation. The metallographic
priate safety, health, and environmental practices and deter-
specimen is etched and the distance is measured from the
mine the applicability of regulatory limitations prior to use.
surface of the part to the point at which a discernible difference
1.4 This international standard was developed in accor-
in the microstructure of the material is observed.
dance with internationally recognized principles on standard-
ization established in the Decision on Principles for the
5. Significance and Use
Development of International Standards, Guides and Recom-
mendations issued by the World Trade Organization Technical
5.1 The engineering function of many PM parts may require
Barriers to Trade (TBT) Committee.
an exterior portion of the part to have a hardened layer. Where
case hardening produces a distinct transition in the
2. Referenced Documents
microstructure, metallographic estimation of the observed case
depth may be used to check the depth to which the surface has
2.1 ASTM Standards:
been hardened.
B243 Terminology of Powder Metallurgy
E407 Practice for Microetching Metals and Alloys
6. Apparatus
E456 Terminology Relating to Quality and Statistics
E691 Practice for Conducting an Interlaboratory Study to
6.1 Equipment for the metallographic preparation of test
Determine the Precision of a Test Method
specimens—see MPIF Standard 70.
2.2 MPIF Standards:
6.2 Metallographic Microscope, permitting observation and
MPIF Standard 70 Guide to Sample Preparation of Ferrous
measurement at a magnification of 100×.
Powder Metallurgy (PM) Materials for Cross-Sectional
Metallographic Evaluation
7. Reagents and Materials
7.1 Etchants such as 2 % to 5 % nital, nital/picral
combinations, or other suitable etchants. For more information
This test method is under the jurisdiction of ASTM Committee B09 on Metal
Powders and Metal Powder Products and is the direct responsibility of Subcom-
on suitable etchants refer to Practice E407.
mittee B09.05 on Structural Parts.
Current edition approved Feb. 1, 2023. Published February 2023. Originally
8. Test Specimens
ɛ1
approved in 2003. Last previous edition approved in 2018 as B931 – 14 (2018) .
DOI: 10.1520/B0931-23.
8.1 Cut a test specimen from the PM part, perpendicular to
For referenced ASTM standards, visit the ASTM website, www.astm.org, or
the hardened surface at a specified location, being careful to
contact ASTM Customer Service at service@astm.org. For Annual Book of ASTM
avoid any cutting or grinding procedure that would affect the
Standards volume information, refer to the standard’s Document Summary page on
the ASTM website. original microstructure.
*A Summary of Changes section appears at the end of this standard
Copyright © ASTM International, 100 Barr Harbor Drive, PO Box C700, West Conshohocken, PA 19428-2959. United States
B931 − 23
8.2 Mounting of the test specimen is recommended for one laboratory, Practice E691 was followed for the design and
convenience in surface preparation and edge retention. Edge analysis of the data; the details are given in ASTM Research
retention is important for proper measurement of the observed Report No. B09-1021.
case depth. 11.1.1 The 95 % repeatability limit, r, as defined by Te
...
This document is not an ASTM standard and is intended only to provide the user of an ASTM standard an indication of what changes have been made to the previous version. Because
it may not be technically possible to adequately depict all changes accurately, ASTM recommends that users consult prior editions as appropriate. In all cases only the current version
of the standard as published by ASTM is to be considered the official document.
´1
Designation: B931 − 14 (Reapproved 2018) B931 − 23
Standard Test Method for
Metallographically Estimating the Observed Case Depth of
Ferrous Powder Metallurgy (PM) Parts
This standard is issued under the fixed designation B931; the number immediately following the designation indicates the year of
original adoption or, in the case of revision, the year of last revision. A number in parentheses indicates the year of last reapproval. A
superscript epsilon (´) indicates an editorial change since the last revision or reapproval.
ε NOTE—Editorially corrected Table 1 in October 2018.
1. Scope Scope*
1.1 A metallographic method is described for estimating the observed case depth of ferrous powder metallurgy (PM) parts. This
method may be used for all types of hardened cases where there is a discernible difference between the microstructure of the
hardened surface and that of the interior of the part.
1.2 With the exception of the values for grit size for which the U.S. standard designation is the industry standard, the values stated
in SI units are to be regarded as standard.
1.3 This standard does not purport to address all of the safety concerns, if any, associated with its use. It is the responsibility
of the user of this standard to establish appropriate safety, health, and environmental practices and determine the applicability of
regulatory limitations prior to use.
1.4 This international standard was developed in accordance with internationally recognized principles on standardization
established in the Decision on Principles for the Development of International Standards, Guides and Recommendations issued
by the World Trade Organization Technical Barriers to Trade (TBT) Committee.
2. Referenced Documents
2.1 ASTM Standards:
B243 Terminology of Powder Metallurgy
E177 Practice for Use of the Terms Precision and Bias in ASTM Test Methods
E407 Practice for Microetching Metals and Alloys
E456 Terminology Relating to Quality and Statistics
E691 Practice for Conducting an Interlaboratory Study to Determine the Precision of a Test Method
2.2 MPIF Standards:
MPIF Standard 70 Guide to Sample Preparation of Ferrous Powder Metallurgy (PM) Materials for Cross-Sectional
Metallographic Evaluation
This test method is under the jurisdiction of ASTM Committee B09 on Metal Powders and Metal Powder Products and is the direct responsibility of Subcommittee B09.05
on Structural Parts.
Current edition approved Sept. 1, 2014Feb. 1, 2023. Published October 2018February 2023. Originally approved in 2003. Last previous edition approved in 20142018
ɛ1
as B931 – 14.B931 – 14 (2018) . DOI: 10.1520/B0931-14R18E01.10.1520/B0931-23.
For referenced ASTM standards, visit the ASTM website, www.astm.org, or contact ASTM Customer Service at service@astm.org. For Annual Book of ASTM Standards
volume information, refer to the standard’s Document Summary page on the ASTM website.
*A Summary of Changes section appears at the end of this standard
Copyright © ASTM International, 100 Barr Harbor Drive, PO Box C700, West Conshohocken, PA 19428-2959. United States
B931 − 23
3. Terminology
3.1 Definitions—Definitions of powder metallurgy (PM) terms can be found in Terminology B243. Additional descriptive
information is available in the Related Material section of Vol 02.05 of the under “General Information on PM” on the B09 web
page.Annual Book of ASTM Standards.
3.2 The metallographically estimated observed case depth is defined as the distance from the surface of the part to the point where,
at a magnification of 100×, there is a discernible difference in the microstucturemicrostructure of the material.
4. Summary of Test Method
4.1 The powder metallurgy part is sectioned and the surface prepared for metallographic evaluation. The metallographic specimen
is etched and the distance is measured from the surface of the part to the point at which a discernible difference in the
microstructure of the material is observed.
5. Significance and Use
5.1 The engineering function of many PM parts may require an exterior portion of the part to have a hardened layer. Where case
hardening produces a distinct transition in the microstructure, metallographic estimation of the observed case depth may be used
to check the depth to which the surface has been hardened.
6. Apparatus
6.1 Equipment for the metallographic preparation of test specimens—see Appendix X1.MPIF Standard 70.
6.2 Metallographic Microscope, permitting observation and measurement at a magnification of 100×.
7. Reagents and Materials
7.1 Etchants such as 22 % to 5 % nital, nital/picral combinations, or other suitable etchants. For more information on suitable
etchants refer to Practice E407.
8. Test Specimens
8.1 Cut a test specimen from the PM part, perpendicular to the hardened surface at a specified location, being careful to avoid any
cutting or grinding procedure that would affect the original microstructure.
8.2 Mounting of the test specimen is recommended for convenience in surface preparation and edge retention. Edge retention is
important for proper measurement of the observed case depth.
9. Procedure
9.1 Grind and polish the test specimen using methods such as those summarized Guidelines for grinding and polishing specimens
are provided in Appendix X1.MPIF Standard 70.
9.2 Etch the specimen with etchants such as 22 % to 5 % nital or nital/picral combinations.
9.2.1 Observed Case Depth:
9.2.1.1 Examine the surface region of the part at a magnification of 100×.
9.2.1.2 Measure the distance from the surface of the part to the point where there is a discernible difference in the microstructure
of the material.
NOTE 1—The nature and amount of intermediate transformation products will depend on the material being heat treated, its density, and the type of surface
hardening treatment being used. The sharpness of the change in the microstructure at the point of transition will therefore vary. The microstructure
B931 − 23
expected at this transition point should be agreed between the producer and userpurchaser of the part. Magnifications higher than 100× may be used to
check the microstructure of the part in the region of the transition zone. However, the metallographic estimate of the observed case depth shall be made
at a magnification of 100×.
10. Report
10.1 Report the following information:
10.1.1 The type of material and case measured,
10.1.2 The type of etchant used,
10.1.3 The location of the measurement, and
10.1.4 The metallographically estimated observed case depth to the nearest 0.1 mm.0.1 mm.
11. Precision and Bias
11.1 The precision of this test method is based on an intralaboratory study of ASTM B931, Standard Test Method for
Metallographically Estimating the Observed Case Depth of Ferrous Powder Metallurgy (PM) Parts, conducted in 2013. A single
laboratory participated in this study, testing two different induction-hardened PM parts. Every “test result” represents an individual
determination. The laboratory reported 40 replicate test results for each of the materials. Except for the use of only one laboratory,
Practice E691E691 was followed for the design and analysis of the data; the details are given in ASTM Research Report No.
B09-1021.
11.1.1 Repeatability (r)—The difference between repetitive results obtained by the95 % repeatability limit, r, as defined by
Terminology E456same operator in a given laboratory applying the same test method with the same apparatus under constant
operating conditions on identical test material within short intervals of time would , is listed in Table 1the long run, in the normal
and correct operation of the test method, exceed the following values only in one case in 20. The repeatability was determined
based on 40 individual tests in a single laboratory.
11.1.1.1 Repeatability can be interpreted as maximum difference between two results, obtained under repeatability conditions,
which is accepted as plausible due to random causes under normal and correct operation of the test method.
11.1.1.2 Repeatability limits are listed in Table 1.
11.1.2 Reproducibility (R)—The difference between two single and independent results obtained by different operators applying
the same test method in different laboratories using different apparatus on identical test material would, in the long run, in the
normal and correct operation of the test method, exceed the following values only in one case in 20.Reproducibility limits cannot
be calculated from a single laboratory’s results. The reproducibility of this test method is being determined and will be available
on or before December 2025.
11.1.2.1 Reproducibility can be interpreted as maximum difference between two results, obtained under reproducibility conditions,
which is accepted as plausible due to random causes under normal and correct operation of the test method.
11.1.2.2 Reproducibility limits cannot be calculated from a single laboratory’s results. The reproducibility of this test method is
being determined and will be available on or before December 2018.
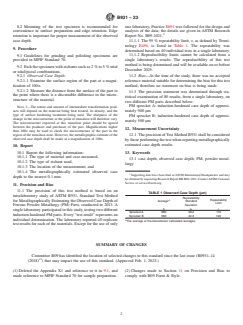
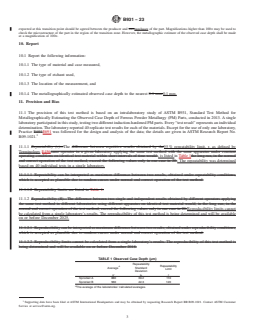
TABLE 1 Observed Case Depth (μm)
Repeatability
Repeatability
A
Average Standard
Limit
Deviation
x¯ s r
r
Sprocket A 880 39.2 110
Sprocket B 560 42.3 120
A
The average of the laboratories’ calculated averages.
Supporting data have been filed at ASTM International Headquarters and may be obtained by requesting Research Report RR:B09-1021. Contact ASTM Customer
Service at service@astm.org.
B931 − 23
11.1.3 The above terms (“repeatability limit” and “reproducibility limit”) are used as specified in Practice E177.
11.1.4 Any judgment in accordance with statement 11.1.1 would normally have an approximate 95 % probability of being correct.
The precision statistics obtained in this ILS must not, however, be treated as exact mathematical quantities which are applicable
to all circumstances and uses. The limited number of laboratories reporting replicate results essentially guarantees that there will
be times when differences greater than predicted by the ILS results will arise, sometimes with considerably greater or smaller
frequency than the 95 % probability limit would imply. Consider the repeatability limit as a general guide, and the associated
probability of 95 % as only a rough indicator of what can be expected.
11.2 Bias—At the time of the study, there was no accepted reference material suitable for determining the bias for this test method,
therefore no statement on bias is being made.
11.3 The precision statement was determined through statistical examination of 80 results, from a single laboratory, on two
different PM parts described below:
PM sprocket A: induction-hardened case depth of approximately 900 μm
PM sprocket B: induction-hardened case depth of approximately 500 μm
12. Measurement Uncertainty
12.1 The precision of Test Method B931 shall be considered by those performing the test when reporting metallographically
estimated case depth results.
13. Keywords
13.1 case depth; observed case depth; PM; powder metallurgy
APPENDIX
(Nonmandatory Information)
X1. SAMPLE PREPARATION
X1.1 The methods described in this appendix are proven practices for m
...


Questions, Comments and Discussion
Ask us and Technical Secretary will try to provide an answer. You can facilitate discussion about the standard in here.
Loading comments...