ASTM D1746-09
(Test Method)Standard Test Method for Transparency of Plastic Sheeting
Standard Test Method for Transparency of Plastic Sheeting
SIGNIFICANCE AND USE
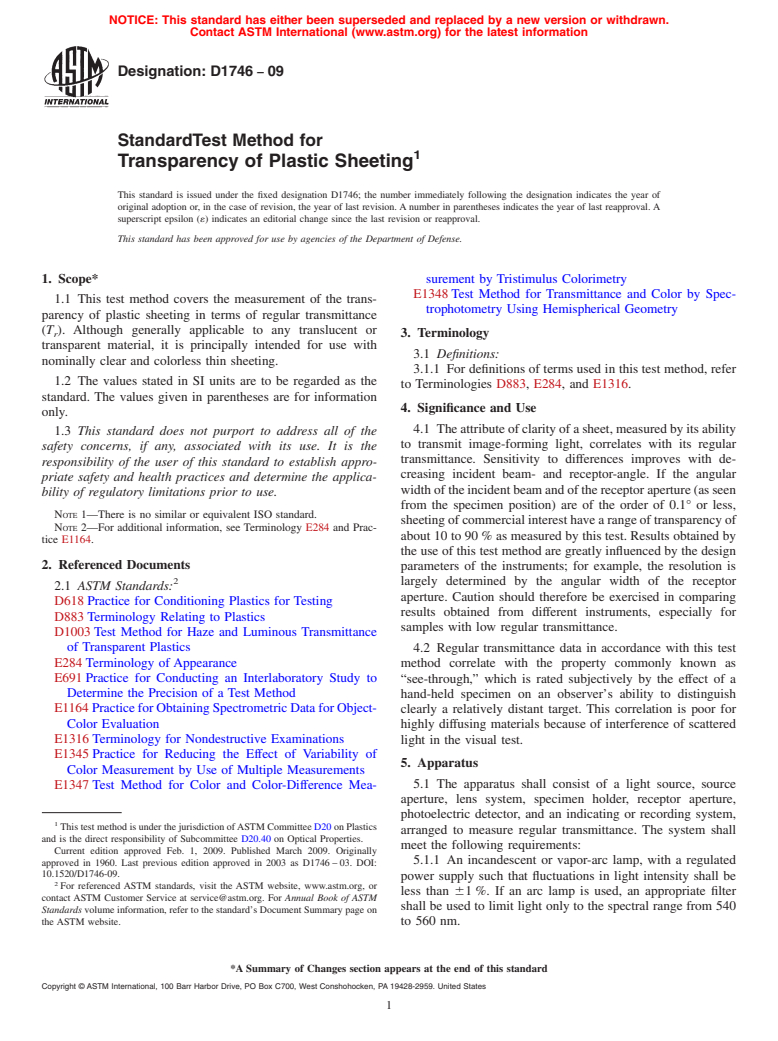
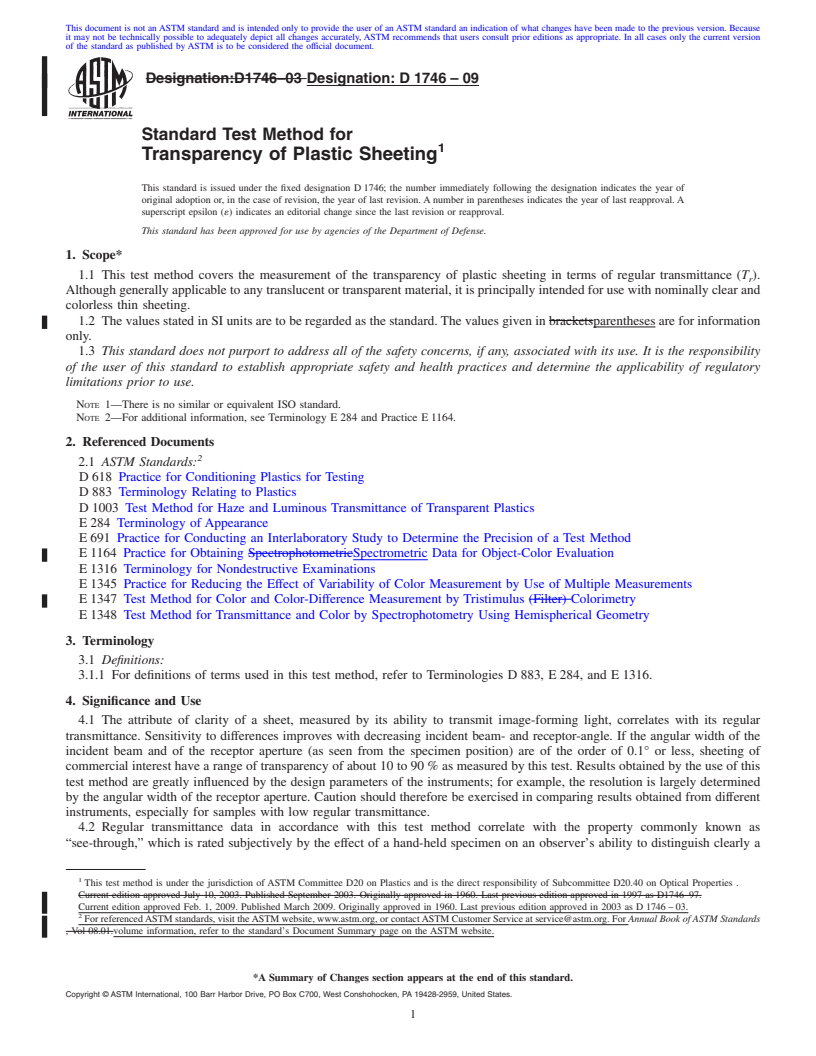
The attribute of clarity of a sheet, measured by its ability to transmit image-forming light, correlates with its regular transmittance. Sensitivity to differences improves with decreasing incident beam- and receptor-angle. If the angular width of the incident beam and of the receptor aperture (as seen from the specimen position) are of the order of 0.1° or less, sheeting of commercial interest have a range of transparency of about 10 to 90 % as measured by this test. Results obtained by the use of this test method are greatly influenced by the design parameters of the instruments; for example, the resolution is largely determined by the angular width of the receptor aperture. Caution should therefore be exercised in comparing results obtained from different instruments, especially for samples with low regular transmittance.
Regular transmittance data in accordance with this test method correlate with the property commonly known as “see-through,” which is rated subjectively by the effect of a hand-held specimen on an observer's ability to distinguish clearly a relatively distant target. This correlation is poor for highly diffusing materials because of interference of scattered light in the visual test.
SCOPE
1.1 This test method covers the measurement of the transparency of plastic sheeting in terms of regular transmittance (Tr). Although generally applicable to any translucent or transparent material, it is principally intended for use with nominally clear and colorless thin sheeting.
1.2 The values stated in SI units are to be regarded as the standard. The values given in parentheses are for information only.
1.3 This standard does not purport to address all of the safety concerns, if any, associated with its use. It is the responsibility of the user of this standard to establish appropriate safety and health practices and determine the applicability of regulatory limitations prior to use.
Note 1—There is no similar or equivalent ISO standard.
Note 2—For additional information, see Terminology E 284 and Practice E 1164.
General Information
Relations
Buy Standard
Standards Content (Sample)
NOTICE: This standard has either been superseded and replaced by a new version or withdrawn.
Contact ASTM International (www.astm.org) for the latest information
Designation: D1746 − 09
StandardTest Method for
1
Transparency of Plastic Sheeting
This standard is issued under the fixed designation D1746; the number immediately following the designation indicates the year of
original adoption or, in the case of revision, the year of last revision.Anumber in parentheses indicates the year of last reapproval.A
superscript epsilon (´) indicates an editorial change since the last revision or reapproval.
This standard has been approved for use by agencies of the Department of Defense.
1. Scope* surement by Tristimulus Colorimetry
E1348Test Method for Transmittance and Color by Spec-
1.1 This test method covers the measurement of the trans-
trophotometry Using Hemispherical Geometry
parency of plastic sheeting in terms of regular transmittance
(T ). Although generally applicable to any translucent or
r 3. Terminology
transparent material, it is principally intended for use with
3.1 Definitions:
nominally clear and colorless thin sheeting.
3.1.1 For definitions of terms used in this test method, refer
1.2 The values stated in SI units are to be regarded as the
to Terminologies D883, E284, and E1316.
standard. The values given in parentheses are for information
4. Significance and Use
only.
4.1 Theattributeofclarityofasheet,measuredbyitsability
1.3 This standard does not purport to address all of the
to transmit image-forming light, correlates with its regular
safety concerns, if any, associated with its use. It is the
transmittance. Sensitivity to differences improves with de-
responsibility of the user of this standard to establish appro-
creasing incident beam- and receptor-angle. If the angular
priate safety and health practices and determine the applica-
widthoftheincidentbeamandofthereceptoraperture(asseen
bility of regulatory limitations prior to use.
from the specimen position) are of the order of 0.1° or less,
NOTE 1—There is no similar or equivalent ISO standard.
sheetingofcommercialinteresthavearangeoftransparencyof
NOTE 2—For additional information, see Terminology E284 and Prac-
about 10 to 90% as measured by this test. Results obtained by
tice E1164.
the use of this test method are greatly influenced by the design
2. Referenced Documents
parameters of the instruments; for example, the resolution is
2
largely determined by the angular width of the receptor
2.1 ASTM Standards:
aperture. Caution should therefore be exercised in comparing
D618Practice for Conditioning Plastics for Testing
results obtained from different instruments, especially for
D883Terminology Relating to Plastics
samples with low regular transmittance.
D1003Test Method for Haze and Luminous Transmittance
of Transparent Plastics 4.2 Regular transmittance data in accordance with this test
E284Terminology of Appearance
method correlate with the property commonly known as
E691Practice for Conducting an Interlaboratory Study to
“see-through,” which is rated subjectively by the effect of a
Determine the Precision of a Test Method hand-held specimen on an observer’s ability to distinguish
E1164PracticeforObtainingSpectrometricDataforObject-
clearly a relatively distant target. This correlation is poor for
Color Evaluation highly diffusing materials because of interference of scattered
E1316Terminology for Nondestructive Examinations
light in the visual test.
E1345Practice for Reducing the Effect of Variability of
5. Apparatus
Color Measurement by Use of Multiple Measurements
5.1 The apparatus shall consist of a light source, source
E1347Test Method for Color and Color-Difference Mea-
aperture, lens system, specimen holder, receptor aperture,
photoelectric detector, and an indicating or recording system,
1
ThistestmethodisunderthejurisdictionofASTMCommitteeD20onPlastics
arranged to measure regular transmittance. The system shall
and is the direct responsibility of Subcommittee D20.40 on Optical Properties.
meet the following requirements:
Current edition approved Feb. 1, 2009. Published March 2009. Originally
5.1.1 An incandescent or vapor-arc lamp, with a regulated
approved in 1960. Last previous edition approved in 2003 as D1746–03. DOI:
10.1520/D1746-09.
power supply such that fluctuations in light intensity shall be
2
For referenced ASTM standards, visit the ASTM website, www.astm.org, or
less than 61%. If an arc lamp is used, an appropriate filter
contact ASTM Customer Service at service@astm.org. For Annual Book of ASTM
shall be used to limit light only to the spectral range from 540
Standards volume information, refer to the standard’s Document Summary page on
the ASTM website. to 560 nm.
*A Summary of Changes section appears at the end of this standard
Copyright © ASTM International, 100 Barr Harbor Drive, PO Box C700, West Conshohocken, PA 19428-2959. United States
1
---------------------- Page: 1 ----------------------
D1746 − 09
5.1.2 A
...
This document is not anASTM standard and is intended only to provide the user of anASTM standard an indication of what changes have been made to the previous version. Because
it may not be technically possible to adequately depict all changes accurately, ASTM recommends that users consult prior editions as appropriate. In all cases only the current version
of the standard as published by ASTM is to be considered the official document.
Designation:D1746–03 Designation:D1746–09
Standard Test Method for
1
Transparency of Plastic Sheeting
This standard is issued under the fixed designation D 1746; the number immediately following the designation indicates the year of
original adoption or, in the case of revision, the year of last revision. A number in parentheses indicates the year of last reapproval. A
superscript epsilon (´) indicates an editorial change since the last revision or reapproval.
This standard has been approved for use by agencies of the Department of Defense.
1. Scope*
1.1 This test method covers the measurement of the transparency of plastic sheeting in terms of regular transmittance (T ).
r
Although generally applicable to any translucent or transparent material, it is principally intended for use with nominally clear and
colorless thin sheeting.
1.2 The values stated in SI units are to be regarded as the standard.The values given in bracketsparentheses are for information
only.
1.3 This standard does not purport to address all of the safety concerns, if any, associated with its use. It is the responsibility
of the user of this standard to establish appropriate safety and health practices and determine the applicability of regulatory
limitations prior to use.
NOTE 1—There is no similar or equivalent ISO standard.
NOTE 2—For additional information, see Terminology E 284 and Practice E 1164.
2. Referenced Documents
2
2.1 ASTM Standards:
D 618 Practice for Conditioning Plastics for Testing
D 883 Terminology Relating to Plastics
D 1003 Test Method for Haze and Luminous Transmittance of Transparent Plastics
E 284 Terminology of Appearance
E 691 Practice for Conducting an Interlaboratory Study to Determine the Precision of a Test Method
E 1164 Practice for Obtaining SpectrophotometricSpectrometric Data for Object-Color Evaluation
E 1316 Terminology for Nondestructive Examinations
E 1345 Practice for Reducing the Effect of Variability of Color Measurement by Use of Multiple Measurements
E 1347 Test Method for Color and Color-Difference Measurement by Tristimulus (Filter) Colorimetry
E 1348 Test Method for Transmittance and Color by Spectrophotometry Using Hemispherical Geometry
3. Terminology
3.1 Definitions:
3.1.1 For definitions of terms used in this test method, refer to Terminologies D 883, E 284, and E 1316.
4. Significance and Use
4.1 The attribute of clarity of a sheet, measured by its ability to transmit image-forming light, correlates with its regular
transmittance. Sensitivity to differences improves with decreasing incident beam- and receptor-angle. If the angular width of the
incident beam and of the receptor aperture (as seen from the specimen position) are of the order of 0.1° or less, sheeting of
commercial interest have a range of transparency of about 10 to 90 % as measured by this test. Results obtained by the use of this
test method are greatly influenced by the design parameters of the instruments; for example, the resolution is largely determined
by the angular width of the receptor aperture. Caution should therefore be exercised in comparing results obtained from different
instruments, especially for samples with low regular transmittance.
4.2 Regular transmittance data in accordance with this test method correlate with the property commonly known as
“see-through,” which is rated subjectively by the effect of a hand-held specimen on an observer’s ability to distinguish clearly a
1
This test method is under the jurisdiction of ASTM Committee D20 on Plastics and is the direct responsibility of Subcommittee D20.40 on Optical Properties .
Current edition approved July 10, 2003. Published September 2003. Originally approved in 1960. Last previous edition approved in 1997 as D1746–97.
Current edition approved Feb. 1, 2009. Published March 2009. Originally approved in 1960. Last previous edition approved in 2003 as D 1746 – 03.
2
For referencedASTM standards, visit theASTM website, www.astm.org, or contactASTM Customer Service at service@astm.org. For Annual Book of ASTM Standards
, Vol 08.01.volume information, refer to the standard’s Document Summary page on the ASTM website.
*A Summary of Changes section appears at the end of this standard.
Copyright © ASTM International, 100 Barr Harbor Drive, PO Box C700, West Conshohocken, PA 19428-2959, United States.
1
---------------------- Page: 1 ----------------------
D1746–09
relativelydistanttarget.Thiscorrelationispoorforhighlydiffusingmaterialsbecauseofinterferenceofscatteredlightinthevisual
test.
5. Apparatus
5.1 The apparatus shall co
...


Questions, Comments and Discussion
Ask us and Technical Secretary will try to provide an answer. You can facilitate discussion about the standard in here.