ASTM E1277-23
(Test Method)Standard Test Method for Analysis of Zinc-5 % Aluminum-Mischmetal Alloys by Inductively Coupled Plasma Atomic Emission Spectrometry
Standard Test Method for Analysis of Zinc-5 % Aluminum-Mischmetal Alloys by Inductively Coupled Plasma Atomic Emission Spectrometry
SIGNIFICANCE AND USE
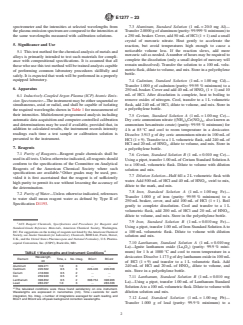
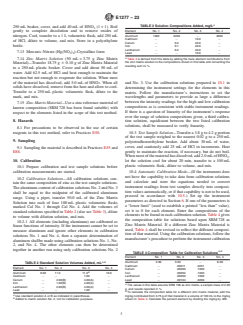
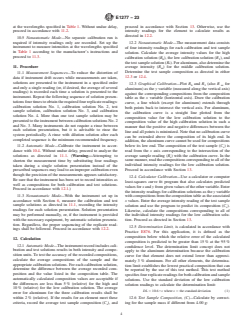
5.1 This test method for the chemical analysis of metals and alloys is primarily intended to test such materials for compliance with compositional specifications. It is assumed that all those who use this test method will be trained analysts capable of performing common laboratory procedures skillfully and safely. It is expected that work will be performed in a properly equipped laboratory.
SCOPE
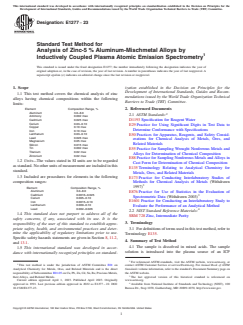
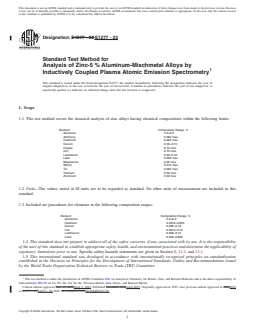
1.1 This test method covers the chemical analysis of zinc alloys having chemical compositions within the following limits:
Element
Composition Range, %
Aluminum
3.0–8.0
Antimony
0.002 max
Cadmium
0.025 max
Cerium
0.03–0.10
Copper
0.10 max
Iron
0.10 max
Lanthanum
0.03–0.10
Lead
0.026 max
Magnesium
0.05 max
Silicon
0.015 max
Tin
0.002 max
Titanium
0.02 max
Zirconium
0.02 max
1.2 Units—The values stated in SI units are to be regarded as standard. No other units of measurement are included in this standard.
1.3 Included are procedures for elements in the following composition ranges:
Element
Composition Range, %
Aluminum
3.0–8.0
Cadmium
0.0016–0.025
Cerium
0.005–0.10
Iron
0.0015–0.10
Lanthanum
0.009–0.10
Lead
0.002–0.026
1.4 This standard does not purport to address all of the safety concerns, if any, associated with its use. It is the responsibility of the user of this standard to establish appropriate safety, health, and environmental practices and determine the applicability of regulatory limitations prior to use. Specific safety hazards statements are given in Section 8, 11.2, and 13.1.
1.5 This international standard was developed in accordance with internationally recognized principles on standardization established in the Decision on Principles for the Development of International Standards, Guides and Recommendations issued by the World Trade Organization Technical Barriers to Trade (TBT) Committee.
General Information
- Status
- Published
- Publication Date
- 31-Mar-2023
- Technical Committee
- E01 - Analytical Chemistry for Metals, Ores, and Related Materials
Relations
- Effective Date
- 10-Dec-2019
- Effective Date
- 01-Jan-2020
- Effective Date
- 01-Nov-2019
- Effective Date
- 15-May-2019
- Effective Date
- 01-Sep-2017
- Effective Date
- 01-Sep-2017
- Effective Date
- 01-Aug-2016
- Effective Date
- 15-May-2016
- Effective Date
- 01-Jul-2015
- Effective Date
- 15-May-2015
- Effective Date
- 15-Aug-2014
- Effective Date
- 01-Apr-2014
- Effective Date
- 15-Feb-2014
- Effective Date
- 01-Dec-2013
- Effective Date
- 15-Dec-2012
Overview
ASTM E1277-23 is the standard test method developed by ASTM International for the chemical analysis of zinc-5% aluminum-mischmetal alloys using inductively coupled plasma atomic emission spectrometry (ICP-AES). This method is designed primarily to ensure alloys meet compositional specifications, supporting quality control and regulatory compliance in the metallurgical and manufacturing industries. The procedure is intended for use by trained analysts in properly equipped laboratories, offering precise and reliable elemental analysis for critical applications.
Key Topics
Scope of Analysis:
The method applies to zinc alloys, particularly those containing:- Aluminum (3.0–8.0%)
- Antimony (≤0.002%)
- Cadmium (≤0.025%, quantifiable 0.0016–0.025%)
- Cerium (0.03–0.10%, quantifiable 0.005–0.10%)
- Copper (≤0.10%)
- Iron (≤0.10%, quantifiable 0.0015–0.10%)
- Lanthanum (0.03–0.10%, quantifiable 0.009–0.10%)
- Lead (≤0.026%, quantifiable 0.002–0.026%)
- Other trace elements (magnesium, silicon, tin, titanium, zirconium)
Analytical Process:
- Samples are dissolved in specific acid mixtures, then introduced into the ICP spectrometer.
- Emission intensities at selected wavelengths are measured and compared with calibration standards.
- The method ensures results are traceable to SI units (International System of Units).
Results Reporting:
- Results are rounded per ASTM E29 guidelines.
- Only compositional results within the specified ranges are reported; results outside these ranges are noted accordingly.
Safety and Compliance:
- Strict laboratory best practices are required.
- Users are responsible for adhering to health, safety, and environmental regulations relevant to laboratory operations.
Applications
The ASTM E1277-23 standard provides value across industries and laboratory settings involved in:
- Quality Control: Verifying that zinc-based alloys meet specified chemical composition requirements.
- Manufacturing: Ensuring product performance and consistency, especially in automotive, electronics, and metal casting sectors.
- Materials Research: Supporting alloy development with accurate, multi-element analysis.
- Compliance Auditing: Satisfying internal and regulatory documentation needs for alloy certification.
Benefits of using ICP-AES under this standard include:
- High sensitivity and precision for trace and major element quantification.
- Simultaneous multi-element detection, increasing laboratory efficiency.
- Enhanced confidence in alloy certification and material selection.
Related Standards
ASTM E1277-23 works alongside several key ASTM and reference documents, including:
- ASTM D1193 - Specification for Reagent Water: Ensures water purity in sample and solution preparation.
- ASTM E29 - Practice for Using Significant Digits in Test Data: Guides rounding and reporting of analytical results.
- ASTM E50 - Practices for Apparatus, Reagents, and Safety: Addresses required equipment and safety precautions in chemical analysis.
- ASTM E55 / E88 - Practices for Sampling Metals and Alloys: Describes best practices for preparing representative samples.
- ASTM E135 - Terminology Relating to Analytical Chemistry for Metals.
- NIST SRM 728 - Reference material for zinc matrix calibration.
Summary
ASTM E1277-23 establishes industry-accepted protocols for the accurate analysis of zinc-5% aluminum-mischmetal alloys using ICP-AES. Adherence to this standard supports precise quality assessment, regulatory compliance, and traceability in alloy production, making it essential for laboratories and manufacturers focused on zinc alloy applications. For optimal implementation, users should also reference related ASTM standards and use certified reference materials to verify analytical accuracy.
Buy Documents
ASTM E1277-23 - Standard Test Method for Analysis of Zinc-5 % Aluminum-Mischmetal Alloys by Inductively Coupled Plasma Atomic Emission Spectrometry
REDLINE ASTM E1277-23 - Standard Test Method for Analysis of Zinc-5 % Aluminum-Mischmetal Alloys by Inductively Coupled Plasma Atomic Emission Spectrometry
Get Certified
Connect with accredited certification bodies for this standard

Element Materials Technology
Materials testing and product certification.

Inštitut za kovinske materiale in tehnologije
Institute of Metals and Technology. Materials testing, metallurgical analysis, NDT.
Sponsored listings
Frequently Asked Questions
ASTM E1277-23 is a standard published by ASTM International. Its full title is "Standard Test Method for Analysis of Zinc-5 % Aluminum-Mischmetal Alloys by Inductively Coupled Plasma Atomic Emission Spectrometry". This standard covers: SIGNIFICANCE AND USE 5.1 This test method for the chemical analysis of metals and alloys is primarily intended to test such materials for compliance with compositional specifications. It is assumed that all those who use this test method will be trained analysts capable of performing common laboratory procedures skillfully and safely. It is expected that work will be performed in a properly equipped laboratory. SCOPE 1.1 This test method covers the chemical analysis of zinc alloys having chemical compositions within the following limits: Element Composition Range, % Aluminum 3.0–8.0 Antimony 0.002 max Cadmium 0.025 max Cerium 0.03–0.10 Copper 0.10 max Iron 0.10 max Lanthanum 0.03–0.10 Lead 0.026 max Magnesium 0.05 max Silicon 0.015 max Tin 0.002 max Titanium 0.02 max Zirconium 0.02 max 1.2 Units—The values stated in SI units are to be regarded as standard. No other units of measurement are included in this standard. 1.3 Included are procedures for elements in the following composition ranges: Element Composition Range, % Aluminum 3.0–8.0 Cadmium 0.0016–0.025 Cerium 0.005–0.10 Iron 0.0015–0.10 Lanthanum 0.009–0.10 Lead 0.002–0.026 1.4 This standard does not purport to address all of the safety concerns, if any, associated with its use. It is the responsibility of the user of this standard to establish appropriate safety, health, and environmental practices and determine the applicability of regulatory limitations prior to use. Specific safety hazards statements are given in Section 8, 11.2, and 13.1. 1.5 This international standard was developed in accordance with internationally recognized principles on standardization established in the Decision on Principles for the Development of International Standards, Guides and Recommendations issued by the World Trade Organization Technical Barriers to Trade (TBT) Committee.
SIGNIFICANCE AND USE 5.1 This test method for the chemical analysis of metals and alloys is primarily intended to test such materials for compliance with compositional specifications. It is assumed that all those who use this test method will be trained analysts capable of performing common laboratory procedures skillfully and safely. It is expected that work will be performed in a properly equipped laboratory. SCOPE 1.1 This test method covers the chemical analysis of zinc alloys having chemical compositions within the following limits: Element Composition Range, % Aluminum 3.0–8.0 Antimony 0.002 max Cadmium 0.025 max Cerium 0.03–0.10 Copper 0.10 max Iron 0.10 max Lanthanum 0.03–0.10 Lead 0.026 max Magnesium 0.05 max Silicon 0.015 max Tin 0.002 max Titanium 0.02 max Zirconium 0.02 max 1.2 Units—The values stated in SI units are to be regarded as standard. No other units of measurement are included in this standard. 1.3 Included are procedures for elements in the following composition ranges: Element Composition Range, % Aluminum 3.0–8.0 Cadmium 0.0016–0.025 Cerium 0.005–0.10 Iron 0.0015–0.10 Lanthanum 0.009–0.10 Lead 0.002–0.026 1.4 This standard does not purport to address all of the safety concerns, if any, associated with its use. It is the responsibility of the user of this standard to establish appropriate safety, health, and environmental practices and determine the applicability of regulatory limitations prior to use. Specific safety hazards statements are given in Section 8, 11.2, and 13.1. 1.5 This international standard was developed in accordance with internationally recognized principles on standardization established in the Decision on Principles for the Development of International Standards, Guides and Recommendations issued by the World Trade Organization Technical Barriers to Trade (TBT) Committee.
ASTM E1277-23 is classified under the following ICS (International Classification for Standards) categories: 77.040.30 - Chemical analysis of metals. The ICS classification helps identify the subject area and facilitates finding related standards.
ASTM E1277-23 has the following relationships with other standards: It is inter standard links to ASTM E428-08(2013), ASTM E135-20, ASTM E1601-19, ASTM E135-19, ASTM E88-11(2017), ASTM E50-17, ASTM E50-11(2016), ASTM E135-16, ASTM E135-15a, ASTM E135-15, ASTM E135-14b, ASTM E135-14a, ASTM E135-14, ASTM E135-13a, ASTM E1601-12. Understanding these relationships helps ensure you are using the most current and applicable version of the standard.
ASTM E1277-23 is available in PDF format for immediate download after purchase. The document can be added to your cart and obtained through the secure checkout process. Digital delivery ensures instant access to the complete standard document.
Standards Content (Sample)
This international standard was developed in accordance with internationally recognized principles on standardization established in the Decision on Principles for the
Development of International Standards, Guides and Recommendations issued by the World Trade Organization Technical Barriers to Trade (TBT) Committee.
Designation: E1277 − 23
Standard Test Method for
Analysis of Zinc-5 % Aluminum-Mischmetal Alloys by
Inductively Coupled Plasma Atomic Emission Spectrometry
This standard is issued under the fixed designation E1277; the number immediately following the designation indicates the year of
original adoption or, in the case of revision, the year of last revision. A number in parentheses indicates the year of last reapproval. A
superscript epsilon (´) indicates an editorial change since the last revision or reapproval.
1. Scope ization established in the Decision on Principles for the
Development of International Standards, Guides and Recom-
1.1 This test method covers the chemical analysis of zinc
mendations issued by the World Trade Organization Technical
alloys having chemical compositions within the following
Barriers to Trade (TBT) Committee.
limits:
Element Composition Range, % 2. Referenced Documents
Aluminum 3.0–8.0
2.1 ASTM Standards:
Antimony 0.002 max
Cadmium 0.025 max D1193 Specification for Reagent Water
Cerium 0.03–0.10
E29 Practice for Using Significant Digits in Test Data to
Copper 0.10 max
Determine Conformance with Specifications
Iron 0.10 max
Lanthanum 0.03–0.10
E50 Practices for Apparatus, Reagents, and Safety Consid-
Lead 0.026 max
erations for Chemical Analysis of Metals, Ores, and
Magnesium 0.05 max
Related Materials
Silicon 0.015 max
Tin 0.002 max
E55 Practice for Sampling Wrought Nonferrous Metals and
Titanium 0.02 max
Alloys for Determination of Chemical Composition
Zirconium 0.02 max
E88 Practice for Sampling Nonferrous Metals and Alloys in
1.2 Units—The values stated in SI units are to be regarded
Cast Form for Determination of Chemical Composition
as standard. No other units of measurement are included in this
E135 Terminology Relating to Analytical Chemistry for
standard.
Metals, Ores, and Related Materials
1.3 Included are procedures for elements in the following
E173 Practice for Conducting Interlaboratory Studies of
composition ranges: Methods for Chemical Analysis of Metals (Withdrawn
1997)
Element Composition Range, %
Aluminum 3.0–8.0
E876 Practice for Use of Statistics in the Evaluation of
Cadmium 0.0016–0.025
Spectrometric Data (Withdrawn 2003)
Cerium 0.005–0.10
E1601 Practice for Conducting an Interlaboratory Study to
Iron 0.0015–0.10
Lanthanum 0.009–0.10
Evaluate the Performance of an Analytical Method
Lead 0.002–0.026 4
2.2 NIST Standard Reference Materials:
1.4 This standard does not purport to address all of the
SRM 728 Zinc, Intermediate Purity
safety concerns, if any, associated with its use. It is the
3. Terminology
responsibility of the user of this standard to establish appro-
priate safety, health, and environmental practices and deter-
3.1 For definitions of terms used in this test method, refer to
mine the applicability of regulatory limitations prior to use.
Terminology E135.
Specific safety hazards statements are given in Section 8, 11.2,
4. Summary of Test Method
and 13.1.
4.1 The sample is dissolved in mixed acids. The sample
1.5 This international standard was developed in accor-
solution is introduced into the plasma source of an ICP
dance with internationally recognized principles on standard-
For referenced ASTM standards, visit the ASTM website, www.astm.org, or
This test method is under the jurisdiction of ASTM Committee E01 on contact ASTM Customer Service at service@astm.org. For Annual Book of ASTM
Analytical Chemistry for Metals, Ores, and Related Materials and is the direct Standards volume information, refer to the standard’s Document Summary page on
responsibility of Subcommittee E01.05 on Cu, Pb, Zn, Cd, Sn, Be, Precious Metals, the ASTM website.
their Alloys, and Related Metals. The last approved version of this historical standard is referenced on
Current edition approved April 1, 2023. Published April 2023. Originally www.astm.org.
approved in 1991. Last previous edition approved in 2022 as E1277 – 22. DOI: Available from National Institute of Standards and Technology (NIST), 100
10.1520/E1277-23. Bureau Dr., Stop 1070, Gaithersburg, MD 20899-1070, http://www.nist.gov.
Copyright © ASTM International, 100 Barr Harbor Drive, PO Box C700, West Conshohocken, PA 19428-2959. United States
E1277 − 23
spectrometer and the intensities at selected wavelengths from 7.3 Aluminum, Standard Solution (1 mL = 20.0 mg Al)—
the plasma emission spectrum are compared to the intensities at Transfer 2.0000 g of aluminum (purity: 99.999 % minimum) to
the same wavelengths measured with calibration solutions. a 250 mL beaker. Cover, add 50 mL of HCl (1 + 1) and a small
crystal of mercuric nitrate. Heat gently to accelerate the
5. Significance and Use
reaction, but avoid temperatures high enough to cause a
noticeable volume loss. If the reaction slows, add more
5.1 This test method for the chemical analysis of metals and
mercuric salt as needed. A number of hours may be required to
alloys is primarily intended to test such materials for compli-
complete the dissolution (only a small droplet of mercury will
ance with compositional specifications. It is assumed that all
remain undissolved). Transfer the solution to a 100 mL volu-
those who use this test method will be trained analysts capable
metric flask, dilute to volume, and mix. Store in a polyethylene
of performing common laboratory procedures skillfully and
bottle.
safely. It is expected that work will be performed in a properly
equipped laboratory.
7.4 Cadmium, Standard Solution (1 mL = 1.00 mg Cd)—
Transfer 1.000 g of cadmium (purity: 99.95 % minimum) to a
6. Apparatus
250 mL beaker. Cover and add 40 mL of HNO (1 + 1) and 10
mL of HCl. After dissolution is complete, heat to boiling to
6.1 Inductively-Coupled Argon Plasma (ICP) Atomic Emis-
remove oxides of nitrogen. Cool, transfer to a 1 L volumetric
sion Spectrometer—The instrument may be either sequential or
flask, add 240 mL of HCl, dilute to volume, and mix. Store in
simultaneous, axial or radial, and shall be capable of isolating
a polyethylene bottle.
the required wavelengths shown in Table 1 for measurement of
their intensities. Multielement programmed analysis including
7.5 Cerium, Standard Solution A (1 mL = 1.00 mg Ce)—
automatic data acquisition and computer-controlled calibration
Dry ceric ammonium nitrate ((NH ) Ce(NO ) , also known as
4 2 3 6
and determinations may be used if available, provided that, in
ammonium hexanitrato cerate) (purity: 99.95 % minimum) for
addition to calculated results, the instrument records intensity
4 h at 85 °C and cool to room temperature in a desiccator.
readings each time a test sample or calibration solution is
Dissolve 3.913 g of dry ceric ammonium nitrate in 100 mL of
presented to the instrument.
HCl (1 + 9). Transfer to a 1 L volumetric flask, add 240 mL of
HCl and 20 mL of HNO , dilute to volume, and mix. Store in
7. Reagents
a polyethylene bottle.
7.1 Purity of Reagents—Reagent grade chemicals shall be
7.6 Cerium, Standard Solution B (1 mL = 0.010 mg Ce)—
used in all tests. Unless otherwise indicated, all reagents should
Using a pipet, transfer 1.00 mL of Cerium Standard Solution A
conform to the specifications of the Committee on Analytical
to a 100 mL volumetric flask. Dilute to volume with dilution
Reagents of the American Chemical Society where such
solution and mix.
specifications are available. Other grades may be used, pro-
7.7 Dilution Solution—Half fill a 2 L volumetric flask with
vided it is first ascertained that the reagent is of sufficiently
water. Add 500 mL of HCl and 40 mL of HNO , swirl to mix,
high purity to permit its use without lessening the accuracy of
dilute to the mark, and mix.
the determination.
7.8 Iron, Standard Solution A (1 mL = 1.00 mg Fe)—
7.2 Purity of Water—Unless otherwise indicated, references
Transfer 1.000 g of iron (purity: 99.95 % minimum) to a
to water shall mean reagent water as defined by Type II of
250 mL beaker, cover, and add 100 mL of HCl (1 + 1). Boil
Specification D1193.
gently to complete dissolution. Cool and transfer to a 1 L
volumetric flask, add 200 mL of HCl and 20 mL of HNO ,
dilute to volume, and mix. Store in the polyethylene bottle.
7.9 Iron, Standard Solution B (1 mL = 0.010 mg Fe)—
ACS Reagent Chemicals, Specifications and Procedures for Reagents and
Using a pipet, transfer 1.00 mL of Iron Standard Solution A to
Standard-Grade Reference Materials, American Chemical Society, Washington,
DC. For suggestions on the testing of reagents not listed by the American Chemical a 100 mL volumetric flask. Dilute to volume with dilution
Society, see Analar Standards for Laboratory Chemicals, BDH Ltd., Poole, Dorset,
solution and mix.
U.K., and the United States Pharmacopeia and National Formulary, U.S. Pharma-
7.10 Lanthanum, Standard Solution A (1 mL = 0.010 mg
copeial Convention, Inc. (USPC), Rockville, MD.
La)—Ignite lanthanum oxide (La O ) (purity: 99.9 % mini-
2 3
A
mum) for 1 h at 1000 °C and cool to room temperature in a
TABLE 1 Wavelengths and Instrument Conditions
desiccator. Dissolve 1.173 g of dry lanthanum oxide in 100 mL
Wavelength,
Element Time, s No. Integ. BCor1 BCor2
nm
of HCl (1 + 9) and transfer to a 1 L volumetric flask. Add
Aluminum 309.271 1.0 3 . .
240 mL of HCl and 20 mL of HNO , dilute to volume, and
Cadmium 226.502 0.5 3 226.446 226.558
mix. Store in a polyethylene bottle.
Cerium 418.660 0.5 2 . .
Iron 259.940 0.5 2 . .
7.11 Lanthanum, Standard Solution B (1 mL = 0.010 mg
Lanthanum 398.852 0.5 2 398.754 398.906
La)—Using a pipet, transfer 1.00 mL of Lanthanum Standard
Lead 283.297 1.0 3 . 283.336
Solution A to a 100 mL volumetric flask. Dilute to volume with
A
The tabulated conditions were those found satisfactory on one instrument.
dilution solution and mix.
Wavelengths are expressed in nanometres (nm). Time = seconds for each
integration, No. Integ. = number of integrations averaged for each reading, and
7.12 Lead, Standard Solution (1 mL = 1.00 mg Pb)—
BCor1 and BCor2 are off-peak background correction wavelengths.
Transfer 1.000 g of lead (purity: 99.9 % minimum) to a
E1277 − 23
A
TABLE 3 Solution Compositions Added, mg/L
250 mL beaker, cover, and add 40 mL of HNO (1 + 1). Boil
Element No. 1 No. 2 No. 3 No. 4
gently to complete dissolution and to remove oxides of
Aluminum 1200 2200 . 3200
nitrogen. Cool, transfer to a 1 L volumetric flask, add 250 mL
Cadmium . . 10.0 .
of HCl, dilute to volume, and mix. Store in a polyethylene
Cerium . 0.2 40.0 .
bottle.
Iron . 0.1 40.0 .
Lanthanum . 0.2 40.0 .
7.13 Mercuric Nitrate (Hg(NO ) )-Crystalline form
3 2
Lead . . 10.0 .
A
7.14 Zinc Matrix Solution (50 mL = 3.75 g Zinc Matrix Table 4 is derived from this table by adding the trace element contributions from
the zinc matrix solution to the compositions shown in this table and converting the
Material)—Transfer 18.75 g 6 0.10 g of Zinc Matrix Material
resulting sum to %.
to a 250 mL plastic beaker. Cover and add about 50 mL of
water. Add 62.5 mL of HCl and heat enough to maintain the
reaction but not enough to evaporate the solution. When most
of the material has dissolved, add 5.0 mL of HNO . When all
and No. 3. Use the calibration solutions prepared in 10.1 in
solids have dissolved, remove from the heat and allow to cool.
determining the instrument settings for the elements in this
Transfer to a 250 mL plastic volumetric flask, dilute to the
matrix. Follow the manufacturer’s instructions to set the
mark, and mix.
wavelengths and parameters to provide as large a difference
between the intensity readings for the high and low calibration
7.15 Zinc Matrix Material—Use a zinc reference material of
compositions as is consistent with stable instrument readings.
known composition (SRM 728 has been found suitable) with
If there is a question of linearity of the instrument’s response
respect to the elements listed in the scope of this test method.
over the range of solution compositions given, a third calibra-
8. Hazards tion solution, equidistant between the two listed calibration
solutions, shall be measured to verify linearity.
8.1 For precautions to be observed in the use of certain
reagents in this test method, refer to Practices E50. 10.3 Test Sample Solution—Transfer a 3.8 g to 4.2 g portion
of the test sample weighed to the nearest 0.02 g to a 250 mL
9. Sampling
polytetrafluoroethylene beaker. Add about 30 mL of water,
cover, and cautiously add 25 mL of HCl in increments. Heat
9.1 Sampling the material is described in Practices E55 and
gently to maintain the reaction, if necessary, but do not boil.
E88.
When most of the material has dissolved, add 2.0 mL of HNO ,
10. Calibration
let the solution cool for about 20 min, transfer to a 100 mL
plastic volumetric flask, dilute to volume, and mix.
10.1 Prepare calibration and test sample solutions before
calibration measurements are started.
10.4 Automatic Calibration Mode—(If the instrument does
not have the capability to take data from calibration solutions
10.2 Calibration Solutions—All calibration solutions con-
and calculate and store the equations needed to convert
tain the same composition of zinc as the test sample solutions.
instrument readings from test samples directl
...
This document is not an ASTM standard and is intended only to provide the user of an ASTM standard an indication of what changes have been made to the previous version. Because
it may not be technically possible to adequately depict all changes accurately, ASTM recommends that users consult prior editions as appropriate. In all cases only the current version
of the standard as published by ASTM is to be considered the official document.
Designation: E1277 − 22 E1277 − 23
Standard Test Method for
Analysis of Zinc-5 % Aluminum-Mischmetal Alloys by
Inductively Coupled Plasma Atomic Emission Spectrometry
This standard is issued under the fixed designation E1277; the number immediately following the designation indicates the year of
original adoption or, in the case of revision, the year of last revision. A number in parentheses indicates the year of last reapproval. A
superscript epsilon (´) indicates an editorial change since the last revision or reapproval.
1. Scope
1.1 This test method covers the chemical analysis of zinc alloys having chemical compositions within the following limits:
Element Composition Range, %
Aluminum 3.0–8.0
Antimony 0.002 max
Cadmium 0.025 max
Cerium 0.03–0.10
Copper 0.10 max
Iron 0.10 max
Lanthanum 0.03–0.10
Lead 0.026 max
Magnesium 0.05 max
Silicon 0.015 max
Tin 0.002 max
Titanium 0.02 max
Zirconium 0.02 max
1.2 Units—The values stated in SI units are to be regarded as standard. No other units of measurement are included in this
standard.
1.3 Included are procedures for elements in the following composition ranges:
Element Composition Range, %
Aluminum 3.0–8.0
Cadmium 0.0016–0.025
Cerium 0.005–0.10
Iron 0.0015–0.10
Lanthanum 0.009–0.10
Lead 0.002–0.026
1.4 This standard does not purport to address all of the safety concerns, if any, associated with its use. It is the responsibility
of the user of this standard to establish appropriate safety, health, and environmental practices and determine the applicability of
regulatory limitations prior to use. Specific safety hazards statements are given in Section 8, 11.2, and 13.1.
1.5 This international standard was developed in accordance with internationally recognized principles on standardization
established in the Decision on Principles for the Development of International Standards, Guides and Recommendations issued
by the World Trade Organization Technical Barriers to Trade (TBT) Committee.
This test method is under the jurisdiction of ASTM Committee E01 on Analytical Chemistry for Metals, Ores, and Related Materials and is the direct responsibility of
Subcommittee E01.05 on Cu, Pb, Zn, Cd, Sn, Be, Precious Metals, their Alloys, and Related Metals.
Current edition approved Nov. 15, 2022April 1, 2023. Published December 2022April 2023. Originally approved in 1991. Last previous edition approved in 20142022
as E1277 – 14.E1277 – 22. DOI: 10.1520/E1277-22.10.1520/E1277-23.
Copyright © ASTM International, 100 Barr Harbor Drive, PO Box C700, West Conshohocken, PA 19428-2959. United States
E1277 − 23
2. Referenced Documents
2.1 ASTM Standards:
D1193 Specification for Reagent Water
E29 Practice for Using Significant Digits in Test Data to Determine Conformance with Specifications
E50 Practices for Apparatus, Reagents, and Safety Considerations for Chemical Analysis of Metals, Ores, and Related Materials
E55 Practice for Sampling Wrought Nonferrous Metals and Alloys for Determination of Chemical Composition
E88 Practice for Sampling Nonferrous Metals and Alloys in Cast Form for Determination of Chemical Composition
E135 Terminology Relating to Analytical Chemistry for Metals, Ores, and Related Materials
E173 Practice for Conducting Interlaboratory Studies of Methods for Chemical Analysis of Metals (Withdrawn 1997)
E876 Practice for Use of Statistics in the Evaluation of Spectrometric Data (Withdrawn 2003)
E1601 Practice for Conducting an Interlaboratory Study to Evaluate the Performance of an Analytical Method
2.2 NIST Standard Reference Materials:
SRM 728 Zinc, Intermediate Purity
3. Terminology
3.1 For definitions of terms used in this test method, refer to Terminology E135.
4. Summary of Test Method
4.1 The sample is dissolved in mixed acids. The sample solution is introduced into the plasma source of an ICP spectrometer and
the intensities at selected wavelengths from the plasma emission spectrum are compared to the intensities at the same wavelengths
measured with calibration solutions.
5. Significance and Use
5.1 This test method for the chemical analysis of metals and alloys is primarily intended to test such materials for compliance with
compositional specifications. It is assumed that all those who use this test method will be trained analysts capable of performing
common laboratory procedures skillfully and safely. It is expected that work will be performed in a properly equipped laboratory.
6. Apparatus
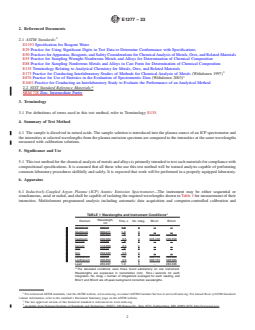
6.1 Inductively-Coupled Argon Plasma (ICP) Atomic Emission Spectrometer—The instrument may be either sequential or
simultaneous, axial or radial, and shall be capable of isolating the required wavelengths shown in Table 1 for measurement of their
intensities. Multielement programmed analysis including automatic data acquisition and computer-controlled calibration and
A
TABLE 1 Wavelengths and Instrument Conditions
Wavelength,
Element Time, s No. Integ. BCor1 BCor2
nm
Aluminum 309.27 1.0 3 . .
Aluminum 309.271 1.0 3 . .
Cadmium 226.502 .5 3 226.446 226.558
Cadmium 226.502 0.5 3 226.446 226.558
Cerium 418.66 .5 2 . .
Cerium 418.660 0.5 2 . .
Iron 259.94 .5 2 . .
Iron 259.940 0.5 2 . .
Lanthanum 398.85 .5 2 398.754 398.906
Lanthanum 398.852 0.5 2 398.754 398.906
Lead 283.297 1.0 3 . 283.336
A
The tabulated conditions were those found satisfactory on one instrument.
Wavelengths are expressed in nanometres (nm). Time = seconds for each
integration, No. Integ. = number of integrations averaged for each reading, and
BCor1 and BCor2 are off-peak background correction wavelengths.
For referenced ASTM standards, visit the ASTM website, www.astm.org, or contact ASTM Customer Service at service@astm.org. For Annual Book of ASTM Standards
volume information, refer to the standard’s Document Summary page on the ASTM website.
The last approved version of this historical standard is referenced on www.astm.org.
Available from National Institute of Standards and Technology (NIST), 100 Bureau Dr., Stop 1070, Gaithersburg, MD 20899-1070, http://www.nist.gov.
E1277 − 23
determinations may be used if available, provided that, in addition to calculated results, the instrument records intensity readings
each time a test sample or calibration solution is presented to the instrument.
7. Reagents
7.1 Purity of Reagents—Reagent grade chemicals shall be used in all tests. Unless otherwise indicated, it is intended that all
reagents should conform to the specifications of the Committee on Analytical Reagents of the American Chemical Society where
such specifications are available. Other Other grades may be used, provided it is first ascertained that the reagent is of sufficiently
high purity to permit its use without lessening the accuracy of the determination.
7.2 Purity of Water—Unless otherwise indicated, references to water shall mean reagent water as defined by Type II of
Specification D1193.
7.3 Aluminum, Standard Solution (1 mL = 20.0 mg Al)—Transfer 2.0000 g 2.0000 g of aluminum (purity: 99.999 % minimum)
to a 250 mL beaker. Cover, add 50 mL 50 mL of HCl (1 + 1) and a small crystal of mercuric nitrate. Heat gently to accelerate the
reaction, but avoid temperatures high enough to cause a noticeable volume loss. If the reaction slows, add more mercuric salt as
needed. A number of hours may be required to complete the dissolution (only a small droplet of mercury will remain undissolved).
Transfer the solution to a 100 mL volumetric flask, dilute to volume, and mix. Store in a polyethylene bottle.
7.4 Cadmium, Standard Solution (1 mL = 1.00 mg (1 mL = 1.00 mg Cd)—Transfer 1.000 g of cadmium (purity: 99.95 %
minimum) to a 250 mL beaker. Cover and add 40 mL 40 mL of HNO (1 + 1) and 10 mL of HCl. After dissolution is complete,
heat to boiling to remove oxides of nitrogen. Cool, transfer to a 1 L volumetric flask, add 240 mL of HCl, dilute to volume, and
mix. Store in a polyethylene bottle.
7.5 Cerium, Standard Solution A (1 mL = 1.00 mg (1 mL = 1.00 mg Ce)—Dry ceric ammonium nitrate ((NH ) Ce(NO ) , also
4 2 3 6
known as ammonium hexanitrato cerate) (purity: 99.95 % minimum) for 4 h 4 h at 85 °C and cool to room temperature in a
desiccator. Dissolve 3.913 g 3.913 g of dry ceric ammonium nitrate in 100 mL 100 mL of HCl (1 + 9). Transfer to a 1 L volumetric
flask, add 240 mL 240 mL of HCl and 20 mL 20 mL of HNO , dilute to volume, and mix. Store in a polyethylene bottle.
7.6 Cerium, Standard Solution B (1 mL = 0.010 mg Ce)—Using a pipet, transfer 1.00 mL 1.00 mL of Cerium Standard Solution
A to a 100 mL volumetric flask. Dilute to volume with dilution solution and mix.
7.7 Dilution Solution—Half fill a 2 L volumetric flask with water. Add 500 mL 500 mL of HCl and 40 mL 40 mL of HNO , swirl
to mix, dilute to the mark, and mix.
7.8 Iron, Standard Solution A (1 mL = 1.00 mg (1 mL = 1.00 mg Fe)—Transfer 1.000 g of iron (purity: 99.95 % minimum) to a
250 mL beaker, cover, and add 100 mL 100 mL of HCl (1 + 1). Boil gently to complete dissolution. Cool and transfer to a 1-L1 L
volumetric flask, add 200 mL of HCl and 20 mL of HNO , dilute to volume, and mix. Store in the polyethylene bottle.
7.9 Iron, Standard Solution B (1 mL = 0.010 mg (1 mL = 0.010 mg Fe)—Using a pipet, transfer 1.00 mL of Iron Standard Solution
A to a 100 mL volumetric flask. Dilute to volume with dilution solution and mix.
7.10 Lanthanum, Standard Solution A (1 mL = 1.00 mg (1 mL = 0.010 mg La)—Ignite lanthanum oxide (La O ) (purity: 99.9 %
2 3
minimum) for 1 h at 1000 °C and cool to room temperature in a desiccator. Dissolve 1.173 g of dry lanthanum oxide in 100 mL
100 mL of HCl (1 + 9) and transfer to a 1 L volumetric flask. Add 240 mL 240 mL of HCl and 20 mL 20 mL of HNO , dilute to
volume, and mix. Store in a polyethylene bottle.
7.11 Lanthanum, Standard Solution B (1 mL = 0.010 (1 mL = 0.010 mg La)—Using a pipet, transfer 1.00 mL 1.00 mL of
Lanthanum Standard Solution A to a 100 mL volumetric flask. Dilute to volume with dilution solution and mix.
Reagent Chemicals, American Chemical Society SpecificationsACS Reagent Chemicals, Specifications and Procedures for Reagents and Standard-Grade Reference
Materials, (www.acs.org), American Chemical Society, Washington, DC. For suggestions on the testing of reagents not listed by the American Chemical Society, see Analar
Standards for Laboratory Chemicals, BDH Ltd., Poole, Dorset, U.K., and the United States Pharmacopeia and National Formulary, (www.usp.org), U.S. Pharmacopeial
Convention, Inc. (USPC), Rockville, MD.
E1277 − 23
7.12 Lead, Standard Solution (1 mL = 1.00 mg (1 mL = 1.00 mg Pb)—Transfer 1.000 g of lead (purity: 99.9 % minimum) to a
250 mL beaker, cover, and add 40 mL 40 mL of HNO (1 + 1). Boil gently to complete dissolution and to remove oxides of
nitrogen. Cool, transfer to a 1 L volumetric flask, add 250 mL 250 mL of HCl, dilute to volume, and mix. Store in a polyethylene
bottle.
7.13 Mercuric Nitrate (Hg(NO ) )-Crystalline form
3 2
7.14 Zinc Matrix Solution (50 mL = 3.75 g Zinc Matrix Standard)Material)—Transfer 18.75 g 6 0.10 g of Zinc Matrix
StandardMaterial to a 250 mL plastic beaker. Cover and add about 50 mL of water. Add 62.5 mL of HCl and heat enough to
maintain the reaction but not enough to evaporate the solution. When most of the material has dissolved, add 5.0 mL of HNO .
When all solids have dissolved, remove from the heat and allow to cool. Transfer to a 250 mL plastic volumetric flask, dilute to
the mark, and mix.
7.15 Zinc Matrix Standard—Material—Use a zinc reference material of known composition (NIST SRM 728(SRM 728 has been
found suitable) with respect to the elements listed in the scope of this test method.
8. Hazards
8.1 For precautions to be observed in the use of certain reagents in this test method, refer to Practices E50.
9. Sampling
9.1 Sampling the material is described in Practices E55 and E88.
10. Calibration
10.1 Prepare calibration and test sample solutions before calibration measurements are started.
10.2 Calibration Solutions—All calibration solutions contain the same composition of zinc as the test sample solutions. The
aluminum content of calibration solutions No. 2 and No. 3 shall be equal to the midpoint of the calibrated aluminum range. Using
a pipet, transfer 50.0 mL of the Zinc Matrix Solution into each of four 100 mL plastic volumetric flasks marked Cal No. 1 through
Cal No. 4. Add the volumes of standard solutions specified in Table 2 (also see Table 3), dilute to volume with dilution solution,
and mix.
10.2.1 All elements (including aluminum) are calibrated as linear functions of intensity. If the instrument cannot be set to measure
aluminum and ignore other elements in calibration solutions No. 1 and No. 4, then a separate determination of aluminum shallbe
made using calibration solutions No. 1, No. 2, and No. 4. The other elements can then be determined together in another run using
only calibration solutions No. 2 and No. 3. Use the calibration solutions prepared in 10.1 in determining the instrument settings
for the elements in this matrix. Follow the manufacturer’s instructions to set the wavelengths and parameters to provide as large
a difference between the intensity readings for the high and low calibration compositions as is consistent with stable instrument
readings. If there is a question of linearity of the instrument’s response over the range of solution compositions given, a third
calibration solution, equidistant between the two listed calibration solutions, shall be measured to verify linearity.
NOTE 1—All elements (including aluminum) are calibrated as linear functions of intensity. If the instrument cannot be set to measure aluminum and ignore
other elements in calibration solutions No. 1 and No. 4, then a separate determination of aluminum shall be made using calibration solutions No. 1, No.
2, and No. 4. The other elements can then be determined together in another run using only calibration solutions No. 2 and No. 3. Use the calibration
A,B
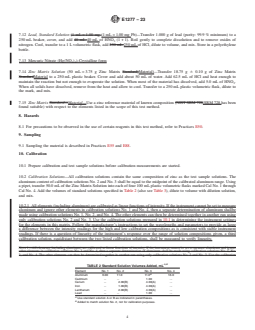
TABLE 2 Standard Solution Volumes Added, mL
Element No. 1 No. 2 No. 3 No. 4
B
Aluminum 6.00 11.0 11.0 16.0
Cadmium . . 1.00 .
Cerium . 2.00(B) 4.00(A) .
Iron . 1.00(B) 4.00(A) .
Lanthanum . 2.00(B) 4.00(A) .
Lead . . 1.00 .
A
Use standard solu
...
Questions, Comments and Discussion
Ask us and Technical Secretary will try to provide an answer. You can facilitate discussion about the standard in here.
Loading comments...