ASTM E831-24
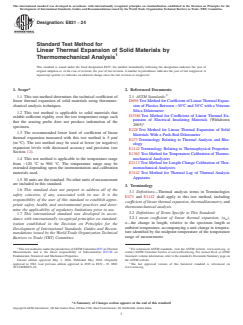
(Test Method)Standard Test Method for Linear Thermal Expansion of Solid Materials by Thermomechanical Analysis
Standard Test Method for Linear Thermal Expansion of Solid Materials by Thermomechanical Analysis
SIGNIFICANCE AND USE
5.1 Coefficients of linear thermal expansion are used, for example, for design purposes and to determine if failure by thermal stress may occur when a solid body composed of two different materials is subjected to temperature variations.
5.2 This test method is comparable to Test Method D3386 for testing electrical insulation materials, but it covers a more general group of solid materials and it defines test conditions more specifically. This test method uses a smaller specimen and substantially different apparatus than Test Methods E228 and D696.
5.3 This test method may be used in research, specification acceptance, regulatory compliance, and quality assurance.
SCOPE
1.1 This test method determines the technical coefficient of linear thermal expansion of solid materials using thermomechanical analysis techniques.
1.2 This test method is applicable to solid materials that exhibit sufficient rigidity over the test temperature range such that the sensing probe does not produce indentation of the specimen.
1.3 The recommended lower limit of coefficient of linear thermal expansion measured with this test method is 5 μm/(m·°C). The test method may be used at lower (or negative) expansion levels with decreased accuracy and precision (see Section 12).
1.4 This test method is applicable to the temperature range from −120 °C to 900 °C. The temperature range may be extended depending upon the instrumentation and calibration materials used.
1.5 SI units are the standard. No other units of measurement are included in this standard.
1.6 This standard does not purport to address all of the safety concerns, if any, associated with its use. It is the responsibility of the user of this standard to establish appropriate safety, health, and environmental practices and determine the applicability of regulatory limitations prior to use.
1.7 This international standard was developed in accordance with internationally recognized principles on standardization established in the Decision on Principles for the Development of International Standards, Guides and Recommendations issued by the World Trade Organization Technical Barriers to Trade (TBT) Committee.
General Information
- Status
- Published
- Publication Date
- 30-Apr-2024
- Technical Committee
- E37 - Thermal Measurements
- Drafting Committee
- E37.10 - Fundamental, Statistical and Mechanical Properties
Overview
ASTM E831-24, titled "Standard Test Method for Linear Thermal Expansion of Solid Materials by Thermomechanical Analysis," is an internationally recognized ASTM standard that establishes the procedure for determining the coefficient of linear thermal expansion (CTE) in solid materials. Using thermomechanical analysis (TMA) techniques, this test method provides reliable measurements vital for material selection, design, research, and quality assurance. The standard applies to rigid solids that maintain integrity across a wide temperature range, making it highly relevant across diverse industries.
Key Topics
- Coefficient of Linear Thermal Expansion (CTE): This test method measures the dimensional change of a solid material per degree change in temperature, a critical property in engineering and manufacturing.
- Thermomechanical Analysis (TMA): The method utilizes a thermomechanical analyzer to track specimen length changes as temperature varies, enabling precise calculation of CTE.
- Temperature Range: The standard covers a broad temperature range from −120 °C to 900 °C, with possible extensions depending on equipment and calibration.
- Specimen Requirements: Applicable to materials with a CTE of at least 5 μm/(m·°C) that are sufficiently rigid to avoid deformation by the sensing probe during testing.
- Precision and Reporting: Guidance is provided for ensuring precise, reproducible results through calibration, proper specimen preparation, and detailed reporting.
- Compliance and Quality Assurance: The test supports regulatory compliance and specification acceptance, providing documentation and traceability for quality systems.
Applications
ASTM E831-24 plays a critical role in a wide range of practical applications:
- Product Design and Engineering: Understanding linear thermal expansion is essential when designing assemblies or products where different materials are joined, helping prevent failures from thermal stress due to temperature fluctuations.
- Material Research and Development: The method is valuable for developing new solid materials, alloys, polymers, ceramics, and composites by characterizing their thermal expansion behavior.
- Manufacturing and Quality Control: Manufacturers use this standard to verify incoming material specifications and to monitor production processes for consistent material performance.
- Regulatory Compliance: The methodology ensures that products and materials conform to industry standards and regulatory requirements related to thermal properties.
- Component Testing: It is widely used to assess the performance of mechanical, structural, and electrical components exposed to thermal cycling in service.
Related Standards
For a comprehensive approach to thermal expansion testing and terminology, other relevant ASTM standards include:
- ASTM D696: Test Method for Coefficient of Linear Thermal Expansion of Plastics Between −30 °C and 30 °C with a Vitreous Silica Dilatometer.
- ASTM D3386: Test Method for Coefficient of Linear Thermal Expansion of Electrical Insulating Materials (withdrawn).
- ASTM E228: Test Method for Linear Thermal Expansion of Solid Materials With a Push-Rod Dilatometer.
- ASTM E473: Terminology Relating to Thermal Analysis and Rheology.
- ASTM E1363: Test Method for Temperature Calibration of Thermomechanical Analyzers.
- ASTM E2113: Test Method for Length Change Calibration of Thermomechanical Analyzers.
- ASTM E3142: Test Method for Thermal Lag of Thermal Analysis Apparatus.
- ASTM E1142: Terminology Relating to Thermophysical Properties.
Practical Value
By establishing consistent procedures and ensuring reliable, accurate measurements of linear thermal expansion, ASTM E831-24 supports decision-making throughout the material lifecycle. From research laboratories to manufacturing floors, this standard underpins safety, performance, and compliance in fields where thermal expansion matters. It is an essential reference for engineers, material scientists, quality professionals, and anyone involved in the study or application of solid materials that are subjected to varying temperatures.
Buy Documents
ASTM E831-24 - Standard Test Method for Linear Thermal Expansion of Solid Materials by Thermomechanical Analysis
REDLINE ASTM E831-24 - Standard Test Method for Linear Thermal Expansion of Solid Materials by Thermomechanical Analysis
Get Certified
Connect with accredited certification bodies for this standard

IMP NDT d.o.o.
Non-destructive testing services. Radiography, ultrasonic, magnetic particle, penetrant, visual inspection.

Inštitut za kovinske materiale in tehnologije
Institute of Metals and Technology. Materials testing, metallurgical analysis, NDT.

Q Techna d.o.o.
NDT and quality assurance specialist. 30+ years experience. NDT personnel certification per ISO 9712, nuclear and thermal power plant inspections, QA/
Sponsored listings
Frequently Asked Questions
ASTM E831-24 is a standard published by ASTM International. Its full title is "Standard Test Method for Linear Thermal Expansion of Solid Materials by Thermomechanical Analysis". This standard covers: SIGNIFICANCE AND USE 5.1 Coefficients of linear thermal expansion are used, for example, for design purposes and to determine if failure by thermal stress may occur when a solid body composed of two different materials is subjected to temperature variations. 5.2 This test method is comparable to Test Method D3386 for testing electrical insulation materials, but it covers a more general group of solid materials and it defines test conditions more specifically. This test method uses a smaller specimen and substantially different apparatus than Test Methods E228 and D696. 5.3 This test method may be used in research, specification acceptance, regulatory compliance, and quality assurance. SCOPE 1.1 This test method determines the technical coefficient of linear thermal expansion of solid materials using thermomechanical analysis techniques. 1.2 This test method is applicable to solid materials that exhibit sufficient rigidity over the test temperature range such that the sensing probe does not produce indentation of the specimen. 1.3 The recommended lower limit of coefficient of linear thermal expansion measured with this test method is 5 μm/(m·°C). The test method may be used at lower (or negative) expansion levels with decreased accuracy and precision (see Section 12). 1.4 This test method is applicable to the temperature range from −120 °C to 900 °C. The temperature range may be extended depending upon the instrumentation and calibration materials used. 1.5 SI units are the standard. No other units of measurement are included in this standard. 1.6 This standard does not purport to address all of the safety concerns, if any, associated with its use. It is the responsibility of the user of this standard to establish appropriate safety, health, and environmental practices and determine the applicability of regulatory limitations prior to use. 1.7 This international standard was developed in accordance with internationally recognized principles on standardization established in the Decision on Principles for the Development of International Standards, Guides and Recommendations issued by the World Trade Organization Technical Barriers to Trade (TBT) Committee.
SIGNIFICANCE AND USE 5.1 Coefficients of linear thermal expansion are used, for example, for design purposes and to determine if failure by thermal stress may occur when a solid body composed of two different materials is subjected to temperature variations. 5.2 This test method is comparable to Test Method D3386 for testing electrical insulation materials, but it covers a more general group of solid materials and it defines test conditions more specifically. This test method uses a smaller specimen and substantially different apparatus than Test Methods E228 and D696. 5.3 This test method may be used in research, specification acceptance, regulatory compliance, and quality assurance. SCOPE 1.1 This test method determines the technical coefficient of linear thermal expansion of solid materials using thermomechanical analysis techniques. 1.2 This test method is applicable to solid materials that exhibit sufficient rigidity over the test temperature range such that the sensing probe does not produce indentation of the specimen. 1.3 The recommended lower limit of coefficient of linear thermal expansion measured with this test method is 5 μm/(m·°C). The test method may be used at lower (or negative) expansion levels with decreased accuracy and precision (see Section 12). 1.4 This test method is applicable to the temperature range from −120 °C to 900 °C. The temperature range may be extended depending upon the instrumentation and calibration materials used. 1.5 SI units are the standard. No other units of measurement are included in this standard. 1.6 This standard does not purport to address all of the safety concerns, if any, associated with its use. It is the responsibility of the user of this standard to establish appropriate safety, health, and environmental practices and determine the applicability of regulatory limitations prior to use. 1.7 This international standard was developed in accordance with internationally recognized principles on standardization established in the Decision on Principles for the Development of International Standards, Guides and Recommendations issued by the World Trade Organization Technical Barriers to Trade (TBT) Committee.
ASTM E831-24 is classified under the following ICS (International Classification for Standards) categories: 19.060 - Mechanical testing. The ICS classification helps identify the subject area and facilitates finding related standards.
ASTM E831-24 is available in PDF format for immediate download after purchase. The document can be added to your cart and obtained through the secure checkout process. Digital delivery ensures instant access to the complete standard document.
Standards Content (Sample)
This international standard was developed in accordance with internationally recognized principles on standardization established in the Decision on Principles for the
Development of International Standards, Guides and Recommendations issued by the World Trade Organization Technical Barriers to Trade (TBT) Committee.
Designation: E831 − 24
Standard Test Method for
Linear Thermal Expansion of Solid Materials by
Thermomechanical Analysis
This standard is issued under the fixed designation E831; the number immediately following the designation indicates the year of
original adoption or, in the case of revision, the year of last revision. A number in parentheses indicates the year of last reapproval. A
superscript epsilon (´) indicates an editorial change since the last revision or reapproval.
1. Scope* 2. Referenced Documents
1.1 This test method determines the technical coefficient of 2.1 ASTM Standards:
linear thermal expansion of solid materials using thermome- D696 Test Method for Coefficient of Linear Thermal Expan-
chanical analysis techniques. sion of Plastics Between −30°C and 30°C with a Vitreous
Silica Dilatometer
1.2 This test method is applicable to solid materials that
D3386 Test Method for Coefficient of Linear Thermal Ex-
exhibit sufficient rigidity over the test temperature range such
pansion of Electrical Insulating Materials (Withdrawn
that the sensing probe does not produce indentation of the
2005)
specimen.
E228 Test Method for Linear Thermal Expansion of Solid
1.3 The recommended lower limit of coefficient of linear
Materials With a Push-Rod Dilatometer
thermal expansion measured with this test method is 5 μm/
E473 Terminology Relating to Thermal Analysis and Rhe-
(m·°C). The test method may be used at lower (or negative)
ology
expansion levels with decreased accuracy and precision (see
E1142 Terminology Relating to Thermophysical Properties
Section 12).
E1363 Test Method for Temperature Calibration of Thermo-
1.4 This test method is applicable to the temperature range mechanical Analyzers
E2113 Test Method for Length Change Calibration of Ther-
from −120 °C to 900 °C. The temperature range may be
extended depending upon the instrumentation and calibration momechanical Analyzers
E3142 Test Method for Thermal Lag of Thermal Analysis
materials used.
Apparatus
1.5 SI units are the standard. No other units of measurement
are included in this standard.
3. Terminology
1.6 This standard does not purport to address all of the
3.1 Definitions—Thermal analysis terms in Terminologies
safety concerns, if any, associated with its use. It is the
E473 and E1142 shall apply to this test method, including
responsibility of the user of this standard to establish appro-
coeffıcient of linear thermal expansion, thermodilatometry, and
priate safety, health, and environmental practices and deter-
thermomechanical analysis.
mine the applicability of regulatory limitations prior to use.
3.2 Definitions of Terms Specific to This Standard:
1.7 This international standard was developed in accor-
3.2.1 mean coeffıcient of linear thermal expansion, (α ),
m
dance with internationally recognized principles on standard-
n—the change in length, relative to the specimen length at
ization established in the Decision on Principles for the
ambient temperature, accompanying a unit change in tempera-
Development of International Standards, Guides and Recom-
ture identified by the midpoint temperature of the temperature
mendations issued by the World Trade Organization Technical
range of measurement.
Barriers to Trade (TBT) Committee.
1 2
This test method is under the jurisdiction of ASTM Committee E37 on Thermal For referenced ASTM standards, visit the ASTM website, www.astm.org, or
Measurements and is the direct responsibility of Subcommittee E37.10 on contact ASTM Customer Service at service@astm.org. For Annual Book of ASTM
Fundamental, Statistical and Mechanical Properties. Standards volume information, refer to the standard’s Document Summary page on
Current edition approved May 1, 2024. Published May 2024. Originally the ASTM website.
approved in 1981. Last previous edition approved in 2019 as E831 – 19. DOI: The last approved version of this historical standard is referenced on
10.1520/E0831-24. www.astm.org.
*A Summary of Changes section appears at the end of this standard
Copyright © ASTM International, 100 Barr Harbor Drive, PO Box C700, West Conshohocken, PA 19428-2959. United States
E831 − 24
is used when oxidation in air is a concern. Unless effects of moisture are
4. Summary of Test Method
to be studied, use of dry purge gas is recommended and is essential for
4.1 This test method uses a thermomechanical analyzer or
operation at subambient temperatures.
similar device to determine the linear thermal expansion of
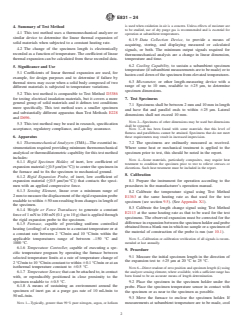
6.1.9 Data Collection Device, to provide a means of
solid materials when subjected to a constant heating rate.
acquiring, storing, and displaying measured or calculated
4.2 The change of the specimen length is electronically
signals, or both. The minimum output signals required for
recorded as a function of temperature. The coefficient of linear
thermomechanical analysis are a change in linear dimension,
thermal expansion can be calculated from these recorded data.
temperature and time.
6.2 Cooling Capability, to sustain a subambient specimen
5. Significance and Use
temperature (if subambient measurements are to be made) or to
5.1 Coefficients of linear thermal expansion are used, for
hasten cool down of the specimen from elevated temperatures.
example, for design purposes and to determine if failure by
6.3 Micrometer, or other length-measuring device with a
thermal stress may occur when a solid body composed of two
range of up to 10 mm, readable to 625 μm, to determine
different materials is subjected to temperature variations.
specimen dimensions.
5.2 This test method is comparable to Test Method D3386
for testing electrical insulation materials, but it covers a more
7. Test Specimens
general group of solid materials and it defines test conditions
7.1 Specimens shall be between 2 mm and 10 mm in length
more specifically. This test method uses a smaller specimen
and have flat and parallel ends to within 625 μm. Lateral
and substantially different apparatus than Test Methods E228
dimensions shall not exceed 10 mm.
and D696.
NOTE 2—Specimens of other dimensions may be used but dimensions
5.3 This test method may be used in research, specification
shall be reported.
acceptance, regulatory compliance, and quality assurance.
NOTE 3—It has been found with some materials that this level of
flatness and parallelness cannot be attained. Specimens that do not meet
6. Apparatus
these requirements may result in increased imprecision.
6.1 Thermomechanical Analyzers (TMA)—The essential in- 7.2 The specimens are ordinarily measured as received.
strumentation required providing minimum thermomechanical Where some heat or mechanical treatment is applied to the
analytical or thermodilatometric capability for this test method
specimen prior to test, this should be noted in the report.
includes:
NOTE 4—Some materials, particularly composites, may require heat
6.1.1 Rigid Specimen Holder, of inert, low coefficient of
treatment to condition the specimen prior to test to relieve stresses or
expansion material (≤0.5 μm/(m·°C)) to center the specimen in
distortions. Such heat treatment must be included in the report.
the furnace and to fix the specimen to mechanical ground.
8. Calibration
6.1.2 Rigid Expansion Probe, of inert, low coefficient of
expansion material (≤0.5 μm/(m·°C)) that contacts the speci- 8.1 Prepare the instrument for operation according to the
procedures in the manufacturer’s operation manual.
men with an applied compressive force.
6.1.3 Sensing Element, linear over a minimum range of
8.2 Calibrate the temperature signal using Test Method
2 mm to measure the displacement of the rigid expansion probe
E1363 at the same heating rate as that used for the test
readable to within 650 nm resulting from changes in length of
specimen (see section 9.5). (See Appendix X1).
the specimen.
8.3 Calibrate the length change signal using Test Method
6.1.4 Weight or Force Transducer, to generate a constant
E2113 at the same heating rate as that to be used for the test
force of 1 mN to 100 mN (0.1 g to 10 g) that is applied through
specimens. The observed expansion must be corrected for the
the rigid expansion probe to the specimen.
difference in expansion between the specimen holder and probe
6.1.5 Furnace, capable of providing uniform controlled
obtained from a blank run in which no sample or a specimen of
heating (cooling) of a specimen to a constant temperature or at
the material of construction of the probe is run (see 10.1).
a constant rate between 2 °C/min and 10 °C/min within the
applicable temperatures range of between –150 °C and
NOTE 5—Calibration or calibration verification of all signals is recom-
mended at last annually.
1000 °C.
6.1.6 Temperature Controller, capable of executing a spe-
9. Procedure
cific temperature program by operating the furnace between
9.1 Measure the initial specimen length in the direction of
selected temperature limits at a rate of temperature change of
the expansion test to 625 μm at 20 °C to 25 °C.
2 °C/min to 10 °C/min constant to within 60.1 °C/min or at an
isothermal temperature constant to 60.5 °C.
NOTE 6—Direct readout of zero position and specimen length (L) using
6.1.7 Temperature Sensor, that can be attached to, in contact the analyzer sensing element, where available, with a sufficient range has
been found to be an accurate means of length determination.
with, or reproducibly positioned in close proximity to the
specimen readable to 60.5 °C.
9.2 Place the specimen in the specimen holder under the
6.1.8 A means of sustaining an environment around the
probe. Place the specimen temperature sensor in contact with
specimen of inert gas at a purge gas rate of 10 mL/min to
the specimen or as near to the specimen as possible.
50 mL ⁄min.
9.3 Move the furnace to enclose the specimen holder. If
NOTE 1—Typically, greater than 99 % pure nitrogen, argon, or helium measurements at subambient temperature are to be made, cool
E831 − 24
the specimen to at least 20 °C below the lowest temperature of 10. Calculation
interest. The refrigerant used for cooling shall not come into
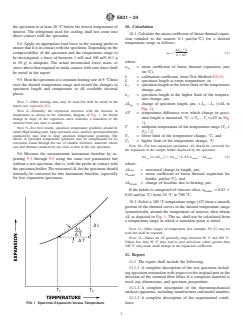
10.1 Calculate the mean coefficient of linear thermal expan-
direct contact with the specimen.
sion rounded to the nearest 0.1 μm/(m·°C) for a desired
9.4 Apply an appropriate load force to the sensing probe to temperature range as follows:
ensure that it is in contact with the specimen. Depending on the
ΔL × k
sp
α 5 (1)
compressibility of the specimen and the temperature range to
m
L × ΔT
be investigated, a force of between 1 mN and 100 mN (0.1 g
where:
to 10 g) is adequate. The actual incre
...
This document is not an ASTM standard and is intended only to provide the user of an ASTM standard an indication of what changes have been made to the previous version. Because
it may not be technically possible to adequately depict all changes accurately, ASTM recommends that users consult prior editions as appropriate. In all cases only the current version
of the standard as published by ASTM is to be considered the official document.
Designation: E831 − 19 E831 − 24
Standard Test Method for
Linear Thermal Expansion of Solid Materials by
Thermomechanical Analysis
This standard is issued under the fixed designation E831; the number immediately following the designation indicates the year of
original adoption or, in the case of revision, the year of last revision. A number in parentheses indicates the year of last reapproval. A
superscript epsilon (´) indicates an editorial change since the last revision or reapproval.
1. Scope Scope*
1.1 This test method determines the technical coefficient of linear thermal expansion of solid materials using thermomechanical
analysis techniques.
1.2 This test method is applicable to solid materials that exhibit sufficient rigidity over the test temperature range such that the
sensing probe does not produce indentation of the specimen.
1.3 The recommended lower limit of coefficient of linear thermal expansion measured with this test method is 5 μm/(m·°C). The
test method may be used at lower (or negative) expansion levels with decreased accuracy and precision (see Section 1112).
1.4 This test method is applicable to the temperature range from −120 °C to 900 °C. The temperature range may be extended
depending upon the instrumentation and calibration materials used.
1.5 The values stated in SI units are to be regarded as the standard. No other units of measurement are included in this standard.
1.6 This standard does not purport to address all of the safety concerns, if any, associated with its use. It is the responsibility
of the user of this standard to establish appropriate safety, health, and environmental practices and determine the applicability of
regulatory limitations prior to use.
1.7 This international standard was developed in accordance with internationally recognized principles on standardization
established in the Decision on Principles for the Development of International Standards, Guides and Recommendations issued
by the World Trade Organization Technical Barriers to Trade (TBT) Committee.
2. Referenced Documents
2.1 ASTM Standards:
D696 Test Method for Coefficient of Linear Thermal Expansion of Plastics Between −30°C and 30°C with a Vitreous Silica
Dilatometer
D3386 Test Method for Coefficient of Linear Thermal Expansion of Electrical Insulating Materials (Withdrawn 2005)
E228 Test Method for Linear Thermal Expansion of Solid Materials With a Push-Rod Dilatometer
E473 Terminology Relating to Thermal Analysis and Rheology
This test method is under the jurisdiction of ASTM Committee E37 on Thermal Measurements and is the direct responsibility of Subcommittee E37.10 on Fundamental,
Statistical and Mechanical Properties.
Current edition approved April 1, 2019May 1, 2024. Published April 2019May 2024. Originally approved in 1981. Last previous edition approved in 20142019 as
E831 – 14.E831 – 19. DOI: 10.1520/E0831-19.10.1520/E0831-24.
For referenced ASTM standards, visit the ASTM website, www.astm.org, or contact ASTM Customer Service at service@astm.org. For Annual Book of ASTM Standards
volume information, refer to the standard’s Document Summary page on the ASTM website.
The last approved version of this historical standard is referenced on www.astm.org.
*A Summary of Changes section appears at the end of this standard
Copyright © ASTM International, 100 Barr Harbor Drive, PO Box C700, West Conshohocken, PA 19428-2959. United States
E831 − 24
E1142 Terminology Relating to Thermophysical Properties
E1363 Test Method for Temperature Calibration of Thermomechanical Analyzers
E2113 Test Method for Length Change Calibration of Thermomechanical Analyzers
E3142 Test Method for Thermal Lag of Thermal Analysis Apparatus
3. Terminology
3.1 Definitions—Thermal analysis terms in Terminologies E473 and E1142 shall apply to this test method, including coeffıcient
of linear thermal expansion, thermodilatometry, and thermomechanical analysis.
3.2 Definitions of Terms Specific to This Standard:
3.2.1 mean coeffıcient of linear thermal expansion, (α ), n—the change in length, relative to the specimen length at ambient
m
temperature, accompanying a unit change in temperature identified by the midpoint temperature of the temperature range of
measurement.
4. Summary of Test Method
4.1 This test method uses a thermomechanical analyzer or similar device to determine the linear thermal expansion of solid
materials when subjected to a constant heating rate.
4.2 The change of the specimen length is electronically recorded as a function of temperature. The coefficient of linear thermal
expansion can be calculated from these recorded data.
5. Significance and Use
5.1 Coefficients of linear thermal expansion are used, for example, for design purposes and to determine if failure by thermal stress
may occur when a solid body composed of two different materials is subjected to temperature variations.
5.2 This test method is comparable to Test Method D3386 for testing electrical insulation materials, but it covers a more general
group of solid materials and it defines test conditions more specifically. This test method uses a smaller specimen and substantially
different apparatus than Test Methods E228 and D696.
5.3 This test method may be used in research, specification acceptance, regulatory compliance, and quality assurance.
6. Apparatus
6.1 Thermomechanical Analyzers (TMA)—The essential instrumentation required providing minimum thermomechanical analyti-
cal or thermodilatometric capability for this test method includes:
6.1.1 Rigid Specimen Holder, of inert, low coefficient of expansion material (≤0.5 μm/(m·°C)) to center the specimen in the furnace
and to fix the specimen to mechanical ground.
6.1.2 Rigid Expansion Probe, of inert, low coefficient of expansion material (≤0.5 μm/(m·°C)) that contacts the specimen with an
applied compressive force.
6.1.3 Sensing Element, linear over a minimum range of 2 mm 2 mm to measure the displacement of the rigid expansion probe
readable to within 650 nm resulting from changes in length of the specimen.
6.1.4 Weight or Force Transducer, to generate a constant force of 1 mN to 100 mN (0.1 g to 10 g) that is applied through the rigid
expansion probe to the specimen.
6.1.5 Furnace, capable of providing uniform controlled heating (cooling) of a specimen to a constant temperature or at a constant
rate between 2 °C/min and 10 °C/min within the applicable temperatures range of between –150 °C and 1000 °C.1000 °C.
6.1.6 Temperature Controller, capable of executing a specific temperature program by operating the furnace between selected
temperature limits at a rate of temperature change of 2 °C/min to 10 °C/min constant to within 60.1 °C/min or at an isothermal
temperature constant to 60.5 °C.
E831 − 24
6.1.7 Temperature Sensor, that can be attached to, in contact with, or reproducibly positioned in close proximity to the specimen
capable of indicating temperature readable to 60.5 °C.
6.1.8 A means of sustaining an environment around the specimen of inert gas at a purge gas rate of 10 mL/min to 50
50 mL mL/min.⁄min.
NOTE 1—Typically, greater than 99 % pure nitrogen, argon, or helium is used when oxidation in air is a concern. Unless effects of moisture are to be
studied, use of dry purge gas is recommended and is essential for operation at subambient temperatures.
6.1.9 Data Collection Device, to provide a means of acquiring, storing, and displaying measured or calculated signals, or both.
The minimum output signals required for thermomechanical analysis are a change in linear dimension, temperature and time.
6.2 Cooling Capability, to sustain a subambient specimen temperature (if subambient measurements are to be made) or to hasten
cool down of the specimen from elevated temperatures.
6.3 Micrometer, or other length-measuring device with a range of up to 10 mm to determine specimen dimensions to within 625
μm.mm, readable to 625 μm, to determine specimen dimensions.
7. Test Specimens
7.1 Specimens shall be between 2 mm and 10 mm in length and have flat and parallel ends to within 625 μm. Lateral dimensions
shall not exceed 10 mm.
NOTE 2—Specimens of other dimensions may be used but dimensions shall be reported.
NOTE 3—It has been found with some materials that this level of flatness and parallelness cannot be attained. Specimens that do not meet these
requirements may result in increased imprecision.
7.2 The specimens are ordinarily measured as received. Where some heat or mechanical treatment is applied to the specimen prior
to test, this should be noted in the report.
NOTE 4—Some materials, particularly composites, may require heat treatment to condition the specimen prior to test to relieve stresses or distortions. Such
heat treatment must be included in the report.
8. Calibration
8.1 Prepare the instrument for operation according to the procedures in the manufacturer’s operation manual.
8.2 Calibrate the temperature signal using Test Method E1363. at the same heating rate as that used for the test specimen (see
section 9.5). (See Appendix X1).
8.3 Calibrate the length change signal using Test Method E2113 at the same heating rate as that to be used for the test specimens.
The observed expansion must be corrected for the difference in expansion between the specimen holder and probe obtained from
a blank run in which no sample or a specimen of the material of construction of the probe is run (see 10.1).
NOTE 5—Calibration or calibration verification of all signals is recommended at last annually.
9. Procedure
9.1 Measure the initial specimen length in the direction of the expansion test to 625 μm at 20 °C to 25 °C.
NOTE 6—Direct readout of zero position and specimen length (L) using the analyzer sensing element, where available, with a sufficient range has been
found to be an accurate means of length determination.
E831 − 24
9.2 Place the specimen in the specimen holder under the probe. Place the specimen temperature sensor in contact with the
specimen or as near to the specimen as possible.
9.3 Move the furnace to enclose the specimen holder. If measurements at subambient temperature are to be made, cool the
specimen to at least 20 °C below the lowest temperature of interest. The refrigerant used for cooling shall not come into direct
contact with the specimen.
9.4 Apply an appropriate load force to the sensing probe to ensure that it is in contact with the specimen. Depending on the
compressibility of the specimen and the temperature range to be investigated, a force of between 1 mN and 100 mN (0.1 g to 10
g) is adequate. The actual incremental force, mass, or stress above that required to make contact with zero force shall be noted
in the report.
9.5 Heat the specimen at a constant heat
...
Questions, Comments and Discussion
Ask us and Technical Secretary will try to provide an answer. You can facilitate discussion about the standard in here.
Loading comments...