ASTM D1921-12
(Test Method)Standard Test Methods for Particle Size (Sieve Analysis) of Plastic Materials
Standard Test Methods for Particle Size (Sieve Analysis) of Plastic Materials
SIGNIFICANCE AND USE
4.1 These test methods are used to determine particle size distribution and therefore are useful for determining lot-to-lot uniformity.
4.2 The particle sizes of plastic materials affect the handling characteristics and sometimes will affect the processing characteristics of some polymers.
SCOPE
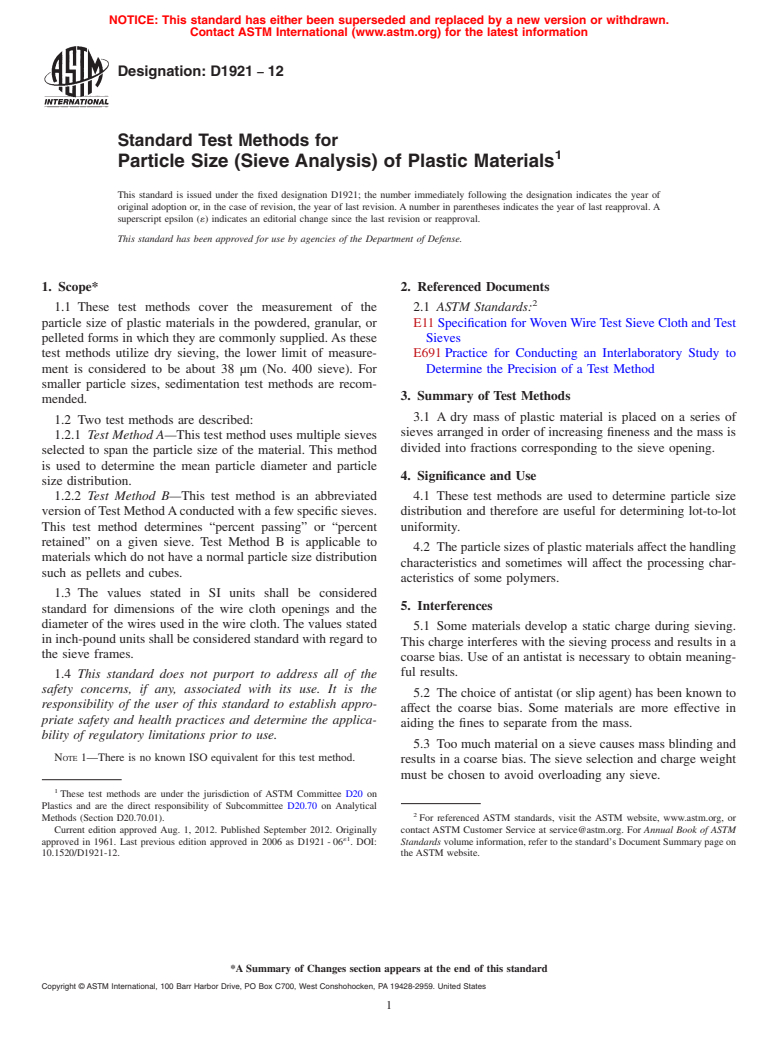
1.1 These test methods cover the measurement of the particle size of plastic materials in the powdered, granular, or pelleted forms in which they are commonly supplied. As these test methods utilize dry sieving, the lower limit of measurement is considered to be about 38 μm (No. 400 sieve). For smaller particle sizes, sedimentation test methods are recommended.
1.2 Two test methods are described:
1.2.1 Test Method A—This test method uses multiple sieves selected to span the particle size of the material. This method is used to determine the mean particle diameter and particle size distribution.
1.2.2 Test Method B—This test method is an abbreviated version of Test Method A conducted with a few specific sieves. This test method determines “percent passing” or “percent retained” on a given sieve. Test Method B is applicable to materials which do not have a normal particle size distribution such as pellets and cubes.
1.3 The values stated in SI units shall be considered standard for dimensions of the wire cloth openings and the diameter of the wires used in the wire cloth. The values stated in inch-pound units shall be considered standard with regard to the sieve frames.
1.4 This standard does not purport to address all of the safety concerns, if any, associated with its use. It is the responsibility of the user of this standard to establish appropriate safety and health practices and determine the applicability of regulatory limitations prior to use. Note 1—There is no known ISO equivalent for this test method.
General Information
Relations
Buy Standard
Standards Content (Sample)
NOTICE: This standard has either been superseded and replaced by a new version or withdrawn.
Contact ASTM International (www.astm.org) for the latest information
Designation: D1921 − 12
Standard Test Methods for
1
Particle Size (Sieve Analysis) of Plastic Materials
This standard is issued under the fixed designation D1921; the number immediately following the designation indicates the year of
original adoption or, in the case of revision, the year of last revision.Anumber in parentheses indicates the year of last reapproval.A
superscript epsilon (´) indicates an editorial change since the last revision or reapproval.
This standard has been approved for use by agencies of the Department of Defense.
1. Scope* 2. Referenced Documents
2
1.1 These test methods cover the measurement of the 2.1 ASTM Standards:
particle size of plastic materials in the powdered, granular, or E11Specification forWovenWireTest Sieve Cloth andTest
pelleted forms in which they are commonly supplied.As these Sieves
test methods utilize dry sieving, the lower limit of measure- E691Practice for Conducting an Interlaboratory Study to
ment is considered to be about 38 µm (No. 400 sieve). For Determine the Precision of a Test Method
smaller particle sizes, sedimentation test methods are recom-
3. Summary of Test Methods
mended.
3.1 A dry mass of plastic material is placed on a series of
1.2 Two test methods are described:
sieves arranged in order of increasing fineness and the mass is
1.2.1 Test Method A—This test method uses multiple sieves
divided into fractions corresponding to the sieve opening.
selected to span the particle size of the material. This method
is used to determine the mean particle diameter and particle
4. Significance and Use
size distribution.
1.2.2 Test Method B—This test method is an abbreviated 4.1 These test methods are used to determine particle size
versionofTestMethodAconductedwithafewspecificsieves. distribution and therefore are useful for determining lot-to-lot
This test method determines “percent passing” or “percent uniformity.
retained” on a given sieve. Test Method B is applicable to
4.2 Theparticlesizesofplasticmaterialsaffectthehandling
materials which do not have a normal particle size distribution
characteristics and sometimes will affect the processing char-
such as pellets and cubes.
acteristics of some polymers.
1.3 The values stated in SI units shall be considered
5. Interferences
standard for dimensions of the wire cloth openings and the
diameter of the wires used in the wire cloth. The values stated
5.1 Some materials develop a static charge during sieving.
ininch-poundunitsshallbeconsideredstandardwithregardto
This charge interferes with the sieving process and results in a
the sieve frames.
coarse bias. Use of an antistat is necessary to obtain meaning-
ful results.
1.4 This standard does not purport to address all of the
safety concerns, if any, associated with its use. It is the
5.2 The choice of antistat (or slip agent) has been known to
responsibility of the user of this standard to establish appro-
affect the coarse bias. Some materials are more effective in
priate safety and health practices and determine the applica-
aiding the fines to separate from the mass.
bility of regulatory limitations prior to use.
5.3 Too much material on a sieve causes mass blinding and
NOTE 1—There is no known ISO equivalent for this test method.
results in a coarse bias. The sieve selection and charge weight
must be chosen to avoid overloading any sieve.
1
These test methods are under the jurisdiction of ASTM Committee D20 on
Plastics and are the direct responsibility of Subcommittee D20.70 on Analytical
2
Methods (Section D20.70.01). For referenced ASTM standards, visit the ASTM website, www.astm.org, or
Current edition approved Aug. 1, 2012. Published September 2012. Originally contact ASTM Customer Service at service@astm.org. For Annual Book of ASTM
´1
approved in 1961. Last previous edition approved in 2006 as D1921-06 . DOI: Standards volume information, refer to the standard’s Document Summary page on
10.1520/D1921-12. the ASTM website.
*A Summary of Changes section appears at the end of this standard
Copyright © ASTM International, 100 Barr Harbor Drive, PO Box C700, West Conshohocken, PA 19428-2959. United States
1
---------------------- Page: 1 ----------------------
D1921 − 12
5.4 Wavy, improperly stretched wire-cloth potentially al- 11. Conditioning
lows wires to separate without being visually damaged. Sieves
11.1 The plastic material must be in a free-flowing condi-
with wavy or torn wires shall not be used, as they no longer
tion.
conform to Specification E11.
11.2 If possible, condition the material to the laboratory
temperature and humidity.
6. Apparatus
6.1 Balance,500-gminimumcapacitywiththecapabilityof
TEST METHOD A
reading to the nearest 0.1 g.
12. Procedure
6.2 Mechanical Sieving Device and Time Switch—A me-
chanicalsieve-shakingdeviceequippedwithanautomatictime
12.1 Selectsievesinsufficient
...
This document is not an ASTM standard and is intended only to provide the user of an ASTM standard an indication of what changes have been made to the previous version. Because
it may not be technically possible to adequately depict all changes accurately, ASTM recommends that users consult prior editions as appropriate. In all cases only the current version
of the standard as published by ASTM is to be considered the official document.
´1
Designation: D1921 − 06 D1921 − 12
Standard Test Methods for
1
Particle Size (Sieve Analysis) of Plastic Materials
This standard is issued under the fixed designation D1921; the number immediately following the designation indicates the year of
original adoption or, in the case of revision, the year of last revision. A number in parentheses indicates the year of last reapproval. A
superscript epsilon (´) indicates an editorial change since the last revision or reapproval.
This standard has been approved for use by agencies of the Department of Defense.
1
´ NOTE—Added research report information to Section 17 editorially in September 2010.
1. Scope*
1.1 These test methods cover the measurement of the particle size of plastic materials in the powdered, granular, or pelleted
forms in which they are commonly supplied. As these test methods utilize dry sieving, the lower limit of measurement is
considered to be about 38 μm (No. 400 sieve). For smaller particle sizes, sedimentation test methods are recommended.
1.2 Two test methods are described:
1.2.1 Test Method A—This test method uses multiple sieves selected to span the particle size of the material. This method is used
to determine the mean particle diameter and particle size distribution.
1.2.2 Test Method B—This test method is an abbreviated version of Test Method A conducted with a few specific sieves. This
test method determines “percent passing” or “percent retained” on a given sieve. Test Method B is applicable to materials which
do not have a normal particle size distribution such as pellets and cubes.
1.3 The values stated in SI units shall be considered standard for dimensions of the wire cloth openings and the diameter of the
wires used in the wire cloth. The values stated in inch-pound units shall be considered standard with regard to the sieve frames.
1.4 This standard does not purport to address all of the safety concerns, if any, associated with its use. It is the responsibility
of the user of this standard to establish appropriate safety and health practices and determine the applicability of regulatory
limitations prior to use.
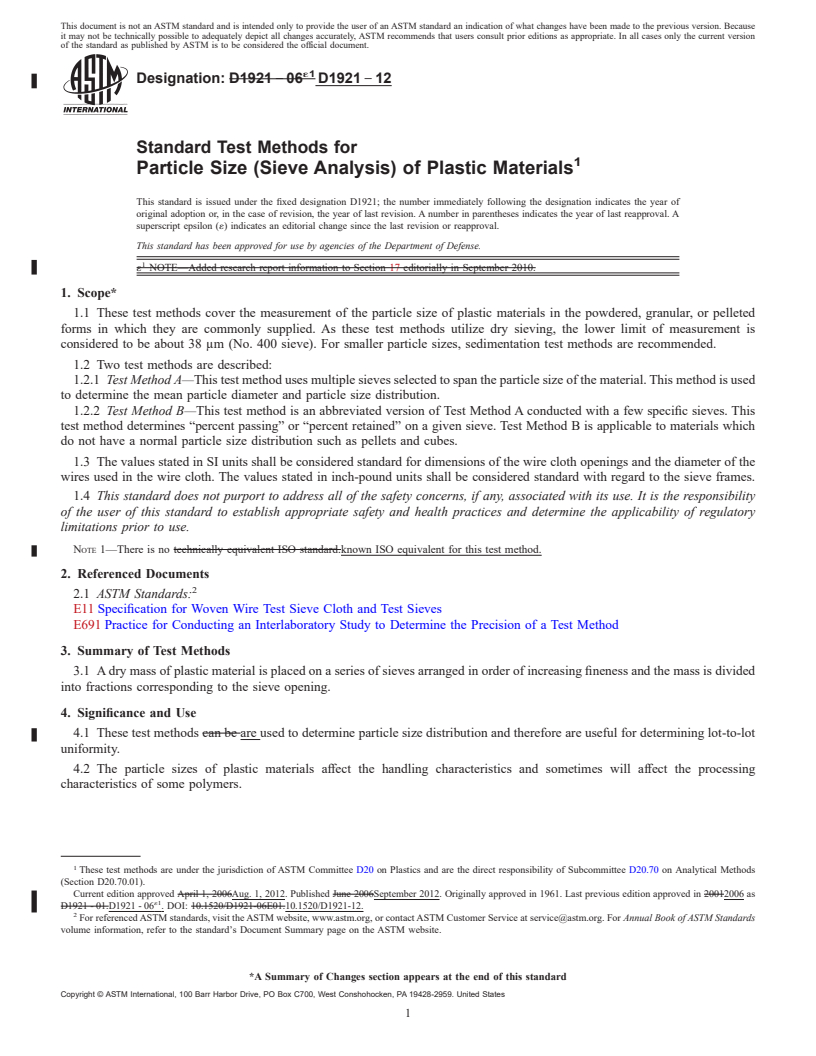
NOTE 1—There is no technically equivalent ISO standard.known ISO equivalent for this test method.
2. Referenced Documents
2
2.1 ASTM Standards:
E11 Specification for Woven Wire Test Sieve Cloth and Test Sieves
E691 Practice for Conducting an Interlaboratory Study to Determine the Precision of a Test Method
3. Summary of Test Methods
3.1 A dry mass of plastic material is placed on a series of sieves arranged in order of increasing fineness and the mass is divided
into fractions corresponding to the sieve opening.
4. Significance and Use
4.1 These test methods can be are used to determine particle size distribution and therefore are useful for determining lot-to-lot
uniformity.
4.2 The particle sizes of plastic materials affect the handling characteristics and sometimes will affect the processing
characteristics of some polymers.
1
These test methods are under the jurisdiction of ASTM Committee D20 on Plastics and are the direct responsibility of Subcommittee D20.70 on Analytical Methods
(Section D20.70.01).
Current edition approved April 1, 2006Aug. 1, 2012. Published June 2006September 2012. Originally approved in 1961. Last previous edition approved in 20012006 as
´1
D1921 - 01.D1921 - 06 . DOI: 10.1520/D1921-06E01.10.1520/D1921-12.
2
For referenced ASTM standards, visit the ASTM website, www.astm.org, or contact ASTM Customer Service at service@astm.org. For Annual Book of ASTM Standards
volume information, refer to the standard’s Document Summary page on the ASTM website.
*A Summary of Changes section appears at the end of this standard
Copyright © ASTM International, 100 Barr Harbor Drive, PO Box C700, West Conshohocken, PA 19428-2959. United States
1
---------------------- Page: 1 ----------------------
D1921 − 12
5. Interferences
5.1 Some materials develop a static charge during sieving. This charge interferes with the sieving process and results in a coarse
bias. Use of an antistat is necessary to obtain meaningful results.
5.2 The choice of antistat (or slip agent) has been known to affect the coarse bias. Some materials are more effective in aiding
the fines to separate from the mass.
5.3 Too much material on a sieve causes mass blinding and results in a coarse bias. The sieve selection and charge weight must
be chosen to avoid overloading any sieve.
5.4 Wavy, improperly stretched wire-cloth may allowpotentially allows wires to separate without being visually damaged.
Sieves
...


Questions, Comments and Discussion
Ask us and Technical Secretary will try to provide an answer. You can facilitate discussion about the standard in here.