Standard Practice for Use of Control Charts in Statistical Process Control

SIGNIFICANCE AND USE
4.1 This practice describes the use of control charts as a tool for use in statistical process control (SPC). Control charts were developed by Shewhart (2) in the 1920s and are still in wide use today. SPC is a branch of statistical quality control (3, 4), which also encompasses process capability analysis and acceptance sampling inspection. Process capability analysis, as described in Practice E2281, requires the use of SPC in some of its procedures. Acceptance sampling inspection, described in Practices E1994, E2234, and E2762, requires the use of SPC so as to minimize rejection of product.  
4.2 Principles of SPC—A process may be defined as a set of interrelated activities that convert inputs into outputs. SPC uses various statistical methodologies to improve the quality of a process by reducing the variability of one or more of its outputs, for example, a quality characteristic of a product or service.  
4.2.1 A certain amount of variability will exist in all process outputs regardless of how well the process is designed or maintained. A process operating with only this inherent variability is said to be in a state of statistical control, with its output variability subject only to chance, or common, causes.  
4.2.2 Process upsets, said to be due to assignable, or special causes, are manifested by changes in the output level, such as a spike, shift, trend, or by changes in the variability of an output. The control chart is the basic analytical tool in SPC and is used to detect the occurrence of special causes operating on the process.  
4.2.3 When the control chart signals the presence of a special cause, other SPC tools, such as flow charts, brainstorming, cause-and-effect diagrams, or Pareto analysis, described in various references (4-8), are used to identify the special cause. Special causes, when identified, are either eliminated or controlled. When special cause variation is eliminated, process variability is reduced to its inherent variability, and co...
SCOPE
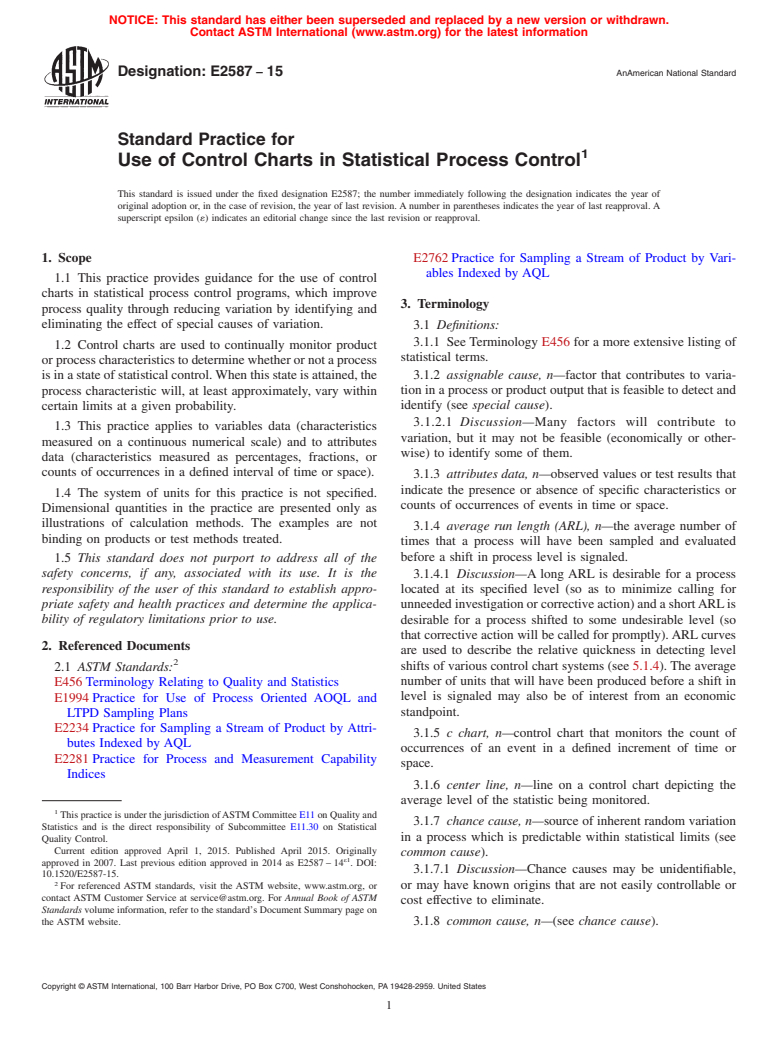
1.1 This practice provides guidance for the use of control charts in statistical process control programs, which improve process quality through reducing variation by identifying and eliminating the effect of special causes of variation.  
1.2 Control charts are used to continually monitor product or process characteristics to determine whether or not a process is in a state of statistical control. When this state is attained, the process characteristic will, at least approximately, vary within certain limits at a given probability.  
1.3 This practice applies to variables data (characteristics measured on a continuous numerical scale) and to attributes data (characteristics measured as percentages, fractions, or counts of occurrences in a defined interval of time or space).  
1.4 The system of units for this practice is not specified. Dimensional quantities in the practice are presented only as illustrations of calculation methods. The examples are not binding on products or test methods treated.  
1.5 This standard does not purport to address all of the safety concerns, if any, associated with its use. It is the responsibility of the user of this standard to establish appropriate safety and health practices and determine the applicability of regulatory limitations prior to use.

General Information

Status
Historical
Publication Date
30-Sep-2014
Current Stage
Ref Project

Relations

Buy Standard

Standard
ASTM E2587-14 - Standard Practice for Use of Control Charts in Statistical Process Control
English language
25 pages
sale 15% off
Preview
sale 15% off
Preview
Standard
REDLINE ASTM E2587-14 - Standard Practice for Use of Control Charts in Statistical Process Control
English language
25 pages
sale 15% off
Preview
sale 15% off
Preview

Standards Content (Sample)


NOTICE: This standard has either been superseded and replaced by a new version or withdrawn.
Contact ASTM International (www.astm.org) for the latest information
Designation: E2587 − 14 AnAmerican National Standard
Standard Practice for
Use of Control Charts in Statistical Process Control
This standard is issued under the fixed designation E2587; the number immediately following the designation indicates the year of
original adoption or, in the case of revision, the year of last revision. A number in parentheses indicates the year of last reapproval. A
superscript epsilon (´) indicates an editorial change since the last revision or reapproval.
1. Scope E2762 Practice for Sampling a Stream of Product by Vari-
ables Indexed by AQL
1.1 This practice provides guidance for the use of control
charts in statistical process control programs, which improve
3. Terminology
process quality through reducing variation by identifying and
eliminating the effect of special causes of variation. 3.1 Definitions:
3.1.1 See Terminology E456 for a more extensive listing of
1.2 Control charts are used to continually monitor product
statistical terms.
orprocesscharacteristicstodeterminewhetherornotaprocess
isinastateofstatisticalcontrol.Whenthisstateisattained,the 3.1.2 assignable cause, n—factor that contributes to varia-
tion in a process or product output that is feasible to detect and
process characteristic will, at least approximately, vary within
certain limits at a given probability. identify (see special cause).
3.1.2.1 Discussion—Many factors will contribute to
1.3 This practice applies to variables data (characteristics
variation, but it may not be feasible (economically or other-
measured on a continuous numerical scale) and to attributes
wise) to identify some of them.
data (characteristics measured as percentages, fractions, or
counts of occurrences in a defined interval of time or space).
3.1.3 attributes data, n—observed values or test results that
indicate the presence or absence of specific characteristics or
1.4 The system of units for this practice is not specified.
counts of occurrences of events in time or space.
Dimensional quantities in the practice are presented only as
illustrations of calculation methods. The examples are not
3.1.4 average run length (ARL), n—the average number of
binding on products or test methods treated.
times that a process will have been sampled and evaluated
before a shift in process level is signaled.
1.5 This standard does not purport to address all of the
safety concerns, if any, associated with its use. It is the 3.1.4.1 Discussion—A long ARL is desirable for a process
responsibility of the user of this standard to establish appro- located at its specified level (so as to minimize calling for
priate safety and health practices and determine the applica- unneededinvestigationorcorrectiveaction)andashortARLis
bility of regulatory limitations prior to use.
desirable for a process shifted to some undesirable level (so
that corrective action will be called for promptly).ARLcurves
2. Referenced Documents
are used to describe the relative quickness in detecting level
shifts of various control chart systems (see 5.1.4). The average
2.1 ASTM Standards:
number of units that will have been produced before a shift in
E456 Terminology Relating to Quality and Statistics
level is signaled may also be of interest from an economic
E1994 Practice for Use of Process Oriented AOQL and
standpoint.
LTPD Sampling Plans
E2234 Practice for Sampling a Stream of Product by Attri-
3.1.5 c chart, n—control chart that monitors the count of
butes Indexed by AQL
occurrences of an event in a defined increment of time or
E2281 Practice for Process and Measurement Capability
space.
Indices
3.1.6 center line, n—line on a control chart depicting the
average level of the statistic being monitored.
This practice is under the jurisdiction ofASTM Committee E11 on Quality and
3.1.7 chance cause, n—source of inherent random variation
Statistics and is the direct responsibility of Subcommittee E11.30 on Statistical
Quality Control. in a process which is predictable within statistical limits (see
Current edition approved Oct. 1, 2014. Published November 2014. Originally
common cause).
approved in 2007. last previous edition approved in 2012 as E2587 – 12. DOI:
3.1.7.1 Discussion—Chance causes may be unidentifiable,
10.1520/E2587-12.
For referenced ASTM standards, visit the ASTM website, www.astm.org, or or may have known origins that are not easily controllable or
contact ASTM Customer Service at service@astm.org. For Annual Book of ASTM
cost effective to eliminate.
Standards volume information, refer to the standard’s Document Summary page on
the ASTM website. 3.1.8 common cause, n—(see chance cause).
Copyright © ASTM International, 100 Barr Harbor Drive, PO Box C700, West Conshohocken, PA 19428-2959. United States
E2587 − 14
3.1.9 control chart, n—chart on which are plotted a statis- statistical control. This implies that any assignable, or special,
ticalmeasureofasubgroupversustimeofsamplingalongwith cause variation will show up as differences between the
¯
limits based on the statistical distribution of that measure so as
subgroups on a corresponding X chart.
to indicate how much common, or chance, cause variation is
3.1.22 s chart, n—control chart that monitors the standard
inherent in the process or product.
deviations of subgroup observations.
3.1.10 control chart factor, n—a tabulated constant, depend-
3.1.23 special cause, n—(see assignable cause).
ing on sample size, used to convert specified statistics or
3.1.24 standardized chart, n—control chart that monitors a
parameters into a central line value or control limit appropriate
standardized statistic.
to the control chart.
3.1.24.1 Discussion—Astandardized statistic is equal to the
3.1.11 control limits, n—limits on a control chart that are
statistic minus its mean and divided by its standard error.
used as criteria for signaling the need for action or judging
3.1.25 state of statistical control, n—process condition
whether a set of data does or does not indicate a state of
when only common causes are operating on the process.
statistical control based on a prescribed degree of risk.
3.1.25.1 Discussion—In the strict sense, a process being in
3.1.11.1 Discussion—For example, typical three-sigma lim-
astateofstatisticalcontrolimpliesthatsuccessivevaluesofthe
its carry a risk of 0.135 % of being out of control (on one side
characteristic have the statistical character of a sequence of
of the center line) when the process is actually in control and
observations drawn independently from a common distribu-
the statistic has a normal distribution.
tion.
3.1.12 EWMA chart, n—control chart that monitors the
3.1.26 statistical process control (SPC), n—set of tech-
exponentially weighted moving averages of consecutive sub-
niques for improving the quality of process output by reducing
groups.
variability through the use of one or more control charts and a
3.1.13 EWMV chart, n—control chart that monitors the
corrective action strategy used to bring the process back into a
exponentially weighted moving variance.
state of statistical control.
3.1.14 exponentially weighted moving average (EWMA),
3.1.27 subgroup, n—set of observations on outputs sampled
n—weightedaverageoftimeordereddatawheretheweightsof
from a process at a particular time.
past observations decrease geometrically with age.
3.1.28 u chart, n—control chart that monitors the count of
3.1.14.1 Discussion—Data used for the EWMAmay consist
occurrences of an event in variable intervals of time or space,
of individual observations, averages, fractions, numbers
or another continuum.
defective, or counts.
3.1.29 upper control limit (UCL), n—maximum value of the
3.1.15 exponentially weighted moving variance (EWMV),
control chart statistic that indicates statistical control.
n—weighted average of squared deviations of observations
3.1.30 variables data, n—observations or test results de-
from their current estimate of the process average for time
fined on a continuous scale.
ordered observations, where the weights of past squared
deviations decrease geometrically with age.
3.1.31 warning limits, n—limits on a control chart that are
3.1.15.1 Discussion—The estimate of the process average
two standard errors below and above the centerline.
used for the current deviation comes from a coupled EWMA
3.1.32 X-bar chart, n—control chart that monitors the aver-
chart monitoring the same process characteristic.This estimate
age of observations within a subgroup.
is the EWMA from the previous time period, which is the
3.2 Definitions of Terms Specific to This Standard:
forecast of the process average for the current time period.
3.2.1 average count ~c¯!,n—arithmetic average of subgroup
3.1.16 I chart, n—control chart that monitors the individual
counts.
subgroup observations.
¯
3.2.2 average moving range ~MR!,n—arithmetic average of
3.1.17 lower control limit (LCL), n—minimum value of the
subgroup moving ranges.
control chart statistic that indicates statistical control.
3.2.3 average proportion ~p¯!,n—arithmetic average of sub-
3.1.18 MR chart, n—control chart that monitors the moving
group proportions.
range of consecutive individual subgroup observations.
¯
3.2.4 average range ~R!,n—arithmeticaverageofsubgroup
3.1.19 p chart, n—control chart that monitors the fraction of
ranges.
occurrences of an event.
3.2.5 average standard deviation ~s¯!,n—arithmetic average
3.1.20 R chart, n—control chart that monitors the range of
of subgroup sample standard deviations.
observations within a subgroup.
3.2.6 grand average (X), n—average of subgroup averages.
3.1.21 rational subgroup, n—subgroup chosen to minimize
the variability within subgroups and maximize the variability 3.2.7 inspection interval, n—a subgroup size for counts of
between subgroups (see subgroup). eventsinadefinedintervaloftimespaceoranothercontinuum.
3.1.21.1 Discussion—Variation within the subgroup is as- 3.2.7.1 Discussion—Examples are 10 000 metres of wire
sumed to be due only to common, or chance, cause variation, inspected for insulation defects, 100 square feet of material
that is, the variation is believed to be homogeneous. If using a surface inspected for blemishes, the number of minor injuries
range or standard deviation chart, this chart should be in per month, or scratches on bearing race surfaces.
E2587 − 14
3.2.8 moving range (MR), n—absolute difference between
A = factor for converting the average range to three
two adjacent subgroup observations in an I chart.
standard errors for the X-bar chart (Table 1)
A = factor for converting the average standard devia-
3.2.9 observation, n—a single value of a process output for
tion to three standard errors of the average for the
charting purposes.
X-bar chart (Table 1)
3.2.9.1 Discussion—This term has a different meaning than
B,B = factors for converting the average standard devia-
3 4
the term defined in Terminology E456, which refers there to a
tion to three-sigma limits for the s chart (Table 1)
component of a test result.
* *
B ,B = factors for converting the initial estimate of the
5 6
3.2.10 overall proportion, n—average subgroup proportion
variancetothree-sigmalimitsfortheEWMVchart
calculated by dividing the total number of events by the total
(Table 11)
number of objects inspected (see average proportion).
c = factor for converting the average standard devia-
3.2.10.1 Discussion—Thiscalculationmaybeusedforfixed
tion to an unbiased estimate of sigma (see σ)
or variable sample sizes.
(Table 1)
3.2.11 process, n—setofinterrelatedorinteractingactivities
c = counts of the observed occurrences of events in the
i
that convert input into outputs.
ith subgroup (10.2.1)
c¯ = average of the k subgroup counts (10.2.1)
¯
3.2.12 subgroup average (X ), n—average for the ith sub-
i
¯
= factor for converting the average range to an
d
group in an X-bar chart.
estimate of sigma (see σ)(Table 1)
3.2.13 subgroup count (c), n—count for the ith subgroup in
i
D,D = factors for converting the average range to three-
3 4
a c chart.
sigma limits for the R chart (Table 1)
D = the squared deviation of the observation at time i
3.2.14 subgroup EWMA(Z), n—valueoftheEWMAforthe
i
i
ith subgroup in an EWMA chart. minus its forecast average (12.1)
k = number of subgroups used in calculation of control
3.2.15 subgroupEWMV(V),n—valueoftheEWMVforthe
i
limits (6.2.1)
ith subgroup in an EWMV chart.
MR = absolute value of the difference of the observations
i
¯
3.2.16 subgroup individual observation (X ), n—valueofthe
i in the (i-1)th and the ith subgroups in a MR chart
single observation for the ith subgroup in an I chart.
(8.2.1)
¯
= average of the subgroup moving ranges (8.2.2.1)
~MR!
3.2.17 subgroup moving range (MR), n—moving range for
i
n = subgroup size, number of observations in a sub-
the ith subgroup in an MR chart.
group (5.1.3)
3.2.17.1 Discussion—If there are k subgroups, there will be
n = subgroup size, number of observations (objects
k-1 moving ranges. i
inspected) in the ith subgroup (9.1.2)
3.2.18 subgroup proportion (p), n—proportion for the ith
i
p = proportionoftheobservedoccurrencesofeventsin
i
subgroup in a p chart.
the ith subgroup (9.2.1)
3.2.19 subgrouprange(R),n—rangeoftheobservationsfor
i p¯ = average of the k subgroup proportions (9.2.1)
the ith subgroup in an R chart.
R = range of the observations in the ith subgroup for
i
the R chart (6.2.1.2)
3.2.20 subgroup size (n), n—the number of observations,
i
¯
= average of the k subgroup ranges (6.2.2)
R
objectsinspected,ortheinspectionintervalinthe ithsubgroup.
s = Sample standard deviation of the observations in
3.2.20.1 Discussion—For fixed sample sizes the symbol n is i
the ith subgroup for the s chart (7.2.1)
used.
s = standard error of the EWMA statistic (11.2.1.2)
z
3.2.21 subgroup standard deviation (s), n—samplestandard
i
s¯ = average of the k subgroup standard deviations
deviation of the observations for the ith subgroup in an s chart.
(7.2.2)
3.3 Symbols:
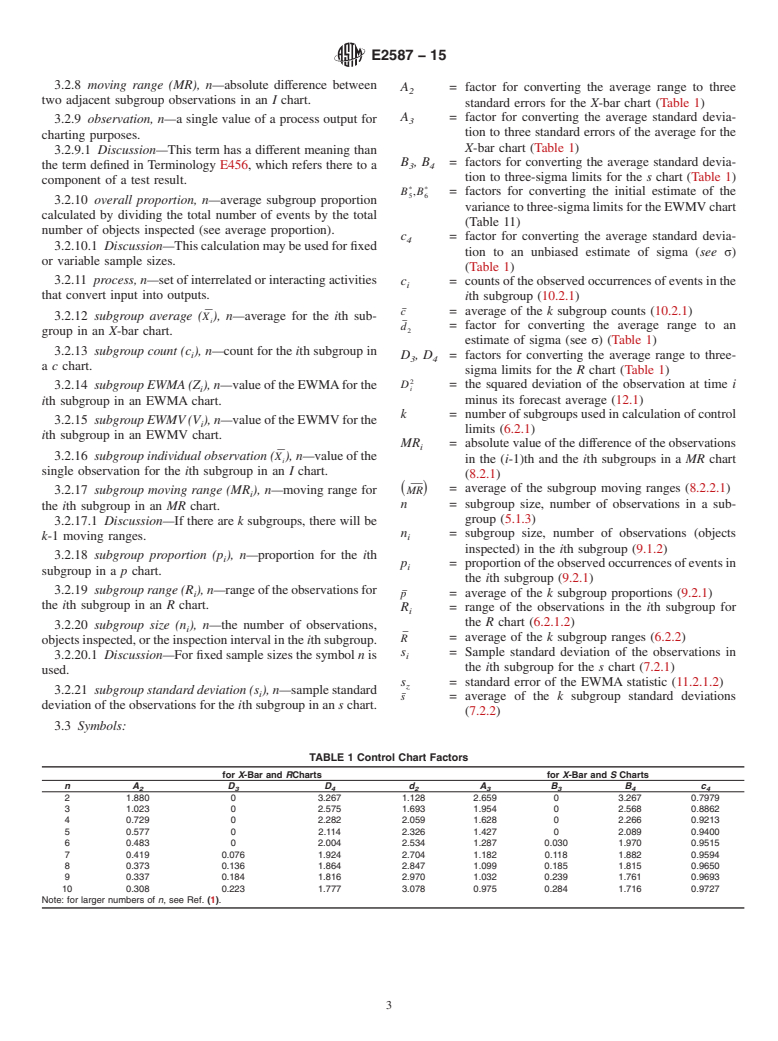
TABLE 1 Control Chart Factors
for X-Bar and RCharts for X-Bar and S Charts
nA D D d A B B c
2 3 4 2 3 3 4 4
2 1.880 0 3.267 1.128 2.659 0 3.267 0.7979
3 1.023 0 2.575 1.693 1.954 0 2.568 0.8862
4 0.729 0 2.282 2.059 1.628 0 2.266 0.9213
5 0.577 0 2.114 2.326 1.427 0 2.089 0.9400
6 0.483 0 2.004 2.534 1.287 0.030 1.970 0.9515
7 0.419 0.076 1.924 2.704 1.182 0.118 1.882 0.9594
8 0.373 0.136 1.864 2.847 1.099 0.185 1.815 0.9650
9 0.337 0.184 1.816 2.970 1.032 0.239 1.761 0.9693
10 0.308 0.223 1.777 3.078 0.975 0.284 1.716 0.9727
Note: for larger numbers of n, see Ref. (1).
E2587 − 14
ability is said to be in a state of statistical control, with its
u = counts of the observed occurrences of events in the
i
output variability subject only to c
...


This document is not an ASTM standard and is intended only to provide the user of an ASTM standard an indication of what changes have been made to the previous version. Because
it may not be technically possible to adequately depict all changes accurately, ASTM recommends that users consult prior editions as appropriate. In all cases only the current version
of the standard as published by ASTM is to be considered the official document.
Designation: E2587 − 12 E2587 − 14 An American National Standard
Standard Practice for
Use of Control Charts in Statistical Process Control
This standard is issued under the fixed designation E2587; the number immediately following the designation indicates the year of
original adoption or, in the case of revision, the year of last revision. A number in parentheses indicates the year of last reapproval. A
superscript epsilon (´) indicates an editorial change since the last revision or reapproval.
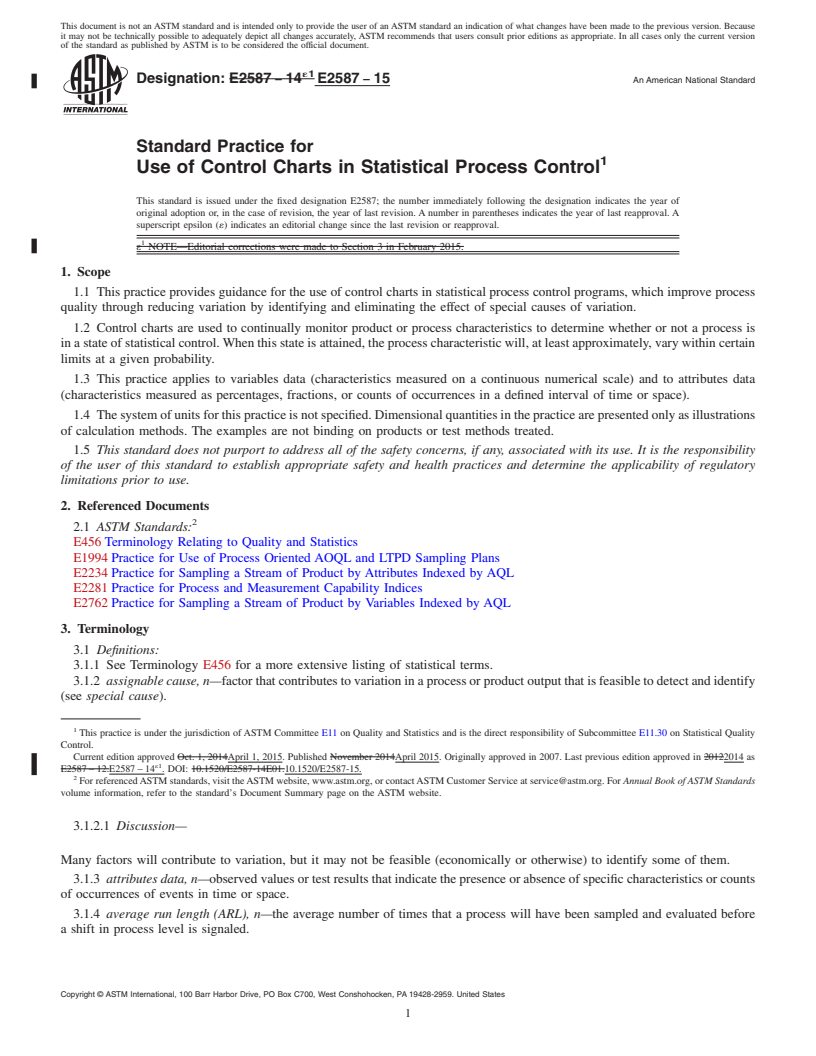
1. Scope
1.1 This practice provides guidance for the use of control charts in statistical process control programs, which improve process
quality through reducing variation by identifying and eliminating the effect of special causes of variation.
1.2 Control charts are used to continually monitor product or process characteristics to determine whether or not a process is
in a state of statistical control. When this state is attained, the process characteristic will, at least approximately, vary within certain
limits at a given probability.
1.3 This practice applies to variables data (characteristics measured on a continuous numerical scale) and to attributes data
(characteristics measured as percentages, fractions, or counts of occurrences in a defined interval of time or space).
1.4 The system of units for this practice is not specified. Dimensional quantities in the practice are presented only as illustrations
of calculation methods. The examples are not binding on products or test methods treated.
1.5 This standard does not purport to address all of the safety concerns, if any, associated with its use. It is the responsibility
of the user of this standard to establish appropriate safety and health practices and determine the applicability of regulatory
limitations prior to use.
2. Referenced Documents
2.1 ASTM Standards:
E456 Terminology Relating to Quality and Statistics
E1994 Practice for Use of Process Oriented AOQL and LTPD Sampling Plans
E2234 Practice for Sampling a Stream of Product by Attributes Indexed by AQL
E2281 Practice for Process and Measurement Capability Indices
E2762 Practice for Sampling a Stream of Product by Variables Indexed by AQL
3. Terminology
3.1 Definitions:
3.1.1 See Terminology E456 for a more extensive listing of statistical terms.
3.1.2 assignable cause, n—factor that contributes to variation in a process or product output that is feasible to detect and identify
(see special cause).
This practice is under the jurisdiction of ASTM Committee E11 on Quality and Statistics and is the direct responsibility of Subcommittee E11.30 on Statistical Quality
Control.
Current edition approved Dec. 1, 2012Oct. 1, 2014. Published February 2013November 2014. Originally approved in 2007. last previous edition approved in 20102012
as E2587 – 10.E2587 – 12. DOI: 10.1520/E2587-12.
For referenced ASTM standards, visit the ASTM website, www.astm.org, or contact ASTM Customer Service at service@astm.org. For Annual Book of ASTM Standards
volume information, refer to the standard’s Document Summary page on the ASTM website.
3.1.2.1 Discussion—
Many factors will contribute to variation, but it may not be feasible (economically or otherwise) to identify some of them.
3.1.3 attributes data, n—observed values or test results that indicate the presence or absence of specific characteristics or counts
of occurrences of events in time or space.
3.1.4 average run length (ARL), n—the average number of times that a process will have been sampled and evaluated before
a shift in process level is signaled.
Copyright © ASTM International, 100 Barr Harbor Drive, PO Box C700, West Conshohocken, PA 19428-2959. United States
E2587 − 14
3.1.4.1 Discussion—
A long ARL is desirable for a process located at its specified level (so as to minimize calling for unneeded investigation or
corrective action) and a short ARL is desirable for a process shifted to some undesirable level (so that corrective action will be
called for promptly). ARL curves are used to describe the relative quickness in detecting level shifts of various control chart
systems (see section 5.45.1.4). The average number of units that will have been produced before a shift in level is signaled may
also be of interest from an economic standpoint.
3.1.5 c chart, n—control chart that monitors the count of occurrences of an event in a defined increment of time or spacespace.
3.1.6 center line, n—line on a control chart depicting the average level of the statistic being monitored.
3.1.7 chance cause, n—source of inherent random variation in a process which is predictable within statistical limits (see
common cause).
3.1.7.1 Discussion—
Chance causes may be unidentifiable, or may have known origins that are not easily controllable or cost effective to eliminate.
3.1.8 common cause, n—(see chance cause).
3.1.9 control chart, n—chart on which are plotted a statistical measure of a subgroup versus time of sampling along with limits
based on the statistical distribution of that measure so as to indicate how much common, or chance, cause variation is inherent in
the process or product.
3.1.10 control chart factor, n—a tabulated constant, depending on sample size, used to convert specified statistics or parameters
into a central line value or control limit appropriate to the control chart.
3.1.11 control limits, n—limits on a control chart that are used as criteria for signaling the need for action or judging whether
a set of data does or does not indicate a state of statistical control based on a prescribed degree of risk.
3.1.11.1 Discussion—
For example, typical three-sigma limits carry a risk of 0.135 % of being out of control (on one side of the center line) when the
process is actually in control and the statistic has a normal distribution.
3.1.12 EWMA chart, n—control chart that monitors the exponentially weighted moving averages of consecutive subgroups.
3.1.13 EWMV chart, n—control chart that monitors the exponentially weighted moving variance.
3.1.14 exponentially weighted moving average (EWMA), n—weighted average of time ordered data where the weights of past
observations decrease geometrically with age.
3.1.14.1 Discussion—
Data used for the EWMA may consist of individual observations, averages, fractions, numbers defective, or counts.
3.1.15 exponentially weighted moving variance (EWMV), n—weighted average of squared deviations of observations from their
current estimate of the process average for time ordered observations, where the weights of past squared deviations decrease
geometrically with age.
3.1.15.1 Discussion—
The estimate of the process average used for the current deviation comes from a coupled EWMA chart monitoring the same process
characteristic. This estimate is the EWMA from the previous time period, which is the forecast of the process average for the
current time period.
3.1.16 I chart, n—control chart that monitors the individual subgroup observations.
3.1.17 lower control limit (LCL), n—minimum value of the control chart statistic that indicates statistical control.
3.1.18 MR chart, n—control chart that monitors the moving range of consecutive individual subgroup observations.
3.1.19 p chart, n—control chart that monitors the fraction of occurrences of an event.
3.1.20 R chart, n—control chart that monitors the range of observations within a subgroup.
3.1.21 rational subgroup, n—subgroup chosen to minimize the variability within subgroups and maximize the variability
between subgroups (see subgroup).
E2587 − 14
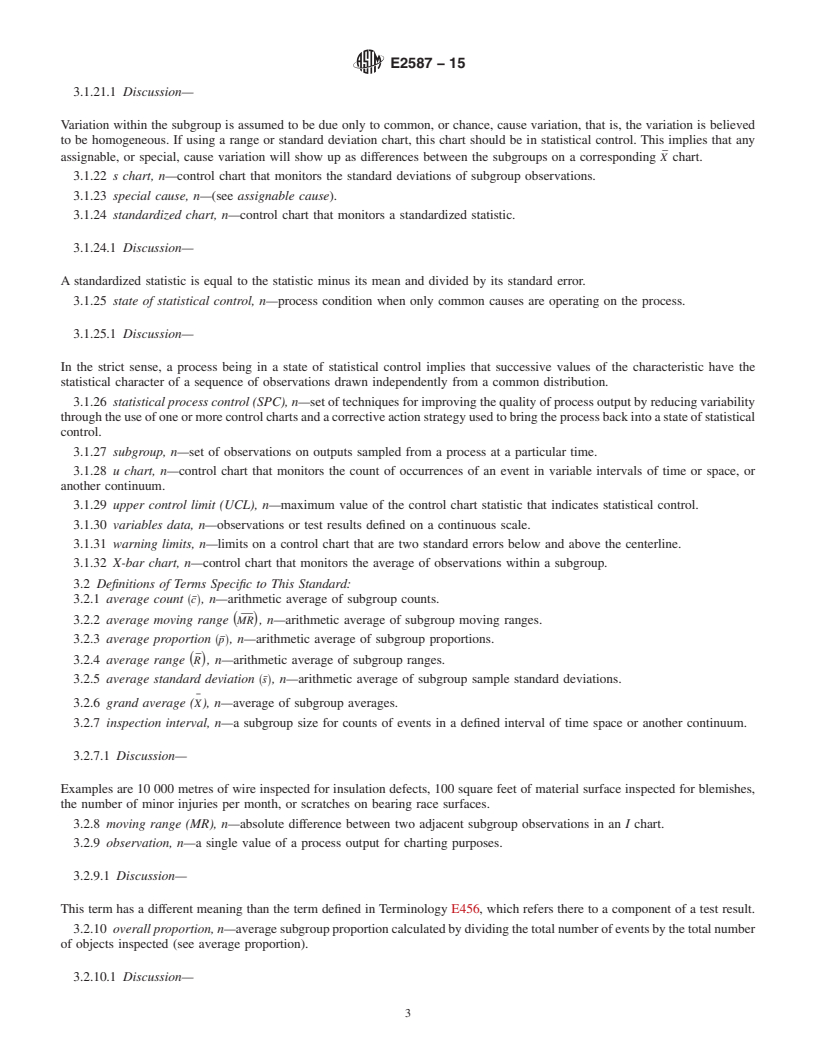
3.1.21.1 Discussion—
Variation within the subgroup is assumed to be due only to common, or chance, cause variation, that is, the variation is believed
to be homogeneous. If using a range or standard deviation chart, this chart should be in statistical control. This implies that any
¯
assignable, or special, cause variation will show up as differences between the subgroups on a corresponding X¯X chart.
3.1.22 s chart, n—control chart that monitors the standard deviations of subgroup observations.
3.1.23 special cause, n—(see assignable cause).
3.1.24 standardized chart, n—control chart that monitors a standardized statistic.
3.1.24.1 Discussion—
A standardized statistic is equal to the statistic minus its mean and divided by its standard error.
3.1.25 state of statistical control, n—process condition when only common causes are operating on the process.
3.1.25.1 Discussion—
In the strict sense, a process being in a state of statistical control implies that successive values of the characteristic have the
statistical character of a sequence of observations drawn independently from a common distribution.
3.1.26 statistical process control (SPC), n—set of techniques for improving the quality of process output by reducing variability
through the use of one or more control charts and a corrective action strategy used to bring the process back into a state of statistical
control.
3.1.27 subgroup, n—set of observations on outputs sampled from a process at a particular time.
3.1.28 u chart, n—control chart that monitors the count of occurrences of an event in variable intervals of time or space, or
another continuum.
3.1.29 upper control limit (UCL), n—maximum value of the control chart statistic that indicates statistical control.
3.1.30 variables data, n—observations or test results defined on a continuous scale.
3.1.31 warning limits, n—limits on a control chart that are two standard errors below and above the centerline.
3.1.32 X-bar chart, n—control chart that monitors the average of observations within a subgroup.
3.2 Definitions of Terms Specific to This Standard:
3.2.1 average count ~c¯!, n—arithmetic average of subgroup counts.
¯
3.2.2 average moving range ~MR!, n—arithmetic average of subgroup moving ranges.
3.2.3 average proportion ~p¯!, n—arithmetic average of subgroup proportions.
¯
3.2.4 average range ~R!, n—arithmetic average of subgroup ranges.
3.2.5 average standard deviation ~s¯!, n—arithmetic average of subgroup sample standard deviations.
3.2.6 grand average (X), n—average of subgroup averages.
3.2.7 inspection interval, n—a subgroup size for counts of events in a defined interval of time space or another continuum.
3.2.7.1 Discussion—
Examples are 10 000 metres of wire inspected for insulation defects, 100 square feet of material surface inspected for blemishes,
the number of minor injuries per month, or scratches on bearing race surfaces.
3.2.8 moving range (MR), n—absolute difference between two adjacent subgroup observations in an I chart.
3.2.9 observation, n—a single value of a process output for charting purposes.
3.2.9.1 Discussion—
This term has a different meaning than the term defined in Terminology E456, which refers there to a component of a test result.
3.2.10 overall proportion, n—average subgroup proportion calculated by dividing the total number of events by the total number
of objects inspected (see average proportion).
3.2.10.1 Discussion—
E2587 − 14
This calculation may be used for fixed or variable sample sizes.
3.2.11 process, n—set of interrelated or interacting activities that convert input into outputs.
th
¯
3.2.12 subgroup average (X¯X ), n—average for the i th subgroup in an X-bar chart.
ii
th
3.2.13 subgroup count (c ), n—count for the i th subgroup in a c chart.
i
3.2.14 subgroup EWMA (Z ), n—value of the EWMA for the ith subgroup in an EWMA chart.
i
3.2.15 subgroup EWMV (V ), n—value of the EWMV for the ith subgroup in an EWMV chart.
i
th
¯
3.2.16 subgroup individual observation (X¯X ), n—value of the single observation for the i th subgroup in an I chart.
ii
th
3.2.17 subgroup moving range (MR ), n—moving range for the i th subgroup in an MR chart.
i
3.2.17.1 Discussion—
If there are k subgroups, there will be k-1 moving ranges.
th
3.2.18 subgroup proportion ( p(p ), n—proportion for the i th subgroup in a p chart.
i
th
3.2.19 subgroup range (R ), n—range of the observations for the i th subgroup in an R chart.
i
3.2.20 subgroup size (n ), n—the number of observations, objects inspected, or the inspection interval in the ith subgroup.
i
3.2.20.1 Discussion—
For fixed sample sizes the symbol n is used.
th
3.2.21 subgroup standard deviation (s ), n—sample standard deviation of the observations for the i th subgroup in an s chart.
i
3.3 Symbols:
A = Factor for converting the average range to three standard errors for the X-bar chart (Table 1)
A = factor for converting the average range to three standard errors for the X-bar chart (Table 1)
A = Factor for converting the average standard deviation to three standard errors of the average for the X-bar chart (Table
1)
A = factor for converting the average standard deviation to three standard errors of the average for the X-bar chart (Table
1)
B , B = Factors for converting the average standard deviation to three-sigma limits for the s chart (Table 1)
3 4
B , B = factors for converting the average standard deviation to three-sigma limits for the s chart (Table 1)
3 4
th
c = Counts of the observed occurrences of events in the i subgroup (10.2.1)
i
* *
B ,B = factors for converting the initial estimate of the variance to three-sigma limits for the EWMV chart (Table 11)
5 6
c¯ = Average of the k subgroup counts (10.2.1)
c = Factor for converting the average standard deviation to an unbiased estimate of sigma (see σ) (Table 1)
c = factor for converting the average standard deviation to an unbiased estimate of sigma (see σ) (Table 1)
c = counts of the observed occurrences of events in the ith subgroup (10.2.1)
i
c¯ = factor for converting the average range to an estimate of sigma (see σ) (Table 1)
d¯ = Factor for converting the average range to an estimate of sigma (see σ) (Table 1)
¯
= factor for converting the average range to an estimate of sigma (see σ) (Table 1)
d
D , D = Factors for converting the average range to three-sigma limits for the R chart (Table 1)
3 4
D , D = factors for converting the average range to three-sigma limits for the R chart (Table 1)
3 4
D = the squared deviation of the observation at time i minus its forecast average (12.1)
i
k = Number of subgroups used in calculation of control limits (6.2.1)
TABLE 1 Control Chart Factors
forX-Bar andRCharts forX-Bar andSCharts
n A D D d A B B c
2 3 4 2 3 3 4 4
2 1.880 0 3.267 1.128 2.659 0 3.267 0.7979
3 1.023 0 2.575 1.693 1.954 0 2.568 0.8862
4 0.729 0 2.282 2.059 1.6
...

Questions, Comments and Discussion

Ask us and Technical Secretary will try to provide an answer. You can facilitate discussion about the standard in here.