ASTM A381/A381M-23
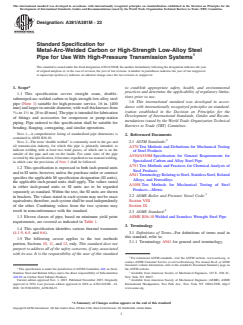
(Specification)Standard Specification for Metal-Arc-Welded Carbon or High-Strength Low-Alloy Steel Pipe for Use With High-Pressure Transmission Systems
Standard Specification for Metal-Arc-Welded Carbon or High-Strength Low-Alloy Steel Pipe for Use With High-Pressure Transmission Systems
ABSTRACT
This specification covers metal-arc-welded steel pipe for use with high pressure transmission systems. The pipe is intended for fabrication of fittings and accessories for compressor or pump-station piping. The required chemical compositions for carbon steel, and the tensile properties of finished pipes are presented. Mechanical testing requirements namely transverse body tension test and transverse weld tension test shall be performed on each length of pipe from each lot of 100 lengths, and transverse guided-bend weld test cut from a length of pipe from each lot of 50 length, also hydrostatic test from each length of pipes shall be performed. A radiographic examination shall also be performed to ensure that the welding equipment is consistently producing the required quality.
SCOPE
1.1 This specification covers straight seam, double-submerged-arc-welded carbon or high-strength low-alloy steel pipe (Note 1) suitable for high-pressure service, 16 in. [400 mm] and larger in outside diameter, with wall thicknesses from 5/16 to 11/2 in. [8 to 40 mm]. The pipe is intended for fabrication of fittings and accessories for compressor or pump-station piping. Pipe ordered to this specification shall be suitable for bending, flanging, corrugating, and similar operations.
Note 1: A comprehensive listing of standardized pipe dimensions is contained in ANSI B36.10.
Note 2: The term “double welded” is commonly used in the gas and oil transmission industry, for which this pipe is primarily intended, to indicate welding with at least two weld passes, of which one is on the outside of the pipe and one on the inside. For some sizes of the pipe covered by this specification, it becomes expedient to use manual welding, in which case the provisions of Note 3 shall be followed.
1.2 This specification is expressed in both inch-pound units and in SI units; however, unless the purchase order or contract specifies the applicable M specification designation (SI units), the applicable inch-pound units shall apply. The values stated in either inch-pound units or SI units are to be regarded separately as standard. Within the text, the SI units are shown in brackets. The values stated in each system may not be exact equivalents; therefore, each system shall be used independently of the other. Combining values from the two systems may result in nonconformance with the standard.
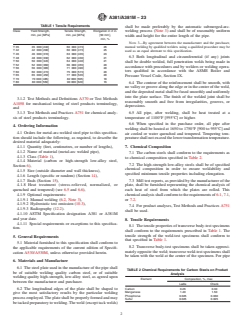
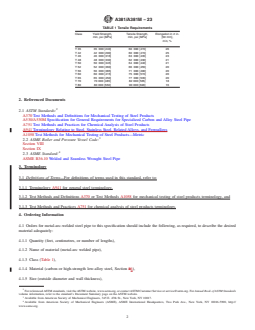
1.3 Eleven classes of pipe, based on minimum yield point requirements, are covered as indicated in Table 1.
1.4 This specification identifies various thermal treatments (4.1.9, 6.5, and 6.6).
1.5 The following caveat applies to the test methods portion, Sections 10, 11, and 12, only. This standard does not purport to address all of the safety concerns, if any, associated with its use. It is the responsibility of the user of this standard to establish appropriate safety, health, and environmental practices and determine the applicability of regulatory limitations prior to use.
1.6 This international standard was developed in accordance with internationally recognized principles on standardization established in the Decision on Principles for the Development of International Standards, Guides and Recommendations issued by the World Trade Organization Technical Barriers to Trade (TBT) Committee.
General Information
- Status
- Published
- Publication Date
- 31-Oct-2023
- Technical Committee
- A01 - Steel, Stainless Steel and Related Alloys
- Drafting Committee
- A01.09 - Carbon Steel Tubular Products
Relations
- Effective Date
- 01-Nov-2023
- Effective Date
- 01-Mar-2024
- Effective Date
- 01-Mar-2024
- Effective Date
- 15-Sep-2023
- Effective Date
- 01-May-2023
Overview
ASTM A381/A381M-23 sets the requirements for metal-arc-welded carbon steel and high-strength low-alloy steel pipe, specifically designed for high-pressure transmission systems. Issued by ASTM International, this standard covers straight seam, double-submerged-arc-welded pipe, with diameters of 16 inches (400 mm) and larger, and wall thicknesses from 5/16 to 1-1/2 inches (8 to 40 mm). The primary application is for the construction and fabrication of fittings and accessories used in compressor or pump-station piping, critical to oil and gas transmission infrastructure.
This specification establishes requirements for chemical composition, mechanical properties (including several tensile strength classes), heat treatment, dimensional tolerances, mechanical and nondestructive testing, and inspection. Both inch-pound and SI unit systems are addressed.
Key Topics
Pipe Grades and Classes
- Eleven classes based on minimum yield strength, tailored for a range of high-pressure service demands.
- Suitable for both carbon steel and high-strength, low-alloy steel materials.
Manufacturing and Welding
- Specifies double-submerged-arc welding (at least two weld passes, inside and outside).
- Allows for manual welding using qualified welders and procedures, as agreed by manufacturer and purchaser.
- All welds must ensure full penetration and be produced under strict quality control.
Chemical and Mechanical Properties
- Carbon steels must conform to strict limits for elements such as carbon, manganese, phosphorus, and sulfur.
- High-strength low-alloy steels require specified compositions to guarantee weldability and mechanical performance.
- Rigorous mechanical testing, including transverse body tension, weld tension, and guided-bend weld tests, assures structural integrity.
Testing and Inspection
- Hydrostatic testing is required for each length of pipe unless specifically omitted by agreement.
- At least 5% of total weld footage is subjected to radiographic examination. Complete radiography may be specified.
- Inspection rights for purchaser’s representatives to ensure compliance during production.
Dimensional and Finish Requirements
- Strict tolerances for outside diameter, wall thickness, and out-of-roundness.
- Pipe ends typically finished beveled for welding during pipeline assembly.
Applications
High-Pressure Transmission Systems
- Critical in the transport of oil and natural gas under demanding pressure conditions.
- Commonly used for pipelines requiring reliable mechanical strength and consistent weld quality.
Compressor and Pump-Station Piping
- Designed for the assembly of fittings, bends, and accessories essential to pressure control in transmission networks.
- Suitable for subsequent operations such as bending, flanging, and corrugating.
Infrastructure Components
- Supports construction flexibility through use of both carbon and high-strength low-alloy steels.
- Ensures compatibility with standardized fittings and accessories.
Industrial and Energy Sectors
- Used wherever robust, high-pressure piping is necessary, including refineries, gas processing plants, and industrial installations.
Related Standards
- ASTM A370 - Mechanical testing methods for steel products.
- ASTM A530/A530M - General requirements for specialized carbon and alloy steel pipe.
- ASTM A751 - Chemical analysis methods for steel products.
- ASME Section VIII & IX - Boiler and Pressure Vessel Code, addressing welding qualifications and pressure testing.
- ASME B36.10 - Standardized dimensions for welded and seamless wrought steel pipe.
ASTM A381/A381M-23 provides a comprehensive framework for the production, testing, and acceptance of metal-arc-welded pipes, ensuring safety, consistency, and performance in high-pressure pipeline systems. Compliance with this specification helps safeguard the integrity of critical infrastructure in the energy sector.
Buy Documents
ASTM A381/A381M-23 - Standard Specification for Metal-Arc-Welded Carbon or High-Strength Low-Alloy Steel Pipe for Use With High-Pressure Transmission Systems
REDLINE ASTM A381/A381M-23 - Standard Specification for Metal-Arc-Welded Carbon or High-Strength Low-Alloy Steel Pipe for Use With High-Pressure Transmission Systems
Get Certified
Connect with accredited certification bodies for this standard

Institut za varilstvo d.o.o. (Welding Institute)
Slovenia's leading welding institute since 1952. ISO 3834, EN 1090, pressure equipment certification, NDT personnel, welder qualification. Only IIW Au
Sponsored listings
Frequently Asked Questions
ASTM A381/A381M-23 is a technical specification published by ASTM International. Its full title is "Standard Specification for Metal-Arc-Welded Carbon or High-Strength Low-Alloy Steel Pipe for Use With High-Pressure Transmission Systems". This standard covers: ABSTRACT This specification covers metal-arc-welded steel pipe for use with high pressure transmission systems. The pipe is intended for fabrication of fittings and accessories for compressor or pump-station piping. The required chemical compositions for carbon steel, and the tensile properties of finished pipes are presented. Mechanical testing requirements namely transverse body tension test and transverse weld tension test shall be performed on each length of pipe from each lot of 100 lengths, and transverse guided-bend weld test cut from a length of pipe from each lot of 50 length, also hydrostatic test from each length of pipes shall be performed. A radiographic examination shall also be performed to ensure that the welding equipment is consistently producing the required quality. SCOPE 1.1 This specification covers straight seam, double-submerged-arc-welded carbon or high-strength low-alloy steel pipe (Note 1) suitable for high-pressure service, 16 in. [400 mm] and larger in outside diameter, with wall thicknesses from 5/16 to 11/2 in. [8 to 40 mm]. The pipe is intended for fabrication of fittings and accessories for compressor or pump-station piping. Pipe ordered to this specification shall be suitable for bending, flanging, corrugating, and similar operations. Note 1: A comprehensive listing of standardized pipe dimensions is contained in ANSI B36.10. Note 2: The term “double welded” is commonly used in the gas and oil transmission industry, for which this pipe is primarily intended, to indicate welding with at least two weld passes, of which one is on the outside of the pipe and one on the inside. For some sizes of the pipe covered by this specification, it becomes expedient to use manual welding, in which case the provisions of Note 3 shall be followed. 1.2 This specification is expressed in both inch-pound units and in SI units; however, unless the purchase order or contract specifies the applicable M specification designation (SI units), the applicable inch-pound units shall apply. The values stated in either inch-pound units or SI units are to be regarded separately as standard. Within the text, the SI units are shown in brackets. The values stated in each system may not be exact equivalents; therefore, each system shall be used independently of the other. Combining values from the two systems may result in nonconformance with the standard. 1.3 Eleven classes of pipe, based on minimum yield point requirements, are covered as indicated in Table 1. 1.4 This specification identifies various thermal treatments (4.1.9, 6.5, and 6.6). 1.5 The following caveat applies to the test methods portion, Sections 10, 11, and 12, only. This standard does not purport to address all of the safety concerns, if any, associated with its use. It is the responsibility of the user of this standard to establish appropriate safety, health, and environmental practices and determine the applicability of regulatory limitations prior to use. 1.6 This international standard was developed in accordance with internationally recognized principles on standardization established in the Decision on Principles for the Development of International Standards, Guides and Recommendations issued by the World Trade Organization Technical Barriers to Trade (TBT) Committee.
ABSTRACT This specification covers metal-arc-welded steel pipe for use with high pressure transmission systems. The pipe is intended for fabrication of fittings and accessories for compressor or pump-station piping. The required chemical compositions for carbon steel, and the tensile properties of finished pipes are presented. Mechanical testing requirements namely transverse body tension test and transverse weld tension test shall be performed on each length of pipe from each lot of 100 lengths, and transverse guided-bend weld test cut from a length of pipe from each lot of 50 length, also hydrostatic test from each length of pipes shall be performed. A radiographic examination shall also be performed to ensure that the welding equipment is consistently producing the required quality. SCOPE 1.1 This specification covers straight seam, double-submerged-arc-welded carbon or high-strength low-alloy steel pipe (Note 1) suitable for high-pressure service, 16 in. [400 mm] and larger in outside diameter, with wall thicknesses from 5/16 to 11/2 in. [8 to 40 mm]. The pipe is intended for fabrication of fittings and accessories for compressor or pump-station piping. Pipe ordered to this specification shall be suitable for bending, flanging, corrugating, and similar operations. Note 1: A comprehensive listing of standardized pipe dimensions is contained in ANSI B36.10. Note 2: The term “double welded” is commonly used in the gas and oil transmission industry, for which this pipe is primarily intended, to indicate welding with at least two weld passes, of which one is on the outside of the pipe and one on the inside. For some sizes of the pipe covered by this specification, it becomes expedient to use manual welding, in which case the provisions of Note 3 shall be followed. 1.2 This specification is expressed in both inch-pound units and in SI units; however, unless the purchase order or contract specifies the applicable M specification designation (SI units), the applicable inch-pound units shall apply. The values stated in either inch-pound units or SI units are to be regarded separately as standard. Within the text, the SI units are shown in brackets. The values stated in each system may not be exact equivalents; therefore, each system shall be used independently of the other. Combining values from the two systems may result in nonconformance with the standard. 1.3 Eleven classes of pipe, based on minimum yield point requirements, are covered as indicated in Table 1. 1.4 This specification identifies various thermal treatments (4.1.9, 6.5, and 6.6). 1.5 The following caveat applies to the test methods portion, Sections 10, 11, and 12, only. This standard does not purport to address all of the safety concerns, if any, associated with its use. It is the responsibility of the user of this standard to establish appropriate safety, health, and environmental practices and determine the applicability of regulatory limitations prior to use. 1.6 This international standard was developed in accordance with internationally recognized principles on standardization established in the Decision on Principles for the Development of International Standards, Guides and Recommendations issued by the World Trade Organization Technical Barriers to Trade (TBT) Committee.
ASTM A381/A381M-23 is classified under the following ICS (International Classification for Standards) categories: 23.040.10 - Iron and steel pipes. The ICS classification helps identify the subject area and facilitates finding related standards.
ASTM A381/A381M-23 has the following relationships with other standards: It is inter standard links to ASTM A381/A381M-18, ASTM A941-24, ASTM A370-24, ASTM A370-23, ASTM A941-23. Understanding these relationships helps ensure you are using the most current and applicable version of the standard.
ASTM A381/A381M-23 is available in PDF format for immediate download after purchase. The document can be added to your cart and obtained through the secure checkout process. Digital delivery ensures instant access to the complete standard document.
Standards Content (Sample)
This international standard was developed in accordance with internationally recognized principles on standardization established in the Decision on Principles for the
Development of International Standards, Guides and Recommendations issued by the World Trade Organization Technical Barriers to Trade (TBT) Committee.
Designation: A381/A381M − 23
Standard Specification for
Metal-Arc-Welded Carbon or High-Strength Low-Alloy Steel
Pipe for Use With High-Pressure Transmission Systems
This standard is issued under the fixed designation A381/A381M; the number immediately following the designation indicates the year
of original adoption or, in the case of revision, the year of last revision. A number in parentheses indicates the year of last reapproval.
A superscript epsilon (´) indicates an editorial change since the last revision or reapproval.
1. Scope* to establish appropriate safety, health, and environmental
practices and determine the applicability of regulatory limita-
1.1 This specification covers straight seam, double-
tions prior to use.
submerged-arc-welded carbon or high-strength low-alloy steel
1.6 This international standard was developed in accor-
pipe (Note 1) suitable for high-pressure service, 16 in. [400
dance with internationally recognized principles on standard-
mm] and larger in outside diameter, with wall thicknesses from
ization established in the Decision on Principles for the
5 1
⁄16 to 1 ⁄2 in. [8 to 40 mm]. The pipe is intended for fabrication
Development of International Standards, Guides and Recom-
of fittings and accessories for compressor or pump-station
mendations issued by the World Trade Organization Technical
piping. Pipe ordered to this specification shall be suitable for
Barriers to Trade (TBT) Committee.
bending, flanging, corrugating, and similar operations.
NOTE 1—A comprehensive listing of standardized pipe dimensions is
2. Referenced Documents
contained in ANSI B36.10.
2.1 ASTM Standards:
NOTE 2—The term “double welded” is commonly used in the gas and
oil transmission industry, for which this pipe is primarily intended, to
A370 Test Methods and Definitions for Mechanical Testing
indicate welding with at least two weld passes, of which one is on the
of Steel Products
outside of the pipe and one on the inside. For some sizes of the pipe
A530/A530M Specification for General Requirements for
covered by this specification, it becomes expedient to use manual welding,
Specialized Carbon and Alloy Steel Pipe
in which case the provisions of Note 3 shall be followed.
A751 Test Methods and Practices for Chemical Analysis of
1.2 This specification is expressed in both inch-pound units
Steel Products
and in SI units; however, unless the purchase order or contract
A941 Terminology Relating to Steel, Stainless Steel, Related
specifies the applicable M specification designation (SI units),
Alloys, and Ferroalloys
the applicable inch-pound units shall apply. The values stated
A1058 Test Methods for Mechanical Testing of Steel
in either inch-pound units or SI units are to be regarded
Products—Metric
separately as standard. Within the text, the SI units are shown
2.2 ASME Boiler and Pressure Vessel Code:
in brackets. The values stated in each system may not be exact
Section VIII
equivalents; therefore, each system shall be used independently
Section IX
of the other. Combining values from the two systems may
result in nonconformance with the standard.
2.3 ASME Standard:
ASME B36.10 Welded and Seamless Wrought Steel Pipe
1.3 Eleven classes of pipe, based on minimum yield point
requirements, are covered as indicated in Table 1.
3. Terminology
1.4 This specification identifies various thermal treatments
3.1 Definitions of Terms—For definitions of terms used in
(4.1.9, 6.5, and 6.6).
this standard, refer to:
1.5 The following caveat applies to the test methods
3.1.1 Terminology A941 for general steel terminology,
portion, Sections 10, 11, and 12, only. This standard does not
purport to address all of the safety concerns, if any, associated
with its use. It is the responsibility of the user of this standard
For referenced ASTM standards, visit the ASTM website, www.astm.org, or
contact ASTM Customer Service at service@astm.org. For Annual Book of ASTM
Standards volume information, refer to the standard’s Document Summary page on
This specification is under the jurisdiction of ASTM Committee A01 on Steel, the ASTM website.
Stainless Steel and Related Alloys and is the direct responsibility of Subcommittee Available from American Society of Mechanical Engineers, 345 E. 47th St.,
A01.09 on Carbon Steel Tubular Products. New York, NY 10017.
Current edition approved Nov. 1, 2023. Published November 2023. Originally Available from American Society of Mechanical Engineers (ASME), ASME
approved in 1954. Last previous edition approved in 2018 as A381/A381M – 18. International Headquarters, Two Park Ave., New York, NY 10016-5990, http://
DOI: 10.1520/A0381_A0381M-23. www.asme.org.
*A Summary of Changes section appears at the end of this standard
Copyright © ASTM International, 100 Barr Harbor Drive, PO Box C700, West Conshohocken, PA 19428-2959. United States
A381/A381M − 23
TABLE 1 Tensile Requirements
shall be made preferably by the automatic submerged-arc-
Class Yield Strength, Tensile Strength, Elongation in 2 in. welding process (Note 3) and shall be of reasonably uniform
min, psi [MPa] min, psi [MPa] [50 mm],
width and height for the entire length of the pipe.
min, %
NOTE 3—By agreement between the manufacturer and the purchaser,
Y 35 35 000 [240] 60 000 [415] 26 manual welding by qualified welders using a qualified procedure may be
Y 42 42 000 [290] 60 000 [415] 25
used as an equal alternate to this specification.
Y 46 46 000 [316] 63 000 [435] 23
6.3 Both longitudinal and circumferential (if any) joints
Y 48 48 000 [330] 62 000 [430] 21
Y 50 50 000 [345] 64 000 [440] 21
shall be double welded, full penetration welds being made in
Y 52 52 000 [360] 66 000 [455] 20
accordance with procedures and by welders or welding opera-
Y 56 56 000 [385] 71 000 [490] 20
tors qualified in accordance with the ASME Boiler and
Y 60 60 000 [415] 75 000 [515] 20
Y 65 65 000 [450] 77 000 [535] 20
Pressure Vessel Code, Section IX.
Y 70 70 000 [485] 82 000 [565] 18
Y 80 80 000 [550] 90 000 [620] 16
6.4 The contour of the reinforcement shall be smooth, with
no valley or groove along the edge or in the center of the weld,
and the deposited metal shall be fused smoothly and uniformly
into the plate surface. The finish of the welded joint shall be
3.1.2 Test Methods and Definitions A370 or Test Methods
reasonably smooth and free from irregularities, grooves, or
A1058 for mechanical testing of steel products terminology,
depressions.
and
6.5 All pipe, after welding, shall be heat treated at a
3.1.3 Test Methods and Practices A751 for chemical analy-
temperature of 1100°F [595°C] or higher.
sis of steel products terminology.
6.6 When specified in the purchase order, all pipe after
4. Ordering Information
welding shall be heated at 1650 to 1750°F [900 to 955°C] and
4.1 Orders for metal-arc-welded steel pipe to this specifica-
air cooled or water quenched and tempered. Tempering tem-
tion should include the following, as required, to describe the
perature shall not exceed the lower transformation temperature.
desired material adequately:
4.1.1 Quantity (feet, centimetres, or number of lengths), 7. Chemical Composition
4.1.2 Name of material (metal-arc welded pipe),
7.1 The carbon steels shall conform to the requirements as
4.1.3 Class (Table 1),
to chemical composition specified in Table 2.
4.1.4 Material (carbon or high-strength low-alloy steel,
7.2 The high-strength low-alloy steels shall be of specified
Section 6),
chemical composition in order to ensure weldability and
4.1.5 Size (outside diameter and wall thickness),
specified minimum tensile properties including elongation.
4.1.6 Length (specific or random) (Section 14),
4.1.7 Ends (Section 15), 7.3 Mill test reports, as provided by the manufacturer of the
4.1.8 Heat treatment (stress-relieved, normalized, or plate, shall be furnished representing the chemical analysis of
quenched and tempered) (see 6.5 and 6.6), each heat of steel from which the plates are rolled. This
4.1.9 Optional requirements: chemical analysis shall conform to the requirements of 6.1, 7.1,
4.1.9.1 Manual welding (6.2, Note 3), or 7.2.
4.1.9.2 Hydrostatic test omission (10.3),
7.4 For product analyses, Test Methods and Practices A751
4.1.9.3 Radiography (12.2).
shall be used.
4.1.10 ASTM Specification designation A381 or A381M
and year date.
8. Tensile Requirements
4.1.11 Special requirements or exceptions to this specifica-
8.1 The tensile properties of transverse body-test specimens
tion.
shall conform to the requirements prescribed in Table 1. The
tensile strength of the weld-test specimens shall conform to
5. General Requirements
that specified in Table 1.
5.1 Material furnished to this specification shall conform to
8.2 Transverse body-test specimens shall be taken approxi-
the applicable requirements of the current edition of Specifi-
mately opposite the weld; transverse weld-test specimens shall
cation A530/A530M, unless otherwise provided herein.
be taken with the weld at the center of the specimen. For pipe
6. Materials and Manufacture
6.1 The steel plate used in the manufacture of the pipe shall
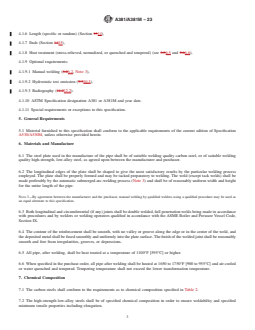
TABLE 2 Chemical Requirements for Carbon Steels on Product
be of suitable welding quality carbon steel, or of suitable
Analysis
welding quality high-strength, low-alloy steel, as agreed upon
Element Composition, %, max
between the manufacturer and purchaser.
Ladle Check
6.2 The longitudinal edges of the plate shall be shaped to Carbon 0.26 0.30
Manganese 1.40 1.50
give the most satisfactory results by the particular welding
Phosphorus 0.025 0.030
process employed. The plate shall be properly formed and may
Sulfur 0.025 0.025
be tacked preparatory to welding. The weld (except tack welds)
A381/A381M − 23
wall thicknesses up to ⁄4 in. [19 mm], incl, all test specim
...
This document is not an ASTM standard and is intended only to provide the user of an ASTM standard an indication of what changes have been made to the previous version. Because
it may not be technically possible to adequately depict all changes accurately, ASTM recommends that users consult prior editions as appropriate. In all cases only the current version
of the standard as published by ASTM is to be considered the official document.
Designation: A381/A381M − 18 A381/A381M − 23
Standard Specification for
Metal-Arc-Welded Carbon or High-Strength Low-Alloy Steel
Pipe for Use With High-Pressure Transmission Systems
This standard is issued under the fixed designation A381/A381M; the number immediately following the designation indicates the year
of original adoption or, in the case of revision, the year of last revision. A number in parentheses indicates the year of last reapproval.
A superscript epsilon (´) indicates an editorial change since the last revision or reapproval.
1. Scope*
1.1 This specification covers straight seam, double-submerged-arc-welded carbon or high-strength low-alloy steel pipe (Note 1)
5 1
suitable for high-pressure service, 16 in. [400 mm] and larger in outside diameter, with wall thicknesses from ⁄16 to 1 ⁄2 in. [8 to
40 mm]. The pipe is intended for fabrication of fittings and accessories for compressor or pump-station piping. Pipe ordered to this
specification shall be suitable for bending, flanging, corrugating, and similar operations.
NOTE 1—A comprehensive listing of standardized pipe dimensions is contained in ANSI B36.10.
NOTE 2—The term “double welded” is commonly used in the gas and oil transmission industry, for which this pipe is primarily intended, to indicate
welding with at least two weld passes, of which one is on the outside of the pipe and one on the inside. For some sizes of the pipe covered by this
specification, it becomes expedient to use manual welding, in which case the provisions of Note 3 shall be followed.
1.2 This specification is expressed in both inch-pound units and in SI units; however, unless the purchase order or contract
specifies the applicable M specification designation (SI units), the applicable inch-pound units shall apply. The values stated in
either inch-pound units or SI units are to be regarded separately as standard. Within the text, the SI units are shown in brackets.
The values stated in each system may not be exact equivalents; therefore, each system shall be used independently of the other.
Combining values from the two systems may result in nonconformance with the standard.
1.3 Eleven classes of pipe, based on minimum yield point requirements, are covered as indicated in Table 1.
1.4 This specification identifies various thermal treatments (3.1.94.1.9, 5.56.5, and 5.66.6).
1.5 The following caveat applies to the test methods portion, Sections 910, 1011, and 1112, only. This standard does not purport
to address all of the safety concerns, if any, associated with its use. It is the responsibility of the user of this standard to establish
appropriate safety, health, and environmental practices and determine the applicability of regulatory limitations prior to use.
1.6 This international standard was developed in accordance with internationally recognized principles on standardization
established in the Decision on Principles for the Development of International Standards, Guides and Recommendations issued
by the World Trade Organization Technical Barriers to Trade (TBT) Committee.
This specification is under the jurisdiction of ASTM Committee A01 on Steel, Stainless Steel and Related Alloys and is the direct responsibility of Subcommittee A01.09
on Carbon Steel Tubular Products.
Current edition approved Nov. 1, 2018Nov. 1, 2023. Published December 2018November 2023. Originally approved in 1954. Last previous edition approved in 20122018
as A381 – 96A381/A381M – 18. (2012). DOI: 10.1520/A0381_A0381M-18.10.1520/A0381_A0381M-23.
*A Summary of Changes section appears at the end of this standard
Copyright © ASTM International, 100 Barr Harbor Drive, PO Box C700, West Conshohocken, PA 19428-2959. United States
A381/A381M − 23
TABLE 1 Tensile Requirements
Class Yield Strength, Tensile Strength, Elongation in 2 in.
min, psi [MPa] min, psi [MPa] [50 mm],
min, %
Y 35 35 000 [240] 60 000 [415] 26
Y 42 42 000 [290] 60 000 [415] 25
Y 46 46 000 [316] 63 000 [435] 23
Y 48 48 000 [330] 62 000 [430] 21
Y 50 50 000 [345] 64 000 [440] 21
Y 52 52 000 [360] 66 000 [455] 20
Y 56 56 000 [385] 71 000 [490] 20
Y 60 60 000 [415] 75 000 [515] 20
Y 65 65 000 [450] 77 000 [535] 20
Y 70 70 000 [485] 82 000 [565] 18
Y 80 80 000 [550] 90 000 [620] 16
2. Referenced Documents
2.1 ASTM Standards:
A370 Test Methods and Definitions for Mechanical Testing of Steel Products
A530/A530M Specification for General Requirements for Specialized Carbon and Alloy Steel Pipe
A751 Test Methods and Practices for Chemical Analysis of Steel Products
A941 Terminology Relating to Steel, Stainless Steel, Related Alloys, and Ferroalloys
A1058 Test Methods for Mechanical Testing of Steel Products—Metric
2.2 ASME Boiler and Pressure Vessel Code:
Section VIII
Section IX
2.3 ASME Standard:
ASME B36.10 Welded and Seamless Wrought Steel Pipe
3. Terminology
3.1 Definitions of Terms—For definitions of terms used in this standard, refer to:
3.1.1 Terminology A941 for general steel terminology,
3.1.2 Test Methods and Definitions A370 or Test Methods A1058 for mechanical testing of steel products terminology, and
3.1.3 Test Methods and Practices A751 for chemical analysis of steel products terminology.
4. Ordering Information
4.1 Orders for metal-arc-welded steel pipe to this specification should include the following, as required, to describe the desired
material adequately:
4.1.1 Quantity (feet, centimetres, or number of lengths),
4.1.2 Name of material (metal-arc welded pipe),
4.1.3 Class (Table 1),
4.1.4 Material (carbon or high-strength low-alloy steel, Section 56),
4.1.5 Size (outside diameter and wall thickness),
For referenced ASTM standards, visit the ASTM website, www.astm.org, or contact ASTM Customer Service at service@astm.org. For Annual Book of ASTM Standards
volume information, refer to the standard’s Document Summary page on the ASTM website.
Available from American Society of Mechanical Engineers, 345 E. 47th St., New York, NY 10017.
Available from American Society of Mechanical Engineers (ASME), ASME International Headquarters, Two Park Ave., New York, NY 10016-5990, http://
www.asme.org.
A381/A381M − 23
4.1.6 Length (specific or random) (Section 1314),
4.1.7 Ends (Section 1415),
4.1.8 Heat treatment (stress-relieved, normalized, or quenched and tempered) (see 5.56.5 and 5.66.6),
4.1.9 Optional requirements:
4.1.9.1 Manual welding (5.26.2, Note 3),
4.1.9.2 Hydrostatic test omission (9.310.3),
4.1.9.3 Radiography (11.212.2).
4.1.10 ASTM Specification designation A381 or A381M and year date.
4.1.11 Special requirements or exceptions to this specification.
5. General Requirements
5.1 Material furnished to this specification shall conform to the applicable requirements of the current edition of Specification
A530/A530M, unless otherwise provided herein.
6. Materials and Manufacture
6.1 The steel plate used in the manufacture of the pipe shall be of suitable welding quality carbon steel, or of suitable welding
quality high-strength, low-alloy steel, as agreed upon between the manufacturer and purchaser.
6.2 The longitudinal edges of the plate shall be shaped to give the most satisfactory results by the particular welding process
employed. The plate shall be properly formed and may be tacked preparatory to welding. The weld (except tack welds) shall be
made preferably by the automatic submerged-arc-welding process (Note 3) and shall be of reasonably uniform width and height
for the entire length of the pipe.
NOTE 3—By agreement between the manufacturer and the purchaser, manual welding by qualified welders using a qualified procedure may be used as
an equal alternate to this specification.
6.3 Both longitudinal and circumferential (if any) joints shall be double welded, full penetration welds being made in accordance
with procedures and by welders or welding operators qualified in accordance with the ASME Boiler and Pressure Vessel Code,
Section IX.
6.4 The contour of the reinforcement shall be smooth, with no valley or groove along the edge or in the center of the weld, and
the deposited metal shall be fused smoothly and uniformly into the plate surface. The finish of the welded joint shall be reasonably
smooth and free from irregularities, grooves, or depressions.
6.5 All pipe, after welding, shall be heat treated at a temperature of 1100°F [595°C] or higher.
6.6 When specified in the purchase order, all pipe after welding shall be heated at 1650 to 1750°F [900 to 955°C] and air cooled
or water quenched and tempered. Tempering temperature shall not exceed the lower transformation temperature.
7. Chemical Composition
7.1 The carbon steels shall conform to the requirements as to chemical composition specified in Table 2.
7.2 The high-strength low-alloy steels shall be of specified chemical composition in order to ensure weldability and specified
minimum tensile properties including elongation.
A381/A381M − 23
TABLE 2 Chemical Requirements for Carbon Steels on Product
Analysis
Element Composition, %, max
Ladle Check
Carbon 0.26 0.30
Manganese 1.40 1.50
Phosphorus 0.025 0.030
Sulfur 0.025 0.025
7.3 Mill test reports, as provided by the manufacturer of the plate, shall be furnished representing the chemical analysis of each
heat of steel from which the plates are rolled. This chemical analysis shall conform to the requirements of 5.16.1, 6.17.1, or 6.27.2.
7.4 For product analyses, Test Methods and Practices A751 shall be used.
8. Tensile Requirements
8.1 The tensile properties of transverse body-test specimens shall conform to the requirements prescribed in Table 1. The tensile
strength of the weld-test specimens shall conform to that specified in Table 1.
8.2 Transverse body-test specimens shall be taken approximately opposite the weld; transverse weld-test specimens shall be taken
with the weld at the center of the specimen. For pipe wall thicknesses up to ⁄4 in. [19 mm], incl, all test specimens shall be in
accordance with Test Methods and Definitions A370 using full-size specimens or the largest obtainable sub-s
...

Questions, Comments and Discussion
Ask us and Technical Secretary will try to provide an answer. You can facilitate discussion about the standard in here.
Loading comments...