ASTM B317/B317M-23
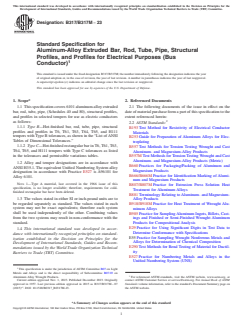
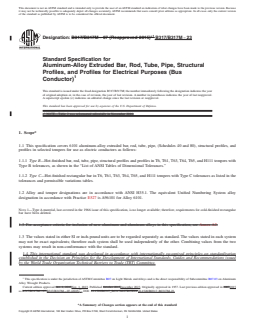
(Specification)Standard Specification for Aluminum-Alloy Extruded Bar, Rod, Tube, Pipe, Structural Profiles, and Profiles for Electrical Purposes (Bus Conductor)
Standard Specification for Aluminum-Alloy Extruded Bar, Rod, Tube, Pipe, Structural Profiles, and Profiles for Electrical Purposes (Bus Conductor)
ABSTRACT
This specification covers 6101 aluminum-alloy extruded bar, rod, tube, pipe, (Schedules 40 and 80), structural profiles, and profiles in selected tempers for use as electric conductors. The bars, rods, tubes, pipes, structural profiles and profiles shall be produced by hot extrusion or by similar methods. Pipe or tube may be produced through porthole or bridge type dies. Tensile properties of the specimens such as tensile and yield strengths and bending shall be determined by tension test and bending test, respectively. Electrical resistivity and conductivity shall be determined.
SCOPE
1.1 This specification covers 6101 aluminum-alloy extruded bar, rod, tube, pipe, (Schedules 40 and 80), structural profiles, and profiles in selected tempers for use as electric conductors as follows:
1.1.1 Type B—Hot-finished bar, rod, tube, pipe, structural profiles and profiles in T6, T61, T63, T64, T65, and H111 tempers with Type B tolerances, as shown in the “List of ANSI Tables of Dimensional Tolerances.”
1.1.2 Type C—Hot-finished rectangular bar in T6, T61, T63, T64, T65, and H111 tempers with Type C tolerances as listed in the tolerances and permissible variations tables.
1.2 Alloy and temper designations are in accordance with ANSI H35.1. The equivalent Unified Numbering System alloy designation in accordance with Practice E527 is A96101 for Alloy 6101.
Note 1: Type A material, last covered in the 1966 issue of this specification, is no longer available; therefore, requirements for cold-finished rectangular bar have been deleted.
1.3 The values stated in either SI or inch-pound units are to be regarded separately as standard. The values stated in each system may not be exact equivalents; therefore each system shall be used independently of the other. Combining values from the two systems may result in non-conformance with the standard.
1.4 This international standard was developed in accordance with internationally recognized principles on standardization established in the Decision on Principles for the Development of International Standards, Guides and Recommendations issued by the World Trade Organization Technical Barriers to Trade (TBT) Committee.
General Information
- Status
- Published
- Publication Date
- 31-Oct-2023
- Technical Committee
- B07 - Light Metals and Alloys
- Drafting Committee
- B07.03 - Aluminum Alloy Wrought Products
Relations
- Effective Date
- 01-Nov-2023
- Effective Date
- 01-Dec-2023
- Effective Date
- 01-Nov-2023
- Effective Date
- 01-Sep-2021
- Effective Date
- 01-Jun-2017
- Referred By
ASTM B236-07(2015) - Standard Specification for Aluminum Bars for Electrical Purposes (Bus Bars) - Effective Date
- 01-Nov-2023
- Effective Date
- 01-Nov-2023
- Effective Date
- 01-Nov-2023
Overview
ASTM B317/B317M-23 is a standard specification established by ASTM International for 6101 aluminum-alloy extruded bar, rod, tube, pipe (Schedules 40 and 80), structural profiles, and profiles intended for electrical applications, specifically as electric conductors and bus conductors. This standard defines requirements for materials used primarily in the electrical industry, ensuring reliable mechanical and electrical performance. The specification covers products manufactured by hot extrusion or similar processes and includes guidance on chemical composition, mechanical properties, dimensional tolerances, and electrical characteristics.
Key Topics
Scope & Material Types
- Applies to 6101 aluminum alloy, a material valued for its balance of strength and electrical conductivity.
- Covers extruded bar, rod, tube, pipe, and various structural or specialized profiles in selected tempers (T6, T61, T63, T64, T65, H111).
- Specifies both SI and inch-pound units; each must be used independently for compliance.
Dimensional & Tolerance Requirements
- Two types of tolerances:
- Type B: Applies to a broad variety of products (bars, rods, tubes, pipes, profiles) with specific dimensional controls.
- Type C: Applies particularly to hot-finished rectangular bar, with additional width and thickness tolerances.
Mechanical & Electrical Properties
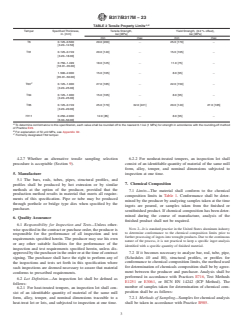
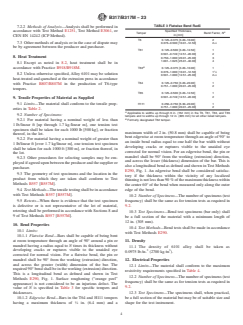
- Establishes minimum requirements for tensile strength, yield strength, bend properties, and specifies full compliance through standardized test methods.
- Requires conformity to specific electrical resistivity and conductivity limits, important for electrical conductor applications.
Chemical Composition
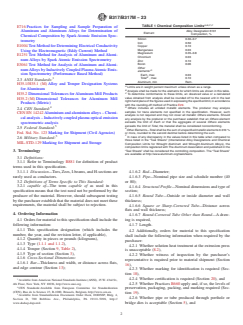
- Defines allowed ranges for key alloying elements to ensure material performance and consistency.
- Compliance checked via sampling procedures, utilizing methods such as spectrometric or chemical analysis.
Quality Assurance & Marking
- Outlines requirements for inspection, sampling, certification, and rejection of batches that do not conform.
- Prescribes identification marking, packaging, and shipment labeling for product traceability.
Applications
ASTM B317/B317M-23 governs essential materials used for electrical conductors, specifically aluminum bus conductors and related electrical components. Key application areas include:
- Electrical Power Distribution: Suitable for busbars, conductor bars, and structural profiles in substations, transformers, switchgear, and industrial power panels.
- Utilities and Large-Scale Electrical Installations: Used in overhead and underground electrical networks where high conductivity and strength are required.
- Manufacturing of Tubular or Bar Conductors: Common in the production of power transmission equipment and supporting components.
- Custom Extruded Aluminum Profiles: Used when bespoke cross-sections are needed for specialized electrical installations.
These products are chosen for their excellent balance of electrical conductivity, strength, and corrosion resistance, meeting the rigorous demands of electrical infrastructure environments.
Related Standards
Standards referenced in ASTM B317/B317M-23 and relevant to aluminum-alloy extruded products for electrical conductors include:
- ASTM B193: Test method for resistivity of electrical conductor materials.
- ASTM B557/B557M: Test methods for tensile properties of wrought and cast aluminum products.
- ASTM B918/B918M, ASTM B807/B807M: Practices for heat treatment and extrusion press solution heat treatment.
- ASTM B666/B666M: Practice for identification marking of aluminum products.
- ANSI H35.1, H35.2: Alloy, temper designation, and dimensional tolerances for aluminum mill products.
- CEN EN 14242: European standard for chemical analysis by ICP.
Using ASTM B317/B317M-23 in conjunction with these standards ensures complete compliance for aluminum alloy electrical conductor applications, supporting quality, performance, and interoperability across global markets.
Keywords: ASTM B317, aluminum alloy, 6101, extruded bar, rod, tube, pipe, bus conductor, electrical conductor, dimensional tolerance, electrical resistivity, mechanical properties, ANSI H35.1, ASTM standards.
Buy Documents
ASTM B317/B317M-23 - Standard Specification for Aluminum-Alloy Extruded Bar, Rod, Tube, Pipe, Structural Profiles, and Profiles for Electrical Purposes (Bus Conductor)
REDLINE ASTM B317/B317M-23 - Standard Specification for Aluminum-Alloy Extruded Bar, Rod, Tube, Pipe, Structural Profiles, and Profiles for Electrical Purposes (Bus Conductor)
Get Certified
Connect with accredited certification bodies for this standard

Element Materials Technology
Materials testing and product certification.

Inštitut za kovinske materiale in tehnologije
Institute of Metals and Technology. Materials testing, metallurgical analysis, NDT.
Sponsored listings
Frequently Asked Questions
ASTM B317/B317M-23 is a technical specification published by ASTM International. Its full title is "Standard Specification for Aluminum-Alloy Extruded Bar, Rod, Tube, Pipe, Structural Profiles, and Profiles for Electrical Purposes (Bus Conductor)". This standard covers: ABSTRACT This specification covers 6101 aluminum-alloy extruded bar, rod, tube, pipe, (Schedules 40 and 80), structural profiles, and profiles in selected tempers for use as electric conductors. The bars, rods, tubes, pipes, structural profiles and profiles shall be produced by hot extrusion or by similar methods. Pipe or tube may be produced through porthole or bridge type dies. Tensile properties of the specimens such as tensile and yield strengths and bending shall be determined by tension test and bending test, respectively. Electrical resistivity and conductivity shall be determined. SCOPE 1.1 This specification covers 6101 aluminum-alloy extruded bar, rod, tube, pipe, (Schedules 40 and 80), structural profiles, and profiles in selected tempers for use as electric conductors as follows: 1.1.1 Type B—Hot-finished bar, rod, tube, pipe, structural profiles and profiles in T6, T61, T63, T64, T65, and H111 tempers with Type B tolerances, as shown in the “List of ANSI Tables of Dimensional Tolerances.” 1.1.2 Type C—Hot-finished rectangular bar in T6, T61, T63, T64, T65, and H111 tempers with Type C tolerances as listed in the tolerances and permissible variations tables. 1.2 Alloy and temper designations are in accordance with ANSI H35.1. The equivalent Unified Numbering System alloy designation in accordance with Practice E527 is A96101 for Alloy 6101. Note 1: Type A material, last covered in the 1966 issue of this specification, is no longer available; therefore, requirements for cold-finished rectangular bar have been deleted. 1.3 The values stated in either SI or inch-pound units are to be regarded separately as standard. The values stated in each system may not be exact equivalents; therefore each system shall be used independently of the other. Combining values from the two systems may result in non-conformance with the standard. 1.4 This international standard was developed in accordance with internationally recognized principles on standardization established in the Decision on Principles for the Development of International Standards, Guides and Recommendations issued by the World Trade Organization Technical Barriers to Trade (TBT) Committee.
ABSTRACT This specification covers 6101 aluminum-alloy extruded bar, rod, tube, pipe, (Schedules 40 and 80), structural profiles, and profiles in selected tempers for use as electric conductors. The bars, rods, tubes, pipes, structural profiles and profiles shall be produced by hot extrusion or by similar methods. Pipe or tube may be produced through porthole or bridge type dies. Tensile properties of the specimens such as tensile and yield strengths and bending shall be determined by tension test and bending test, respectively. Electrical resistivity and conductivity shall be determined. SCOPE 1.1 This specification covers 6101 aluminum-alloy extruded bar, rod, tube, pipe, (Schedules 40 and 80), structural profiles, and profiles in selected tempers for use as electric conductors as follows: 1.1.1 Type B—Hot-finished bar, rod, tube, pipe, structural profiles and profiles in T6, T61, T63, T64, T65, and H111 tempers with Type B tolerances, as shown in the “List of ANSI Tables of Dimensional Tolerances.” 1.1.2 Type C—Hot-finished rectangular bar in T6, T61, T63, T64, T65, and H111 tempers with Type C tolerances as listed in the tolerances and permissible variations tables. 1.2 Alloy and temper designations are in accordance with ANSI H35.1. The equivalent Unified Numbering System alloy designation in accordance with Practice E527 is A96101 for Alloy 6101. Note 1: Type A material, last covered in the 1966 issue of this specification, is no longer available; therefore, requirements for cold-finished rectangular bar have been deleted. 1.3 The values stated in either SI or inch-pound units are to be regarded separately as standard. The values stated in each system may not be exact equivalents; therefore each system shall be used independently of the other. Combining values from the two systems may result in non-conformance with the standard. 1.4 This international standard was developed in accordance with internationally recognized principles on standardization established in the Decision on Principles for the Development of International Standards, Guides and Recommendations issued by the World Trade Organization Technical Barriers to Trade (TBT) Committee.
ASTM B317/B317M-23 is classified under the following ICS (International Classification for Standards) categories: 77.120.10 - Aluminium and aluminium alloys; 77.150.10 - Aluminium products. The ICS classification helps identify the subject area and facilitates finding related standards.
ASTM B317/B317M-23 has the following relationships with other standards: It is inter standard links to ASTM B317/B317M-07(2015)e1, ASTM E1004-23, ASTM B660-23, ASTM B660-21, ASTM E1004-17, ASTM B236-07(2015), ASTM B881-17, ASTM B236M-07(2015). Understanding these relationships helps ensure you are using the most current and applicable version of the standard.
ASTM B317/B317M-23 is available in PDF format for immediate download after purchase. The document can be added to your cart and obtained through the secure checkout process. Digital delivery ensures instant access to the complete standard document.
Standards Content (Sample)
This international standard was developed in accordance with internationally recognized principles on standardization established in the Decision on Principles for the
Development of International Standards, Guides and Recommendations issued by the World Trade Organization Technical Barriers to Trade (TBT) Committee.
Designation: B317/B317M − 23
Standard Specification for
Aluminum-Alloy Extruded Bar, Rod, Tube, Pipe, Structural
Profiles, and Profiles for Electrical Purposes (Bus
Conductor)
This standard is issued under the fixed designation B317/B317M; the number immediately following the designation indicates the year
of original adoption or, in the case of revision, the year of last revision. A number in parentheses indicates the year of last reapproval.
A superscript epsilon (´) indicates an editorial change since the last revision or reapproval.
This standard has been approved for use by agencies of the U.S. Department of Defense.
1. Scope* 2. Referenced Documents
2.1 The following documents of the issue in effect on the
1.1 This specification covers 6101 aluminum-alloy extruded
date of material purchase form a part of this specification to the
bar, rod, tube, pipe, (Schedules 40 and 80), structural profiles,
extent referenced herein:
and profiles in selected tempers for use as electric conductors
as follows:
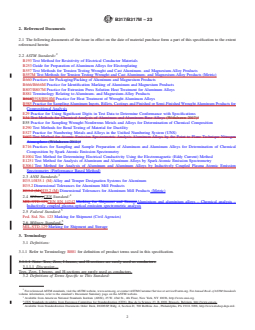
2.2 ASTM Standards:
1.1.1 Type B—Hot-finished bar, rod, tube, pipe, structural
B193 Test Method for Resistivity of Electrical Conductor
profiles and profiles in T6, T61, T63, T64, T65, and H111
Materials
tempers with Type B tolerances, as shown in the “List of ANSI
B253 Guide for Preparation of Aluminum Alloys for Elec-
Tables of Dimensional Tolerances.”
troplating
1.1.2 Type C—Hot-finished rectangular bar in T6, T61, T63,
B557 Test Methods for Tension Testing Wrought and Cast
T64, T65, and H111 tempers with Type C tolerances as listed
Aluminum- and Magnesium-Alloy Products
in the tolerances and permissible variations tables.
B557M Test Methods for Tension Testing Wrought and Cast
Aluminum- and Magnesium-Alloy Products (Metric)
1.2 Alloy and temper designations are in accordance with
B660 Practices for Packaging/Packing of Aluminum and
ANSI H35.1. The equivalent Unified Numbering System alloy
Magnesium Products
designation in accordance with Practice E527 is A96101 for
B666/B666M Practice for Identification Marking of Alumi-
Alloy 6101.
num and Magnesium Products
NOTE 1—Type A material, last covered in the 1966 issue of this
B807/B807M Practice for Extrusion Press Solution Heat
specification, is no longer available; therefore, requirements for cold-
Treatment for Aluminum Alloys
finished rectangular bar have been deleted.
B881 Terminology Relating to Aluminum- and Magnesium-
1.3 The values stated in either SI or inch-pound units are to
Alloy Products
be regarded separately as standard. The values stated in each
B918/B918M Practice for Heat Treatment of Wrought Alu-
system may not be exact equivalents; therefore each system
minum Alloys
shall be used independently of the other. Combining values
B985 Practice for Sampling Aluminum Ingots, Billets, Cast-
from the two systems may result in non-conformance with the
ings and Finished or Semi-Finished Wrought Aluminum
standard.
Products for Compositional Analysis
E29 Practice for Using Significant Digits in Test Data to
1.4 This international standard was developed in accor-
Determine Conformance with Specifications
dance with internationally recognized principles on standard-
E55 Practice for Sampling Wrought Nonferrous Metals and
ization established in the Decision on Principles for the
Alloys for Determination of Chemical Composition
Development of International Standards, Guides and Recom-
E290 Test Methods for Bend Testing of Material for Ductil-
mendations issued by the World Trade Organization Technical
ity
Barriers to Trade (TBT) Committee.
E527 Practice for Numbering Metals and Alloys in the
Unified Numbering System (UNS)
This specification is under the jurisdiction of ASTM Committee B07 on Light
Metals and Alloys and is the direct responsibility of Subcommittee B07.03 on
Aluminum Alloy Wrought Products. For referenced ASTM standards, visit the ASTM website, www.astm.org, or
Current edition approved Nov. 1, 2023. Published December 2023. Originally contact ASTM Customer Service at service@astm.org. For Annual Book of ASTM
approved in 1957. Last previous edition approved in 2015 as B317/B317M – 07 Standards volume information, refer to the standard’s Document Summary page on
ɛ1
(2015) . DOI: 10.1520/B0317_B0317M-23. the ASTM website.
*A Summary of Changes section appears at the end of this standard
Copyright © ASTM International, 100 Barr Harbor Drive, PO Box C700, West Conshohocken, PA 19428-2959. United States
B317/B317M − 23
A,B,C,F
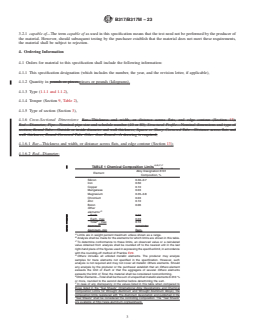
TABLE 1 Chemical Composition Limits
E716 Practices for Sampling and Sample Preparation of
Alloy Designation 6101
Aluminum and Aluminum Alloys for Determination of
Element
Composition, %
Chemical Composition by Spark Atomic Emission Spec-
Silicon 0.30–0.7
trometry
Iron 0.50
E1004 Test Method for Determining Electrical Conductivity
Copper 0.10
Manganese 0.03
Using the Electromagnetic (Eddy Current) Method
Magnesium 0.35–0.8
E1251 Test Method for Analysis of Aluminum and Alumi-
Chromium 0.03
num Alloys by Spark Atomic Emission Spectrometry
Zinc 0.10
Boron 0.06
E3061 Test Method for Analysis of Aluminum and Alumi-
Other
num Alloys by Inductively Coupled Plasma Atomic Emis-
D
elements:
sion Spectrometry (Performance Based Method)
Each, max 0.03
E
Total , max 0.10
2.3 ANSI Standards:
Aluminum, min Rem.
H35.1/H35.1 (M) Alloy and Temper Designation Systems
A
Limits are in weight percent maximum unless shown as a range.
for Aluminum
B
Analysis shall be made for the elements for which limits are shown in this table.
C
H35.2 Dimensional Tolerances for Aluminum Mill Products
To determine conformance to these limits, an observed value or a calculated
value obtained from analysis shall be rounded off to the nearest unit in the last
H35.2 (M) Dimensional Tolerances for Aluminum Mill
right-hand place of the figures used in expressing the specified limit, in accordance
Products (Metric)
with the rounding-off method of Practice E29.
D
2.4 CEN Standard: Others includes all unlisted metallic elements. The producer may analyze
samples for trace elements not specified in the specification. However, such
CEN EN 14242 Aluminium and aluminium alloys – Chemi-
analysis is not required and may not cover all metallic Others elements. Should
cal analysis – Inductively coupled plasma optical emission
any analysis by the producer or the purchaser establish that an Others element
exceeds the limit of Each or that the aggregate of several Others elements
spectrometric analysis
exceeds the limit of Total, the material shall be considered nonconforming.
2.5 Federal Standard:
E
Other Elements—Total shall be the sum of unspecified metallic elements 0.010 %
Fed. Std. No. 123 Marking for Shipment (Civil Agencies)
or more, rounded to the second decimal before determining the sum.
F
5 In case of any discrepancy in the values listed in this table when compared to
2.6 Military Standard:
those listed in the “Teal Sheets” (International Alloy Designations and Chemical
MIL-STD-129 Marking for Shipment and Storage
Composition Limits for Wrought Aluminum and Wrought Aluminum Alloys), the
composition limits registered with The Aluminum Association and published in the
“Teal Sheets” shall be considered the controlling composition. The “Teal Sheets”
3. Terminology
are available at http://www.aluminum.org/tealsheets.
3.1 Definitions:
3.1.1 Refer to Terminology B881 for definition of product
terms used in this specification.
3.1.1.1 Discussion—Tees, Zees, I-beams, and H-sections are 4.1.6.2 Rod—Diameter;
rarely used as conductors.
4.1.6.3 Pipe—Nominal pipe size and schedule number (40
3.2 Definitions of Terms Specific to This Standard:
or 80);
3.2.1 capable of—The term capable of as used in this
4.1.6.4 Structural Profile—Nominal dimensions and type of
specification means that the test need not be performed by the
section;
producer of the material. However, should subsequent testing
4.1.6.5 Round Tube—Outside or inside diameter and wall
by the purchaser establish that the material does not meet these
thickness;
requirements, the material shall be subject to rejection.
4.1.6.6 Square or Sharp-Cornered Tube—Distance across
flats and wall thickness;
4. Ordering Information
4.1.6.7 Round-Cornered Tube Other than Round—A draw-
ing is required,
4.1 Orders for material to this specification shall include the
4.1.7 Length.
following information:
4.1.1 This specification designation (which includes the
4.2 Additionally, orders for material to this specification
number, the year, and the revision letter, if applicable),
shall include the following information when required by the
4.1.2 Quantity in pieces or pounds (kilograms),
purchaser:
4.1.3 Type (1.1.1 and 1.1.2),
4.2.1 Whether solution heat treatment at the extrusion press
4.1.4 Temper (Section 9, Table 2),
is unacceptable (8.2),
4.1.5 Type of section (Section 3),
4.2.2 Whether witness of inspection by the purchaser’s
4.1.6 Cross-Sectional Dimensions:
representative is required prior to material shipment (Section
4.1.6.1 Bar—Thickness and width, or distance across flats,
16),
and edge contour (Section 13);
4.2.3 Whether marking for identification is required (Sec-
tion 18),
3 4.2.4 Whether certification is required (Section 20), and
Available from American National Standards Institute (ANSI), 25 W. 43rd St.,
4.2.5 Whether Practices B660 apply and, if so, the levels of
4th Floor, New York, NY 10036, http://www.ansi.org.
CEN Standards:Available from European Committee for Standardization
preservation, packaging, packing, and marking required (Sec-
(CEN), Rue de la Science 23, B-1000, Brussels, Belgium, http://www.cen.eu.
tion 19).
Available from Standardization Documents Order Desk, DODSSP, Bldg. 4,
4.2.6 Whether pipe or tube produced through porthole or
Section D, 700 Robbins Ave., Philadelphia, PA 19111-5098, http://
www.dodssp.daps.mil. bridge dies is acceptable (Section 5), and
B317/B317M − 23
A,B
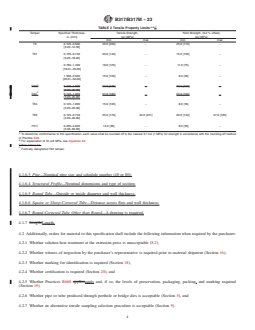
TABLE 2 Tensile Property Limits
Temper Specified Thickness, Tensile Strength, Yield Strength, (0.2 % offset),
in. [mm] ksi [MPa] ksi [MPa]
min max min max
T6 0.125–0.500 29.0 [200] . 25.0 [170] .
[3.20–12.50]
T61 0.125–0.749 20.0 [140] . 15.0 [105] .
[3.20–18.00]
0.750–1.499 18.0 [125] . 11.0 [75] .
[18.01–35.00]
1.500–2.000 15.0 [105] . 8.0 [55] .
[35.01–50.00]
C
T63 0.125–1.000 27.0 [185] . 22.0 [150] .
[3.20–25.00]
T64 0.125–1.000 15.0 [105] . 8.0 [55] .
[3.20–25.00]
T65 0.125–0.749 25.0 [170] 32.0 [221] 20.0 [140] 27.0 [185]
[3.20–20.00]
H111 0.250–2.000 12.0 [85] . 8.0 [55] .
[6.30–50.00]
A
To determine conformance to this specification, each value shall be rounded off to the nearest 0.1 ksi (1 MPa) for strength in accordance with the rounding-off method
of Practice E29.
B
For explanation of SI unit MPa, see Appendix X2.
C
Formerly designated T62 temper.
4.2.7 Whether an alternative tensile sampling selection 6.2.2 For nonheat-treated tempers, an inspection lot shall
procedure is acceptable (Section 9).
consist of an identifiable quantity of material of the same mill
form, alloy, temper, and nominal dimensions subjected to
5. Manufacture
inspection at one time.
5.1 The bars, rods, tubes, pipes, structural profiles, and
7. Chemical Composition
profiles shall be produced by hot extrusion or by similar
methods at the option of the producer, provided that the
7.1 Limits—The material shall conform to the chemical
production method results in material that meets all require-
composition limits in Table 1. Conformance shall be deter-
ments of this specification. Pipe or tube may be produced
mined by the producer by analyzing samples taken at the time
through porthole or bridge type dies when specified by the
ingots are poured, or samples taken from the finished or
purchaser.
semifinished product. If chemical composition has been deter-
mined during the course of manufacture, analysis of the
6. Quality Assurance
finished product shall not be required.
6.1 Responsibility for Inspection and Tests—Unless other-
NOTE 2—It is standard practice in the United States aluminum industry
wise specified in the contract or purchase order, the producer is
to determine conformance to the chemical composition limits prior to
responsible for the performance of all inspection and test
further processing of ingots into wrought products. Due to the continuous
requirements specified herein. The producer may use his own
nature of the process, it is not practical to keep a specific ingot analysis
or any other suitable facilities for the performance of the
identified with a specific quantity of finished material.
inspection and test requirements specified herein, unless dis-
7.2 If it becomes necessary to analyze bar, rod, tube, pipe,
approved by the purchaser in the order or at the time of contract
(Schedules 40 and 80), structural profiles, or profiles for
signing. The purchaser shall have the right to perform any of
conformance to chemical composition limits, the method used
the inspections and tests set forth in this specification where
for determination of chemicals composition shall be by agree-
such inspections are deemed necessary to assure that material
conforms to prescribed requirements. ment between the producer and purchaser. Analysis shall be
performed in accordance with Practices E716, Test Methods
6.2 Lot Definition—An inspection lot shall be defined as
E1251 or E3061, or ECN EN 14242 (ICP Method). The
follows:
number of samples taken for determination of chemical com-
6.2.1 For heat-treated tempers, an inspection lot shall con-
position shall be as follows:
sist of an identifiable quantity of material of the same mill
7.2.1 Methods of Sampling—Samples for chemical analysis
form, alloy, temper, and nominal dimensions traceable to a
heat-treat lot or lots, and subjected to inspection at one time. shall be taken in accordance with Practice B985.
B317/B317M − 23
TABLE 3 Flatwise Bend Radii
7.2.2 Methods of Analysis—Analysis shall be performed in
accordance with Test Method E1251, Test Method E3061, or Specified Thickness,
A
Temper Bend Factor, N
in.[mm]
CEN EN 14242 (ICP Method).
T6 0.125–0.375 [3.20–10.00] 2
7.3 Other methods of analysis or in the case of dispute may 1
0.376–0.500 [10.01–12.50] 2 ⁄2
be by agreement between the producer and purchaser.
T61 0.125–0.500 [3.20–12.50] 1
0.501–0.749 [12.51–20.00] 2
8. Heat Treatment
0.750–1.000 [20.01–25.00] 3
1.001–1.625 [25.01–40.00] 4
8.1 Except as noted in 8.2, heat treatment shall be in
B
accordance with Practice B918/B918M.
T63 0.125–0.375 [3.20–10.00] 1
0.376–1.000 [10.01–12.50] 1 ⁄2
8.2 Unless otherwise specified, Alloy 6101 may be solution
0.501–1.000 [12.51–25.00] 2 ⁄2
heat-treated and quenched at the extrusion press in accordance
T64 0.125–0.750 [3.20–20.00] 1
with Practice B807/B807M in the production of T6-type
0.751–1.000 [20.01–25.00] 2
tempers.
T65 0.125–0.500 [3.20–12.50] 1
0.501–0.749 [12.51–20.00] 2
9. Tensile Properties of Material as Supplied
9.1 Limits—The material shall conform to the tensile prop- H111 0.250–0.750 [6.30–20.00] 1
0.751–1.000 [20.01–25.00] 2
erties in Table 2.
A
Applicable to widths up through 6 in. (152 mm) in the T6, T61, T63, and T65
9.2 Number of Specimens:
tempers and to widths up through 12 in. (305 mm) for all other listed tempers.
B
Formerly designated T62 temper.
9.2.1 For material having a nominal weight of less than
1 lb ⁄linear ft [up through 1.7 kg ⁄linear m], one tension test
specimen shall be taken for each 1000 lb [500 kg], or fraction
maximum width of 2 in. (50.8 mm) shall be capable of being
thereof, in the lot.
b
...
This document is not an ASTM standard and is intended only to provide the user of an ASTM standard an indication of what changes have been made to the previous version. Because
it may not be technically possible to adequately depict all changes accurately, ASTM recommends that users consult prior editions as appropriate. In all cases only the current version
of the standard as published by ASTM is to be considered the official document.
´1
Designation: B317/B317M − 07 (Reapproved 2015) B317/B317M − 23
Standard Specification for
Aluminum-Alloy Extruded Bar, Rod, Tube, Pipe, Structural
Profiles, and Profiles for Electrical Purposes (Bus
Conductor)
This standard is issued under the fixed designation B317/B317M; the number immediately following the designation indicates the year
of original adoption or, in the case of revision, the year of last revision. A number in parentheses indicates the year of last reapproval.
A superscript epsilon (´) indicates an editorial change since the last revision or reapproval.
This standard has been approved for use by agencies of the U.S. Department of Defense.
ε NOTE—Table 2 was reformatted editorially in November 2016.
1. Scope*
1.1 This specification covers 6101 aluminum-alloy extruded bar, rod, tube, pipe, (Schedules 40 and 80), structural profiles, and
profiles in selected tempers for use as electric conductors as follows:
1.1.1 Type B—Hot-finished bar, rod, tube, pipe, structural profiles and profiles in T6, T61, T63, T64, T65, and H111 tempers with
Type B tolerances, as shown in the “List of ANSI Tables of Dimensional Tolerances.”
1.1.2 Type C—Hot-finished rectangular bar in T6, T61, T63, T64, T65, and H111 tempers with Type C tolerances as listed in the
tolerances and permissible variations tables.
1.2 Alloy and temper designations are in accordance with ANSI H35.1. The equivalent Unified Numbering System alloy
designation in accordance with Practice E527 is A96101 for Alloy 6101.
NOTE 1—Type A material, last covered in the 1966 issue of this specification, is no longer available; therefore, requirements for cold-finished rectangular
bar have been deleted.
1.3 For acceptance criteria for inclusion of new aluminum and aluminum alloys in this specification, see Annex A2.
1.3 The values stated in either SI or inch-pound units are to be regarded separately as standard. The values stated in each system
may not be exact equivalents; therefore each system shall be used independently of the other. Combining values from the two
systems may result in non-conformance with the standard.
1.4 This international standard was developed in accordance with internationally recognized principles on standardization
established in the Decision on Principles for the Development of International Standards, Guides and Recommendations issued
by the World Trade Organization Technical Barriers to Trade (TBT) Committee.
This specification is under the jurisdiction of ASTM Committee B07 on Light Metals and Alloys and is the direct responsibility of Subcommittee B07.03 on Aluminum
Alloy Wrought Products.
Current edition approved Oct. 1, 2015Nov. 1, 2023. Published October 2015December 2023. Originally approved in 1957. Last previous edition approved in 20072015
ɛ1
as B317/B317M – 07.B317/B317M – 07 (2015) . DOI: 10.1520/B0317_B0317M-07R15E01.10.1520/B0317_B0317M-23.
*A Summary of Changes section appears at the end of this standard
Copyright © ASTM International, 100 Barr Harbor Drive, PO Box C700, West Conshohocken, PA 19428-2959. United States
B317/B317M − 23
2. Referenced Documents
2.1 The following documents of the issue in effect on the date of material purchase form a part of this specification to the extent
referenced herein:
2.2 ASTM Standards:
B193 Test Method for Resistivity of Electrical Conductor Materials
B253 Guide for Preparation of Aluminum Alloys for Electroplating
B557 Test Methods for Tension Testing Wrought and Cast Aluminum- and Magnesium-Alloy Products
B557M Test Methods for Tension Testing Wrought and Cast Aluminum- and Magnesium-Alloy Products (Metric)
B660 Practices for Packaging/Packing of Aluminum and Magnesium Products
B666/B666M Practice for Identification Marking of Aluminum and Magnesium Products
B807/B807M Practice for Extrusion Press Solution Heat Treatment for Aluminum Alloys
B881 Terminology Relating to Aluminum- and Magnesium-Alloy Products
B918B918/B918M Practice for Heat Treatment of Wrought Aluminum Alloys
B985 Practice for Sampling Aluminum Ingots, Billets, Castings and Finished or Semi-Finished Wrought Aluminum Products for
Compositional Analysis
E29 Practice for Using Significant Digits in Test Data to Determine Conformance with Specifications
E34 Test Methods for Chemical Analysis of Aluminum and Aluminum-Base Alloys (Withdrawn 2017)
E55 Practice for Sampling Wrought Nonferrous Metals and Alloys for Determination of Chemical Composition
E290 Test Methods for Bend Testing of Material for Ductility
E527 Practice for Numbering Metals and Alloys in the Unified Numbering System (UNS)
E607 Test Method for Atomic Emission Spectrometric Analysis Aluminum Alloys by the Point to Plane Technique Nitrogen
Atmosphere (Withdrawn 2011)
E716 Practices for Sampling and Sample Preparation of Aluminum and Aluminum Alloys for Determination of Chemical
Composition by Spark Atomic Emission Spectrometry
E1004 Test Method for Determining Electrical Conductivity Using the Electromagnetic (Eddy Current) Method
E1251 Test Method for Analysis of Aluminum and Aluminum Alloys by Spark Atomic Emission Spectrometry
E3061 Test Method for Analysis of Aluminum and Aluminum Alloys by Inductively Coupled Plasma Atomic Emission
Spectrometry (Performance Based Method)
2.3 ANSI Standards:
H35.1/H35.1 (M) Alloy and Temper Designation Systems for Aluminum
H35.2 Dimensional Tolerances for Aluminum Mill Products
H35.2 (M)H35.2 (M) Dimensional Tolerances for Aluminum Mill Products (Metric)
2.4 MilitaryCEN Standard:
MIL-STD-129CEN EN 14242 Marking for Shipment and StorageAluminium and aluminium alloys – Chemical analysis –
Inductively coupled plasma optical emission spectrometric analysis
2.5 Federal Standard:
Fed. Std. No. 123 Marking for Shipment (Civil Agencies)
2.6 Military Standard:
MIL-STD-129 Marking for Shipment and Storage
3. Terminology
3.1 Definitions:
3.1.1 Refer to Terminology B881 for definition of product terms used in this specification.
3.1.1.1 Note: Tees, Zees, I-beams, and H-sections are rarely used as conductors.
3.1.1.1 Discussion—
Tees, Zees, I-beams, and H-sections are rarely used as conductors.
3.2 Definitions of Terms Specific to This Standard:
For referenced ASTM standards, visit the ASTM website, www.astm.org, or contact ASTM Customer Service at service@astm.org. For Annual Book of ASTM Standards
volume information, refer to the standard’s Document Summary page on the ASTM website.
Available from American National Standards Institute (ANSI), 25 W. 43rd St., 4th Floor, New York, NY 10036, http://www.ansi.org.
CEN Standards:Available from European Committee for Standardization (CEN), Rue de la Science 23, B-1000, Brussels, Belgium, http://www.cen.eu.
Available from Standardization Documents Order Desk, DODSSP, Bldg. 4, Section D, 700 Robbins Ave., Philadelphia, PA 19111-5098, http://www.dodssp.daps.mil.
B317/B317M − 23
3.2.1 capable of—The term capable of as used in this specification means that the test need not be performed by the producer of
the material. However, should subsequent testing by the purchaser establish that the material does not meet these requirements,
the material shall be subject to rejection.
4. Ordering Information
4.1 Orders for material to this specification shall include the following information:
4.1.1 This specification designation (which includes the number, the year, and the revision letter, if applicable),
4.1.2 Quantity in pounds or pieces,pieces or pounds (kilograms),
4.1.3 Type (1.1.1 and 1.1.2),
4.1.4 Temper (Section 9, Table 2),
4.1.5 Type of section (Section 3),
4.1.6 Cross-Sectional Dimensions: Bar—Thickness and width, or distance across flats, and edge contour (Section 13);
Rod—Diameter; Pipe—Nominal pipe size and schedule number (40 or 80); Structural Profile—Nominal dimensions and type of
section; Round Tube—Outside or inside diameter and wall thickness; Square or Sharp-Cornered Tube—Distance across flats and
wall thickness; Round-Cornered Tube Other than Round—A drawing is required,
4.1.6.1 Bar—Thickness and width, or distance across flats, and edge contour (Section 13);
4.1.6.2 Rod—Diameter;
A,B,C,F
TABLE 1 Chemical Composition Limits
Alloy Designation 6101
Element
Composition, %
Silicon 0.30–0.7
Iron 0.50
Copper 0.10
Manganese 0.03
Magnesium 0.35–0.8
Chromium 0.03
Zinc 0.10
Boron 0.06
Other
D
elements:
Each 0.03
Each, max 0.03
E
Total , max 0.10
Aluminum remainder
Aluminum, min Rem.
A
Limits are in weight percent maximum unless shown as a range.
B
Analysis shall be made for the elements for which limits are shown in this table.
C
To determine conformance to these limits, an observed value or a calculated
value obtained from analysis shall be rounded off to the nearest unit in the last
right-hand place of the figures used in expressing the specified limit, in accordance
with the rounding-off method of Practice E29.
D
Others includes all unlisted metallic elements. The producer may analyze
samples for trace elements not specified in the specification. However, such
analysis is not required and may not cover all metallic Others elements. Should
any analysis by the producer or the purchaser establish that an Others element
exceeds the limit of Each or that the aggregate of several Others elements
exceeds the limit of Total, the material shall be considered nonconforming.
E
Other Elements—Total shall be the sum of unspecified metallic elements 0.010 %
or more, rounded to the second decimal before determining the sum.
F
In case of any discrepancy in the values listed in this table when compared to
those listed in the “Teal Sheets” (International Alloy Designations and Chemical
Composition Limits for Wrought Aluminum and Wrought Aluminum Alloys), the
composition limits registered with The Aluminum Association and published in the
“Teal Sheets” shall be considered the controlling composition. The “Teal Sheets”
are available at http://www.aluminum.org/tealsheets.
B317/B317M − 23
A,B,C
TABLE 2 Tensile Property Limits
Temper Specified Thickness, Tensile Strength, Yield Strength, (0.2 % offset),
in. [mm] ksi [MPa] ksi [MPa]
min max min max
T6 0.125–0.500 29.0 [200] . 25.0 [170] .
[3.20–12.50]
T61 0.125–0.749 20.0 [140] . 15.0 [105] .
[3.20–18.00]
0.750–1.499 18.0 [125] . 11.0 [75] .
[18.01–35.00]
1.500–2.000 15.0 [105] . 8.0 [55] .
[35.01–50.00]
D
T63 0.125–1.000 27.0 [185] . 22.0 [150] .
[3.20–25.00]
C
T63 0.125–1.000 27.0 [185] . 22.0 [150] .
[3.20–25.00]
T64 0.125–1.000 15.0 [105] . 8.0 [55] .
[3.20–25.00]
T65 0.125–0.749 25.0 [170] 32.0 [221] 20.0 [140] 27.0 [185]
[3.20–20.00]
H111 0.250–2.000 12.0 [85] . 8.0 [55] .
[6.30–50.00]
A
To determine conformance to this specification, each value shall be rounded off to the nearest 0.1 ksi (1 MPa) for strength in accordance with the rounding-off method
of Practice E29.
B
For explanation of SI unit MPa, see Appendix X2.
C
See Annex A1.
C
Formerly designated T62 temper.
4.1.6.3 Pipe—Nominal pipe size and schedule number (40 or 80);
4.1.6.4 Structural Profile—Nominal dimensions and type of section;
4.1.6.5 Round Tube—Outside or inside diameter and wall thickness;
4.1.6.6 Square or Sharp-Cornered Tube—Distance across flats and wall thickness;
4.1.6.7 Round-Cornered Tube Other than Round—A drawing is required,
4.1.7 Length,Length.
4.2 Additionally, orders for material to this specification shall include the following information when required by the purchaser:
4.2.1 Whether solution heat treatment at the extrusion press is unacceptable (8.2),
4.2.2 Whether witness of inspection by the purchaser’s representative is required prior to material shipment (Section 16),
4.2.3 Whether marking for identification is required (Section 18),
4.2.4 Whether certification is required (Section 20), and
4.2.5 Whether Practices B660 appliesapply and, if so, the levels of preservation, packaging, packing, and marking required
(Section 19).
4.2.6 Whether pipe or tube produced through porthole or bridge dies is acceptable (Section 5), and
4.2.7 Whether an alternative tensile sampling selection procedure is acceptable (Section 9).
B317/B317M − 23
5. Manufacture
5.1 The bars, rods, tubes, pipes, structural profiles, and profiles shall be produced by hot extrusion or by similar methods at the
option of the producer, provided that the production method results in material that meets all requirements of this specification.
Pipe or tube may be produced through porthole or bridge type dies when specified by the purchaser.
6. Quality Assurance
6.1 Responsibility for Inspection and Tests—Unless otherwise specified in the contract or purchase order, the producer is
responsible for the performance of all inspection and test requirements specified herein. The producer may use his own or any other
suitable facilities for the performance of the inspection and test requirements specified herein, unless disapproved by the purchaser
in the order or at the time of contract signing. The purchaser shall have the right to perform any of the inspections and tests set
forth in this specification where such inspections are deemed necessary to assure that material conforms to prescribed requirements.
6.2 Lot Definition—An inspection lot shall be defined as follows:
6.2.1 For heat-treated tempers, an inspection lot shall consist of an identifiable quantity of material of the same mill form, alloy,
temper, and nominal dimensions traceable to a heat-treat lot or lots, and subjected to inspection at one time.
6.2.2 For nonheat-treated tempers, an inspection lot shall consist of an identifiable quantity of material of the same mill form,
alloy, temper, and nominal dimensions subjected to inspection at one time.
7. Chemical Composition
7.1 Limits—The material shall conform to the chemical composition limits in Table 1. Conformance shall be determined by the
producer by analyzing samples taken at the time ingots are poured, or samples taken from the finished or semifinished product.
If chemical composition has been determined during the course of manufacture, analysis of the finished product shall not be
required.
NOTE 2—It is standard practice in the United States aluminum industry to determine conformance to the chemical composition limits prior to further
processing of ingots into wrought products. Due to the continuous nature of the process, it is not practical to keep a specific ingot analysis identified with
a specific quantity of finished material.
7.2 Number of Samples—If it becomes necessary to analyze bar, rod, tube, pipe, (Schedules 40 and 80), structural profiles, or
profiles for conformance to chemical composition limits, the method used for determination of chemicals composition shall be by
agreement between the producer and purchaser. Analysis shall be performed in accordance with Practices E716, Test Methods
E1251 or E3061, or ECN EN 14242 (ICP Method). The number of samples taken for determination of chemical composition shall
be as follows:
7.2.1 Methods of Sampling—When samples are taken at the time the ingots are poured, at least one sample Samples for chemical
analysis shall be taken for each group ofin accordance with Practice B985ingots poured simultaneously from the same source of
molten metal.
7.2.2 Methods of Analysis—When samples are taken from the finished or semifinished product, a sample shall be taken to represent
each 4000 lb (1800 kg), or fraction thereof, in the lot, except thatAnalysis shall be performed in accordance with Test Method
E1251not more than, Test Method E3061one sample shall be required per piece., or CEN EN 14242 (ICP Method).
7.3 Methods of Sampling—Samples for determination of chemical composition shall be taken in accordance with one of the
following methods:
7.3.1 Samples for chemical analysis shall be taken from the material by sawing, milling, turning, or clipping a representative piece
or pieces to obtain a prepared sample of not less than 75 g. Sampling shall be in accordance with Practice E55.
7.3.2 Sampling for spectrochemical analysis shall be in accordance with Practices E716. Samples for other methods of analysis
shall be taken by methods suitable for the form of material being analyzed and the type of analytical method used.
7.3 Methods of Analysis—The determination of chemical composition shall be made in accordance with suitable chemical (Test
B317/B317M − 23
Methods E34) or spectrochemical (Test Methods E607 and E1251), methods. Other methods may be used only when no published
ASTM method is available. In case of dispute, the methods of analysis shall be agreed uponOther methods of analysis or in the
case of dispute may be by agreement between the producer and purchaser.
8. Heat Treatment
8.1 Except as noted in 8.2, heat treatment shall be in accordance with Practice B918B918/B918M.
8.2 Unless otherwise specified, Alloy 6101 may be solution heat-treated and quenched at the extrusion press in accordance with
Practice B807/B807M in the production of T6-type tempers.
9. Tensile Properties of Material as Supplied
9.1 Limits—The material shall conform to the tensile properties in Table 2.
9.2 Number of Specimens:
9.2.1 For material having a nominal weight of less than 11 lb lb/linear ⁄linear ft [up through 1.71.7 kg kg/linear ⁄linear m], one
tension test specimen shall be taken for each 1000 lb [500 kg], 1000 lb [500 kg], or fraction thereof, in the lot.
9.2.2 For material having a nominal weight of greater than 1 lb/linear ft [over 1.7 kg/linear m], one tension test specimen shall
be taken for each 1000ft1000 ft [300 m], or fraction thereof, in the lot.
9.2.3 Other procedures for selecting samples may be employed if agreed upon between the producer and the supplier or purchaser.
9.3 The geometry of test specimens and the location in the product from which they are taken shall conform to Test Methods B557.
[B557M].
9.4 Test Methods—The tensile testing shall be in accordance with Test MethodMethods B557. [B557M].
9.5 Retests—When there is evidence that the test specimen is defective or is not representative of the lot of material, retesting shall
be performed in accordance with Sections 8 and 9 of Test MethodMethods B557. [B557M].
10. Bend Properties
10.1 Limits:
10.1.1 Flatwise Bends—Bend—Bars shall be capable of being bent at room temperature through an angle of 90° around a pin or
mandrel having a radius equal to N times its thickness without developing cracks or ruptures visible to the unaided eye corrected
for normal vision. For a flatwise bend, the pin or mandrel shall be 90° from the working (extrusion) direction, and across the greater
(width) dimension of the bar. The required 90° bend shall be in the working (extrusion) direction. This is a longi
...
Questions, Comments and Discussion
Ask us and Technical Secretary will try to provide an answer. You can facilitate discussion about the standard in here.
Loading comments...