ASTM E7-15
(Terminology)Standard Terminology Relating to Metallography
Standard Terminology Relating to Metallography
SIGNIFICANCE AND USE
3.1 Standards of Committee E04 consist of test methods, practices, and guides developed to ensure proper and uniform testing in the field of metallography. In order for one to properly use and interpret these standards, the terminology used in these standards must be understood.
3.2 The terms used in the field of metallography have precise definitions. The terminology and its proper usage must be completely understood in order to adequately communicate in this field. In this respect, this standard is also a general source of terminology relating to the field of metallography facilitating the transfer of information within the field.
General Information
Relations
Standards Content (Sample)
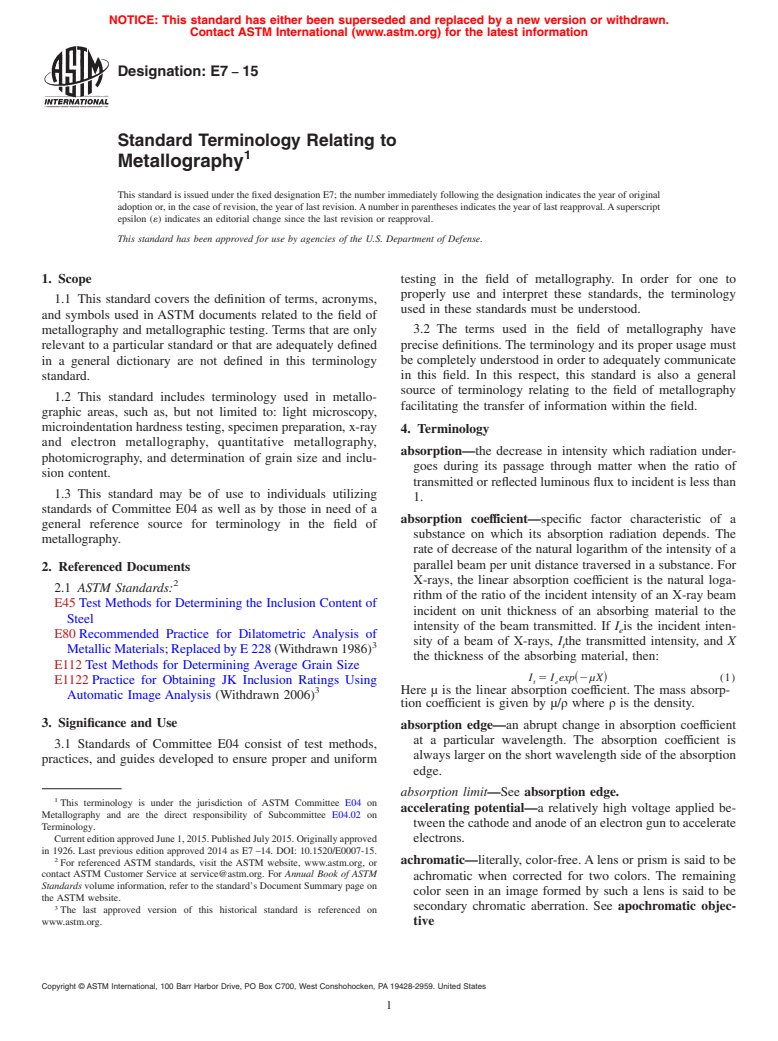
NOTICE: This standard has either been superseded and replaced by a new version or withdrawn.
Contact ASTM International (www.astm.org) for the latest information
Designation: E7 − 15
Standard Terminology Relating to
1
Metallography
This standard is issued under the fixed designation E7; the number immediately following the designation indicates the year of original
adoptionor,inthecaseofrevision,theyearoflastrevision.Anumberinparenthesesindicatestheyearoflastreapproval.Asuperscript
epsilon (´) indicates an editorial change since the last revision or reapproval.
This standard has been approved for use by agencies of the U.S. Department of Defense.
1. Scope testing in the field of metallography. In order for one to
properly use and interpret these standards, the terminology
1.1 This standard covers the definition of terms, acronyms,
used in these standards must be understood.
and symbols used in ASTM documents related to the field of
metallography and metallographic testing. Terms that are only 3.2 The terms used in the field of metallography have
precise definitions. The terminology and its proper usage must
relevant to a particular standard or that are adequately defined
in a general dictionary are not defined in this terminology be completely understood in order to adequately communicate
in this field. In this respect, this standard is also a general
standard.
source of terminology relating to the field of metallography
1.2 This standard includes terminology used in metallo-
facilitating the transfer of information within the field.
graphic areas, such as, but not limited to: light microscopy,
microindentationhardnesstesting,specimenpreparation,x-ray
4. Terminology
and electron metallography, quantitative metallography,
absorption—the decrease in intensity which radiation under-
photomicrography, and determination of grain size and inclu-
goes during its passage through matter when the ratio of
sion content.
transmitted or reflected luminous flux to incident is less than
1.3 This standard may be of use to individuals utilizing
1.
standards of Committee E04 as well as by those in need of a
absorption coefficient—specific factor characteristic of a
general reference source for terminology in the field of
substance on which its absorption radiation depends. The
metallography.
rate of decrease of the natural logarithm of the intensity of a
parallel beam per unit distance traversed in a substance. For
2. Referenced Documents
X-rays, the linear absorption coefficient is the natural loga-
2
2.1 ASTM Standards:
rithm of the ratio of the incident intensity of an X-ray beam
E45Test Methods for Determining the Inclusion Content of
incident on unit thickness of an absorbing material to the
Steel
intensity of the beam transmitted. If I is the incident inten-
e
E80Recommended Practice for Dilatometric Analysis of
sity of a beam of X-rays, Ithe transmitted intensity, and X
3 t
MetallicMaterials;ReplacedbyE228(Withdrawn1986)
the thickness of the absorbing material, then:
E112Test Methods for Determining Average Grain Size
I 5 I exp~2µX! (1)
E1122Practice for Obtaining JK Inclusion Ratings Using t e
3
Here µ is the linear absorption coefficient. The mass absorp-
Automatic Image Analysis (Withdrawn 2006)
tion coefficient is given by µ/ρ where ρ is the density.
3. Significance and Use
absorption edge—an abrupt change in absorption coefficient
at a particular wavelength. The absorption coefficient is
3.1 Standards of Committee E04 consist of test methods,
always larger on the short wavelength side of the absorption
practices, and guides developed to ensure proper and uniform
edge.
absorption limit—See absorption edge.
1
This terminology is under the jurisdiction of ASTM Committee E04 on
accelerating potential—a relatively high voltage applied be-
Metallography and are the direct responsibility of Subcommittee E04.02 on
tweenthecathodeandanodeofanelectronguntoaccelerate
Terminology.
CurrenteditionapprovedJune1,2015.PublishedJuly2015.Originallyapproved
electrons.
in 1926. Last previous edition approved 2014 as E7–14. DOI: 10.1520/E0007-15.
2
achromatic—literally, color-free.Alens or prism is said to be
For referenced ASTM standards, visit the ASTM website, www.astm.org, or
contact ASTM Customer Service at service@astm.org. For Annual Book of ASTM
achromatic when corrected for two colors. The remaining
Standards volume information, refer to the standard’s Document Summary page on
color seen in an image formed by such a lens is said to be
the ASTM website.
3
secondary chromatic aberration. See apochromatic objec-
The last approved version of this historical standard is referenced on
www.astm.org. tive
Copyright © ASTM International, 100 Barr Harbor Drive, PO Box C700, West Conshohocken, PA 19428-2959. United States
1
---------------------- Page: 1 ----------------------
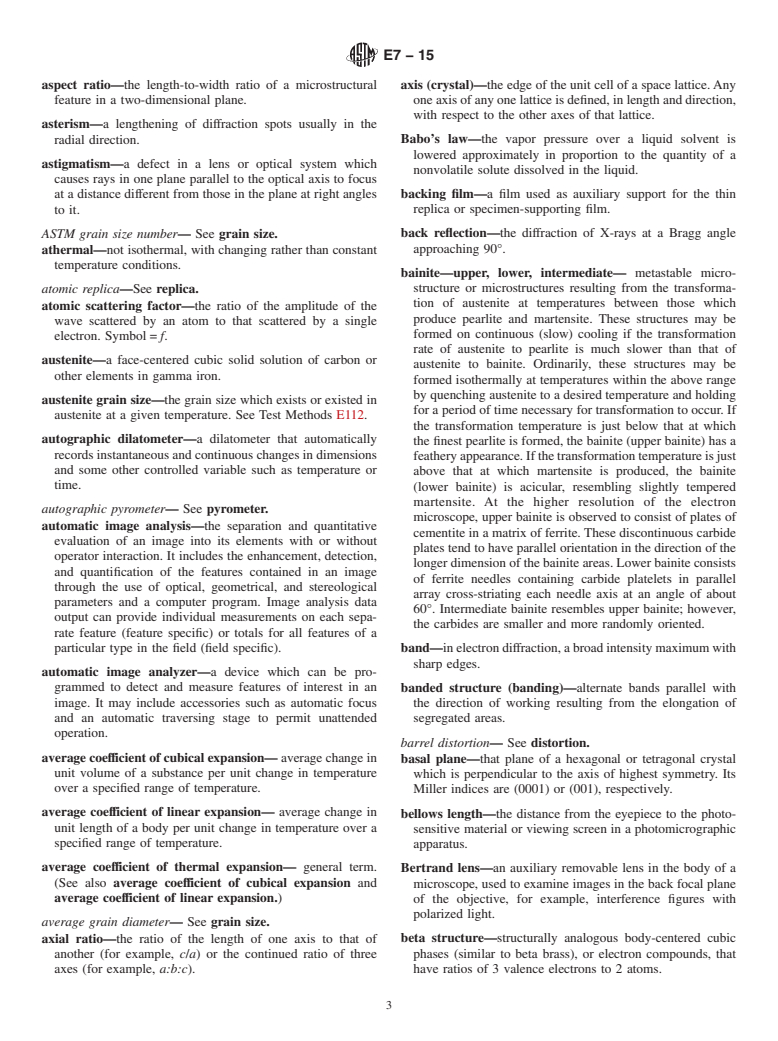
E7−15
achromatic objective—an objective that is corrected chro- Angstrom unit (abbreviation)=A,Å , or A. U—a unit of
−8
matically for two colors, and spherically for one, us
...
This document is not an ASTM standard and is intended only to provide the user of an ASTM standard an indication of what changes have been made to the previous version. Because
it may not be technically possible to adequately depict all changes accurately, ASTM recommends that users consult prior editions as appropriate. In all cases only the current version
of the standard as published by ASTM is to be considered the official document.
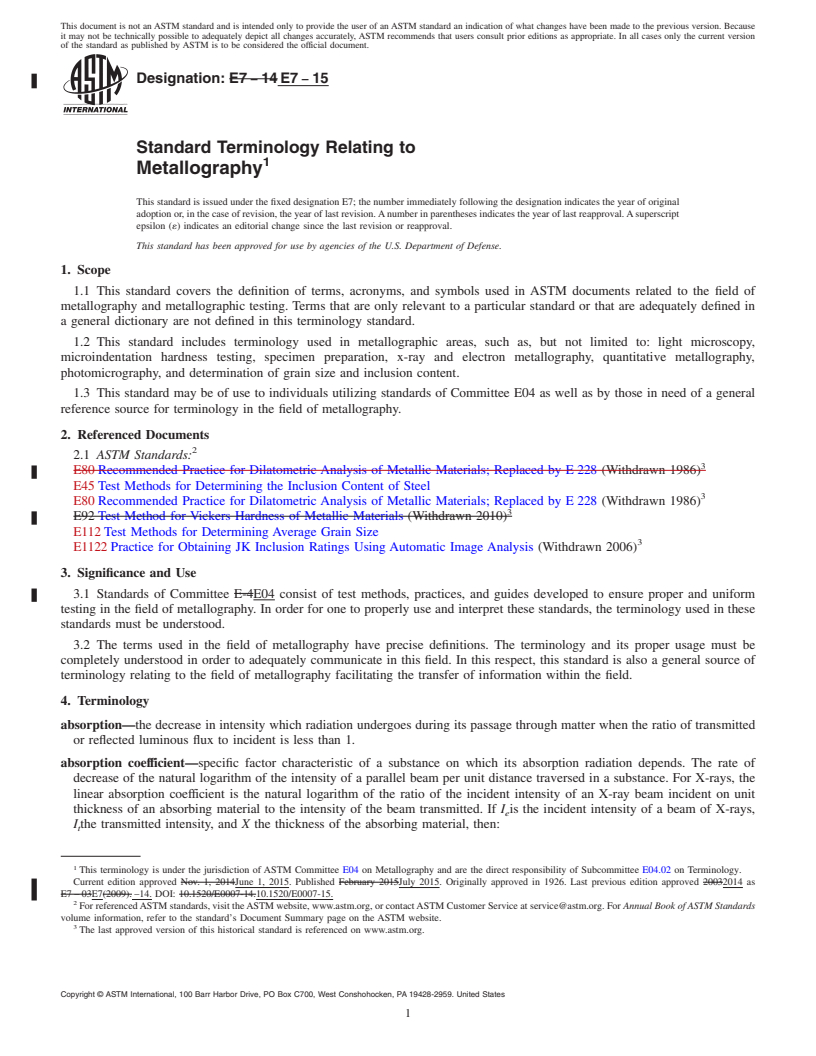
Designation: E7 − 14 E7 − 15
Standard Terminology Relating to
1
Metallography
This standard is issued under the fixed designation E7; the number immediately following the designation indicates the year of original
adoption or, in the case of revision, the year of last revision. A number in parentheses indicates the year of last reapproval. A superscript
epsilon (´) indicates an editorial change since the last revision or reapproval.
This standard has been approved for use by agencies of the U.S. Department of Defense.
1. Scope
1.1 This standard covers the definition of terms, acronyms, and symbols used in ASTM documents related to the field of
metallography and metallographic testing. Terms that are only relevant to a particular standard or that are adequately defined in
a general dictionary are not defined in this terminology standard.
1.2 This standard includes terminology used in metallographic areas, such as, but not limited to: light microscopy,
microindentation hardness testing, specimen preparation, x-ray and electron metallography, quantitative metallography,
photomicrography, and determination of grain size and inclusion content.
1.3 This standard may be of use to individuals utilizing standards of Committee E04 as well as by those in need of a general
reference source for terminology in the field of metallography.
2. Referenced Documents
2
2.1 ASTM Standards:
3
E80 Recommended Practice for Dilatometric Analysis of Metallic Materials; Replaced by E 228 (Withdrawn 1986)
E45 Test Methods for Determining the Inclusion Content of Steel
3
E80 Recommended Practice for Dilatometric Analysis of Metallic Materials; Replaced by E 228 (Withdrawn 1986)
3
E92 Test Method for Vickers Hardness of Metallic Materials (Withdrawn 2010)
E112 Test Methods for Determining Average Grain Size
3
E1122 Practice for Obtaining JK Inclusion Ratings Using Automatic Image Analysis (Withdrawn 2006)
3. Significance and Use
3.1 Standards of Committee E-4E04 consist of test methods, practices, and guides developed to ensure proper and uniform
testing in the field of metallography. In order for one to properly use and interpret these standards, the terminology used in these
standards must be understood.
3.2 The terms used in the field of metallography have precise definitions. The terminology and its proper usage must be
completely understood in order to adequately communicate in this field. In this respect, this standard is also a general source of
terminology relating to the field of metallography facilitating the transfer of information within the field.
4. Terminology
absorption—the decrease in intensity which radiation undergoes during its passage through matter when the ratio of transmitted
or reflected luminous flux to incident is less than 1.
absorption coefficient—specific factor characteristic of a substance on which its absorption radiation depends. The rate of
decrease of the natural logarithm of the intensity of a parallel beam per unit distance traversed in a substance. For X-rays, the
linear absorption coefficient is the natural logarithm of the ratio of the incident intensity of an X-ray beam incident on unit
thickness of an absorbing material to the intensity of the beam transmitted. If I is the incident intensity of a beam of X-rays,
e
I the transmitted intensity, and X the thickness of the absorbing material, then:
t
1
This terminology is under the jurisdiction of ASTM Committee E04 on Metallography and are the direct responsibility of Subcommittee E04.02 on Terminology.
Current edition approved Nov. 1, 2014June 1, 2015. Published February 2015July 2015. Originally approved in 1926. Last previous edition approved 20032014 as
E7 – 03E7(2009). –14. DOI: 10.1520/E0007-14.10.1520/E0007-15.
2
For referenced ASTM standards, visit the ASTM website, www.astm.org, or contact ASTM Customer Service at service@astm.org. For Annual Book of ASTM Standards
volume information, refer to the standard’s Document Summary page on the ASTM website.
3
The last approved version of this historical standard is referenced on www.astm.org.
Copyright © ASTM International, 100 Barr Harbor Drive, PO Box C700, West Conshohocken, PA 19428-2959. United States
1
---------------------- Page: 1 ----------------------
E7 − 15
I 5 I exp 2μX (1)
~ !
t e
Here μ is the linear absorption coefficient. The mass absorption coefficient is given by μ/ρ where ρ is the density.
absorption edge—an abrupt change in absorption coefficient at a particular wavelength. The absorption coefficient is always larger
on the short wavelength side of the
...


Questions, Comments and Discussion
Ask us and Technical Secretary will try to provide an answer. You can facilitate discussion about the standard in here.