ASTM E2093-12(2016)
(Guide)Standard Guide for Optimizing, Controlling and Assessing Test Method Uncertainties from Multiple Workstations in the Same Laboratory Organization
Standard Guide for Optimizing, Controlling and Assessing Test Method Uncertainties from Multiple Workstations in the Same Laboratory Organization
SIGNIFICANCE AND USE
4.1 Many competent analytical laboratories comply with accepted quality system requirements. When using standard test methods, their test results on the same sample should agree with those from other similar laboratories within the reproducibility estimates index (R) published in the standard. Reproducibility estimates are generated as part of the interlaboratory studies (ILS), of the type described in Practice E1601. Competent laboratories participate in proficiency tests, such as those conducted in accordance with Practice E2027, to confirm that they perform consistently over time. In both ILS and proficiency testing protocols, it is generally assumed that only one work station is used to generate the data.
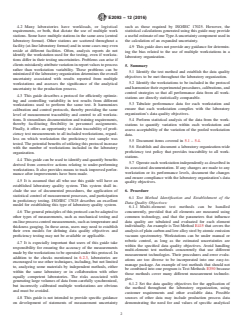
4.2 Many laboratories have workloads, or logistical requirements, or both, that dictate the use of multiple work stations. Some have multiple stations in the same area (central laboratory format). Other stations are scattered throughout a facility (at-line laboratory format) and in some cases may even reside at different facilities. Often, analysis reports do not identify the workstation used for the testing, even if workstations differ in their testing uncertainties. Problems can arise if clients mistakenly attribute variation in report values to process rather than workstation variability. These problems can be minimized if the laboratory organization determines the overall uncertainty associated with results reported from multiple workstations and assesses the significance of the analytical uncertainty to the production process.
4.3 This guide describes a protocol for efficiently optimizing and controlling variability in test results from different workstations used to perform the same test. It harmonizes calibration and control protocols, thereby providing the same level of measurement traceability and control to all workstations. It streamlines documentation and training requirements, thereby facilitating flexibility in personnel assignments. Finally...
SCOPE
1.1 This guide describes a protocol for optimizing, controlling, and reporting test method uncertainties from multiple workstations in the same laboratory organization. It does not apply when different test methods, dissimilar instruments, or different parts of the same laboratory organization function independently to validate or verify the accuracy of a specific analytical measurement.
1.2 This standard does not purport to address all of the safety concerns, if any, associated with its use. It is the responsibility of the user of this standard to establish appropriate safety and health practices and determine the applicability of regulatory limitations prior to use.
General Information
- Status
- Published
- Publication Date
- 30-Nov-2016
- Technical Committee
- E01 - Analytical Chemistry for Metals, Ores, and Related Materials
- Drafting Committee
- E01.22 - Laboratory Quality
Relations
- Effective Date
- 01-Dec-2016
- Effective Date
- 15-Nov-2023
- Effective Date
- 01-Jan-2020
- Effective Date
- 01-Nov-2019
- Effective Date
- 15-May-2019
- Effective Date
- 15-Nov-2017
- Effective Date
- 15-May-2016
- Effective Date
- 01-Jul-2015
- Effective Date
- 15-May-2015
- Effective Date
- 15-Aug-2014
- Effective Date
- 01-Apr-2014
- Effective Date
- 01-Mar-2014
- Effective Date
- 15-Feb-2014
- Effective Date
- 01-Dec-2013
- Effective Date
- 15-Dec-2012
Overview
ASTM E2093-12(2016) is the recognized standard guide for optimizing, controlling, and assessing test method uncertainties originating from multiple workstations within the same laboratory organization. Developed by ASTM, this guide is specifically designed to address the unique challenges that occur when a single laboratory operates several workstations, each potentially contributing unique sources of variability to analytical results.
Many laboratories today require multiple workstations either due to high workloads or specific logistical needs. These stations may be co-located (central laboratory format) or distributed throughout various locations, even across multiple facilities (at-line laboratory format). ASTM E2093-12(2016) provides a systematic protocol to ensure measurement traceability, harmonize calibration and control strategies, and unify documentation and training requirements across all workstations. By doing so, laboratories can reliably manage data quality and analytical uncertainty, leading to greater confidence in reported results and compliance with international quality system requirements such as ISO/IEC 17025.
Key Topics
- Uncertainty Assessment: Establishes methods for determining and reporting analytical uncertainty when multiple workstations perform the same test method, ensuring accurate representation of laboratory performance.
- Workstation Harmonization: Guides laboratories in harmonizing calibration protocols, experimental procedures, and statistical controls to achieve comparable results across all workstations.
- Data Quality Objectives: Emphasizes setting and maintaining strict data quality objectives, ensuring each workstation operates within established limits, directly supporting customer and regulatory needs.
- Statistical Analysis and Control: Encourages the use of standard statistical control procedures (such as control charts) and pooled standard deviation calculations for comprehensive variability assessment.
- Documentation and Traceability: Outlines robust documentation practices for test procedures, changes, and proficiency testing, facilitating traceability and auditing.
- Proficiency Testing Integration: Recommends rotating proficiency test samples across all workstations, providing organization-wide evidence of competence and consistent analytical performance.
Applications
The practical value of ASTM E2093-12(2016) is realized across various laboratory settings that require reliable test method performance, regardless of the location or number of workstations:
- Metals and Materials Analysis: Laboratories analyzing metals, ores, or related materials benefit from unified protocols, especially when employing standard methods such as those in ASTM E350 or E415.
- Process Control Laboratories: Facilities with multiple, distributed laboratory stations conducting process or product quality monitoring can use the guide to standardize uncertainty assessment.
- Accredited Testing Laboratories: Organizations seeking or maintaining accreditation under ISO/IEC 17025 or similar standards use this guide to ensure compliance and data integrity across all analytical stations.
- Industrial or Integrated Laboratory Networks: Multi-lab organizations needing organization-wide confidence in data quality and performance can demonstrate traceability and consistency using the protocols in ASTM E2093.
Related Standards
ASTM E2093-12(2016) references several related standards and best practices, enhancing its applicability and integration into broader quality management systems:
- ISO/IEC 17025 - General requirements for the competence of testing and calibration laboratories.
- ISO 9000 - Quality management and quality assurance standards.
- ASTM E135 - Terminology relating to analytical chemistry for metals, ores, and related materials.
- ASTM E350 - Test methods for chemical analysis of carbon steel and related materials.
- ASTM E415 - Test method for the analysis of carbon and low-alloy steel by atomic emission spectrometry.
- ASTM E1329 - Practice for verification and use of control charts in spectrochemical analysis.
- ASTM E1601 - Practice for conducting an interlaboratory study to evaluate the performance of an analytical method.
- ASTM E2027 - Practice for conducting proficiency tests in the chemical analysis of metals, ores, and related materials.
- Measurement Systems Analysis Reference Manual (AIAG) - Comprehensive resource for evaluating measurement system variability.
Keywords: test method uncertainty, laboratory quality, measurement traceability, multiple workstations, proficiency testing, ASTM E2093, ISO/IEC 17025, laboratory accreditation, data quality objectives, calibration protocols, statistical control, analytical variability.
Buy Documents
ASTM E2093-12(2016) - Standard Guide for Optimizing, Controlling and Assessing Test Method Uncertainties from Multiple Workstations in the Same Laboratory Organization
Get Certified
Connect with accredited certification bodies for this standard

BSI Group
BSI (British Standards Institution) is the business standards company that helps organizations make excellence a habit.

Bureau Veritas
Bureau Veritas is a world leader in laboratory testing, inspection and certification services.

DNV
DNV is an independent assurance and risk management provider.
Sponsored listings
Frequently Asked Questions
ASTM E2093-12(2016) is a guide published by ASTM International. Its full title is "Standard Guide for Optimizing, Controlling and Assessing Test Method Uncertainties from Multiple Workstations in the Same Laboratory Organization". This standard covers: SIGNIFICANCE AND USE 4.1 Many competent analytical laboratories comply with accepted quality system requirements. When using standard test methods, their test results on the same sample should agree with those from other similar laboratories within the reproducibility estimates index (R) published in the standard. Reproducibility estimates are generated as part of the interlaboratory studies (ILS), of the type described in Practice E1601. Competent laboratories participate in proficiency tests, such as those conducted in accordance with Practice E2027, to confirm that they perform consistently over time. In both ILS and proficiency testing protocols, it is generally assumed that only one work station is used to generate the data. 4.2 Many laboratories have workloads, or logistical requirements, or both, that dictate the use of multiple work stations. Some have multiple stations in the same area (central laboratory format). Other stations are scattered throughout a facility (at-line laboratory format) and in some cases may even reside at different facilities. Often, analysis reports do not identify the workstation used for the testing, even if workstations differ in their testing uncertainties. Problems can arise if clients mistakenly attribute variation in report values to process rather than workstation variability. These problems can be minimized if the laboratory organization determines the overall uncertainty associated with results reported from multiple workstations and assesses the significance of the analytical uncertainty to the production process. 4.3 This guide describes a protocol for efficiently optimizing and controlling variability in test results from different workstations used to perform the same test. It harmonizes calibration and control protocols, thereby providing the same level of measurement traceability and control to all workstations. It streamlines documentation and training requirements, thereby facilitating flexibility in personnel assignments. Finally... SCOPE 1.1 This guide describes a protocol for optimizing, controlling, and reporting test method uncertainties from multiple workstations in the same laboratory organization. It does not apply when different test methods, dissimilar instruments, or different parts of the same laboratory organization function independently to validate or verify the accuracy of a specific analytical measurement. 1.2 This standard does not purport to address all of the safety concerns, if any, associated with its use. It is the responsibility of the user of this standard to establish appropriate safety and health practices and determine the applicability of regulatory limitations prior to use.
SIGNIFICANCE AND USE 4.1 Many competent analytical laboratories comply with accepted quality system requirements. When using standard test methods, their test results on the same sample should agree with those from other similar laboratories within the reproducibility estimates index (R) published in the standard. Reproducibility estimates are generated as part of the interlaboratory studies (ILS), of the type described in Practice E1601. Competent laboratories participate in proficiency tests, such as those conducted in accordance with Practice E2027, to confirm that they perform consistently over time. In both ILS and proficiency testing protocols, it is generally assumed that only one work station is used to generate the data. 4.2 Many laboratories have workloads, or logistical requirements, or both, that dictate the use of multiple work stations. Some have multiple stations in the same area (central laboratory format). Other stations are scattered throughout a facility (at-line laboratory format) and in some cases may even reside at different facilities. Often, analysis reports do not identify the workstation used for the testing, even if workstations differ in their testing uncertainties. Problems can arise if clients mistakenly attribute variation in report values to process rather than workstation variability. These problems can be minimized if the laboratory organization determines the overall uncertainty associated with results reported from multiple workstations and assesses the significance of the analytical uncertainty to the production process. 4.3 This guide describes a protocol for efficiently optimizing and controlling variability in test results from different workstations used to perform the same test. It harmonizes calibration and control protocols, thereby providing the same level of measurement traceability and control to all workstations. It streamlines documentation and training requirements, thereby facilitating flexibility in personnel assignments. Finally... SCOPE 1.1 This guide describes a protocol for optimizing, controlling, and reporting test method uncertainties from multiple workstations in the same laboratory organization. It does not apply when different test methods, dissimilar instruments, or different parts of the same laboratory organization function independently to validate or verify the accuracy of a specific analytical measurement. 1.2 This standard does not purport to address all of the safety concerns, if any, associated with its use. It is the responsibility of the user of this standard to establish appropriate safety and health practices and determine the applicability of regulatory limitations prior to use.
ASTM E2093-12(2016) is classified under the following ICS (International Classification for Standards) categories: 03.120.30 - Application of statistical methods. The ICS classification helps identify the subject area and facilitates finding related standards.
ASTM E2093-12(2016) has the following relationships with other standards: It is inter standard links to ASTM E2093-12, ASTM E350-23, ASTM E135-20, ASTM E1601-19, ASTM E135-19, ASTM E2027-17, ASTM E135-16, ASTM E135-15a, ASTM E135-15, ASTM E135-14b, ASTM E135-14a, ASTM E415-14, ASTM E135-14, ASTM E135-13a, ASTM E1601-12. Understanding these relationships helps ensure you are using the most current and applicable version of the standard.
ASTM E2093-12(2016) is available in PDF format for immediate download after purchase. The document can be added to your cart and obtained through the secure checkout process. Digital delivery ensures instant access to the complete standard document.
Standards Content (Sample)
This international standard was developed in accordance with internationally recognized principles on standardization established in the Decision on Principles for the
Development of International Standards, Guides and Recommendations issued by the World Trade Organization Technical Barriers to Trade (TBT) Committee.
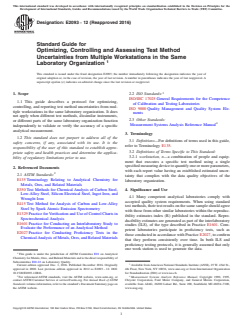
Designation: E2093 − 12 (Reapproved 2016)
Standard Guide for
Optimizing, Controlling and Assessing Test Method
Uncertainties from Multiple Workstations in the Same
Laboratory Organization
This standard is issued under the fixed designation E2093; the number immediately following the designation indicates the year of
original adoption or, in the case of revision, the year of last revision.Anumber in parentheses indicates the year of last reapproval.A
superscript epsilon (´) indicates an editorial change since the last revision or reapproval.
1. Scope 2.2 ISO Standards:
ISO/IEC 17025General Requirements for the Competence
1.1 This guide describes a protocol for optimizing,
of Calibration and Testing Laboratories
controlling, and reporting test method uncertainties from mul-
ISO 9000Quality Management and Quality System Ele-
tiple workstations in the same laboratory organization. It does
ments
not apply when different test methods, dissimilar instruments,
2.3 Other Standards:
or different parts of the same laboratory organization function
Measurement Systems Analysis Reference Manual
independently to validate or verify the accuracy of a specific
analytical measurement.
3. Terminology
1.2 This standard does not purport to address all of the
3.1 Definitions—For definitions of terms used in this guide,
safety concerns, if any, associated with its use. It is the
refer to Terminology E135.
responsibility of the user of this standard to establish appro-
3.2 Definitions of Terms Specific to This Standard:
priate safety and health practices and determine the applica-
3.2.1 workstation, n—a combination of people and equip-
bility of regulatory limitations prior to use.
ment that executes a specific test method using a single
specifiedmeasuringdevicetoquantifyoneormoreparameters,
2. Referenced Documents
with each report value having an established estimated uncer-
2.1 ASTM Standards:
tainty that complies with the data quality objectives of the
E135Terminology Relating to Analytical Chemistry for
laboratory organization.
Metals, Ores, and Related Materials
E350Test Methods for Chemical Analysis of Carbon Steel,
4. Significance and Use
Low-Alloy Steel, Silicon Electrical Steel, Ingot Iron, and
4.1 Many competent analytical laboratories comply with
Wrought Iron
accepted quality system requirements. When using standard
E415Test Method for Analysis of Carbon and Low-Alloy
testmethods,theirtestresultsonthesamesampleshouldagree
Steel by Spark Atomic Emission Spectrometry
with those from other similar laboratories within the reproduc-
E1329PracticeforVerificationandUseofControlChartsin
ibility estimates index (R) published in the standard. Repro-
Spectrochemical Analysis
ducibility estimates are generated as part of the interlaboratory
E1601Practice for Conducting an Interlaboratory Study to
studies (ILS), of the type described in Practice E1601. Com-
Evaluate the Performance of an Analytical Method
petent laboratories participate in proficiency tests, such as
E2027Practice for Conducting Proficiency Tests in the
thoseconductedinaccordancewithPracticeE2027,toconfirm
ChemicalAnalysisofMetals,Ores,andRelatedMaterials
that they perform consistently over time. In both ILS and
proficiency testing protocols, it is generally assumed that only
one work station is used to generate the data.
This guide is under the jurisdiction of ASTM Committee E01 on Analytical
ChemistryforMetals,Ores,andRelatedMaterialsandisthedirectresponsibilityof
Subcommittee E01.22 on Laboratory Quality.
Current edition approved Dec. 1, 2016. Published December 2016. Originally Available fromAmerican National Standards Institute (ANSI), 25 W. 43rd St.,
approved in 2000. Last previous edition approved in 2012 as E2093–12. DOI: 4th Floor, New York, NY 10036, www.ansi.org or from International Organization
10.1520/E2093-12R16. for Standardization (ISO) at www.iso.ch.
2 4
For referenced ASTM standards, visit the ASTM website, www.astm.org, or Measurement Systems Analysis Reference Manual, Copyright 1990, 1995,
contact ASTM Customer Service at service@astm.org. For Annual Book of ASTM Chrysler Corporation, Ford Motor Company, and General Motors Corporation,
Standards volume information, refer to the standard’s Document Summary page on available from AIAG, 26200 Lahser Rd., Suite 200, Southfield, MI 48034–7100,
the ASTM website. www.aiag.org.
Copyright © ASTM International, 100 Barr Harbor Drive, PO Box C700, West Conshohocken, PA 19428-2959. United States
E2093 − 12 (2016)
4.2 Many laboratories have workloads, or logistical such as those required by ISO/IEC 17025. However, the
requirements, or both, that dictate the use of multiple work statistical calculations generated using this guide may provide
stations. Some have multiple stations in the same area (central ausefulestimateofoneTypeAuncertaintycomponentusedin
laboratory format). Other stations are scattered throughout a the calculation of an expanded uncertainty.
facility(at-linelaboratoryformat)andinsomecasesmayeven
4.9 This guide does not provide any guidance for determin-
reside at different facilities. Often, analysis reports do not
ing the bias related to the use of multiple workstations in a
identify the workstation used for the testing, even if worksta-
laboratory organization.
tions differ in their testing uncertainties. Problems can arise if
clientsmistakenlyattributevariationinreportvaluestoprocess
5. Summary
rather than workstation variability. These problems can be
5.1 Identify the test method and establish the data quality
minimizedifthelaboratoryorganizationdeterminestheoverall
objectives to be met throughout the laboratory organization.
uncertainty associated with results reported from multiple
5.2 Identify the workstations to be included in the protocol
workstations and assesses the significance of the analytical
andharmonizetheirexperimentalprocedures,calibrations,and
uncertainty to the production process.
control strategies so that all performance data from all work-
4.3 This guide describes a protocol for efficiently optimiz-
stations are directly statistically comparable.
ing and controlling variability in test results from different
5.3 Tabulate performance data for each workstation and
workstations used to perform the same test. It harmonizes
ensure that each workstation complies with the laboratory
calibration and control protocols, thereby providing the same
organization’s data quality objectives.
level of measurement traceability and control to all worksta-
tions. It streamlines documentation and training requirements,
5.4 Perform statistical analysis of the data from the work-
thereby facilitating flexibility in personnel assignments.
stations to quantify variation within each workstation and
Finally, it offers an opportunity to claim traceability of profi-
assess acceptability of the variation of the pooled workstation
ciency test measurements to all included workstations, regard-
data.
less on which workstation the proficiency test sample was
5.5 Document items covered in 5.1 – 5.4.
tested. The potential benefits of utilizing this protocol increase
5.6 Establish and document a laboratory organization-wide
with the number of workstations included in the laboratory
proficiency test policy that provides traceability to all work-
organization.
stations.
4.4 This guide can be used to identify and quantify benefits
5.7 Operate each workstation independently as described in
derived from corrective actions relating to under-performing
its associated documentation. If any changes are made to any
workstations. It also provides means to track improved perfor-
workstation or its performance levels, document the changes
mance after improvements have been made.
and ensure compliance with the laboratory organization’s data
4.5 It is assumed that all who use this guide will have an
quality objectives.
established laboratory quality system. This system shall in-
clude the use of documented procedures, the application of
6. Procedure
statistical control of measurement processes, and participation
6.1 Test Method Identification and Establishment of the
in proficiency testing. ISO/IEC 17025 describes an excellent
Data Quality Objectives:
model for establishing this type of laboratory quality system.
6.1.1 Multi-element test methods can be handled
concurrently, provided that all elements are measured using
4.6 Thegeneralprinciplesofthisprotocolcanbeadaptedto
other types of measurements, such as mechanical testing and common technology, and that the parameters that influence
data quality are tabulated and evaluated for each element
on-lineprocesscontrolmeasurements,suchastemperatureand
individually.An example is Test Method E415 that covers the
thickness gauging. In these areas, users may need to establish
analysisofplaincarbonandlowalloysteelbyatomicemission
their own models for defining data quality objectives and
vacuum spectrometry. Workstations can be under manual or
proficiency testing may not be available or applicable.
robotic control, as long as the estimated uncertainties are
4.7 It is especially important that users of this guide take
within the specified data quality objectives. Avoid handling
responsibility for ensuring the accuracy of the measurements
multi-element test methods concurrently that use different
madebytheworkstationstobeoperatedunderthisprotocol.In
measurement technologies. Their procedures and error evalu-
addition to the checks mentioned in 6.2.3, laboratories are
ations are too diverse to be incorporated into one easy-to-
encouraged to use other techniques, including, but not limited
manage package. An example of test methods that should not
to, analyzing some materials by independent methods, either
be combined into one program is Test Methods E350 because
within the same laboratory or in collaboration with other
those methods cover many different measurement technolo-
equally competent laboratories. The risks associated with
gies.
generating large volumes of data from carefully synchronized,
6.1.2 Set the data quality objectives for the application of
but incorrectly calibrated multiple workstations are obvious
the method throughout the laboratory organization, using
and must be avoided.
customer requirements and other available data. Possible
4.8 This guide is not intended to provide specific guidance sources of other data may include production process data
on development of statements of measurement uncertainty demonstrating the need for and values of specific analytical
E2093 − 12 (2016)
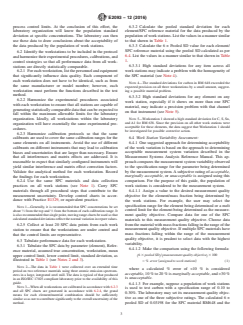
process control limits. At the conclusion of this effort, the 6.3.2 Calculate the pooled standard deviation for each
laboratory organization will know the population standard element/SPC reference material for the data produced by the
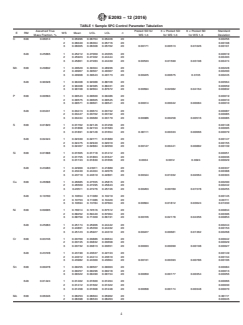
deviation at specific concentrations. The laboratory can then populationofworkstations.Listthevaluesinamannersimilar
use these data to draw conclusions about the acceptability of to that shown in Table 1.
the data produced by the population of work stations.
6.3.3 Calculate the 6 × Pooled SD value for each element/
SPC reference material using the pooled SD calculated as per
6.2 Identify the workstations to be included in the protocol
6.4. List the values in a manner similar to that shown in Table
andharmonizetheirexperimentalprocedures,calibrations,and
1.
control strategies so that all performance data from all work-
6.3.3.1 High standard deviations for any item across all
stations are directly statistically comparable.
work stations may indicate a problem with the homogeneity of
6.2.1 Foreachworkstation,listthepersonnelandequipment
the SPC material (see Note 4).
that significantly influence data quality. Each component of
each workstation does not have to be identical, such as from
NOTE 4—The standard deviations for carbon in RM 648 exceeded the
the same manufacturer or model number; however, each
expected precision on all three workstations by a small amount, suggest-
workstation must perform the functions described in the test ing a possible material problem.
method.
6.3.3.2 High standard deviations for any element on any
6.2.2 Harmonize the experimental procedures associated
work station, especially if it shows on more than one SPC
with each workstation to ensure that all stations are capable of
material, may indicate a precision problem with that channel
generatingstatisticallycomparabledatathatcanbeexpectedto
on that instrument (see Note 5).
fall within the maximum allowable limits for the laboratory
organization. Ideally, all workstations within the laboratory NOTE 5—Workstation 1 showed a high standard deviation for C, S, Sn,
and A1 for RM 638. Since the precision on all other work stations were
organization will have essentially the same experimental pro-
acceptable for these elements, the data suggest that Workstation 1 should
cedures.
be investigated for possible corrective action.
6.2.3 Harmonize calibration protocols so that the same
6.4 Work Station Variability Assessment:
calibrants are used to cover the same calibration ranges for the
same elements on all instruments. Avoid the use of different 6.4.1 One suggested approach for determining acceptability
of the work
...


Questions, Comments and Discussion
Ask us and Technical Secretary will try to provide an answer. You can facilitate discussion about the standard in here.
Loading comments...