ASTM E143-02(2008)
(Test Method)Standard Test Method for Shear Modulus at Room Temperature
Standard Test Method for Shear Modulus at Room Temperature
SIGNIFICANCE AND USE
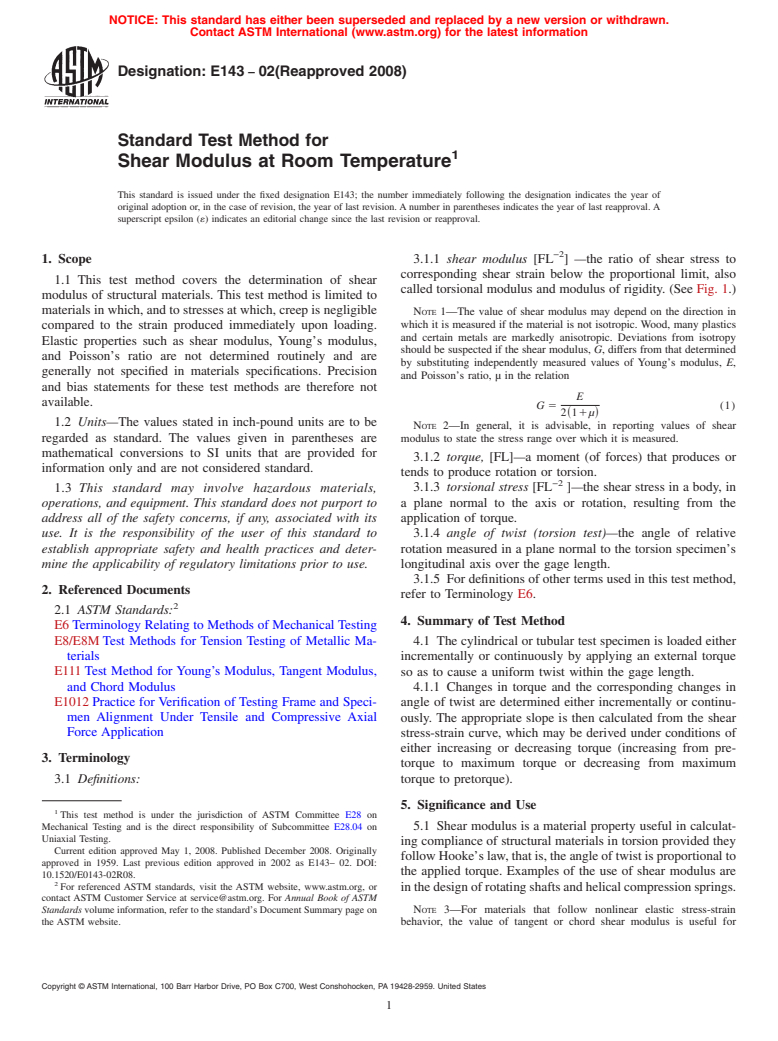
Shear modulus is a material property useful in calculating compliance of structural materials in torsion provided they follow Hooke's law, that is, the angle of twist is proportional to the applied torque. Examples of the use of shear modulus are in the design of rotating shafts and helical compression springs.
Note 3—For materials that follow nonlinear elastic stress-strain behavior, the value of tangent or chord shear modulus is useful for estimating the change in torsional strain to corresponding stress for a specified stress or stress-range, respectively. Such determinations are, however, outside the scope of this standard. (See for example Ref (1).)
The procedural steps and precision of the apparatus and the test specimens should be appropriate to the shape and the material type, since the method applies to a wide variety of materials and sizes.
Precise determination of shear modulus depends on the numerous variables that may affect such determinations.
These factors include characteristics of the specimen such as residual stress, concentricity, wall thickness in the case of tubes, deviation from nominal value, previous strain history and specimen dimension.
Testing conditions that influence the results include: axial position of the specimen, temperature and temperature variations, and maintenance of the apparatus.
Interpretation of data also influences results.
SCOPE
1.1 This test method covers the determination of shear modulus of structural materials. This test method is limited to materials in which, and to stresses at which, creep is negligible compared to the strain produced immediately upon loading. Elastic properties such as shear modulus, Young's modulus, and Poisson's ratio are not determined routinely and are generally not specified in materials specifications. Precision and bias statements for these test methods are therefore not available.
1.2 Units—The values stated in inch-pound units are to be regarded as standard. The values given in parentheses are mathematical conversions to SI units that are provided for information only and are not considered standard.
1.3 This standard may involve hazardous materials, operations, and equipment. This standard does not purport to address all of the safety concerns, if any, associated with its use. It is the responsibility of the user of this standard to establish appropriate safety and health practices and determine the applicability of regulatory limitations prior to use.
General Information
Relations
Buy Standard
Standards Content (Sample)
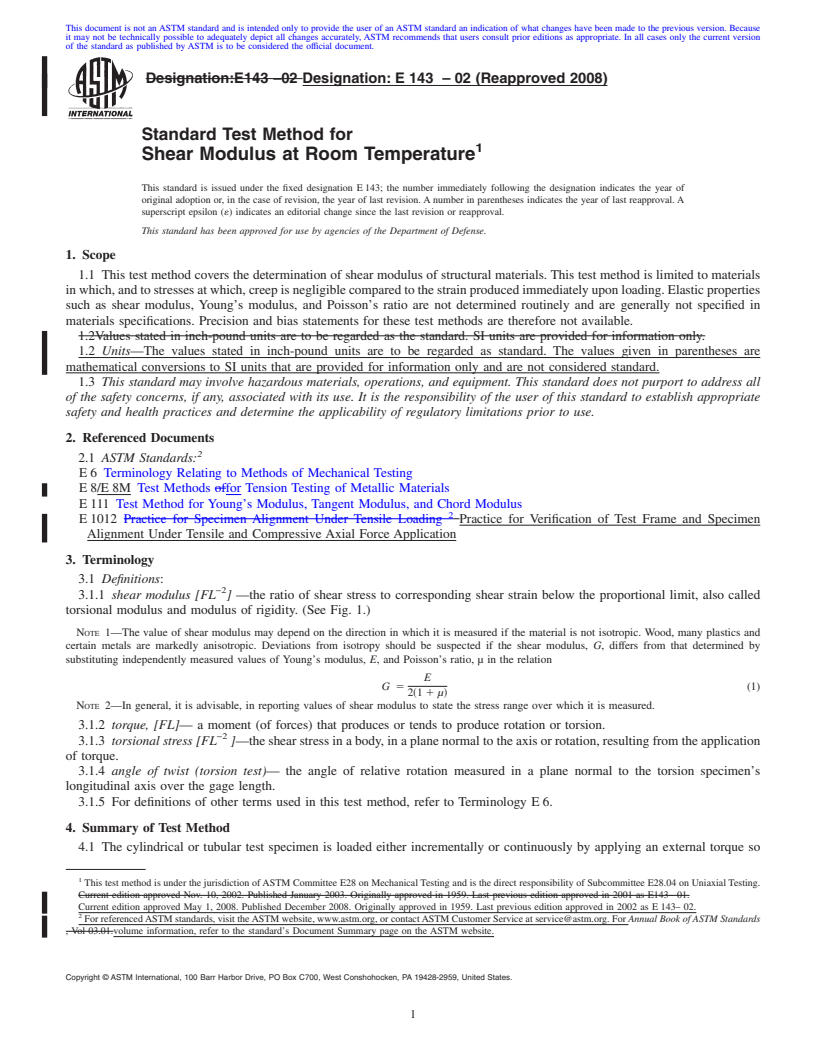
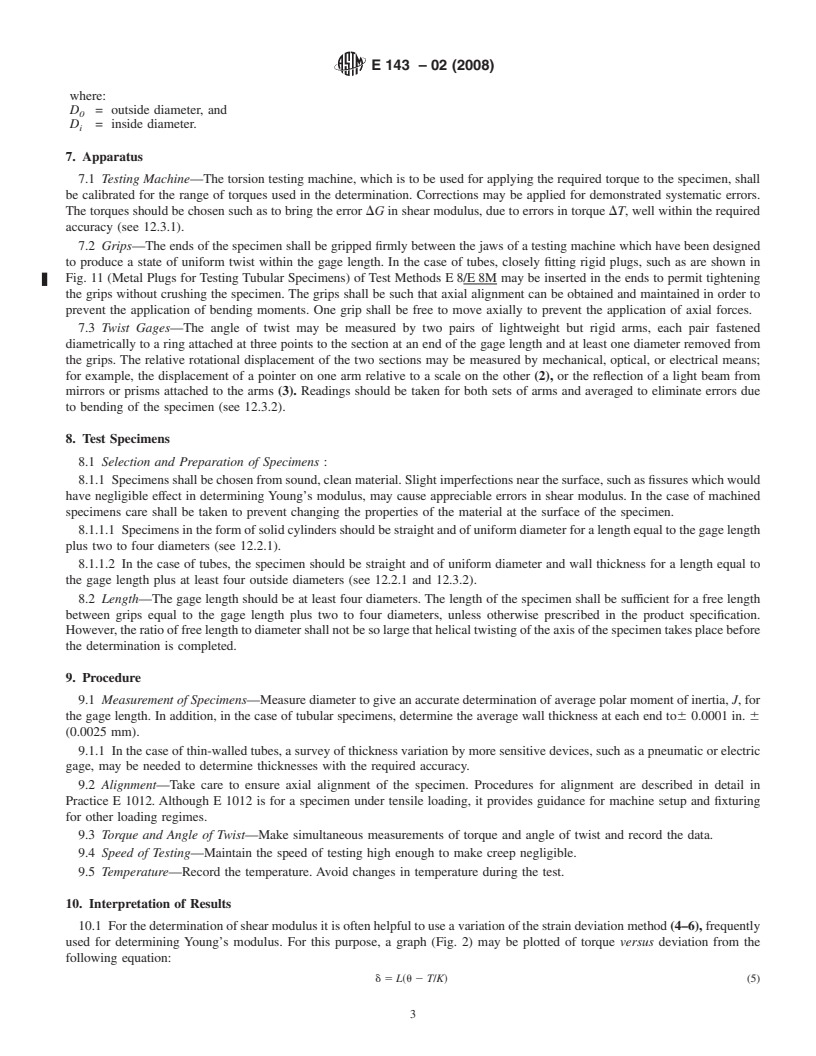
NOTICE: This standard has either been superseded and replaced by a new version or withdrawn.
Contact ASTM International (www.astm.org) for the latest information
Designation: E143 − 02(Reapproved 2008)
Standard Test Method for
Shear Modulus at Room Temperature
This standard is issued under the fixed designation E143; the number immediately following the designation indicates the year of
original adoption or, in the case of revision, the year of last revision.Anumber in parentheses indicates the year of last reapproval.A
superscript epsilon (´) indicates an editorial change since the last revision or reapproval.
−2
1. Scope 3.1.1 shear modulus [FL ] —the ratio of shear stress to
corresponding shear strain below the proportional limit, also
1.1 This test method covers the determination of shear
called torsional modulus and modulus of rigidity. (See Fig. 1.)
modulus of structural materials. This test method is limited to
materialsinwhich,andtostressesatwhich,creepisnegligible
NOTE 1—The value of shear modulus may depend on the direction in
which it is measured if the material is not isotropic. Wood, many plastics
compared to the strain produced immediately upon loading.
and certain metals are markedly anisotropic. Deviations from isotropy
Elastic properties such as shear modulus, Young’s modulus,
should be suspected if the shear modulus, G, differs from that determined
and Poisson’s ratio are not determined routinely and are
by substituting independently measured values of Young’s modulus, E,
generally not specified in materials specifications. Precision
and Poisson’s ratio, µ in the relation
and bias statements for these test methods are therefore not
E
available.
G 5 (1)
2~11µ!
1.2 Units—The values stated in inch-pound units are to be
NOTE 2—In general, it is advisable, in reporting values of shear
regarded as standard. The values given in parentheses are modulus to state the stress range over which it is measured.
mathematical conversions to SI units that are provided for
3.1.2 torque, [FL]—a moment (of forces) that produces or
information only and are not considered standard.
tends to produce rotation or torsion.
−2
1.3 This standard may involve hazardous materials, 3.1.3 torsional stress [FL ]—the shear stress in a body, in
operations, and equipment. This standard does not purport to a plane normal to the axis or rotation, resulting from the
address all of the safety concerns, if any, associated with its application of torque.
use. It is the responsibility of the user of this standard to 3.1.4 angle of twist (torsion test)—the angle of relative
rotation measured in a plane normal to the torsion specimen’s
establish appropriate safety and health practices and deter-
mine the applicability of regulatory limitations prior to use. longitudinal axis over the gage length.
3.1.5 For definitions of other terms used in this test method,
2. Referenced Documents
refer to Terminology E6.
2.1 ASTM Standards:
4. Summary of Test Method
E6Terminology Relating to Methods of Mechanical Testing
E8/E8MTest Methods for Tension Testing of Metallic Ma- 4.1 The cylindrical or tubular test specimen is loaded either
terials incrementally or continuously by applying an external torque
E111Test Method for Young’s Modulus, Tangent Modulus, so as to cause a uniform twist within the gage length.
and Chord Modulus 4.1.1 Changes in torque and the corresponding changes in
E1012Practice for Verification of Testing Frame and Speci- angle of twist are determined either incrementally or continu-
men Alignment Under Tensile and Compressive Axial ously. The appropriate slope is then calculated from the shear
Force Application
stress-strain curve, which may be derived under conditions of
either increasing or decreasing torque (increasing from pre-
3. Terminology
torque to maximum torque or decreasing from maximum
3.1 Definitions: torque to pretorque).
5. Significance and Use
This test method is under the jurisdiction of ASTM Committee E28 on
Mechanical Testing and is the direct responsibility of Subcommittee E28.04 on 5.1 Shear modulus is a material property useful in calculat-
Uniaxial Testing.
ing compliance of structural materials in torsion provided they
Current edition approved May 1, 2008. Published December 2008. Originally
followHooke’slaw,thatis,theangleoftwistisproportionalto
approved in 1959. Last previous edition approved in 2002 as E143– 02. DOI:
the applied torque. Examples of the use of shear modulus are
10.1520/E0143-02R08.
For referenced ASTM standards, visit the ASTM website, www.astm.org, or
inthedesignofrotatingshaftsandhelicalcompressionsprings.
contact ASTM Customer Service at service@astm.org. For Annual Book of ASTM
Standards volume information, refer to the standard’s Document Summary page on NOTE 3—For materials that follow nonlinear elastic stress-strain
the ASTM website. behavior, the value of tangent or chord shear modulus is useful for
Copyright © ASTM International, 100 Barr Harbor Drive, PO Box C700, West Conshohocken, PA 19428-2959. United States
E143 − 02 (2008)
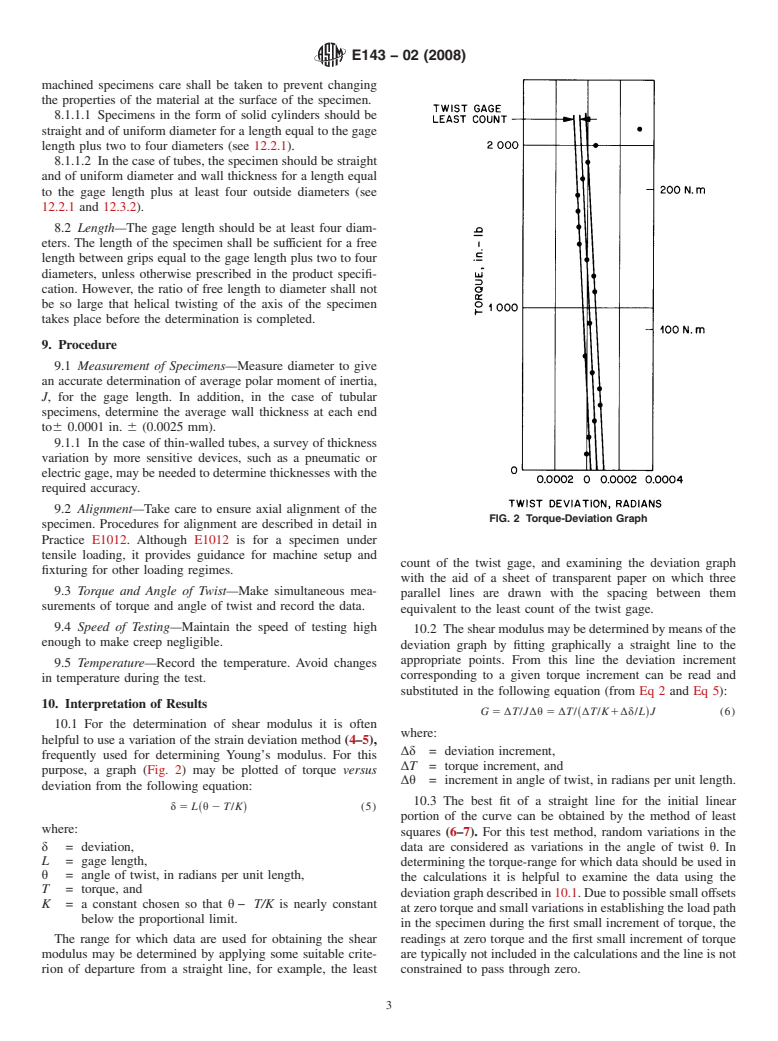
FIG. 1 Shear Stress-Strain Diagram Showing a Straight Line, Corresponding to the Shear Modulus, BetweenR , a Pretorque Stress,
andP , the Proportional Limit
estimating the change in torsional strain to corresponding stress for a
where:
specified stress or stress-range, respectively. Such determinations are,
D = outside diameter, and
however, outside the scope of this standard. (See for example Ref (1).)
D = inside diameter.
i
5.2 The procedural steps and precision of the apparatus and
the test specimens should be appropriate to the shape and the
7. Apparatus
material type, since the method applies to a wide variety of
7.1 Testing Machine—Thetorsiontestingmachine,whichis
materials and sizes.
to be used for applying the required torque to the specimen,
5.3 Precise determination of shear modulus depends on the
shall be calibrated for the range of torques used in the
numerous variables that may affect such determinations.
determination. Corrections may be applied for demonstrated
5.3.1 These factors include characteristics of the specimen
systematic errors. The torques should be chosen such as to
such as residual stress, concentricity, wall thickness in the case
bringtheerror∆Ginshearmodulus,duetoerrorsintorque∆T,
of tubes, deviation from nominal value, previous strain history
well within the required accuracy (see 12.3.1).
and specimen dimension.
7.2 Grips—Theendsofthespecimenshallbegrippedfirmly
5.3.2 Testing conditions that influence the results include:
between the jaws of a testing machine which have been
axial position of the specimen, temperature and temperature
designed to produce a state of uniform twist within the gage
variations, and maintenance of the apparatus.
length. In the case of tubes, closely fitting rigid plugs, such as
5.3.3 Interpretation of data also influences results.
are shown in Fig. 11 (Metal Plugs for Testing Tubular
6. General Considerations
Specimens) of Test Methods E8/E8M may be inserted in the
ends to permit tightening the grips without crushing the
6.1 Shear modulus for a specimen of circular cross-section
specimen. The grips shall be such that axial alignment can be
is given by the equation
obtained and maintained in order to prevent the application of
G 5 TL/Jθ (2)
bending moments. One grip shall be free to move axially to
where: prevent the application of axial forces.
G = shear modulus of the specimen,
7.3 Twist Gages—The angle of twist may be measured by
T = torque,
two pairs of lightweight but rigid arms, each pair fastened
L = gage length,
diametrically to a ring attached at three points to the section at
J = polar moment of inertia of the section about its center,
an end of the gage length and at least one diameter removed
and
from the grips. The relative rotational displacement of the two
θ = angle of twist, in radians.
sections may be measured by mechanical, optical, or electrical
6.1.1 For a solid cylinder:
means; for example, the displacement of a pointer on one arm
4 relative to a scale on the other (2), or the reflection of a light
J 5 πD /32 (3)
beamfrommirrorsorprismsattachedtothearms (3).Readings
where:
shouldbetakenforbothsetsofarmsandaveragedtoeliminate
D = diameter.
errors due to bending of the specimen (see 12.3.2).
6.1.2 For a tube:
8. Test Specimens
π
4 4
J 5 D 2 D (4)
~ !
0 i
8.1 Selection and Preparation of Specimens:
8.1.1 Specimensshallbechosenfromsound,cleanmaterial.
Slight imperfections near the surface, such as fissures which
The boldface numbers in parentheses refer to a list of references at the end of
would have negligible effect in determiningYoung’s modulus,
this standard.
See any standard text in Mechanics of Materials. may cause appreciable errors in shear modulus. In the case of
E143 − 02 (2008)
machined specimens care shall be taken to prevent changing
the properties of the material at the surface of the specimen.
8.1.1.1 Specimens in the form of solid cylinders should be
straight and of uniform diameter for a length equal to the gage
length plus two to four diameters (see 12.2.1).
8.1.1.2 In the case of tubes, the specimen should be straight
and of uniform diameter and wall thickness for a length equal
to the gage length plus at least four outside diameters (see
12.2.1 and 12.3.2).
8.2 Length—The gage length should be at least four diam-
eters. The length of the specimen shall be sufficient for a free
length between grips equal to the gage length plus
...
This document is not anASTM standard and is intended only to provide the user of anASTM standard an indication of what changes have been made to the previous version. Because
it may not be technically possible to adequately depict all changes accurately, ASTM recommends that users consult prior editions as appropriate. In all cases only the current version
of the standard as published by ASTM is to be considered the official document.
Designation:E143 –01 Designation: E 143 – 02 (Reapproved 2008)
Standard Test Method for
Shear Modulus at Room Temperature
This standard is issued under the fixed designation E143; the number immediately following the designation indicates the year of
original adoption or, in the case of revision, the year of last revision.Anumber in parentheses indicates the year of last reapproval.A
superscript epsilon (´) indicates an editorial change since the last revision or reapproval.
This standard has been approved for use by agencies of the Department of Defense.
1. Scope
1.1 This test method covers the determination of shear modulus of structural materials.This test method is limited to materials
inwhich,andtostressesatwhich,creepisnegligiblecomparedtothestrainproducedimmediatelyuponloading.Elasticproperties
such as shear modulus, Young’s modulus, and Poisson’s ratio are not determined routinely and are generally not specified in
materials specifications. Precision and bias statements for these test methods are therefore not available.
1.2Values stated in inch-pound units are to be regarded as the standard. SI units are provided for information only.
1.2 Units—The values stated in inch-pound units are to be regarded as standard. The values given in parentheses are
mathematical conversions to SI units that are provided for information only and are not considered standard.
1.3 This standard may involve hazardous materials, operations, and equipment. This standard does not purport to address all
of the safety concerns, if any, associated with its use. It is the responsibility of the user of this standard to establish appropriate
safety and health practices and determine the applicability of regulatory limitations prior to use.
2. Referenced Documents
2.1 ASTM Standards:
E6 Terminology Relating to Methods of Mechanical Testing
E8/E8M Test Methods offor Tension Testing of Metallic Materials
E 111 Test Method for Young’s Modulus, Tangent Modulus, and Chord Modulus
E1012 Practice for Specimen Alignment Under Tensile Loading Practice for Verification of Test Frame and Specimen
Alignment Under Tensile and Compressive Axial Force Application
3. Terminology
3.1 Definitions:
−2
3.1.1 shear modulus [FL ]—theratioofshearstresstocorrespondingshearstrainbelowtheproportionallimitofthematerial
(see —the ratio of shear stress to corresponding shear strain below the proportional limit, also called torsional modulus and
modulus of rigidity. (See Fig. 1). .)
NOTE 1—The value of shear modulus may depend on the direction in which it is measured if the material is not isotropic. Wood, many plastics and
certain metals are markedly anisotropic. Deviations from isotropy should be suspected if the shear modulus, G, differs from that determined by
substituting independently measured values of Young’s modulus, E, and Poisson’s ratio, µ in the relation
E
G 5 (1)
2~1 1 µ!
NOTE 2—In general, it is advisable, in reporting values of shear modulus to state the stress range over which it is measured.
3.1.2 torque, [FL]— a moment (of forces) that produces or tends to produce rotation or torsion.
−2
3.1.3 torsional stress [FL ]—theshearstressinabody,inaplanenormaltotheaxisorrotation,resultingfromtheapplication
of torque.
3.1.4 angle of twist (torsion test)— the angle of relative rotation measured in a plane normal to the torsion specimen’s
longitudinal axis over the gage length.
3.1.5 For definitions of other terms used in this test method, refer to Terminology E6.
ThistestmethodisunderthejurisdictionofASTMCommitteeE28onMechanicalTestingandisthedirectresponsibilityofSubcommitteeE28.03onElasticProperties.
Current edition approved Oct. 10, 2001. Published November 2001. Originally published as E143–59T. Last previous edition E143– 87(1998).
This test method is under the jurisdiction ofASTM Committee E28 on MechanicalTesting and is the direct responsibility of Subcommittee E28.04 on UniaxialTesting.
Current edition approved May 1, 2008. Published December 2008. Originally approved in 1959. Last previous edition approved in 2002 as E143– 02.
ForreferencedASTMstandards,visittheASTMwebsite,www.astm.org,orcontactASTMCustomerServiceatservice@astm.org.For Annual Book of ASTM Standards
, Vol 03.01.volume information, refer to the standard’s Document Summary page on the ASTM website.
Copyright © ASTM International, 100 Barr Harbor Drive, PO Box C700, West Conshohocken, PA 19428-2959, United States.
E 143 – 02 (2008)
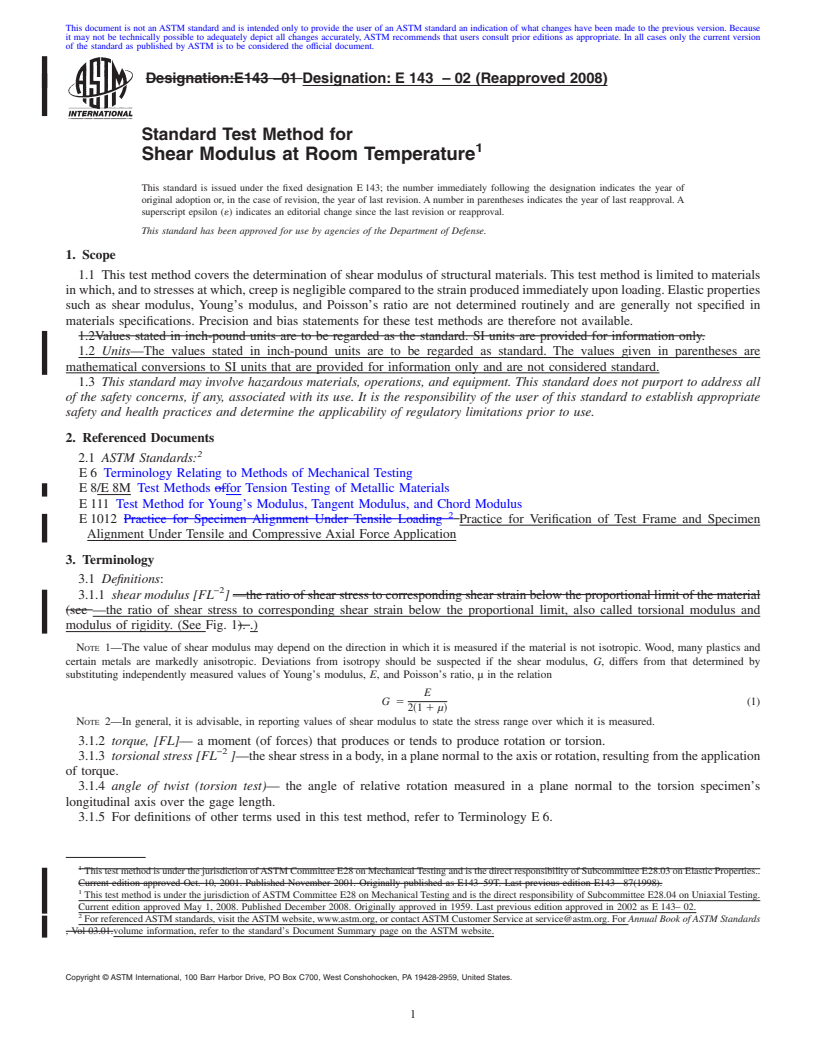
FIG. 1 Shear Stress-Strain Diagram Showing a Straight Line, Corresponding to the Shear Modulus, BetweenR , a Pretorque Stress,
andP , the Proportional Limit
4. Summary of Test Method
4.1 The cylindrical or tubular test specimen is loaded either incrementally or continuously by applying an external torque so
as to cause a uniform twist within the gage length.
4.1.1 Changes in torque and the corresponding changes in angle of twist are determined either incrementally or continuously.
The appropriate slope is then calculated from the shear stress-strain curve, which may be derived under conditions of either
increasingordecreasingtorque(increasingfrompretorquetomaximumtorqueordecreasingfrommaximumtorquetopretorque).
5. Significance and Use
5.1 Shearmodulusisamaterialpropertyusefulincalculatingcomplianceofstructuralmaterialsintorsionprovidedtheyfollow
Hooke’slaw,thatis,theangleoftwistisproportionaltotheappliedtorque.Examplesoftheuseofshearmodulusareinthedesign
of rotating shafts and helical compression springs.
NOTE 3—For materials that follow nonlinear elastic stress-strain behavior, the value of tangent or chord shear modulus is useful for estimating the
change in torsional strain to corresponding stress for a specified stress or stress-range, respectively. Such determinations are, however, outside the scope
of this standard. (See for example Ref (1).)
5.2 The procedural steps and precision of the apparatus and the test specimens should be appropriate to the shape and the
material type, since the method applies to a wide variety of materials and sizes.
5.3 Precise determination of shear modulus depends on the numerous variables that may affect such determinations.
5.3.1 These factors include characteristics of the specimen such as residual stress, concentricity, wall thickness in the case of
tubes, deviation from nominal value, previous strain history and specimen dimension.
5.3.2 Testing conditions that influence the results include: axial position of the specimen, temperature and temperature
variations, and maintenance of the apparatus.
5.3.3 Interpretation of data also influences results.
6. General Considerations
6.1 Shear modulus for a specimen of circular cross-section is given by the equation
G 5 TL/Ju (2)
where:
G = shear modulus of the specimen,
T = torque,
L = gage length,
J = polar moment of inertia of the section about its center, and
u = angle of twist, in radians.
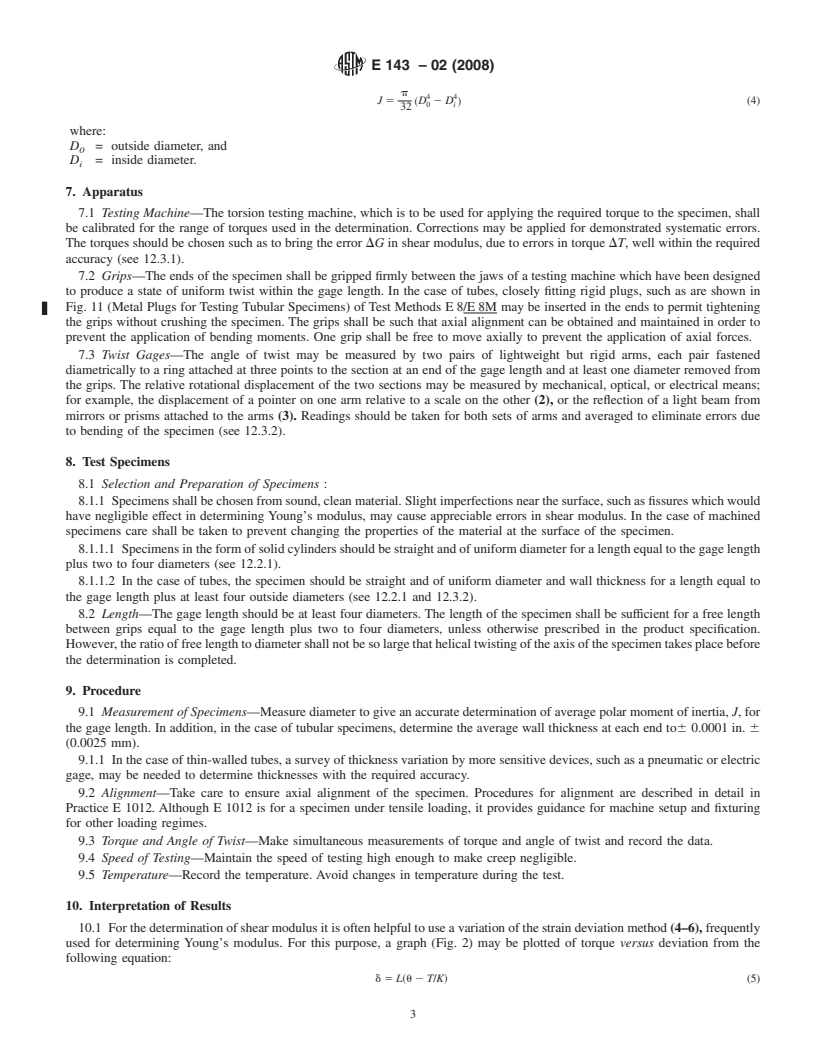
6.1.1 For a solid cylinder:
J5pD /32 (3)
where:
D = diameter.
6.1.2 For a tube:
The boldface numbers in parentheses refer to a list of references at the end of this standard.
See any standard text in Mechanics of Materials.
E 143 – 02 (2008)
p
4 4
J 5 ~D 2 D ! (4)
0 i
where:
D = outside diameter, and
D = inside diameter.
i
7. Apparatus
7.1 Testing Machine—The torsion testing machine, which is to be used for applying the required torque to the specimen, shall
be calibrated for the range of torques used in the determination. Corrections may be applied for demonstrated systematic errors.
The torques should be chosen such as to bring the error DG in shear modulus, due to errors in torque DT, well within the required
accuracy (see 12.3.1).
7.2 Grips—The ends of the specimen shall be gripped firmly between the jaws of a testing machine which have been designed
to produce a state of uniform twist within the gage length. In the case of tubes, closely fitting rigid plugs, such as are shown in
Fig. 11 (Metal Plugs for Testing Tubular Specimens) of Test Methods E8/E8M may be inserted in the ends to permit tightening
the grips without crushing the specimen. The grips shall be such that axial alignment can be obtained and maintained in order to
prevent the application of bending moments. One grip shall be free to move axially to prevent the application of axial forces.
7.3 Twist Gages—The angle of twist may be measured by two pairs of lightweight but rigid arms, each pair fastened
diametrically to a ring attached at three points to the section at an end of the gage length and at least one diameter removed from
the grips. The relative rotational displacement of the two sections may be measured by mechanical, optical, or electrical means;
for example, the displacement of a pointer on one arm relative to a scale on the other (2), or the reflection of a light beam from
mirrors or prisms attached to the arms (3). Readings should be taken for both sets of arms and averaged to eliminate errors due
to bending of the specimen (see 12.3.2).
8. Test Specimens
8.1 Selection and Preparation of Specimens :
8.1.1 Specimensshallbechosenfromsound,cleanmaterial.Slightimperfectionsnearthesurface,suchasfissureswhichwould
have negligible effect in determining Young’s modulus, may cause appreciable errors in shear modulus. In the case of machined
specimens care shall be taken to prevent changing the properties of the material at the surface of the specimen.
8.1.1.1 Specimensintheformofsolidcylindersshould
...
This document is not anASTM standard and is intended only to provide the user of anASTM standard an indication of what changes have been made to the previous version. Because
it may not be technically possible to adequately depict all changes accurately, ASTM recommends that users consult prior editions as appropriate. In all cases only the current version
of the standard as published by ASTM is to be considered the official document.
Designation:E143 –02 Designation: E 143 – 02 (Reapproved 2008)
Standard Test Method for
Shear Modulus at Room Temperature
This standard is issued under the fixed designation E143; the number immediately following the designation indicates the year of
original adoption or, in the case of revision, the year of last revision.Anumber in parentheses indicates the year of last reapproval.A
superscript epsilon (´) indicates an editorial change since the last revision or reapproval.
This standard has been approved for use by agencies of the Department of Defense.
1. Scope
1.1 This test method covers the determination of shear modulus of structural materials.This test method is limited to materials
inwhich,andtostressesatwhich,creepisnegligiblecomparedtothestrainproducedimmediatelyuponloading.Elasticproperties
such as shear modulus, Young’s modulus, and Poisson’s ratio are not determined routinely and are generally not specified in
materials specifications. Precision and bias statements for these test methods are therefore not available.
1.2Values stated in inch-pound units are to be regarded as the standard. SI units are provided for information only.
1.2 Units—The values stated in inch-pound units are to be regarded as standard. The values given in parentheses are
mathematical conversions to SI units that are provided for information only and are not considered standard.
1.3 This standard may involve hazardous materials, operations, and equipment. This standard does not purport to address all
of the safety concerns, if any, associated with its use. It is the responsibility of the user of this standard to establish appropriate
safety and health practices and determine the applicability of regulatory limitations prior to use.
2. Referenced Documents
2.1 ASTM Standards:
E6 Terminology Relating to Methods of Mechanical Testing
E8/E8M Test Methods offor Tension Testing of Metallic Materials
E 111 Test Method for Young’s Modulus, Tangent Modulus, and Chord Modulus
E1012 Practice for Specimen Alignment Under Tensile Loading Practice for Verification of Test Frame and Specimen
Alignment Under Tensile and Compressive Axial Force Application
3. Terminology
3.1 Definitions:
−2
3.1.1 shear modulus [FL ] —the ratio of shear stress to corresponding shear strain below the proportional limit, also called
torsional modulus and modulus of rigidity. (See Fig. 1.)
NOTE 1—The value of shear modulus may depend on the direction in which it is measured if the material is not isotropic. Wood, many plastics and
certain metals are markedly anisotropic. Deviations from isotropy should be suspected if the shear modulus, G, differs from that determined by
substituting independently measured values of Young’s modulus, E, and Poisson’s ratio, µ in the relation
E
G 5 (1)
2 1 1 µ
~ !
NOTE 2—In general, it is advisable, in reporting values of shear modulus to state the stress range over which it is measured.
3.1.2 torque, [FL]— a moment (of forces) that produces or tends to produce rotation or torsion.
−2
3.1.3 torsional stress [FL ]—theshearstressinabody,inaplanenormaltotheaxisorrotation,resultingfromtheapplication
of torque.
3.1.4 angle of twist (torsion test)— the angle of relative rotation measured in a plane normal to the torsion specimen’s
longitudinal axis over the gage length.
3.1.5 For definitions of other terms used in this test method, refer to Terminology E6.
4. Summary of Test Method
4.1 The cylindrical or tubular test specimen is loaded either incrementally or continuously by applying an external torque so
This test method is under the jurisdiction ofASTM Committee E28 on MechanicalTesting and is the direct responsibility of Subcommittee E28.04 on UniaxialTesting.
Current edition approved Nov. 10, 2002. Published January 2003. Originally approved in 1959. Last previous edition approved in 2001 as E143– 01.
Current edition approved May 1, 2008. Published December 2008. Originally approved in 1959. Last previous edition approved in 2002 as E143– 02.
ForreferencedASTMstandards,visittheASTMwebsite,www.astm.org,orcontactASTMCustomerServiceatservice@astm.org.For Annual Book of ASTM Standards
, Vol 03.01.volume information, refer to the standard’s Document Summary page on the ASTM website.
Copyright © ASTM International, 100 Barr Harbor Drive, PO Box C700, West Conshohocken, PA 19428-2959, United States.
E 143 – 02 (2008)
FIG. 1 Shear Stress-Strain Diagram Showing a Straight Line, Corresponding to the Shear Modulus, BetweenR , a Pretorque Stress,
andP , the Proportional Limit
as to cause a uniform twist within the gage length.
4.1.1 Changes in torque and the corresponding changes in angle of twist are determined either incrementally or continuously.
The appropriate slope is then calculated from the shear stress-strain curve, which may be derived under conditions of either
increasingordecreasingtorque(increasingfrompretorquetomaximumtorqueordecreasingfrommaximumtorquetopretorque).
5. Significance and Use
5.1 Shearmodulusisamaterialpropertyusefulincalculatingcomplianceofstructuralmaterialsintorsionprovidedtheyfollow
Hooke’slaw,thatis,theangleoftwistisproportionaltotheappliedtorque.Examplesoftheuseofshearmodulusareinthedesign
of rotating shafts and helical compression springs.
NOTE 3—For materials that follow nonlinear elastic stress-strain behavior, the value of tangent or chord shear modulus is useful for estimating the
change in torsional strain to corresponding stress for a specified stress or stress-range, respectively. Such determinations are, however, outside the scope
of this standard. (See for example Ref (1).)
5.2 The procedural steps and precision of the apparatus and the test specimens should be appropriate to the shape and the
material type, since the method applies to a wide variety of materials and sizes.
5.3 Precise determination of shear modulus depends on the numerous variables that may affect such determinations.
5.3.1 These factors include characteristics of the specimen such as residual stress, concentricity, wall thickness in the case of
tubes, deviation from nominal value, previous strain history and specimen dimension.
5.3.2 Testing conditions that influence the results include: axial position of the specimen, temperature and temperature
variations, and maintenance of the apparatus.
5.3.3 Interpretation of data also influences results.
6. General Considerations
6.1 Shear modulus for a specimen of circular cross-section is given by the equation
G 5 TL/Ju (2)
where:
G = shear modulus of the specimen,
T = torque,
L = gage length,
J = polar moment of inertia of the section about its center, and
u = angle of twist, in radians.
6.1.1 For a solid cylinder:
J5pD /32 (3)
/32
where:
D = diameter.
6.1.2 For a tube:
p
4 4
J 5 D 2 D ! (4)
~
0 i
The boldface numbers in parentheses refer to a list of references at the end of this standard.
See any standard text in Mechanics of Materials.
E 143 – 02 (2008)
where:
D = outside diameter, and
D = inside diameter.
i
7. Apparatus
7.1 Testing Machine—The torsion testing machine, which is to be used for applying the required torque to the specimen, shall
be calibrated for the range of torques used in the determination. Corrections may be applied for demonstrated systematic errors.
The torques should be chosen such as to bring the error DG in shear modulus, due to errors in torque DT, well within the required
accuracy (see 12.3.1).
7.2 Grips—The ends of the specimen shall be gripped firmly between the jaws of a testing machine which have been designed
to produce a state of uniform twist within the gage length. In the case of tubes, closely fitting rigid plugs, such as are shown in
Fig. 11 (Metal Plugs for Testing Tubular Specimens) of Test Methods E8/E8M may be inserted in the ends to permit tightening
the grips without crushing the specimen. The grips shall be such that axial alignment can be obtained and maintained in order to
prevent the application of bending moments. One grip shall be free to move axially to prevent the application of axial forces.
7.3 Twist Gages—The angle of twist may be measured by two pairs of lightweight but rigid arms, each pair fastened
diametrically to a ring attached at three points to the section at an end of the gage length and at least one diameter removed from
the grips. The relative rotational displacement of the two sections may be measured by mechanical, optical, or electrical means;
for example, the displacement of a pointer on one arm relative to a scale on the other (2), or the reflection of a light beam from
mirrors or prisms attached to the arms (3). Readings should be taken for both sets of arms and averaged to eliminate errors due
to bending of the specimen (see 12.3.2).
8. Test Specimens
8.1 Selection and Preparation of Specimens :
8.1.1 Specimensshallbechosenfromsound,cleanmaterial.Slightimperfectionsnearthesurface,suchasfissureswhichwould
have negligible effect in determining Young’s modulus, may cause appreciable errors in shear modulus. In the case of machined
specimens care shall be taken to prevent changing the properties of the material at the surface of the specimen.
8.1.1.1 Specimensintheformofsolidcylindersshouldbestraightandofuniformdiameterforalengthequaltothegagelength
plus two to four diameters (see 12.2.1).
8.1.1.2 I
...


Questions, Comments and Discussion
Ask us and Technical Secretary will try to provide an answer. You can facilitate discussion about the standard in here.