ASTM D6862-11
(Test Method)Standard Test Method for 90 Degree Peel Resistance of Adhesives
Standard Test Method for 90 Degree Peel Resistance of Adhesives
SIGNIFICANCE AND USE
This test method is useful for acceptance and quality control testing. Adherends, application procedure, and sample conditioning shall be as agreed upon by the manufacturer and the user of the adherends and the adhesive.
SCOPE
1.1 This test method covers the determination of the resistance-to-peel strength of an adhesive bond between one rigid adherend and one flexible adherend when tested at an angle of approximately 90 degrees under specified conditions of preparation and testing.
1.2 A variation in thickness of the adherends will generally influence test values. For this reason, the thickness of the adherends used to make the test specimens shall be specified in the material specification. When no thickness is specified, the flexible adherend shall be 0.60 mm (0.025 in.) thick and the rigid adherend shall be 1.60 mm (0.060 in.) thick.
Note 1—A heavy fabric, such as canvas, has been used as a flexible adherend.
1.3 The values stated in SI units are to be regarded as the standard. The values given in parentheses are for information only.
1.4 This standard does not purport to address all of the safety concerns, if any, associated with its use. It is the responsibility of the user of this standard to establish appropriate safety and health practices and determine the applicability of regulatory limitations prior to use.
General Information
Relations
Buy Standard
Standards Content (Sample)
NOTICE: This standard has either been superseded and replaced by a new version or withdrawn.
Contact ASTM International (www.astm.org) for the latest information
Designation: D6862 − 11
StandardTest Method for
1
90 Degree Peel Resistance of Adhesives
This standard is issued under the fixed designation D6862; the number immediately following the designation indicates the year of
original adoption or, in the case of revision, the year of last revision. A number in parentheses indicates the year of last reapproval. A
superscript epsilon (´) indicates an editorial change since the last revision or reapproval.
INTRODUCTION
The purpose of this test method is to provide for the determination of the resistance-to-peel strength
of adhesives when surfaces joined by an adhesive are separated by applying a force to one of the
surfaces at a 90 degree angle. The accuracy of the results of strength tests of adhesive bonds will
depend on the conditions under which the bonding process is carried out. Unless otherwise agreed
upon between the manufacturer and the purchaser, the bonding conditions shall be prescribed by the
manufacturer of the adhesive. In order to ensure that complete information is available to the
individual conducting the tests, the manufacturer of the adhesive shall furnish numerical values and
other specific information for each of the following variables:
(1) Procedure for preparation of the surfaces prior to application of the surfaces prior to application
of the adhesive, the cleaning and drying of surfaces, and special surface treatments, which are not
specifically limited by the pertinent test method.
(2) Complete mixing directions for the adhesive.
(3) Conditions for the application of the adhesive, including the rate of spread or thickness of the
film, number of coats to be applied, whether to one or both of the surfaces, and the conditions of
drying.
(4) Assembly conditions before the application of pressure, including room temperature and length
of time.
(5) Curing conditions, including the amount of pressure to be applied, the length of time under
pressure, and the temperature of the assembly when under pressure. It should be stated whether this
temperature is that of the glue line or of the atmosphere at which the assembly is to be maintained.
(6) Conditioning procedure before testing, unless a standard procedure is specified, including
length of time and relative humidity.
Range may be prescribed for any variable provided it is acceptable to both the manufacturer and the
purchaser of the adhesive.
1. Scope* adherends used to make the test specimens shall be specified in
the material specification. When no thickness is specified, the
1.1 This test method covers the determination of the
flexible adherend shall be 0.60 mm (0.025 in.) thick and the
resistance-to-peel strength of an adhesive bond between one
rigid adherend shall be 1.60 mm (0.060 in.) thick.
rigid adherend and one flexible adherend when tested at an
NOTE 1—A heavy fabric, such as canvas, has been used as a flexible
angle of approximately 90 degrees under specified conditions
adherend.
of preparation and testing.
1.3 The values stated in SI units are to be regarded as the
1.2 A variation in thickness of the adherends will generally
standard. The values given in parentheses are for information
influence test values. For this reason, the thickness of the
only.
1
1.4 This standard does not purport to address all of the
This test method is under the jurisdiction of ASTM Committee D14 on
Adhesives and is the direct responsibility of Subcommittee D14.10 on Working
safety concerns, if any, associated with its use. It is the
Properties.
responsibility of the user of this standard to establish appro-
Current edition approved Dec. 1, 2011. Published January 2012. Originally
priate safety and health practices and determine the applica-
approved in 2003. Last previous edition approved in 2004 as D6862 – 04. DOI:
10.1520/D6862-11. bility of regulatory limitations prior to use.
*A Summary of Changes section appears at the end of this standard
Copyright © ASTM International, 100 Barr Harbor Drive, PO Box C700, West Conshohocken, PA 19428-2959. United States
1
---------------------- Page: 1 ----------------------
D6862 − 11
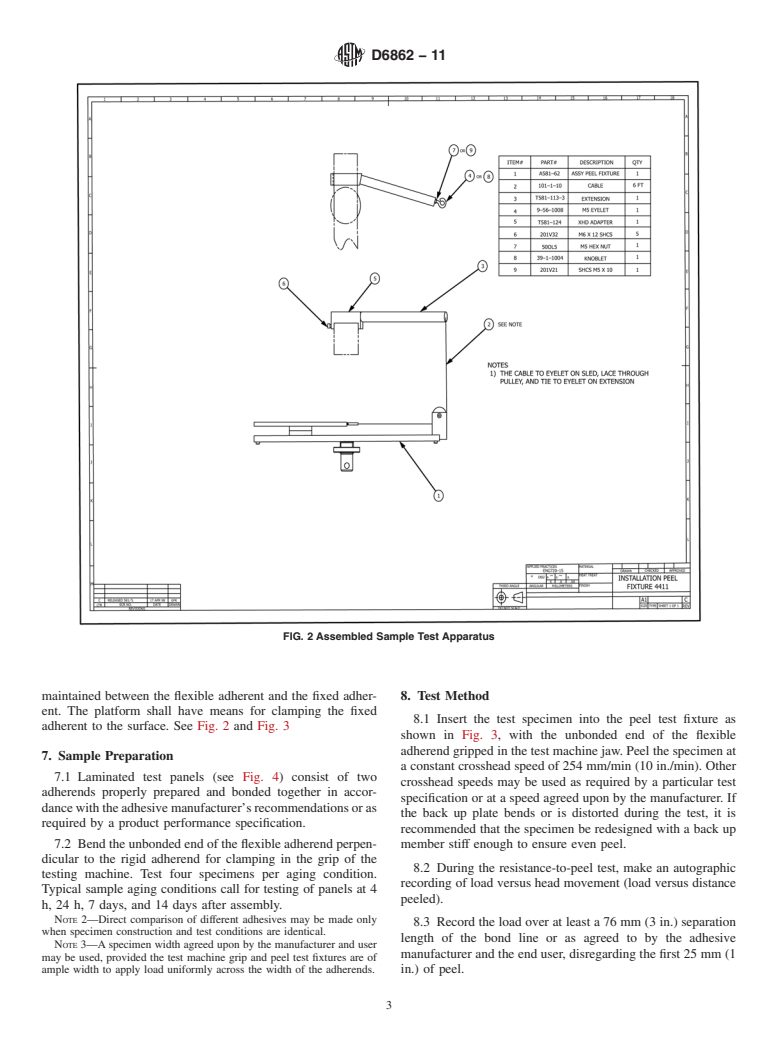
FIG. 1 Sample Test Apparatus
2. Referenced Documents 5. Significance and Use
2
2.1 ASTM Standards:
5.1 This test method is useful for acceptance and quality
D907 Terminology of Adhesives
control testing. Adherends, application procedure, and sample
E4 Practices for Force Verification of Testing Machines
conditioning shall be as agreed upon by the manufacturer and
E177 Practice for Use of the Terms Precision and Bias in
the user of the adherends and the adhesive.
ASTM Test Methods
6. Apparatus
3. Terminology
6.1 Testing Machine—The testing machine shall have a load
3.1 Definitions—Many of the definitions used in this test
weighing system conforming to the requirements of Practice
method are defined in Terminology D907.
E4. It shall have the
...
This document is not anASTM standard and is intended only to provide the user of anASTM standard an indication of what changes have been made to the previous version. Because
it may not be technically possible to adequately depict all changes accurately, ASTM recommends that users consult prior editions as appropriate. In all cases only the current version
of the standard as published by ASTM is to be considered the official document.
Designation:D6862–04 Designation:D6862–11
Standard Test Method for
1
90 Degree Peel Resistance of Adhesives
This standard is issued under the fixed designation D6862; the number immediately following the designation indicates the year of
original adoption or, in the case of revision, the year of last revision. A number in parentheses indicates the year of last reapproval. A
superscript epsilon (´) indicates an editorial change since the last revision or reapproval.
INTRODUCTION
The purpose of this test method is to provide for the determination of the resistance-to-peel strength
of adhesives when surfaces joined by an adhesive are separated by applying a force to one of the
surfaces at a 90 degree angle. The accuracy of the results of strength tests of adhesive bonds will
depend on the conditions under which the bonding process is carried out. Unless otherwise agreed
upon between the manufacturer and the purchaser, the bonding conditions shall be prescribed by the
manufacturer of the adhesive. In order to ensure that complete information is available to the
individual conducting the tests, the manufacturer of the adhesive shall furnish numerical values and
other specific information for each of the following variables:
(1) Procedure for preparation of the surfaces prior to application of the surfaces prior to application
of the adhesive, the cleaning and drying of surfaces, and special surface treatments, which are not
specifically limited by the pertinent test method.
(2) Complete mixing directions for the adhesive.
(3) Conditions for the application of the adhesive, including the rate of spread or thickness of the
film, number of coats to be applied, whether to one or both of the surfaces, and the conditions of
drying.
(4) Assembly conditions before the application of pressure, including room temperature and length
of time.
(5) Curing conditions, including the amount of pressure to be applied, the length of time under
pressure, and the temperature of the assembly when under pressure. It should be stated whether this
temperature is that of the glue line or of the atmosphere at which the assembly is to be maintained.
(6) Conditioning procedure before testing, unless a standard procedure is specified, including
length of time and relative humidity.
Range may be prescribed for any variable provided it is acceptable to both the manufacturer and the
purchaser of the adhesive.
1. Scope*
1.1 Thistestmethodcoversthedeterminationoftheresistance-to-peelstrengthofanadhesivebondbetweenonerigidadherend
and one flexible adherend when tested at an angle of approximately 90 degrees under specified conditions of preparation and
testing.
1.2 Avariation in thickness of the adherends will generally influence test values. For this reason, the thickness of the adherends
used to make the test specimens shall be specified in the material specification. When no thickness is specified, the flexible
adherend shall be 0.630.60 mm (0.025 in.) thick and the rigid adherend shall be 1.631.60 mm (0.064(0.060 in.) thick.
NOTE 1—A heavy fabric, such as canvas, has been used as a flexible adherend.
1.3 The values stated in SI units are to be regarded as the standard. The values given in parentheses are for information only.
1.4 This standard does not purport to address all of the safety concerns, if any, associated with its use. It is the responsibility
of the user of this standard to establish appropriate safety and health practices and determine the applicability of regulatory
limitations prior to use.
1
This test method is under the jurisdiction of ASTM Committee D14 on Adhesives and is the direct responsibility of Subcommittee D14.10 on Working Properties.
Current edition approved JuneDec. 1, 2004.2011. Published June 2004.January 2012. Originally approved in 2003. Last previous edition approved in 20032004 as
D6862 – 034. DOI: 10.1520/D6862-04.10.1520/D6862-11.
*A Summary of Changes section appears at the end of this standard.
Copyright © ASTM International, 100 Barr Harbor Drive, PO Box C700, West Conshohocken, PA 19428-2959, United States.
1
---------------------- Page: 1 ----------------------
D6862–11
2. Referenced Documents
2
2.1 ASTM Standards:
D907 Terminology of Adhesives
E4 Practices for Force Verification of Testing Machines
E177 Practice for Use of the Terms Precision and Bias in ASTM Test Methods
3. Terminology
3.1 Definitions—Many of the definitions used in this test method are defined in Terminology D907.
4. Summary of Test Method
4.1 This test method consists of testing laminated or bonded adherends, wh
...


Questions, Comments and Discussion
Ask us and Technical Secretary will try to provide an answer. You can facilitate discussion about the standard in here.