ASTM E1941-10(2016)
(Test Method)Standard Test Method for Determination of Carbon in Refractory and Reactive Metals and Their Alloys by Combustion Analysis
Standard Test Method for Determination of Carbon in Refractory and Reactive Metals and Their Alloys by Combustion Analysis
SIGNIFICANCE AND USE
5.1 This test method is intended to test for compliance with compositional specifications. It is assumed that all who use this method will be trained analysts capable of performing common laboratory procedures skillfully and safely. It is expected that the work will be performed in a properly equipped laboratory.
SCOPE
1.1 This test method applies to the determination of carbon in refractory and reactive metals and their alloys in quantities from 20 μg to 500 μg. This corresponds to mass fractions ranging from 0.004 wt % to 0.100 wt % for a 0.5 g sample (see Note 1).
Note 1: Actual quantitative range might vary from manufacturer to manufacturer and according to sample mass. Samples of higher mass may allow for proportionally lower detection limits provided complete combustion of the sample is assured.
1.2 This standard does not purport to address all of the safety concerns, if any, associated with its use. It is the responsibility of the user of this standard to establish appropriate safety and health practices and determine the applicability of regulatory limitations prior to use. Specific precautionary statements are given in Section 9.
General Information
- Status
- Published
- Publication Date
- 30-Nov-2016
- Technical Committee
- E01 - Analytical Chemistry for Metals, Ores, and Related Materials
- Drafting Committee
- E01.06 - Ti, Zr, W, Mo, Ta, Nb, Hf, Re
Relations
- Effective Date
- 01-Jan-2020
- Effective Date
- 01-Nov-2019
- Effective Date
- 15-May-2019
- Effective Date
- 01-Sep-2017
- Effective Date
- 01-Aug-2016
- Effective Date
- 15-May-2016
- Effective Date
- 01-Jul-2015
- Effective Date
- 15-May-2015
- Effective Date
- 15-Aug-2014
- Effective Date
- 01-Apr-2014
- Effective Date
- 15-Feb-2014
- Effective Date
- 01-Dec-2013
- Effective Date
- 15-Dec-2012
- Effective Date
- 15-Oct-2011
- Effective Date
- 15-Sep-2011
Overview
ASTM E1941-10(2016), Standard Test Method for Determination of Carbon in Refractory and Reactive Metals and Their Alloys by Combustion Analysis, outlines a procedure for measuring the carbon content in a wide range of refractory and reactive metals, as well as their alloys. This test method is specifically tailored for precise analysis in quantities from 20 micrograms (µg) to 500 µg, corresponding to mass fractions from 0.004% to 0.1% for a 0.5 g sample. The method uses combustion analysis and commercially available carbon analyzers, ensuring suitability for both laboratory quality assurance and specification compliance.
Key Topics
Scope of Applicability
- The method covers the determination of carbon in metals such as titanium, zirconium, hafnium, niobium, tantalum, molybdenum, tungsten, and their alloys.
- Usable for low detection limits depending on sample mass and complete combustion.
Summary of Method
- Samples are combusted in an oxygen-rich environment using an induction furnace.
- The released carbon oxidizes to carbon dioxide or monoxide and is measured via an analyzer/detector.
- The electronic readout provides the carbon content directly when properly calibrated.
Sample and Apparatus Requirements
- Utilizes single-use ceramic crucibles, accelerators (low-carbon copper, iron, tin, tungsten), and high-purity oxygen.
- Requires precise weighing equipment, clean handling, and contamination control in sample preparation.
Analyst & Laboratory Competency
- Method assumes work is performed by trained analysts using properly equipped laboratories, in accordance with standard safety and health practices.
Calibration and Validation
- Calls for calibration with certified reference materials of known carbon content.
- Blank and ongoing calibration verifications ensure measurement accuracy.
Precision and Interferences
- Extensive interlaboratory studies confirm repeatability and reproducibility for various matrices.
- No significant interferences from common alloying elements, though halides in some sponge samples can lead to carbon losses.
Applications
This ASTM standard is widely employed across industries that produce, process, or utilize refractory and reactive metals, including:
- Quality Control and Specification Compliance
- Used to verify that the carbon content of metals and alloys meets industry and customer compositional specifications.
- Metallurgical Research and Development
- Essential for R&D activities requiring precise control of alloy chemistry in advanced material development.
- Production Process Monitoring
- Helps manufacturers monitor and control carbon levels during the production of titanium, zirconium, and other specialized metals.
- Certification and Traceability
- Fundamental in certifying metal batches, supporting product traceability, and meeting contractual and regulatory requirements.
Industries benefiting from ASTM E1941-10(2016) include aerospace, automotive, nuclear, electronics, and any sector reliant on high-performance metals.
Related Standards
- ASTM E50 - Practices for Apparatus, Reagents, and Safety Considerations for Chemical Analysis of Metals, Ores, and Related Materials
- ASTM E135 - Terminology Relating to Analytical Chemistry for Metals, Ores, and Related Materials
- ASTM E1601 - Practice for Conducting an Interlaboratory Study to Evaluate the Performance of an Analytical Method
Organizations seeking to ensure accurate carbon determination and compliance with international trade and quality requirements regularly reference these standards alongside ASTM E1941-10(2016). For comprehensive analytical procedures, consultation with related ASTM standards is highly recommended.
Keywords: ASTM E1941, carbon determination, refractory metals, reactive metals, combustion analysis, metal alloys, quality control, compositional compliance, laboratory testing standards.
Buy Documents
ASTM E1941-10(2016) - Standard Test Method for Determination of Carbon in Refractory and Reactive Metals and Their Alloys by Combustion Analysis
Get Certified
Connect with accredited certification bodies for this standard

ECOCERT
Organic and sustainability certification.

Eurofins Food Testing Global
Global leader in food, environment, and pharmaceutical product testing.

Intertek Bangladesh
Intertek certification and testing services in Bangladesh.
Sponsored listings
Frequently Asked Questions
ASTM E1941-10(2016) is a standard published by ASTM International. Its full title is "Standard Test Method for Determination of Carbon in Refractory and Reactive Metals and Their Alloys by Combustion Analysis". This standard covers: SIGNIFICANCE AND USE 5.1 This test method is intended to test for compliance with compositional specifications. It is assumed that all who use this method will be trained analysts capable of performing common laboratory procedures skillfully and safely. It is expected that the work will be performed in a properly equipped laboratory. SCOPE 1.1 This test method applies to the determination of carbon in refractory and reactive metals and their alloys in quantities from 20 μg to 500 μg. This corresponds to mass fractions ranging from 0.004 wt % to 0.100 wt % for a 0.5 g sample (see Note 1). Note 1: Actual quantitative range might vary from manufacturer to manufacturer and according to sample mass. Samples of higher mass may allow for proportionally lower detection limits provided complete combustion of the sample is assured. 1.2 This standard does not purport to address all of the safety concerns, if any, associated with its use. It is the responsibility of the user of this standard to establish appropriate safety and health practices and determine the applicability of regulatory limitations prior to use. Specific precautionary statements are given in Section 9.
SIGNIFICANCE AND USE 5.1 This test method is intended to test for compliance with compositional specifications. It is assumed that all who use this method will be trained analysts capable of performing common laboratory procedures skillfully and safely. It is expected that the work will be performed in a properly equipped laboratory. SCOPE 1.1 This test method applies to the determination of carbon in refractory and reactive metals and their alloys in quantities from 20 μg to 500 μg. This corresponds to mass fractions ranging from 0.004 wt % to 0.100 wt % for a 0.5 g sample (see Note 1). Note 1: Actual quantitative range might vary from manufacturer to manufacturer and according to sample mass. Samples of higher mass may allow for proportionally lower detection limits provided complete combustion of the sample is assured. 1.2 This standard does not purport to address all of the safety concerns, if any, associated with its use. It is the responsibility of the user of this standard to establish appropriate safety and health practices and determine the applicability of regulatory limitations prior to use. Specific precautionary statements are given in Section 9.
ASTM E1941-10(2016) is classified under the following ICS (International Classification for Standards) categories: 71.040.50 - Physicochemical methods of analysis. The ICS classification helps identify the subject area and facilitates finding related standards.
ASTM E1941-10(2016) has the following relationships with other standards: It is inter standard links to ASTM E135-20, ASTM E1601-19, ASTM E135-19, ASTM E50-17, ASTM E50-11(2016), ASTM E135-16, ASTM E135-15a, ASTM E135-15, ASTM E135-14b, ASTM E135-14a, ASTM E135-14, ASTM E135-13a, ASTM E1601-12, ASTM E50-11, ASTM E135-11b. Understanding these relationships helps ensure you are using the most current and applicable version of the standard.
ASTM E1941-10(2016) is available in PDF format for immediate download after purchase. The document can be added to your cart and obtained through the secure checkout process. Digital delivery ensures instant access to the complete standard document.
Standards Content (Sample)
This international standard was developed in accordance with internationally recognized principles on standardization established in the Decision on Principles for the
Development of International Standards, Guides and Recommendations issued by the World Trade Organization Technical Barriers to Trade (TBT) Committee.
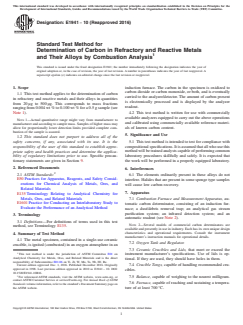
Designation: E1941 − 10 (Reapproved 2016)
Standard Test Method for
Determination of Carbon in Refractory and Reactive Metals
and Their Alloys by Combustion Analysis
This standard is issued under the fixed designation E1941; the number immediately following the designation indicates the year of
original adoption or, in the case of revision, the year of last revision. A number in parentheses indicates the year of last reapproval. A
superscript epsilon (´) indicates an editorial change since the last revision or reapproval.
1. Scope induction furnace. The carbon in the specimen is oxidized to
carbon dioxide or carbon monoxide, or both, and is eventually
1.1 This test method applies to the determination of carbon
carried to the analyzer/detector. The amount of carbon present
in refractory and reactive metals and their alloys in quantities
is electronically processed and is displayed by the analyzer
from 20 µg to 500 µg. This corresponds to mass fractions
readout.
ranging from 0.004 wt % to 0.100 wt % for a 0.5 g sample (see
Note 1). 4.2 This test method is written for use with commercially
available analyzers equipped to carry out the above operations
NOTE 1—Actual quantitative range might vary from manufacturer to
and calibrated using commercially available reference materi-
manufacturer and according to sample mass. Samples of higher mass may
allow for proportionally lower detection limits provided complete com- als of known carbon content.
bustion of the sample is assured.
5. Significance and Use
1.2 This standard does not purport to address all of the
safety concerns, if any, associated with its use. It is the 5.1 This test method is intended to test for compliance with
responsibility of the user of this standard to establish appro- compositional specifications. It is assumed that all who use this
priate safety and health practices and determine the applica- methodwillbetrainedanalystscapableofperformingcommon
bility of regulatory limitations prior to use. Specific precau- laboratory procedures skillfully and safely. It is expected that
tionary statements are given in Section 9. the work will be performed in a properly equipped laboratory.
2. Referenced Documents
6. Interferences
2.1 ASTM Standards:
6.1 The elements ordinarily present in these alloys do not
E50 Practices for Apparatus, Reagents, and Safety Consid-
interfere. Halides that are present in some sponge type samples
erations for Chemical Analysis of Metals, Ores, and
will cause low carbon recovery.
Related Materials
7. Apparatus
E135 Terminology Relating to Analytical Chemistry for
Metals, Ores, and Related Materials
7.1 Combustion Furnace and Measurement Apparatus, au-
E1601 Practice for Conducting an Interlaboratory Study to
tomatic carbon determinator, consisting of an induction fur-
Evaluate the Performance of an Analytical Method
nace; a dust/debris removal trap; an analytical gas stream
purification system; an infrared detection system; and an
3. Terminology
automatic readout (see Note 2).
3.1 Definitions—For definitions of terms used in this test
NOTE 2—Several models of commercial carbon determinators are
method, see Terminology E135.
available and presently in use in industry. Each has its own unique design
characteristics and operational requirements. Consult the instrument
4. Summary of Test Method
manufacturer’s instruction manuals for operational details.
4.1 The metal specimen, contained in a single-use ceramic
7.2 Oxygen Tank and Regulator.
crucible, is ignited (combusted) in an oxygen atmosphere in an
7.3 Ceramic Crucibles and Lids, that meet or exceed the
This test method is under the jurisdiction of ASTM Committee E01 on instrument manufacturer’s specifications. Use of lids is op-
Analytical Chemistry for Metals, Ores, and Related Materials and is the direct
tional. If they are used, they should have holes in them.
responsibility of Subcommittee E01.06 on Ti, Zr, W, Mo, Ta, Nb, Hf, Re.
Current edition approved Dec. 1, 2016. Published December 2016. Originally 7.4 Crucible Tongs, capable of handling recommended cru-
approved in 1998. Last previous edition approved in 2010 as E1941 – 10. DOI:
cibles.
10.1520/E1941-10R16.
For referenced ASTM standards, visit the ASTM website, www.astm.org, or 7.5 Balance, capable of weighing to the nearest milligram.
contact ASTM Customer Service at service@astm.org. For Annual Book of ASTM
7.6 Furnace, capable of reaching and sustaining a tempera-
Standards volume information, refer to the standard’s Document Summary page on
the ASTM website. ture of at least 700 °C.
Copyright © ASTM International, 100 Barr Harbor Drive, PO Box C700, West Conshohocken, PA 19428-2959. United States
E1941 − 10 (2016)
8. Reagents 11.2 Nibble, drill, shear, or machine a clean sample so that
pieces are uniform in size and will fit into the ceramic crucible
8.1 Acetone (A.C.S. Reagent, or other suitable, degreasing
without extending over the rim.
reagents).
11.3 If necessary, wash the pieces in acetone or other
8.2 Copper Accelerator, low carbon (see Note 3).
solvents (Note 6) to remove any oil, grease, or cutting fluid
8.3 High Purity Iron Chip Accelerator, low carbon (see
contamination. For heavier contamination, the sample may be
Note 3).
washed in a soap solution or in a sonic cleaner, or both, and
8.4 Magnesium Perchlorate (Anhydrone), purity as speci- rinsed with a solvent. Decant the solvent and dry the sample.
Careshouldbetakentoensurecompleteremovalofsolventsor
fied by equipment manufacturer.
cleaners, especially from porous samples, which may trap
8.5 Oxygen, high purity (as specified by equipment manu-
cleaning liquids, biasing results. Store the clean dried samples
facturer).
in a manner that minimizes the potential for contamination.
8.6 Tin Accelerator, low carbon (see Note 3).
NOTE 6—Other solvents may be alternative organic solvents, inorganic
8.7 Tungsten Accelerator, low carbon (see Note 3).
solvents or inorganic acids that are capable of removing oil, grease or
machining fluids.
8.8 Sodium Hydroxide on Clay Base, commonly known as
Ascarite III (purity as specified by equipment manufacturer).
12. Calibration
8.9 Reference Materials, with known carbon content.
12.1 Calibration Reference Materials—The calibration ref-
NOTE 3—The total carbon content of all accelerators used must be
erencematerials(RMs)willconsistofoneormorecommercial
sufficiently low to allow for blanking as described in Section 12.
RMs of known carbon content (the high RM value should
slightly exceed that of the unknown). Use appropriate
9. Hazards
accelerators, for example one scoop (approximately 1 g) of
9.1 For hazards to be observed in the use of certain reagents
iron chip accelerator and one scoop (approximately 1.5 g) of
and equipment in this test method, refer to Practices E50.
copper accelerator (Note 7) in a prepared crucible, plus a
prepared crucible lid.
9.2 Use care when handling hot crucibles and operating
furnaces to avoid personal injury by either burn or electrical
NOTE 7—Users of simultaneous carbon-sulfur determinators should be
shock.
aware that copper accelerator will have a negative effect on the sulfur
result caused by the formation of copper sulfide. Other accelerator
combinations that allow for complete combustion without the use of
10. Preparation of Apparatus
copper may be used if data supporting the effectiveness of the alternate
10.1 Make a minimum of two determinations to condition
acceleratorsisavailable.Thecombinationof3 partsiron,3 partstungsten,
and 2 parts tin has been found effective for carbon and sulfur.
the instrument as directed in Section 12 before attempting to
calibrate the system or determine the blank.
12.2 Crucible Blank—The crucible blank will consist of a
crucible and lid prepared the same way as those used for
10.2 Crucible and Lid Preparation—Commercially avail-
samples, containing the same accelerator as that used for
able crucibles and lids (Note 4) often contain levels of carbon
samples.
sufficient to adversely affect results. To minimize this problem,
12.2.1 Prepare four crucible blanks as described in 12.2.
crucibles and lids may be heat treated prior to use to remove
12.2.2 Follow the blank calibration procedure as detailed in
contamination. Heating to 700 °C to 800 °C for at least 2 h or
the manufacturer’s instruction manual, using at least 3 blanks.
to 900 °C to 1000 °C for at least 1 h. has been determined to be
12.2.3 Analyze one additional blank to verify the blank
effective. Other heating conditions may be specified if t
...


Questions, Comments and Discussion
Ask us and Technical Secretary will try to provide an answer. You can facilitate discussion about the standard in here.
Loading comments...