ASTM E323-11
(Specification)Standard Specification for Perforated-Plate Sieves for Testing Purposes
Standard Specification for Perforated-Plate Sieves for Testing Purposes
ABSTRACT
This specification covers perforated-plate sieves with either round or square apertures, normally mounted in a frame for use in precision testing in the classification of materials according to designated nominal particle size. The materials used in the manufacture of these sieves shall be steel, stainless steel, brass, bronze, or other rigid material. Each plate of specified sieve designation and aperture size shall conform to individually allocated dimensional requirements.
SCOPE
1.1 This specification covers perforated plate with either round or square apertures, normally mounted in a frame for use as sieves in precision testing in the classification of materials according to designated nominal particle size. A method for checking the accuracy of perforated sieve plates is included as information in Appendix X1.
Note 1—The perforated-plate sieves covered by this specification are intended for general precision testing. Some industries may require more restricted specifications for sieves for special testing purposes.
Note 2—For other types of sieves see Specifications E11 and E161.
Note 3—Complete instructions and procedures on the use of test sieves are contained in ASTM STP 447, Manual on Test Sieving Methods. This manual also contains a list of all ASTM published standards on sieve analysis procedures for specific materials or industries.
1.2 The values stated in inch-pound units are to be regarded as the standard. The values given in parentheses are mathematical conversions to SI units that are provided for information only and are not considered standard.
1.3 This standard does not purport to address all of the safety concerns, if any, associated with its use. It is the responsibility of the user of this standard to establish appropriate safety and health practices and determine the applicability of regulatory limitations prior to use.
General Information
Relations
Buy Standard
Standards Content (Sample)
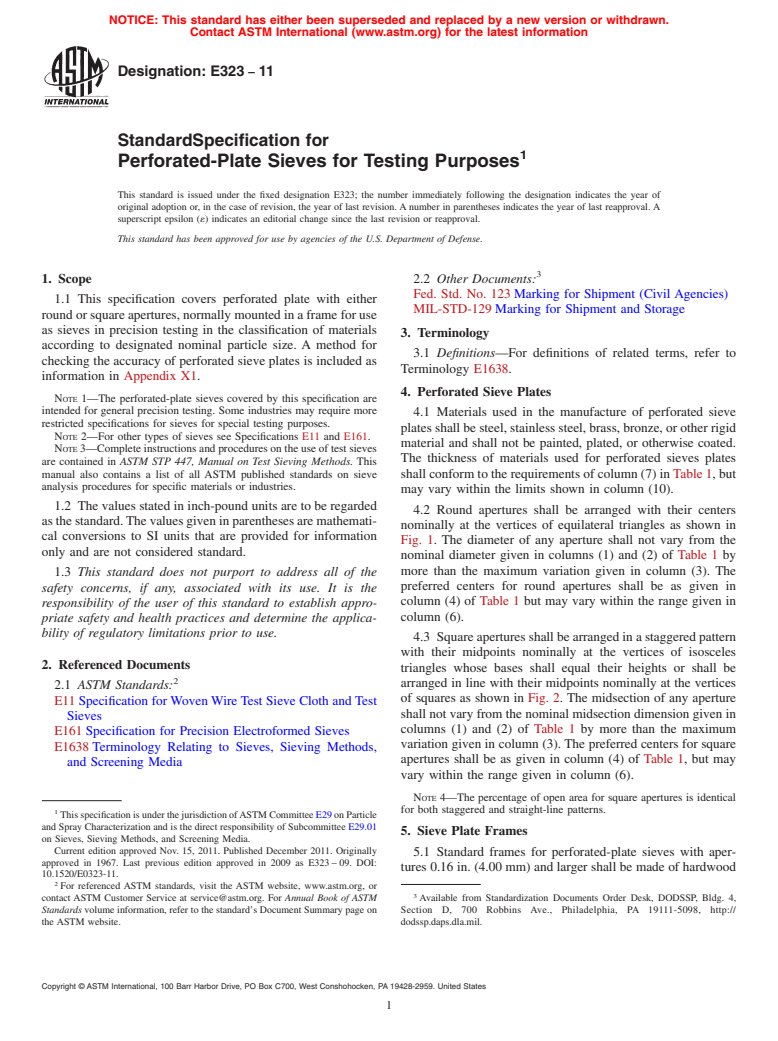
NOTICE: This standard has either been superseded and replaced by a new version or withdrawn.
Contact ASTM International (www.astm.org) for the latest information
Designation:E323 −11
StandardSpecification for
1
Perforated-Plate Sieves for Testing Purposes
This standard is issued under the fixed designation E323; the number immediately following the designation indicates the year of
original adoption or, in the case of revision, the year of last revision. A number in parentheses indicates the year of last reapproval. A
superscript epsilon (´) indicates an editorial change since the last revision or reapproval.
This standard has been approved for use by agencies of the U.S. Department of Defense.
3
1. Scope 2.2 Other Documents:
Fed. Std. No. 123 Marking for Shipment (Civil Agencies)
1.1 This specification covers perforated plate with either
MIL-STD-129 Marking for Shipment and Storage
round or square apertures, normally mounted in a frame for use
as sieves in precision testing in the classification of materials
3. Terminology
according to designated nominal particle size. A method for
3.1 Definitions—For definitions of related terms, refer to
checking the accuracy of perforated sieve plates is included as
Terminology E1638.
information in Appendix X1.
4. Perforated Sieve Plates
NOTE 1—The perforated-plate sieves covered by this specification are
intended for general precision testing. Some industries may require more
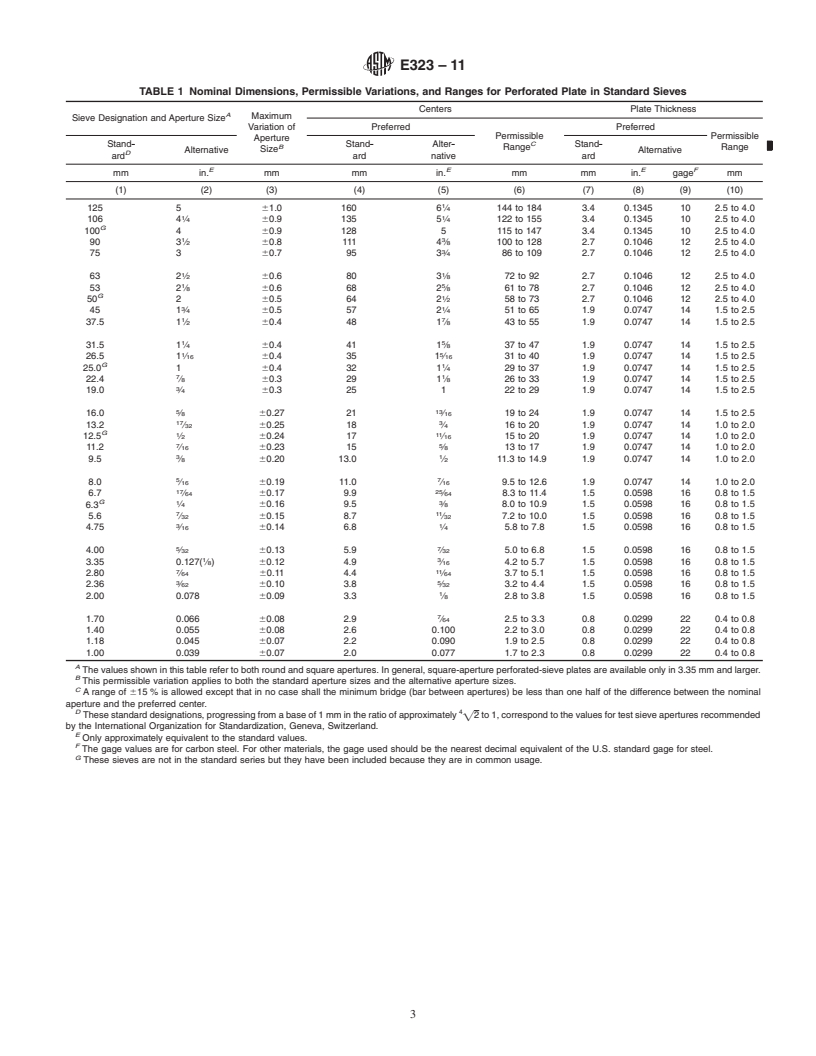
4.1 Materials used in the manufacture of perforated sieve
restricted specifications for sieves for special testing purposes.
plates shall be steel, stainless steel, brass, bronze, or other rigid
NOTE 2—For other types of sieves see Specifications E11 and E161.
material and shall not be painted, plated, or otherwise coated.
NOTE 3—Complete instructions and procedures on the use of test sieves
The thickness of materials used for perforated sieves plates
are contained in ASTM STP 447, Manual on Test Sieving Methods. This
manual also contains a list of all ASTM published standards on sieve shall conform to the requirements of column (7) in Table 1, but
analysis procedures for specific materials or industries.
may vary within the limits shown in column (10).
1.2 The values stated in inch-pound units are to be regarded
4.2 Round apertures shall be arranged with their centers
asthestandard.Thevaluesgiveninparenthesesaremathemati-
nominally at the vertices of equilateral triangles as shown in
cal conversions to SI units that are provided for information
Fig. 1. The diameter of any aperture shall not vary from the
only and are not considered standard.
nominal diameter given in columns (1) and (2) of Table 1 by
more than the maximum variation given in column (3). The
1.3 This standard does not purport to address all of the
preferred centers for round apertures shall be as given in
safety concerns, if any, associated with its use. It is the
column (4) of Table 1 but may vary within the range given in
responsibility of the user of this standard to establish appro-
column (6).
priate safety and health practices and determine the applica-
bility of regulatory limitations prior to use.
4.3 Square apertures shall be arranged in a staggered pattern
with their midpoints nominally at the vertices of isosceles
2. Referenced Documents
triangles whose bases shall equal their heights or shall be
2
arranged in line with their midpoints nominally at the vertices
2.1 ASTM Standards:
of squares as shown in Fig. 2. The midsection of any aperture
E11 Specification for Woven Wire Test Sieve Cloth and Test
shall not vary from the nominal midsection dimension given in
Sieves
columns (1) and (2) of Table 1 by more than the maximum
E161 Specification for Precision Electroformed Sieves
variation given in column (3). The preferred centers for square
E1638 Terminology Relating to Sieves, Sieving Methods,
apertures shall be as given in column (4) of Table 1, but may
and Screening Media
vary within the range given in column (6).
NOTE 4—The percentage of open area for square apertures is identical
for both staggered and straight-line patterns.
1
ThisspecificationisunderthejurisdictionofASTMCommitteeE29onParticle
and Spray Characterization and is the direct responsibility of Subcommittee E29.01
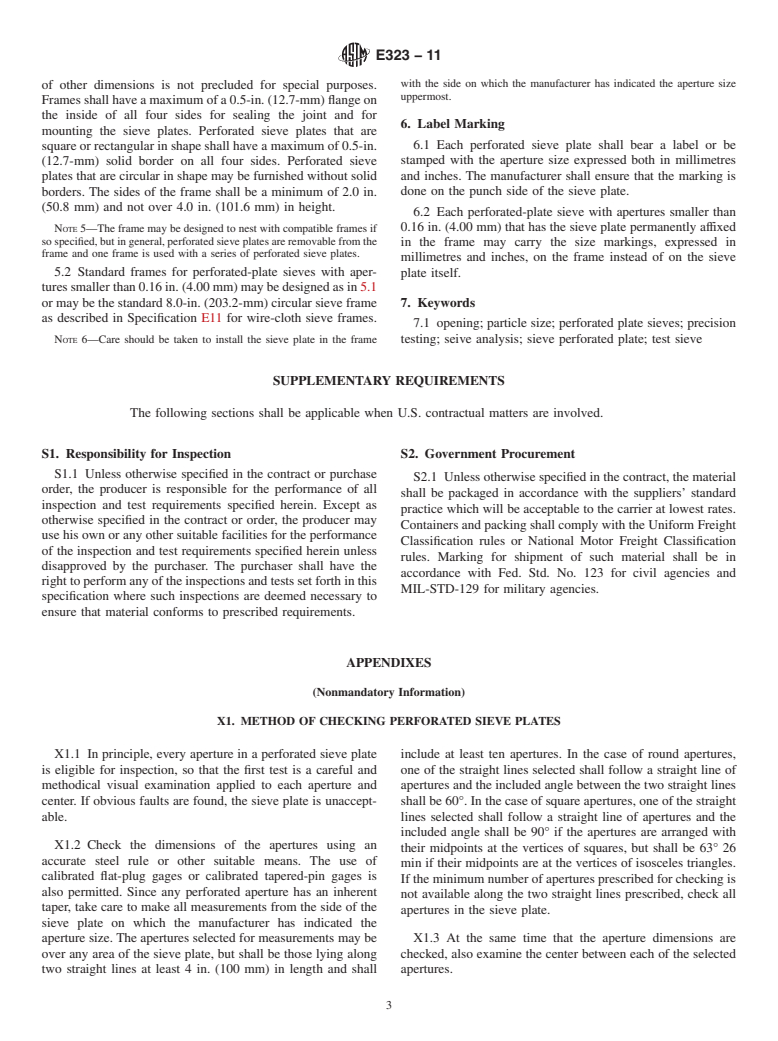
5. Sieve Plate Frames
on Sieves, Sieving Methods, and Screening Media.
Current edition approved Nov. 15, 2011. Published December 2011. Originally
5.1 Standard frames for perforated-plate sieves with aper-
approved in 1967. Last previous edition approved in 2009 as E323 – 09. DOI:
tures 0.16 in. (4.00 mm) and larger shall be made of hardwood
10.1520/E0323-11.
2
For referenced ASTM standards, visit the ASTM website, www.astm.org, or
3
contact ASTM Customer Service at service@astm.org. For Annual Book of ASTM Available from Standardization Documents Order Desk, DODSSP, Bldg. 4,
Standards volume information, refer to the standard’s Document Summary page on Section D, 700 Robbins Ave., Philadelphia, PA 19111-5098, http://
the ASTM website. dodssp.daps.dla.mil.
C
...
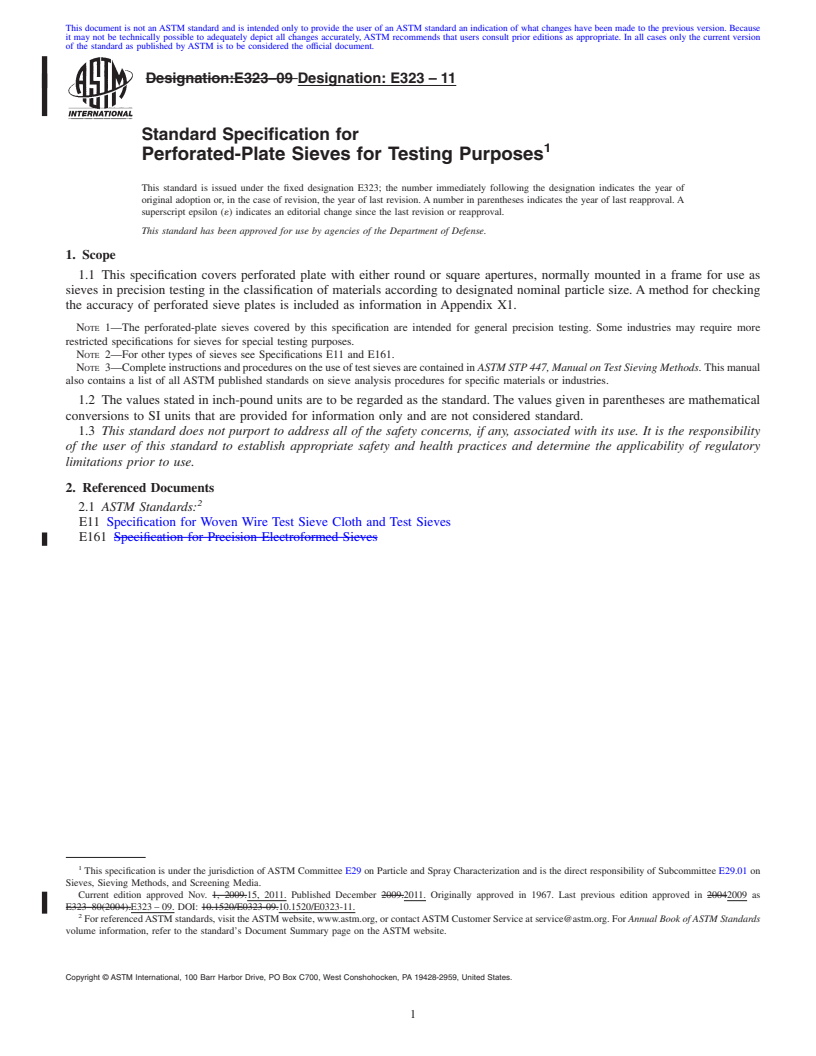
This document is not an ASTM standard and is intended only to provide the user of an ASTM standard an indication of what changes have been made to the previous version. Because
it may not be technically possible to adequately depict all changes accurately, ASTM recommends that users consult prior editions as appropriate. In all cases only the current version
of the standard as published by ASTM is to be considered the official document.
Designation:E323–09 Designation: E323 – 11
Standard Specification for
1
Perforated-Plate Sieves for Testing Purposes
This standard is issued under the fixed designation E323; the number immediately following the designation indicates the year of
original adoption or, in the case of revision, the year of last revision. A number in parentheses indicates the year of last reapproval. A
superscript epsilon (´) indicates an editorial change since the last revision or reapproval.
This standard has been approved for use by agencies of the Department of Defense.
1. Scope
1.1 This specification covers perforated plate with either round or square apertures, normally mounted in a frame for use as
sieves in precision testing in the classification of materials according to designated nominal particle size. A method for checking
the accuracy of perforated sieve plates is included as information in Appendix X1.
NOTE 1—The perforated-plate sieves covered by this specification are intended for general precision testing. Some industries may require more
restricted specifications for sieves for special testing purposes.
NOTE 2—For other types of sieves see Specifications E11 and E161.
NOTE 3—Completeinstructionsandproceduresontheuseoftestsievesarecontainedin ASTM STP 447, Manual on Test Sieving Methods.Thismanual
also contains a list of all ASTM published standards on sieve analysis procedures for specific materials or industries.
1.2 The values stated in inch-pound units are to be regarded as the standard. The values given in parentheses are mathematical
conversions to SI units that are provided for information only and are not considered standard.
1.3 This standard does not purport to address all of the safety concerns, if any, associated with its use. It is the responsibility
of the user of this standard to establish appropriate safety and health practices and determine the applicability of regulatory
limitations prior to use.
2. Referenced Documents
2
2.1 ASTM Standards:
E11 Specification for Woven Wire Test Sieve Cloth and Test Sieves
E161 Specification for Precision Electroformed Sieves
1
This specification is under the jurisdiction ofASTM Committee E29 on Particle and Spray Characterization and is the direct responsibility of Subcommittee E29.01 on
Sieves, Sieving Methods, and Screening Media.
Current edition approved Nov. 1, 2009.15, 2011. Published December 2009.2011. Originally approved in 1967. Last previous edition approved in 20042009 as
E323–80(2004).E323 – 09. DOI: 10.1520/E0323-09.10.1520/E0323-11.
2
For referencedASTM standards, visit theASTM website, www.astm.org, or contactASTM Customer Service at service@astm.org. For Annual Book of ASTM Standards
volume information, refer to the standard’s Document Summary page on the ASTM website.
Copyright © ASTM International, 100 Barr Harbor Drive, PO Box C700, West Conshohocken, PA 19428-2959, United States.
1
---------------------- Page: 1 ----------------------
E323 – 11
Specification for Precision Electroformed Sieves
E1638 Terminology Relating to Sieves, Sieving Methods, and Screening Media
3
2.2 Other Documents:
Fed. Std. No. 123 Marking for Shipment (Civil Agencies)
MIL-STD-129 Marking for Shipment and Storage
3. Terminology
3.1 Definitions—For definitions of related terms, refer to Terminology E1638.
4. Perforated Sieve Plates
34.1 Materials used in the manufacture of perforated sieve plates shall be steel, stainless steel, brass, bronze, or other rigid
material and shall not be painted, plated, or otherwise coated. The thickness of materials used for perforated sieves plates shall
conform to the requirements of column (7) in Table 1, but may vary within the limits shown in column (10).
3.2Round4.2 Round apertures shall be arranged with their centers nominally at the vertices of equilateral triangles as shown in
Fig. 1. The diameter of any aperture shall not vary from the nominal diameter given in columns (1) and (2) of Table 1 by more
than the maximum variation given in column (3).The preferred centers for round apertures shall be as given in column (4) ofTable
1 but may vary within the range given in column (6).
34.3 Square apertures shall be arranged in a staggered pattern with their midpoints nominally at the vertices of isosceles
triangles whose bases shall equal their heights or shall be arranged in line with their midpoints nominally at the vertices of squares
as shown in Fig. 2. The midsection of any aperture shall not vary from the nominal midsection dimension given in columns (1)
and (2) of Table 1 by more than the maximum vari
...


Questions, Comments and Discussion
Ask us and Technical Secretary will try to provide an answer. You can facilitate discussion about the standard in here.