ASTM B820-23
(Test Method)Standard Test Method for Bend Test for Determining the Formability of Copper and Copper Alloy Strip
Standard Test Method for Bend Test for Determining the Formability of Copper and Copper Alloy Strip
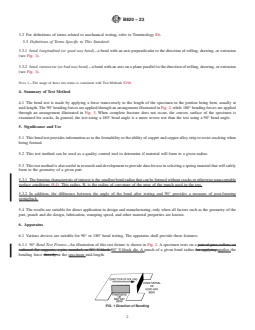
SIGNIFICANCE AND USE
5.1 This bend test provides information as to the formability or the ability of copper and copper alloy strip to resist cracking when being formed.
5.2 This test method can be used as a quality control tool to determine if material will form to a given radius.
5.3 This test method is also useful in research and development to provide data for use in selecting a spring material that will safely form to the geometry of a given part.
5.3.1 The forming characteristic of interest is the smallest bend radius that can be formed without cracks or otherwise unacceptable surface conditions (8.4). This radius, R, is the radius of curvature of the nose of the punch used in the test.
5.3.2 In addition, the difference between the angle of the bend after testing and 90° provides a measure of post-forming springback.
5.4 The results are suitable for direct application in design and manufacturing, only when all factors such as the geometry of the part, punch and die design, lubrication, stamping speed, and other material properties are known.
SCOPE
1.1 This test method covers the technique of bend testing copper and copper alloy strip samples to determine product formability or the ability to resist cracking when forming a bend around a specific radius. The criterion for failure is the occurrence of cracks on the convex surface of the bend.
1.2 This bend test is limited to strip from 0.003 in. to and including 0.031 in. (0.076 mm to and including 0.79 mm) thick.
1.3 The forming or punch radius for the bend test shall be determined by agreement between the manufacturer or supplier and purchaser. This punch radius is typically equal to or greater than the minimum bend radius without failure for the alloy, temper and thickness combination of the strip being tested.
1.4 Units—The values stated in inch-pound units are to be regarded as standard. The values given in parentheses are mathematical conversions to SI units which are provided for information only and are not considered standard.
1.5 This standard does not purport to address all of the safety concerns, if any, associated with its use. It is the responsibility of the user of this standard to establish appropriate safety, health, and environmental practices and determine the applicability of regulatory limitations prior to use.
1.6 This international standard was developed in accordance with internationally recognized principles on standardization established in the Decision on Principles for the Development of International Standards, Guides and Recommendations issued by the World Trade Organization Technical Barriers to Trade (TBT) Committee.
General Information
- Status
- Published
- Publication Date
- 31-Oct-2023
- Technical Committee
- B05 - Copper and Copper Alloys
- Drafting Committee
- B05.06 - Methods of Test
Relations
- Effective Date
- 01-Nov-2023
- Effective Date
- 01-Nov-2023
- Referred By
ASTM B194-22 - Standard Specification for Copper-Beryllium Alloy Plate, Sheet, Strip, and Rolled Bar - Effective Date
- 01-Nov-2023
- Effective Date
- 01-Nov-2023
- Effective Date
- 01-Nov-2023
- Effective Date
- 01-Nov-2023
Overview
ASTM B820-23: Standard Test Method for Bend Test for Determining the Formability of Copper and Copper Alloy Strip defines a reliable method for evaluating the capacity of copper and copper alloy strips to withstand bending without cracking or developing unacceptable surface conditions. This internationally recognized standard, maintained by ASTM, serves as a critical tool in both quality control and research and development for copper-based materials.
The method involves bending strip samples around a specified radius using controlled fixtures. The main goal is to assess the strip's formability by determining the minimum bend radius that does not result in surface cracks, as well as to measure the material’s springback after forming. This information helps manufacturers and designers select appropriate materials and confirm process reliability.
Key Topics
- Formability Assessment: Measures the ability of copper and copper alloy strip to resist cracking during forming processes, ensuring the material is suitable for intended geometric configurations.
- Bend Test Procedures: Details apparatus and protocols for conducting 90° and 180° bend tests, including specimen preparation and examination of results.
- Thickness Range Covered: Applicable for strip thickness from 0.003 in. to 0.031 in. (0.076 mm to 0.79 mm), covering a wide span of typical copper strip products.
- Quality Control Application: Offers pass/fail criteria based on visual inspection and, if necessary, metallographic cross-section analysis, establishing a consistent quality benchmark.
- Directional Testing: Requires tests in both longitudinal (good way) and transverse (bad way) orientations relative to material rolling, identifying potential anisotropy in formability.
- Minimum Bend Radius: Identifies the smallest radius at which strips can be bent without developing cracks, crucial for part design and process setting.
- Springback Measurement: Evaluates post-forming angular recovery, which is essential for predicting final component shape in production.
Applications
ASTM B820-23 is extensively used in multiple stages of the copper product lifecycle:
- Quality Assurance: Manufacturers apply this standard to verify that copper and copper alloy strip batches meet formability requirements, thus preventing downstream production issues.
- Material Selection: Engineers reference bend test results to select strip grades and tempers suitable for complex stamped or formed parts, such as springs or electrical connectors.
- Process Optimization: Production teams use bend test data to set appropriate tooling radii, lubrication types, and forming speeds, minimizing scrap and optimizing yield.
- Research and Development: Laboratories use the bend test for developing new copper alloys or refining processing parameters, aiming to enhance strip performance in demanding applications.
- Design Validation: Product designers rely on the minimum bend radius and springback metrics to ensure that component geometries can be consistently manufactured without defect.
Related Standards
To fully implement and understand the ASTM B820-23 test method, reference to several associated standards is recommended:
- ASTM B846: Terminology for Copper and Copper Alloys - Provides essential definitions for copper alloy categories and characteristics.
- ASTM E6: Terminology Relating to Methods of Mechanical Testing - Offers general mechanical test definitions.
- ASTM E290: Test Methods for Bend Testing of Materials for Ductility - Covers general procedures and guidance for bend testing, complementing B820-23’s specifics.
- Industry Health and Safety Standards: Users should also consider applicable safety, health, and environmental protocols when conducting bend tests.
Keywords: ASTM B820, copper strip, bend test, copper alloy, formability test, minimum bend radius, quality control, springback, ductility, copper standards, manufacturing, material testing.
Buy Documents
ASTM B820-23 - Standard Test Method for Bend Test for Determining the Formability of Copper and Copper Alloy Strip
REDLINE ASTM B820-23 - Standard Test Method for Bend Test for Determining the Formability of Copper and Copper Alloy Strip
Get Certified
Connect with accredited certification bodies for this standard

Element Materials Technology
Materials testing and product certification.

Inštitut za kovinske materiale in tehnologije
Institute of Metals and Technology. Materials testing, metallurgical analysis, NDT.
Sponsored listings
Frequently Asked Questions
ASTM B820-23 is a standard published by ASTM International. Its full title is "Standard Test Method for Bend Test for Determining the Formability of Copper and Copper Alloy Strip". This standard covers: SIGNIFICANCE AND USE 5.1 This bend test provides information as to the formability or the ability of copper and copper alloy strip to resist cracking when being formed. 5.2 This test method can be used as a quality control tool to determine if material will form to a given radius. 5.3 This test method is also useful in research and development to provide data for use in selecting a spring material that will safely form to the geometry of a given part. 5.3.1 The forming characteristic of interest is the smallest bend radius that can be formed without cracks or otherwise unacceptable surface conditions (8.4). This radius, R, is the radius of curvature of the nose of the punch used in the test. 5.3.2 In addition, the difference between the angle of the bend after testing and 90° provides a measure of post-forming springback. 5.4 The results are suitable for direct application in design and manufacturing, only when all factors such as the geometry of the part, punch and die design, lubrication, stamping speed, and other material properties are known. SCOPE 1.1 This test method covers the technique of bend testing copper and copper alloy strip samples to determine product formability or the ability to resist cracking when forming a bend around a specific radius. The criterion for failure is the occurrence of cracks on the convex surface of the bend. 1.2 This bend test is limited to strip from 0.003 in. to and including 0.031 in. (0.076 mm to and including 0.79 mm) thick. 1.3 The forming or punch radius for the bend test shall be determined by agreement between the manufacturer or supplier and purchaser. This punch radius is typically equal to or greater than the minimum bend radius without failure for the alloy, temper and thickness combination of the strip being tested. 1.4 Units—The values stated in inch-pound units are to be regarded as standard. The values given in parentheses are mathematical conversions to SI units which are provided for information only and are not considered standard. 1.5 This standard does not purport to address all of the safety concerns, if any, associated with its use. It is the responsibility of the user of this standard to establish appropriate safety, health, and environmental practices and determine the applicability of regulatory limitations prior to use. 1.6 This international standard was developed in accordance with internationally recognized principles on standardization established in the Decision on Principles for the Development of International Standards, Guides and Recommendations issued by the World Trade Organization Technical Barriers to Trade (TBT) Committee.
SIGNIFICANCE AND USE 5.1 This bend test provides information as to the formability or the ability of copper and copper alloy strip to resist cracking when being formed. 5.2 This test method can be used as a quality control tool to determine if material will form to a given radius. 5.3 This test method is also useful in research and development to provide data for use in selecting a spring material that will safely form to the geometry of a given part. 5.3.1 The forming characteristic of interest is the smallest bend radius that can be formed without cracks or otherwise unacceptable surface conditions (8.4). This radius, R, is the radius of curvature of the nose of the punch used in the test. 5.3.2 In addition, the difference between the angle of the bend after testing and 90° provides a measure of post-forming springback. 5.4 The results are suitable for direct application in design and manufacturing, only when all factors such as the geometry of the part, punch and die design, lubrication, stamping speed, and other material properties are known. SCOPE 1.1 This test method covers the technique of bend testing copper and copper alloy strip samples to determine product formability or the ability to resist cracking when forming a bend around a specific radius. The criterion for failure is the occurrence of cracks on the convex surface of the bend. 1.2 This bend test is limited to strip from 0.003 in. to and including 0.031 in. (0.076 mm to and including 0.79 mm) thick. 1.3 The forming or punch radius for the bend test shall be determined by agreement between the manufacturer or supplier and purchaser. This punch radius is typically equal to or greater than the minimum bend radius without failure for the alloy, temper and thickness combination of the strip being tested. 1.4 Units—The values stated in inch-pound units are to be regarded as standard. The values given in parentheses are mathematical conversions to SI units which are provided for information only and are not considered standard. 1.5 This standard does not purport to address all of the safety concerns, if any, associated with its use. It is the responsibility of the user of this standard to establish appropriate safety, health, and environmental practices and determine the applicability of regulatory limitations prior to use. 1.6 This international standard was developed in accordance with internationally recognized principles on standardization established in the Decision on Principles for the Development of International Standards, Guides and Recommendations issued by the World Trade Organization Technical Barriers to Trade (TBT) Committee.
ASTM B820-23 is classified under the following ICS (International Classification for Standards) categories: 77.150.30 - Copper products. The ICS classification helps identify the subject area and facilitates finding related standards.
ASTM B820-23 has the following relationships with other standards: It is inter standard links to ASTM B820-18, ASTM B248M-22, ASTM B194-22, ASTM B888/B888M-19, ASTM B740-21, ASTM B248-22. Understanding these relationships helps ensure you are using the most current and applicable version of the standard.
ASTM B820-23 is available in PDF format for immediate download after purchase. The document can be added to your cart and obtained through the secure checkout process. Digital delivery ensures instant access to the complete standard document.
Standards Content (Sample)
This international standard was developed in accordance with internationally recognized principles on standardization established in the Decision on Principles for the
Development of International Standards, Guides and Recommendations issued by the World Trade Organization Technical Barriers to Trade (TBT) Committee.
Designation: B820 − 23
Standard Test Method for
Bend Test for Determining the Formability of Copper and
Copper Alloy Strip
This standard is issued under the fixed designation B820; the number immediately following the designation indicates the year of
original adoption or, in the case of revision, the year of last revision. A number in parentheses indicates the year of last reapproval. A
superscript epsilon (´) indicates an editorial change since the last revision or reapproval.
1. Scope* 2. Referenced Documents
2.1 ASTM Standards:
1.1 This test method covers the technique of bend testing
B846 Terminology for Copper and Copper Alloys
copper and copper alloy strip samples to determine product
E6 Terminology Relating to Methods of Mechanical Testing
formability or the ability to resist cracking when forming a
E290 Test Methods for Bend Testing of Material for Ductil-
bend around a specific radius. The criterion for failure is the
ity
occurrence of cracks on the convex surface of the bend.
3. Terminology
1.2 This bend test is limited to strip from 0.003 in. to and
including 0.031 in. (0.076 mm to and including 0.79 mm)
3.1 For definitions of terms related to copper and copper
thick. alloys, refer to Terminology B846.
3.2 For definitions of terms related to mechanical testing,
1.3 The forming or punch radius for the bend test shall be
refer to Terminology E6.
determined by agreement between the manufacturer or supplier
and purchaser. This punch radius is typically equal to or greater
3.3 Definitions of Terms Specific to This Standard:
than the minimum bend radius without failure for the alloy,
3.3.1 bend, longitudinal (or good way bend)—a bend with
temper and thickness combination of the strip being tested. an axis perpendicular to the direction of rolling, drawing, or
extrusion (see Fig. 1).
1.4 Units—The values stated in inch-pound units are to be
3.3.2 bend, transverse (or bad way bend)—a bend with an
regarded as standard. The values given in parentheses are
axis on a plane parallel to the direction of rolling, drawing, or
mathematical conversions to SI units which are provided for
extrusion (see Fig. 1).
information only and are not considered standard.
NOTE 1—The usage of these two terms is consistent with Test Methods
1.5 This standard does not purport to address all of the
E290.
safety concerns, if any, associated with its use. It is the
responsibility of the user of this standard to establish appro- 4. Summary of Test Method
priate safety, health, and environmental practices and deter-
4.1 The bend test is made by applying a force transversely
mine the applicability of regulatory limitations prior to use.
to the length of the specimen in the portion being bent, usually
1.6 This international standard was developed in accor- at mid-length. The 90° bending forces are applied through an
dance with internationally recognized principles on standard-
arrangement illustrated in Fig. 2, while 180° bending forces are
ization established in the Decision on Principles for the applied through an arrangement illustrated in Fig. 3. When
Development of International Standards, Guides and Recom- complete fracture does not occur, the convex surface of the
specimen is examined for cracks. In general, the test using a
mendations issued by the World Trade Organization Technical
Barriers to Trade (TBT) Committee. 180° bend angle is a more severe test than the test using a 90°
bend angle.
5. Significance and Use
5.1 This bend test provides information as to the formability
or the ability of copper and copper alloy strip to resist cracking
when being formed.
This test method is under the jurisdiction of ASTM Committee B05 on Copper
and Copper Alloys and is the direct responsibility of Subcommittee B05.06 on
Methods of Test. For referenced ASTM standards, visit the ASTM website, www.astm.org, or
Current edition approved Nov. 1, 2023. Published November 2023. Originally contact ASTM Customer Service at service@astm.org. For Annual Book of ASTM
approved in 1992. Last previous edition approved in 2018 as B820 – 18. DOI: Standards volume information, refer to the standard’s Document Summary page on
10.1520/B0820-23. the ASTM website.
*A Summary of Changes section appears at the end of this standard
Copyright © ASTM International, 100 Barr Harbor Drive, PO Box C700, West Conshohocken, PA 19428-2959. United States
B820 − 23
die. A punch of a given bend radius applies the bending force
at the specimen mid-length.
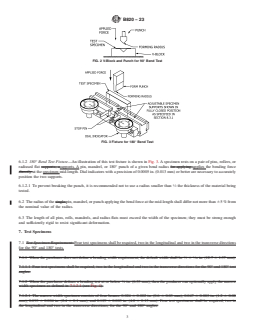
6.1.2 180° Bend Test Fixture—An illustration of this test
fixture is shown in Fig. 3. A specimen rests on a pair of pins,
rollers, or radiused flat supports. A pin, mandrel, or 180° punch
of a given bend radius applies the bending force at the
specimen mid-length. Dial indicators with a precision of
FIG. 1 Direction of Bending
0.0005 in. (0.013 mm) or better are necessary to accurately
position the two supports.
6.1.2.1 To prevent breaking the punch, it is recommended
not to use a radius smaller than ⁄2 the thickness of the material
being tested.
6.2 The radius of the pin, mandrel, or punch applying the
bend force at the mid-length shall differ not more than 65 %
from the nominal value of the radius.
FIG. 2 V-Block and Punch for 90° Bend Test
6.3 The length of all pins, rolls, mandrels, and radius flats
must exceed the width of the specimen; they must be strong
enough and sufficiently rigid to resist significant deformation.
7. Test Specimens
7.1 Four test specimens shall be required, two in the
longitudinal and two in the transverse directions for the 90°
and 180° tests.
7.2 The specimen may be prepared by cutting, shearing, or
stamping.
7.3 The specimen thickness shall be measured using a
micrometer with a precision of 0.0001 in. (0.00254 mm) or
higher.
7.4 The specimen length be any convenient length greater
than ⁄2 in. (12.7 mm) unless specified otherwise by the pur-
chaser.
FIG. 3 Fixture for 180° Bend Test
7.4.1 In a longitudinal specimen, its length shall be parallel
to the direction of rolling as indicated in Fig. 1.
7.4.2 In a transverse specimen, its length shall be perpen-
dicular to the direction of rolling as indicated in Fig. 1.
5.2 This test method can be used as a quality control tool to
determine if material will form to a given radius.
NOTE 2—The bending characteristics of a metal vary with the orienta-
tion of the bends to the direction of rolling. A longitudinal bend will
5.3 This test method is also useful in research and develop-
typically take a sharper bend radius than a transverse bend. This
ment to provide data for use in selecting a spring material that
characteristic becomes more pronounced as the metal thickness increases.
will safely form to the geometry of a given part.
1 1
7.5 The specimen width shall be ⁄2 in. 6 ⁄16 in. (12.7 mm
5.3.1 The forming characteristic of interest is the smallest
6 1.57 mm) unless otherwise agreed upon between the manu-
bend radius that can be formed without cracks or otherwise
facturer or supplier and purchaser.
unacceptable surface conditions (8.4). This radius, R, is the
7.5.1 When the purchaser requires a specimen width less
radius of curvature of the nose of the punch used in the test.
than or equal to ⁄4 in. (6.35 mm) the producer can optionally
5.3.2 In addition, the difference between the angle of the
apply the
...
This document is not an ASTM standard and is intended only to provide the user of an ASTM standard an indication of what changes have been made to the previous version. Because
it may not be technically possible to adequately depict all changes accurately, ASTM recommends that users consult prior editions as appropriate. In all cases only the current version
of the standard as published by ASTM is to be considered the official document.
Designation: B820 − 18 B820 − 23
Standard Test Method for
Bend Test for Determining the Formability of Copper and
Copper Alloy Strip
This standard is issued under the fixed designation B820; the number immediately following the designation indicates the year of
original adoption or, in the case of revision, the year of last revision. A number in parentheses indicates the year of last reapproval. A
superscript epsilon (´) indicates an editorial change since the last revision or reapproval.
1. Scope*
1.1 This test method describescovers the technique of bend testing copper and copper alloy strip samples to determine product
formability or the ability to resist cracking when forming a bend around a specific radius. The criterion for failure is the occurrence
of cracks on the outer (convex) radius of curvature.convex surface of the bend.
1.2 This bend test is limited to strip from 0.0030.003 in. to and including 0.031 in. (0.076(0.076 mm to and including 0.79 mm)
thick.
1.3 The forming or punch radius for the bend test is to shall be determined by agreement between the producer and the
customer.manufacturer or supplier and purchaser. This punch radius is typically equal to or greater than the minimum bend radius
without failure for the alloy, temper and thickness combination of the strip being tested.
1.4 Units—Values The values stated in inch-pound units are to be regarded as standard. The values given in parentheses are
mathematical conversions to SI units which are provided for information only and are not considered standard.
1.5 This standard does not purport to address all of the safety concerns, if any, associated with its use. It is the responsibility
of the user of this standard to establish appropriate safety, health, and environmental practices and determine the applicability of
regulatory limitations prior to use.
1.6 This international standard was developed in accordance with internationally recognized principles on standardization
established in the Decision on Principles for the Development of International Standards, Guides and Recommendations issued
by the World Trade Organization Technical Barriers to Trade (TBT) Committee.
2. Referenced Documents
2.1 ASTM Standards:
B846 Terminology for Copper and Copper Alloys
E6 Terminology Relating to Methods of Mechanical Testing
E290 Test Methods for Bend Testing of Material for Ductility
3. Terminology
3.1 For definitions of terms related to copper and copper alloys, refer to Terminology B846.
This test method is under the jurisdiction of ASTM Committee B05 on Copper and Copper Alloys and is the direct responsibility of Subcommittee B05.06 on Methods
of Test.
Current edition approved March 1, 2018Nov. 1, 2023. Published March 2018November 2023. Originally approved in 1992. Last previous edition approved in 20142018
as B820 – 14a.B820 – 18. DOI: 10.1520/B0820-18.10.1520/B0820-23.
For referenced ASTM standards, visit the ASTM website, www.astm.org, or contact ASTM Customer Service at service@astm.org. For Annual Book of ASTM Standards
volume information, refer to the standard’s Document Summary page on the ASTM website.
*A Summary of Changes section appears at the end of this standard
Copyright © ASTM International, 100 Barr Harbor Drive, PO Box C700, West Conshohocken, PA 19428-2959. United States
B820 − 23
3.2 For definitions of terms related to mechanical testing, refer to Terminology E6.
3.3 Definitions of Terms Specific to This Standard:
3.3.1 bend, longitudinal (or good way bend)—a bend with an axis perpendicular to the direction of rolling, drawing, or extrusion
(see Fig. 1).
3.3.2 bend, transverse (or bad way bend)—a bend with an axis on a plane parallel to the direction of rolling, drawing, or extrusion
(see Fig. 1).
NOTE 1—The usage of these two terms is consistent with Test Methods E290.
4. Summary of Test Method
4.1 The bend test is made by applying a force transversely to the length of the specimen in the portion being bent, usually at
mid-length. The 90° bending forces are applied through an arrangement illustrated in Fig. 2, while 180° bending forces are applied
through an arrangement illustrated in Fig. 3. When complete fracture does not occur, the convex surface of the specimen is
examined for cracks. In general, the test using a 180° bend angle is a more severe test than the test using a 90° bend angle.
5. Significance and Use
5.1 This bend test provides information as to the formability or the ability of copper and copper alloy strip to resist cracking when
being formed.
5.2 This test method can be used as a quality control tool to determine if material will form to a given radius.
5.3 This test method is also useful in research and development to provide data for use in selecting a spring material that will safely
form to the geometry of a given part.
5.3.1 The forming characteristic of interest is the smallest bend radius that can be formed without cracks or otherwise unacceptable
surface conditions (8.4). This radius, R, is the radius of curvature of the nose of the punch used in the test.
5.3.2 In addition, the difference between the angle of the bend after testing and 90° provides a measure of post-forming
springback.
5.4 The results are suitable for direct application in design and manufacturing, only when all factors such as the geometry of the
part, punch and die design, lubrication, stamping speed, and other material properties are known.
6. Apparatus
6.1 Various devices are suitable for 90° or 180° bend testing. The apparatus shall provide these features:
6.1.1 90° Bend Test Fixture—An illustration of this test fixture is shown in Fig. 2. A specimen rests on a pair of pins, rollers, or
radiused flat supports; a pin, mandrel, or 90° V-block 90° V-block die. A punch of a given bend radius for applying applies the
bending force directly at the specimen mid-length.
FIG. 1 Direction of Bending
B820 − 23
FIG. 2 V-Block and Punch for 90° Bend Test
FIG. 3 Fixture for 180° Bend Test
6.1.2 180° Bend Test Fixture—An illustration of this test fixture is shown in Fig. 3. A specimen rests on a pair of pins, rollers, or
radiused flat supports; asupports. A pin, mandrel, or 180° punch of a given bend radius for applying applies the bending force
directly at the specimen mid-length. Dial indicators with a precision of 0.0005 in. (0.013 mm) or better are necessary to accurately
position the two supports.
6.1.2.1 To prevent breaking the punch, it is recommended not to use a radius smaller than ⁄2 the thickness of the material being
tested.
6.2 The radius of the single pin, mandrel, or punch applying the bend force at the mid-length shall differ not more than 65 % from
the nominal value of the radius.
6.3 The length of all pins, rolls, mandrels, and radius flats must exceed the width of the specimen; they must be strong enough
and sufficiently rigid to resist significant deformation.
7. Test Specimens
7.1 Test Specimen Requirement: Four test specimens shall be required, two in the longitudinal and two in the transverse directions
for the 90° and 180° tests.
1 1
7.1.1 When the purchaser does not define a bending width requirement, the default width shall be ⁄2 6 ⁄16 in. (12.7 6 1.57 mm).
7.1.1.1 Four test specimens shall be required, two in the longitudinal and two in the transverse directions for the 90° and 180° test
angles.
7.1.2 When the purchaser defines a bending test at or below ⁄4 in. (6.35 mm), then the producer can optionally apply the narrow
width specimen as defined in 7.1.2.1 (see Fig. 4).
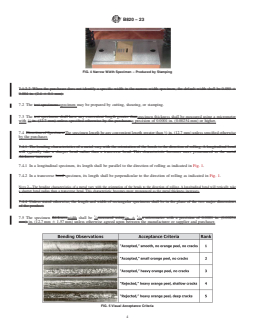
7.1.2.1 The narrow width specimen consists of four beams: 0.024 6 0.002 in. (0.6 6 0.05 mm), 0.047 6 0.003 in. (1.2 6 0.08
mm), 0.095 6 0.004 in. (2.4 6 0.1 mm), and 0.189 6 0.005 in. (4.8 6 0.13 mm). Four test specimens shall be required, two in
the longitudinal and two in the transverse directions, for the 90° and 180° angles.
B820 − 23
FIG. 4 Narrow Width Specimen – Produced by Stamping
7.1.2.2 When the purchaser does not identify a specific width in the narrow width specimen, the default width shall be 0.095 6
0.004 in. (2.4 6 0.1 mm).
7.2 The test specimens specimen may be prepared by cutting, shearing, or stamping.
7.3 The test specimens shall have any convenient length greater thanspecimen thickness shall be measured using a micrometer
with ⁄2 in. (12.7 mm) unless specified otherwise by the purchaser.a precision of 0.0001 in. (0.00254 mm) or higher.
7.4 Direction of Specimen:The specimen length be any convenient length greater than ⁄2 in. (12.7 mm) unless specified otherwise
by the purchaser.
7.4.1 The bending characteristics of a metal vary with the orientation of the bends to the direction of rolling. A longitudinal bend
will typically take a sharper bend radius than a transverse bend. This characteristic becomes more pronounced as the metal
thickness increases.
7.4.1 In a longitudinal specimen, its length shall be parallel to the direction of rolling as indicated in Fig. 1.
7.4.2 In a transverse bend specimen, its length shall be perpendicular to the direction of rolling as indicated in Fig. 1.
NOTE 2—The bending characteristics of a metal vary with the orientation of the bends to the direction of rolling. A longitudinal bend will typically take
a s
...

Questions, Comments and Discussion
Ask us and Technical Secretary will try to provide an answer. You can facilitate discussion about the standard in here.
Loading comments...