ASTM B646-19
(Practice)Standard Practice for Fracture Toughness Testing of Aluminum Alloys
Standard Practice for Fracture Toughness Testing of Aluminum Alloys
SIGNIFICANCE AND USE
5.1 This practice is provided to develop and maintain uniformity in practices for the evaluation of the toughness of aluminum alloys, particularly with regard to supplier qualification, quality assurance, and material release to specifications.
5.2 It is emphasized that the use of these procedures will not alter the validity of data determined with specific test methods, but provides guidance in the interpretation of test results (valid or invalid) and guidance in the selection of a reasonable test procedure in those instances where no standard exists today.
SCOPE
1.1 Fracture toughness is a key property for a number of aluminum alloys utilized in aerospace and process industries. Fracture toughness testing is often required for supplier qualification, quality control, and material release purposes. The purpose of this practice is to provide uniform test procedures for the industry, pointing out which current standards are utilized in specific cases, and providing guidelines where no standards exist. This practice provides guidance for testing (a) sheet and other products having a specified thickness less than 6.35 mm (0.250 in.), (b) intermediate thicknesses of plate, forgings, and extrusions that are too thin for valid plane-strain fracture toughness testing but too thick for treatment as sheet, such as products having a specified thickness greater than or equal to 6.35 mm (0.250 in.) but less than 25 to 50 mm (1 to 2 in.), depending on toughness level, and (c) relatively thick products where Test Method E399 is applicable.
1.2 The values stated in SI units are to be regarded as the standard. The values in inch-pound units given in parenthesis are provided for information purposes only.
1.3 This standard does not purport to address all of the safety concerns, if any, associated with its use. It is the responsibility of the user of this standard to establish appropriate safety, health, and environmental practices and determine the applicability of regulatory limitations prior to use.
1.4 This international standard was developed in accordance with internationally recognized principles on standardization established in the Decision on Principles for the Development of International Standards, Guides and Recommendations issued by the World Trade Organization Technical Barriers to Trade (TBT) Committee.
General Information
- Status
- Published
- Publication Date
- 31-Oct-2019
- Technical Committee
- B07 - Light Metals and Alloys
- Drafting Committee
- B07.05 - Testing
Relations
- Effective Date
- 01-Nov-2019
- Effective Date
- 15-Feb-2024
- Effective Date
- 01-Feb-2024
- Effective Date
- 01-Feb-2020
- Refers
ASTM E561-19 - Standard Test Method for <emph type="bdit">K<inf>R</inf></emph> Curve Determination - Effective Date
- 15-Jul-2019
- Refers
ASTM E561-19e1 - Standard Test Method for <emph type="bdit">K<inf>R</inf></emph> Curve Determination - Effective Date
- 15-Jul-2019
- Refers
ASTM E561-15a - Standard Test Method for <emph type="bdit">K<inf>R</inf></emph> Curve Determination - Effective Date
- 01-Dec-2015
- Refers
ASTM E561-15 - Standard Test Method for <emph type="bdit">K<inf>R</inf></emph> Curve Determination - Effective Date
- 15-Oct-2015
- Effective Date
- 01-Jul-2014
- Effective Date
- 15-May-2014
- Effective Date
- 15-May-2014
- Effective Date
- 15-Dec-2012
- Effective Date
- 15-Nov-2012
- Effective Date
- 15-Nov-2012
- Effective Date
- 15-Nov-2012
Overview
ASTM B646-19: Standard Practice for Fracture Toughness Testing of Aluminum Alloys provides a comprehensive guideline for evaluating the fracture toughness of aluminum alloys, crucial for the aerospace and process industries. This standard ensures industry-wide uniformity in test methodologies for supplier qualification, quality assurance, and material release. It covers a range of aluminum alloy products, including sheets, plates, forgings, extrusions, and thick materials, offering guidance for situations where existing test standards may not be fully applicable.
Understanding fracture toughness - an alloy’s ability to resist crack propagation - is vital to ensuring the structural integrity and safety of components, especially in high-stakes applications. By referencing ASTM B646-19, organizations enhance confidence in the mechanical performance of aluminum alloys and meet stringent quality control requirements.
Key Topics
Test Method Selection: Guidance is provided for using appropriate fracture toughness tests based on product form and thickness, referencing established test methods where applicable.
- Thin products (<6.35 mm): M(T) middle-crack tension specimens, focusing on critical stress intensity factors and K_R curves.
- Intermediate thicknesses (≥6.35 mm to <25-50 mm): Compact tension (C(T)) specimens, results supplemented by detailed test method requirements.
- Thick products: Plain-strain fracture toughness per Test Method E399, supported by Practice B645.
Test Procedure and Validity: Detailed information on specimen preparation, geometry, precracking, and calculation of fracture toughness values ensures reliable and reproducible test outcomes.
Interpretation and Reporting: The practice offers criteria for the evaluation and validity of test results, including rounding rules and guidance for handling retests and replacement tests.
Supplemental Guidance: Support is provided in cases where formal standards may not exist, promoting consistent interpretation of results and bolstering supplier verification programs.
Applications
ASTM B646-19 supports several critical industry activities:
- Supplier Qualification: Establishes a uniform basis for examining whether supplied aluminum alloys meet fracture toughness specifications, ensuring only qualified materials enter service.
- Quality Assurance: Enables consistent, repeatable measurement of fracture toughness during batch production and quality control checks.
- Material Release: Assists in verifying that materials conform to required standards before release for use in critical structures.
- Research and Development: Provides a framework for the assessment of new or non-standard aluminum alloy forms and thicknesses, guiding test method selection where standard methods are not available.
- Aerospace Structures: Ensures the safe application of aluminum alloys in aircraft components subjected to significant mechanical stress and fatigue.
- Industrial Fabrication: Contributes to the development and certification of alloys for pressure vessels, structural applications, and other safety-critical uses.
Related Standards
This ASTM standard references and aligns with several key documents to harmonize fracture toughness testing procedures:
- ASTM E399: Test Method for Linear-Elastic Plane-Strain Fracture Toughness (K_Ic) of Metallic Materials.
- ASTM B645: Practice for Linear-Elastic Plane-Strain Fracture Toughness Testing of Aluminum Alloys.
- ASTM E561: Test Method for K_R Curve Determination.
- ASTM E1304: Test Method for Plane-Strain (Chevron-Notch) Fracture Toughness of Metallic Materials.
- ASTM B557/B557M: Tension Testing of Wrought and Cast Aluminum- and Magnesium-Alloy Products.
- ASTM E1823: Terminology Relating to Fatigue and Fracture Testing.
Practical Value
By following ASTM B646-19, manufacturers and users of aluminum alloys ensure higher reliability, improved traceability in supplier documentation, and safer structural performance. This guidance helps unify the metal testing community, reduces variability in assessing fracture toughness, and links quality control practices directly to recognized international standards - all critical for compliance, certification, and global trade in safety-sensitive industries.
Buy Documents
ASTM B646-19 - Standard Practice for Fracture Toughness Testing of Aluminum Alloys
REDLINE ASTM B646-19 - Standard Practice for Fracture Toughness Testing of Aluminum Alloys
Get Certified
Connect with accredited certification bodies for this standard

Element Materials Technology
Materials testing and product certification.

Inštitut za kovinske materiale in tehnologije
Institute of Metals and Technology. Materials testing, metallurgical analysis, NDT.
Sponsored listings
Frequently Asked Questions
ASTM B646-19 is a standard published by ASTM International. Its full title is "Standard Practice for Fracture Toughness Testing of Aluminum Alloys". This standard covers: SIGNIFICANCE AND USE 5.1 This practice is provided to develop and maintain uniformity in practices for the evaluation of the toughness of aluminum alloys, particularly with regard to supplier qualification, quality assurance, and material release to specifications. 5.2 It is emphasized that the use of these procedures will not alter the validity of data determined with specific test methods, but provides guidance in the interpretation of test results (valid or invalid) and guidance in the selection of a reasonable test procedure in those instances where no standard exists today. SCOPE 1.1 Fracture toughness is a key property for a number of aluminum alloys utilized in aerospace and process industries. Fracture toughness testing is often required for supplier qualification, quality control, and material release purposes. The purpose of this practice is to provide uniform test procedures for the industry, pointing out which current standards are utilized in specific cases, and providing guidelines where no standards exist. This practice provides guidance for testing (a) sheet and other products having a specified thickness less than 6.35 mm (0.250 in.), (b) intermediate thicknesses of plate, forgings, and extrusions that are too thin for valid plane-strain fracture toughness testing but too thick for treatment as sheet, such as products having a specified thickness greater than or equal to 6.35 mm (0.250 in.) but less than 25 to 50 mm (1 to 2 in.), depending on toughness level, and (c) relatively thick products where Test Method E399 is applicable. 1.2 The values stated in SI units are to be regarded as the standard. The values in inch-pound units given in parenthesis are provided for information purposes only. 1.3 This standard does not purport to address all of the safety concerns, if any, associated with its use. It is the responsibility of the user of this standard to establish appropriate safety, health, and environmental practices and determine the applicability of regulatory limitations prior to use. 1.4 This international standard was developed in accordance with internationally recognized principles on standardization established in the Decision on Principles for the Development of International Standards, Guides and Recommendations issued by the World Trade Organization Technical Barriers to Trade (TBT) Committee.
SIGNIFICANCE AND USE 5.1 This practice is provided to develop and maintain uniformity in practices for the evaluation of the toughness of aluminum alloys, particularly with regard to supplier qualification, quality assurance, and material release to specifications. 5.2 It is emphasized that the use of these procedures will not alter the validity of data determined with specific test methods, but provides guidance in the interpretation of test results (valid or invalid) and guidance in the selection of a reasonable test procedure in those instances where no standard exists today. SCOPE 1.1 Fracture toughness is a key property for a number of aluminum alloys utilized in aerospace and process industries. Fracture toughness testing is often required for supplier qualification, quality control, and material release purposes. The purpose of this practice is to provide uniform test procedures for the industry, pointing out which current standards are utilized in specific cases, and providing guidelines where no standards exist. This practice provides guidance for testing (a) sheet and other products having a specified thickness less than 6.35 mm (0.250 in.), (b) intermediate thicknesses of plate, forgings, and extrusions that are too thin for valid plane-strain fracture toughness testing but too thick for treatment as sheet, such as products having a specified thickness greater than or equal to 6.35 mm (0.250 in.) but less than 25 to 50 mm (1 to 2 in.), depending on toughness level, and (c) relatively thick products where Test Method E399 is applicable. 1.2 The values stated in SI units are to be regarded as the standard. The values in inch-pound units given in parenthesis are provided for information purposes only. 1.3 This standard does not purport to address all of the safety concerns, if any, associated with its use. It is the responsibility of the user of this standard to establish appropriate safety, health, and environmental practices and determine the applicability of regulatory limitations prior to use. 1.4 This international standard was developed in accordance with internationally recognized principles on standardization established in the Decision on Principles for the Development of International Standards, Guides and Recommendations issued by the World Trade Organization Technical Barriers to Trade (TBT) Committee.
ASTM B646-19 is classified under the following ICS (International Classification for Standards) categories: 77.120.10 - Aluminium and aluminium alloys. The ICS classification helps identify the subject area and facilitates finding related standards.
ASTM B646-19 has the following relationships with other standards: It is inter standard links to ASTM B646-17, ASTM E1823-24a, ASTM E1823-24, ASTM E1823-20, ASTM E561-19, ASTM E561-19e1, ASTM E561-15a, ASTM E561-15, ASTM E1304-97(2014)e1, ASTM B557M-14, ASTM B557-14, ASTM E1823-12e, ASTM E399-12e1, ASTM E399-12e3, ASTM E1823-12d. Understanding these relationships helps ensure you are using the most current and applicable version of the standard.
ASTM B646-19 is available in PDF format for immediate download after purchase. The document can be added to your cart and obtained through the secure checkout process. Digital delivery ensures instant access to the complete standard document.
Standards Content (Sample)
This international standard was developed in accordance with internationally recognized principles on standardization established in the Decision on Principles for the
Development of International Standards, Guides and Recommendations issued by the World Trade Organization Technical Barriers to Trade (TBT) Committee.
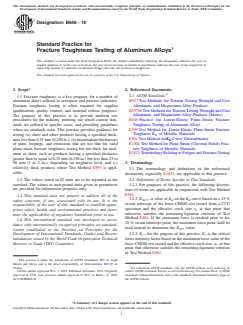
Designation: B646 − 19
Standard Practice for
Fracture Toughness Testing of Aluminum Alloys
This standard is issued under the fixed designation B646; the number immediately following the designation indicates the year of
original adoption or, in the case of revision, the year of last revision. A number in parentheses indicates the year of last reapproval. A
superscript epsilon (´) indicates an editorial change since the last revision or reapproval.
This standard has been approved for use by agencies of the U.S. Department of Defense.
1. Scope* 2. Referenced Documents
2.1 ASTM Standards:
1.1 Fracture toughness is a key property for a number of
B557 Test Methods for Tension Testing Wrought and Cast
aluminum alloys utilized in aerospace and process industries.
Aluminum- and Magnesium-Alloy Products
Fracture toughness testing is often required for supplier
B557M Test Methods for Tension Testing Wrought and Cast
qualification, quality control, and material release purposes.
Aluminum- and Magnesium-Alloy Products (Metric)
The purpose of this practice is to provide uniform test
B645 Practice for Linear-Elastic Plane–Strain Fracture
procedures for the industry, pointing out which current stan-
Toughness Testing of Aluminum Alloys
dards are utilized in specific cases, and providing guidelines
E399 Test Method for Linear-Elastic Plane-Strain Fracture
where no standards exist. This practice provides guidance for
Toughness K of Metallic Materials
testing (a) sheet and other products having a specified thick-
Ic
E561 Test Method forK Curve Determination
nesslessthan6.35 mm(0.250in.),(b)intermediatethicknesses
R
E1304 Test Method for Plane-Strain (Chevron-Notch) Frac-
of plate, forgings, and extrusions that are too thin for valid
ture Toughness of Metallic Materials
plane-strain fracture toughness testing but too thick for treat-
E1823 TerminologyRelatingtoFatigueandFractureTesting
ment as sheet, such as products having a specified thickness
greater than or equal to 6.35 mm (0.250 in.) but less than 25 to
3. Terminology
50 mm (1 to 2 in.), depending on toughness level, and (c)
relatively thick products where Test Method E399 is appli-
3.1 The terminology and definitions in the referenced
cable.
documents, especially E1823, are applicable to this practice.
1.2 The values stated in SI units are to be regarded as the
3.2 Definitions of Terms Specific to This Standard:
standard. The values in inch-pound units given in parenthesis
3.2.1 For purposes of this practice, the following descrip-
are provided for information purposes only.
tions of terms are applicable in conjunction with Test Method
E561:
1.3 This standard does not purport to address all of the
3.2.2 K —a value of K on the K curve based on a 25 %
safety concerns, if any, associated with its use. It is the R25 R R
secant intercept of the force-CMOD test record from a C(T)
responsibility of the user of this standard to establish appro-
specimen and the effective crack size a at that point that
priate safety, health, and environmental practices and deter- e
otherwise satisfies the remaining-ligament criterion of Test
mine the applicability of regulatory limitations prior to use.
Method E561. If the maximum force is reached prior to the
1.4 This international standard was developed in accor-
25 % secant intercept point, the maximum force point shall be
dance with internationally recognized principles on standard-
used instead to determine the K value.
R25
ization established in the Decision on Principles for the
Development of International Standards, Guides and Recom- 3.2.3 K —for the purpose of this practice, K is the critical
c c
stressintensityfactorbasedonthemaximumforcevalueofthe
mendations issued by the World Trade Organization Technical
Barriers to Trade (TBT) Committee. force-CMOD test record and the effective crack size, a , at that
e
point that otherwise satisfies the remaining-ligament criterion
of Test Method E561.
This practice is under the jurisdiction of ASTM Committee B07 on Light
Metals and Alloys and is the direct responsibility of Subcommittee B07.05 on
Testing. For referenced ASTM standards, visit the ASTM website, www.astm.org, or
Current edition approved Nov. 1, 2019. Published November 2019. Originally contact ASTM Customer Service at service@astm.org. For Annual Book of ASTM
approved in 1978. Last previous edition approved in 2017 as B646 – 17. DOI: Standards volume information, refer to the standard’s Document Summary page on
10.1520/B0646-19. the ASTM website.
*A Summary of Changes section appears at the end of this standard
Copyright © ASTM International, 100 Barr Harbor Drive, PO Box C700, West Conshohocken, PA 19428-2959. United States
B646 − 19
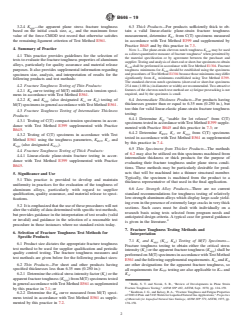
3.2.4 K —the apparent plane stress fracture toughness 6.3 Thick Products—For products sufficiently thick to ob-
app
based on the initial crack size, a , and the maximum force tain a valid linear-elastic plane-strain fracture toughness
o
value of the force-CMOD test record that otherwise satisfies measurement, determine K , from C(T) specimens measured
Ic
the remaining-ligament criterion of Test Method E561. in accordance with Test Method E399 and supplemented by
Practice B645 and by this practice in 7.3.
4. Summary of Practice
NOTE 1—The plane-strain chevron notch toughness K may be used
IvM
as a direct quantitative measure of fracture toughness when permitted by
4.1 This practice provides guidelines for the selection of
the material specification or by agreement between the purchaser and
tests to evaluate the fracture toughness properties of aluminum
supplier.Testingandanalysisofshort-rodorshort-barspecimenstoobtain
alloys, particularly for quality assurance and material release
K shall be performed in accordance with Test Method E1304. Fracture
IvM
purposes. It also provides supplemental information regarding toughness minimums for K should be established using the specimens
IvM
andproceduresofTestMethodE1304becausethoseminimumsmaydiffer
specimen size, analysis, and interpretation of results for the
significantly from K minimums established using Test Method E399.
Ic
following products and test methods:
The standard chevron notch specimens (short-rod or short-bar specimens
25.4mm(1.00in.)indiameterorwidth)arerecommended.Twoattractive
4.2 Fracture Toughness Testing of Thin Products:
features of the chevron notch test method are a) fatigue precracking is not
4.2.1 K curve testing of M(T) middle-crack tension speci-
R
required, and b) the specimen is small.
mens in accordance with Test Method E561.
6.4 Intermediate Thickness Products—For products having
4.2.2 K and K (also designated K or K ) testing of
c app co A
thicknesses greater than or equal to 6.35 mm (0.250 in.), but
M(T)specimensingeneralaccordancewithTestMethodE561.
too thin for valid linear-elastic plane-strain fracture toughness
4.3 Fracture Toughness Testing of Intermediate Thickness
testing:
Products:
6.4.1 Determine K “usable for lot release” from C(T)
Q
4.3.1 Testing of C(T) compact-tension specimens in accor-
specimenstestedinaccordancewithTestMethodE399supple-
dance with Test Method E399 supplemented with Practice
mented with Practice B645 and this practice in 7.3;or
B645.
6.4.2 Determine K , K,or K from C(T) specimens
R25 c app
4.3.2 Testing of C(T) specimens in accordance with Test
tested in accordance with Test Method E561 as supplemented
Method E561 using the toughness parameters, K , K , and
R25 c
by this practice in 7.4.
K (also designated K ).
app A(s)
6.5 Thin Specimens from Thicker Products—The methods
4.4 Fracture Toughness Testing of Thick Products:
of 6.2 may also be utilized on thin specimens machined from
4.4.1 Linear-elastic plane-strain fracture testing in accor-
intermediate thickness or thick products for the purpose of
dance with Test Method E399 supplemented with Practice
evaluating their fracture toughness under plane stress condi-
B645.
tions. These methods may be particularly desirable for prod-
ucts that will be machined into a thinner structural member.
5. Significance and Use
Typically, the specimen is machined from the product to a
5.1 This practice is provided to develop and maintain
thickness representative of that used in the final application.
uniformity in practices for the evaluation of the toughness of
6.6 Low Strength Alloy Products—There are no current
aluminum alloys, particularly with regard to supplier
standard recommendations for toughness testing of relatively
qualification, quality assurance, and material release to speci-
low-strength aluminum alloys which display large-scale yield-
fications.
ing even in the presence of extremely large cracks in very thick
5.2 Itisemphasizedthattheuseoftheseprocedureswillnot
sections. Such cases must be dealt with individually on a
alter the validity of data determined with specific test methods,
research basis using tests selected from program needs and
but provides guidance in the interpretation of test results (valid
anticipated design criteria. A typical case for general guidance
or invalid) and guidance in the selection of a reasonable test
is given in the literature.
procedure in those instances where no standard exists today.
7. Fracture Toughness Testing Methods and
6. Selection of Fracture Toughness Test Methods for
Interpretation
Specific Products
7.1 K and K (K ,K ) Testing of M(T) Specimens—
c app co A
6.1 Product size dictates the appropriate fracture toughness
Fracture toughness testing to obtain either the critical stress
test method to be used for supplier qualification and periodic
intensity (K ) or the apparent fracture toughness (K ) shall be
c app
quality control testing. The fracture toughness measures and
performed on M(T) specimens in accordance withTest Method
test methods are given below for the following product sizes:
E561andthefollowingsupplementalrequirements.K andK
co A
6.2 Thin Products—For sheet and other products having
are other designations for the apparent fracture toughness, so
specified thicknesses less than 6.35 mm (0.250 in.): all requirements for K testing are also applicable to K and
app co
6.2.1 Determinethecriticalstressintensityfactor(K)orthe
K .
c A
apparentfracturetoughness(K )fromM(T)specimenstested
app
in general accordance withTest Method E561 as supplemented
Rolfe, S. T. and Novak, S. R., “Review of Developments in Plane Strain
Fracture Toughness Testing,” ASTM STP 463, ASTM, Sept. 1970, pp. 124–159.
by this practice in 7.1;or
Kaufman, J. G., and Kelsey, R.A., “Fracture Toughness and Fatigue Properties
6.2.2 Determine the K curve measured from M(T) speci-
R
of5083-0Plateand5183WeldsforLiquefiedNaturalGasApplications,” Properties
mens tested in accordance with Test Method E561 as supple-
of Materials for Liquefied Natural Gas Tankage, ASTM STP 579,ASTM, 1975, pp.
mented by this practice in 7.2. 138–158.
B646 − 19
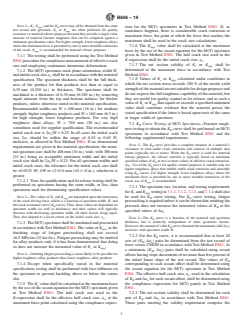
NOTE 2—K , K , and the K curve may all be obtained from the same
sion for the M(T) specimens in Test Method E561. If, as
c app R
test record and specimen. K or K are often preferred for quality
c app
sometimes happens, there is considerable crack extension at
assurance or material release purposes because they provide a single value
maximum force, the point at which the force first reaches the
measure of material fracture toughness that can be compared against a
maximum shall be used in the crack size calculations.
minimum specification value. For higher strength, lower toughness alloys
7.1.6 The K value shall be calculated at the maximum
where the maximum force is preceded by one or more unstable extensions
app
of the crack, K is recommended for material release purposes.
app force by the use of the secant equation for the M(T) specimen
given in Test Method E561. The half crack size used in the
7.1.1 The testing shall be performed using the Test Method
K-expression shall be the initial crack size, a .
E561procedureforcompliancemeasurementofeffectivecrack o
7.1.7 The net section validity of K or K shall be
size and employing continuous monotonic deformation.
c app
determined at the maximum force in accordance with Test
7.1.2 The M(T) specimen crack plane orientation, width W,
Method E561.
andinitialcracksizea shallbeinaccordancewiththematerial
o
7.1.8 Values of K or K calculated under conditions in
specification. The specimen thickness shall be the full thick- c app
which the net section stress exceeds 100 % of the tensile yield
ness of the product for thin products less than or equal to
strengthofthematerialarenotsuitablefordesignpurposesand
6.35 mm (0.250 in.) in thickness. The specimen shall be
do not express the full toughness capability of the material, but
machined to a thickness of 6.35 mm (0.250 in.) by removing
they are useful for quality control or lot release; and as such a
equal amounts from the top and bottom surfaces for thicker
value of K or K that equals or exceeds a specified minimum
products, unless otherwise stated in the material specification.
c app
value shall constitute evidence that the material passes the
Recommended widths are W = 406 mm (16 in.) for medium
stated specification if the latter is based upon tests of the same
strength, higher toughness products and W = 160 mm (6.3 in.)
or larger width of specimen.
for high strength, lower toughness products. For very high
toughness sheet alloys, W = 760 mm (30 in.) are also
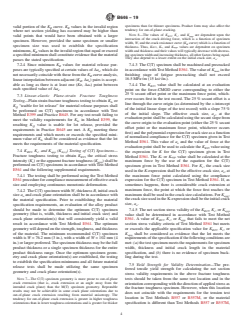
7.2 K Curve Testing of M(T) Specimens—Fracture tough-
R
sometimes used for supplier qualification. The recommended
ness testing to obtain the K curve shall be performed on M(T)
R
initial crack size is 2a /W = 0.25. In all cases the initial crack
o specimens in accordance with Test Method E561 and the
size 2a should be within the range of 0.25 to 0.40 W,
o following supplemental requirements.
inclusive, as allowed in Test Method E561. If no dimensional
NOTE 5—The K curve provides a complete measure of a material’s
R
requirements are given in the material specification, the nomi-
resistance to slow-stable crack extension and consists of multiple data
nal specimen size shall be 406 mm (16 in.) wide, with 380 mm
points (typically ten or more). When the K curve is used for material
R
(15 in.) being an acceptable minimum width and the initial
release purposes, the release criterion is typically based on minimum
crack size shall be 2a /W = 0.25. For all specimen widths and specified values of K at two or more values of effective crack extension,
o R
∆a . Use of the K curve for quality control purposes is suitable only for
e R
initial crack sizes, the tolerance for the initial crack size shall
higher toughness alloys that exhibit stable crack extension and smoothly
be +0.0125 W/- 0W or +2.5/-0 mm (+0.1
...
This document is not an ASTM standard and is intended only to provide the user of an ASTM standard an indication of what changes have been made to the previous version. Because
it may not be technically possible to adequately depict all changes accurately, ASTM recommends that users consult prior editions as appropriate. In all cases only the current version
of the standard as published by ASTM is to be considered the official document.
Designation: B646 − 17 B646 − 19
Standard Practice for
Fracture Toughness Testing of Aluminum Alloys
This standard is issued under the fixed designation B646; the number immediately following the designation indicates the year of
original adoption or, in the case of revision, the year of last revision. A number in parentheses indicates the year of last reapproval. A
superscript epsilon (´) indicates an editorial change since the last revision or reapproval.
This standard has been approved for use by agencies of the U.S. Department of Defense.
1. Scope*
1.1 Fracture toughness is a key property for a number of aluminum alloys utilized in aerospace and process industries. Fracture
toughness testing is often required for supplier qualification, quality control, and material release purposes. The purpose of this
practice is to provide uniform test procedures for the industry, pointing out which current standards are utilized in specific cases,
and providing guidelines where no standards exist. This practice provides guidance for testing (a) sheet and other products having
a specified thickness less than 6.35 mm 6.35 mm (0.250 in.), (b) intermediate thicknesses of plate, forgings, and extrusions that
are too thin for valid plane-strain fracture toughness testing but too thick for treatment as sheet, such as products having a specified
thickness greater than or equal to 6.35 mm (0.250 in.) but less than 25 to 50 mm (1 to 2 in.), depending on toughness level, and
(c) relatively thick products where Test Method E399 is applicable.
1.2 This practice addresses both direct measurements of fracture toughness and screening tests, the latter recognizing the
complexity and expense of making formal fracture toughness measurements on great quantities of production lots.
1.2 The values stated in SI units are to be regarded as the standard. The values in inch-pound units given in parenthesis are
provided for information purposes only.
1.3 This standard does not purport to address all of the safety concerns, if any, associated with its use. It is the responsibility
of the user of this standard to establish appropriate safety safety, health, and healthenvironmental practices and determine the
applicability of regulatory limitations prior to use.
1.4 This international standard was developed in accordance with internationally recognized principles on standardization
established in the Decision on Principles for the Development of International Standards, Guides and Recommendations issued
by the World Trade Organization Technical Barriers to Trade (TBT) Committee.
2. Referenced Documents
2.1 ASTM Standards:
B557 Test Methods for Tension Testing Wrought and Cast Aluminum- and Magnesium-Alloy Products
B557M Test Methods for Tension Testing Wrought and Cast Aluminum- and Magnesium-Alloy Products (Metric)
B645 Practice for Linear-Elastic Plane–Strain Fracture Toughness Testing of Aluminum Alloys
E399 Test Method for Linear-Elastic Plane-Strain Fracture Toughness K of Metallic Materials
Ic
E561 Test Method forK Curve Determination
R
E1304 Test Method for Plane-Strain (Chevron-Notch) Fracture Toughness of Metallic Materials
E1823 Terminology Relating to Fatigue and Fracture Testing
3. Terminology
3.1 The terminology and definitions in the referenced documents, especially E1823, are applicable to this practice.
3.2 Definitions of Terms Specific to This Standard:
3.2.1 For purposes of this practice, the following descriptions of terms are applicable in conjunction with Test Method E561:
3.2.2 CMOD—crack mouth opening displacement; the measurement of specimen displacement between two points spanning the
machined notch at locations specific to the specimen being tested.
This practice is under the jurisdiction of ASTM Committee B07 on Light Metals and Alloys and is the direct responsibility of Subcommittee B07.05 on Testing.
Current edition approved Aug. 1, 2017Nov. 1, 2019. Published August 2017November 2019. Originally approved in 1978. Last previous edition approved in 20122017
as B646 – 12.B646 – 17. DOI: 10.1520/B0646-17.10.1520/B0646-19.
For referenced ASTM standards, visit the ASTM website, www.astm.org, or contact ASTM Customer Service at service@astm.org. For Annual Book of ASTM Standards
volume information, refer to the standard’s Document Summary page on the ASTM website.
*A Summary of Changes section appears at the end of this standard
Copyright © ASTM International, 100 Barr Harbor Drive, PO Box C700, West Conshohocken, PA 19428-2959. United States
B646 − 19
3.2.2 K —a value of K on the K curve based on a 25 % secant intercept of the force-CMOD test record from a C(T)
R25 R R
specimen and the effective crack size a at that point that otherwise satisfies the remaining-ligament criterion of Test Method E561.
e
If the maximum force is reached prior to the 25 % secant intercept point, the maximum force point shall be used instead to
determine the K value.
R25R25
3.2.3 K —for the purpose of this practice, K is the critical stress intensity factor based on the maximum force value of the
c c
force-CMOD test record from an M(T) specimen and the effective crack size, a , at that point that otherwise satisfies the
e
remaining-ligament criterion of Test Method E561.
3.2.4 K (also commonly designatedK )—the apparent plane stress fracture toughness based on the initial crack size, a , and
app co o
the maximum force value of the force-CMOD test record from an M(T) specimen that otherwise satisfies the remaining-ligament
criterion of Test Method E561.
4. Summary of Practice
4.1 This practice provides guidelines for the selection of tests to evaluate the fracture toughness properties of aluminum alloys,
particularly for quality assurance and material release purposes. It also provides supplemental information regarding specimen size,
analysis, and interpretation of results for the following products and test methods:
4.2 Fracture Toughness Testing of Thin Products:
4.2.1 K curve testing of M(T) middle-crack tension specimens in accordance with Test Method E561.
R
4.2.2 K and K ((also designated K or K ) testing of M(T) specimens in general accordance with Test Method E561.
c app co A
4.3 Fracture Toughness Testing of Intermediate Thickness Products:
4.3.1 Testing of C(T) compact-tension specimens in accordance with Test Method E399 supplemented with Practice B645.
4.3.2 Tests onTesting of C(T) specimens in accordance with Test Method E561 using the toughness parameter,parameters,
K .,K , and K (also designated K ).
RR2525 c app A(s)
4.4 Fracture Toughness Testing of Thick Products:
4.4.1 Linear-elastic plane-strain fracture testing in accordance with Test Method E399 supplemented with Practice B645.
5. Significance and Use
5.1 This practice is provided to develop and maintain uniformity in practices for the evaluation of the toughness of aluminum
alloys, particularly with regard to supplier qualification, quality assurance, and material release to specifications.
5.2 It is emphasized that the use of these procedures will not alter the validity of data determined with specific test methods,
but provides guidance in the interpretation of test results (valid or invalid) and guidance in the selection of a reasonable test
procedure in those instances where no standard exists today.
6. Selection of Fracture Toughness Test Methods for Specific Products
6.1 Product size dictates the appropriate fracture toughness test method to be used for supplier qualification and periodic quality
control testing. The fracture toughness measures and test methods are given below for the following product sizes:
6.2 Thin Products—For sheet and other products having specified thicknesses less than 6.35 mm (0.250 in.):
6.2.1 Determine the critical stress intensity factor (K ) or the apparent fracture toughness (K ) from M(T) specimens tested
c app
in general accordance with Test Method E561 as supplemented by this practice in 7.1; or
6.2.2 Determine the K curve measured from M(T) specimens tested in accordance with Test Method E561 as supplemented
R
by this practice in 7.2.
6.3 Thick Products—For products sufficiently thick to obtain a valid linear-elastic plane-strain fracture toughness measurement,
determine K , from C(T) specimens measured in accordance with Test Method E399 and supplemented by Practice B645 and by
Ic
this practice in 7.3.
NOTE 1—The plane-strain chevron notch toughness K may be used as a direct quantitative measure of fracture toughness when permitted by the
IvM
material specification or by agreement between the purchaser and supplier. Testing and analysis of short-rod or short-bar specimens to obtain K shall
IvM
be performed in accordance with Test Method E1304. Fracture toughness minimums for K should be established using the specimens and procedures
IvM
of Test Method E1304 because those minimums may differ significantly from K minimums established using Test Method E399. The standard chevron
Ic
notch specimens (short-rod or short-bar specimens 25.4 mm (1.00 in.) in diameter or width) are recommended. Two attractive features of the chevron
notch test method are a) fatigue precracking is not required, and b) the specimen is small.
6.4 Intermediate Thickness Products—For products having thicknesses greater than or equal to 6.35 mm (0.250 in.), but too thin
for valid linear-elastic plane-strain fracture toughness testing:
6.4.1 Determine K “usable for lot release” from C(T) specimens tested in accordance with Test Method E399 supplemented
Q
with Practice B645 and this practice in 7.3; or
Rolfe, S. T. and Novak, S. R., “Review of Developments in Plane Strain Fracture Toughness Testing,” ASTM STP 463, ASTM, Sept. 1970, pp. 124–159.
B646 − 19
6.4.2 Determine K ,K , or K from C(T) specimens tested in accordance with Test Method E561 as supplemented by this
R25 c app
practice in 7.4.
6.5 Thin Specimens from Thicker Products—The methods of 6.2 may also be utilized on thin specimens machined from
intermediate thickness or thick products for the purpose of evaluating their fracture toughness under plane stress conditions. These
methods may be particularly desirable for products that will be machined into a thinner structural member. Typically, the specimen
is machined from the product to a thickness representative of that used in the final application.
6.6 Low Strength Alloy Products—There are no current standard recommendations for toughness testing of relatively
low-strength aluminum alloys which display large-scale yielding even in the presence of extremely large cracks in very thick
sections. Such cases must be dealt with individually on a research basis using tests selected from program needs and anticipated
design criteria. A typical case for general guidance is given in the literature.
7. Fracture Toughness Testing Methods and Interpretation
7.1 K and K (K , K ) Testing—Testing of M(T) Specimens—Fracture toughness testing to obtain either the critical stress
c app co A
intensity (K ) or the apparent fracture toughness (K ) shall be performed on M(T) specimens in accordance with Test Method
c app
E561 and the following supplemental requirements. K isand anotherK commonly used designationare other designations for the
co A
apparent fracture toughness, so all requirements for K testing are also applicable to K and K .
app co A
NOTE 2—K ,K , and the K curve may all be obtained from the same test record and specimen. K or K are often preferred for quality assurance
c app R c app
or material release purposes because they provide a single value measure of material fracture toughness that can be compared against a minimum
specification value. For higher strength, lower toughness alloys where the maximum force is preceded by one or more unstable extensions of the crack,
K is recommended for material release purposes.
app
7.1.1 The testing shall be performed using the Test Method E561 procedure for compliance measurement of effective crack size
and employing continuous monotonic deformation.
7.1.2 The M(T) specimen crack plane orientation, width W, and initial crack size a shall be in accordance with the material
o
specification. The specimen thickness shall be the full thickness of the product for thin products less than or equal to 6.35 mm
6.35 mm (0.250 in.) in thickness. The specimen shall be machined to a thickness of 6.35 mm 6.35 mm (0.250 in.) by removing
equal amounts from the top and bottom surfaces for thicker products, unless otherwise stated in the material specification.
Recommended widths are W = 406 mm 406 mm (16 in.) for medium strength, higher toughness products and W = 160 mm (6.3
in.) for high strength, lower toughness products. For very high toughness sheet alloys, W = 760 mm (30 in.) are also sometimes
used for supplier qualification. The recommended initial crack size is 2a /W = 0.25. In all cases the initial crack size 2a should
o o
be within the range of 0.25 to 0.40 W, inclusive, as allowed in Test Method E561. If no dimensional requirements are given in the
material specification, the nominal specimen size shall be 406 mm (16 in.) wide, with 380 mm (15 in.) being an acceptable
minimum width and the initial crack size shall be 2a /W = 0.25. For all specimen widths and initial crack sizes, the tolerance for
o
the initial crack size shall be +0.0125 W/- 0W or +2.5/-0 mm+2.5/-0 mm (+0.1 (+0.1/-0 ⁄-0 in.), whichever is greater.
7.1.2.1 Tests for qualification and lot release testing shall be performed on specimens having the same width, or less, than
specimens used for determining specification values.
NOTE 3—The values of K and K are dependent upon the interaction of the crack driving force, which is a function of specimen width, W, and the
c app
crack resistance curve (K curve). Thus, these values are dependent on specimen width (as well as thickness) and their values will typically decrease with
R
decreasing specimen width, all other factors being equal. They also depend to a lesser extent on the initial crack size, a .
o
7.1.3 The M(T) specimen shall be machined and precracked in accordance with Test Method E561. The value of K in the
max
finishing stage of fatigue precracking shall not exceed 16.5 MPa√m 16.5 MPa√m (15 ksi√in.). Fatigue precracking may be omitted
for alloy products only if it can be shownhas been demonstrated that doing so does not increase the measured value of K or K .
c app
NOTE 4—Omitting fatigue precracking is more likely to be possible for higher toughness alloy products than lower toughness alloy products.
7.1.4 Except when specifically stated in the material specification, testing shall be performed with face stiffeners on the
specimen to prevent buckling above or below the center slot.
7.1.5 The K value shall be calculated at the maximum force by the use of the secant equation for the M(T) specimen given
c
in Test Method E561. The half crack size used in the K-expression shall be the effective half crack size, a , at the maximum force
e
point calculated using the compliance expression for the M(T) specimens in Test Method E561. If, as sometimes happens, there
is considerable crack extension at maximum force, the point at which the force first reaches the maximum shall be used in the crack
size calculations.
7.1.6 The K value shall be calculated at the maximum force by the use of the secant equation for the M(T) specimen given
app
in Test Method E561. The half crack size used in the K-expression shall be the
...
Questions, Comments and Discussion
Ask us and Technical Secretary will try to provide an answer. You can facilitate discussion about the standard in here.
Loading comments...