ASTM C1253-14(2019)
(Test Method)Standard Test Method for Determining the Outgassing Potential of Sealant Backing
Standard Test Method for Determining the Outgassing Potential of Sealant Backing
SIGNIFICANCE AND USE
5.1 This test method is an indicator of a potential sealing problem that could occur if a sealant backing is flawed in manufacture or transportation to the job site, or abused during the installation. If flawed, some sealant backing materials, in combination with certain environmental conditions, can outgas, generating voids in the applied sealant before the sealant cures, thereby potentially compromising the cured sealant's intended performance.
5.2 Voids are also known to be caused by other means and under certain conditions such as air entrapment during sealant application, trapped air in the substrate releasing into the uncured sealant, incompatibility of the sealant with the sealant backing or substrate, or inhospitable installation conditions in the field. This test method is limited to identifying the outgassing potential of a punctured sealant backing by formation of a void in the soft uncured sealant under conditions of heat and compression.
SCOPE
1.1 This test method provides a procedure for determining the outgassing potential of a sealant backing when it is punctured during or after installation, with the puncture occurring before the sealant cures.
1.2 The values stated in SI units are to be regarded as the standard. The values given in parentheses are for information only.
1.3 This standard does not purport to address all of the safety concerns, if any, associated with its use. It is the responsibility of the user of this standard to establish appropriate safety, health, and environmental practices and determine the applicability of regulatory limitations prior to use.
1.4 This international standard was developed in accordance with internationally recognized principles on standardization established in the Decision on Principles for the Development of International Standards, Guides and Recommendations issued by the World Trade Organization Technical Barriers to Trade (TBT) Committee.
General Information
- Status
- Published
- Publication Date
- 30-Apr-2019
- Technical Committee
- C24 - Building Seals and Sealants
- Drafting Committee
- C24.20 - General Test Methods
Relations
- Replaces
ASTM C1253-14 - Standard Test Method for Determining the Outgassing Potential of Sealant Backing - Effective Date
- 01-May-2019
- Effective Date
- 01-Mar-2019
- Effective Date
- 01-Mar-2018
- Effective Date
- 01-Nov-2017
- Effective Date
- 01-Jan-2017
- Effective Date
- 15-Nov-2016
- Effective Date
- 01-Sep-2016
- Effective Date
- 01-May-2014
- Effective Date
- 01-Feb-2014
- Effective Date
- 01-Nov-2013
- Effective Date
- 15-Jan-2013
- Effective Date
- 01-Dec-2012
- Effective Date
- 15-Nov-2012
- Effective Date
- 01-May-2012
- Effective Date
- 15-Jan-2012
Overview
ASTM C1253-14(2019) is a standard test method developed by ASTM International for determining the outgassing potential of sealant backing materials. Outgassing from sealant backing can generate voids in applied sealants prior to curing, which may diminish the integrity and performance of sealing systems in joints. This test method is primarily used as a laboratory assessment to identify the likelihood of voids forming due to outgassing when the sealant backing is punctured during or after installation but before the sealant has fully cured. The standard ensures that manufacturers, specifiers, and quality assurance professionals can evaluate sealant backings for potential sealing issues arising from outgassing and, thus, make informed choices to ensure lasting, defect-free installations.
Key Topics
- Scope of the Standard: The method assesses the outgassing potential specifically when the sealant backing is punctured, simulating on-site installation scenarios where damage may occur.
- Test Method Summary: Sealant backing is positioned in a simulated joint, punctured, and then overcoated with sealant. The specimen is exposed to heat and compression to replicate field conditions. The cured sealant is examined for voids, which indicate outgassing.
- Significance and Use: The standard helps identify potential failures in sealant installations caused by improper handling, manufacturing flaws, or unsuitable sealant backing selection. Voids can compromise the sealant’s performance, leading to leaks, decreased durability, and reduced joint movement capability.
- Safety and Applicability: The standard specifies that users must address all relevant safety, health, and environmental practices independently, and ensure regulatory compliance.
- International Context: Developed with reference to WTO guidelines, ASTM C1253-14(2019) supports global harmonization of test methods for building and construction.
Applications
ASTM C1253-14(2019) is widely applicable in industries and projects where reliable joint sealing is critical:
- Quality Control in Manufacturing: Sealant and sealant backing manufacturers use this standard to ensure products are resistant to outgassing, maintaining high performance in end-use applications.
- Product Specification: Architects, designers, and construction professionals can specify outgassing-resistant materials based on ASTM C1253-14(2019) compliance, especially in critical environments such as facades, curtain walls, glazing systems, and expansion joints.
- Failure Analysis: When voids or bubbles are observed in cured sealant, this standard helps in root cause analysis by determining if outgassing of the backing could be the source.
- Jobsite Quality Assurance: Contractors and installers can assess the suitability of backing materials for field use, minimizing costly sealant joint failures and rework resulting from voids forming before curing.
- Regulatory and Performance Qualification: The method offers a reliable way to demonstrate compliance with project or regulatory standards for building envelope performance.
Related Standards
Several ASTM standards complement ASTM C1253-14(2019) and provide additional guidance on sealants, sealant backings, and joint construction:
- ASTM C717: Terminology of Building Seals and Sealants - standardizes key terms for consistent communication across the industry.
- ASTM C1193: Guide for Use of Joint Sealants - offers best practices for selection and installation of sealant systems.
- Other Relevant ASTM Standards: Additional standards address performance, installation, and compatibility of different building sealant systems.
Using ASTM C1253-14(2019) in conjunction with these related standards ensures robust, high-quality, and durable sealant joint construction for a variety of building and infrastructure projects. This standard supports enhanced building envelope performance, risk mitigation, and quality assurance in both new construction and remediation projects.
Buy Documents
ASTM C1253-14(2019) - Standard Test Method for Determining the Outgassing Potential of Sealant Backing
Get Certified
Connect with accredited certification bodies for this standard

ICC Evaluation Service
Building products evaluation and certification.

QAI Laboratories
Building and construction product testing and certification.

Aboma Certification B.V.
Specialized in construction, metal, and transport sectors.
Sponsored listings
Frequently Asked Questions
ASTM C1253-14(2019) is a standard published by ASTM International. Its full title is "Standard Test Method for Determining the Outgassing Potential of Sealant Backing". This standard covers: SIGNIFICANCE AND USE 5.1 This test method is an indicator of a potential sealing problem that could occur if a sealant backing is flawed in manufacture or transportation to the job site, or abused during the installation. If flawed, some sealant backing materials, in combination with certain environmental conditions, can outgas, generating voids in the applied sealant before the sealant cures, thereby potentially compromising the cured sealant's intended performance. 5.2 Voids are also known to be caused by other means and under certain conditions such as air entrapment during sealant application, trapped air in the substrate releasing into the uncured sealant, incompatibility of the sealant with the sealant backing or substrate, or inhospitable installation conditions in the field. This test method is limited to identifying the outgassing potential of a punctured sealant backing by formation of a void in the soft uncured sealant under conditions of heat and compression. SCOPE 1.1 This test method provides a procedure for determining the outgassing potential of a sealant backing when it is punctured during or after installation, with the puncture occurring before the sealant cures. 1.2 The values stated in SI units are to be regarded as the standard. The values given in parentheses are for information only. 1.3 This standard does not purport to address all of the safety concerns, if any, associated with its use. It is the responsibility of the user of this standard to establish appropriate safety, health, and environmental practices and determine the applicability of regulatory limitations prior to use. 1.4 This international standard was developed in accordance with internationally recognized principles on standardization established in the Decision on Principles for the Development of International Standards, Guides and Recommendations issued by the World Trade Organization Technical Barriers to Trade (TBT) Committee.
SIGNIFICANCE AND USE 5.1 This test method is an indicator of a potential sealing problem that could occur if a sealant backing is flawed in manufacture or transportation to the job site, or abused during the installation. If flawed, some sealant backing materials, in combination with certain environmental conditions, can outgas, generating voids in the applied sealant before the sealant cures, thereby potentially compromising the cured sealant's intended performance. 5.2 Voids are also known to be caused by other means and under certain conditions such as air entrapment during sealant application, trapped air in the substrate releasing into the uncured sealant, incompatibility of the sealant with the sealant backing or substrate, or inhospitable installation conditions in the field. This test method is limited to identifying the outgassing potential of a punctured sealant backing by formation of a void in the soft uncured sealant under conditions of heat and compression. SCOPE 1.1 This test method provides a procedure for determining the outgassing potential of a sealant backing when it is punctured during or after installation, with the puncture occurring before the sealant cures. 1.2 The values stated in SI units are to be regarded as the standard. The values given in parentheses are for information only. 1.3 This standard does not purport to address all of the safety concerns, if any, associated with its use. It is the responsibility of the user of this standard to establish appropriate safety, health, and environmental practices and determine the applicability of regulatory limitations prior to use. 1.4 This international standard was developed in accordance with internationally recognized principles on standardization established in the Decision on Principles for the Development of International Standards, Guides and Recommendations issued by the World Trade Organization Technical Barriers to Trade (TBT) Committee.
ASTM C1253-14(2019) is classified under the following ICS (International Classification for Standards) categories: 91.100.50 - Binders. Sealing materials. The ICS classification helps identify the subject area and facilitates finding related standards.
ASTM C1253-14(2019) has the following relationships with other standards: It is inter standard links to ASTM C1253-14, ASTM C717-19, ASTM C717-18, ASTM C717-17a, ASTM C717-17, ASTM C717-16a, ASTM C717-16, ASTM C717-14a, ASTM C717-14, ASTM C717-13, ASTM C1193-13, ASTM C717-12b, ASTM C1193-12, ASTM C717-12a, ASTM C717-12. Understanding these relationships helps ensure you are using the most current and applicable version of the standard.
ASTM C1253-14(2019) is available in PDF format for immediate download after purchase. The document can be added to your cart and obtained through the secure checkout process. Digital delivery ensures instant access to the complete standard document.
Standards Content (Sample)
This international standard was developed in accordance with internationally recognized principles on standardization established in the Decision on Principles for the
Development of International Standards, Guides and Recommendations issued by the World Trade Organization Technical Barriers to Trade (TBT) Committee.
Designation: C1253 − 14 (Reapproved 2019)
Standard Test Method for
Determining the Outgassing Potential of Sealant Backing
This standard is issued under the fixed designation C1253; the number immediately following the designation indicates the year of
original adoption or, in the case of revision, the year of last revision. A number in parentheses indicates the year of last reapproval. A
superscript epsilon (´) indicates an editorial change since the last revision or reapproval.
1. Scope 4. Summary of Test Method
4.1 A sample of sealant backing material is placed between
1.1 This test method provides a procedure for determining
nonporoussubstratesinacompressedcondition,simulatingthe
the outgassing potential of a sealant backing when it is
placing of sealant backing on a job site. The sealant backing is
punctured during or after installation, with the puncture occur-
then punctured at intervals along its exposed face. A sealant is
ring before the sealant cures.
applied immediately after puncture, and it is tooled to make a
1.2 The values stated in SI units are to be regarded as the
typical butt joint as described in Guide C1193. After tooling,
standard. The values given in parentheses are for information
the specimen is placed in an air circulating oven at elevated
only.
temperature for 1 h and then removed. The specimen is
1.3 This standard does not purport to address all of the 1
compressed12 ⁄2 %ofitsdiameterandinthecompressedstate
safety concerns, if any, associated with its use. It is the
returned to the oven. The specimen is removed after another
responsibility of the user of this standard to establish appro- 1
hour in the oven and compressed another 12 ⁄2 % and returned
priate safety, health, and environmental practices and deter-
to the oven, where it remains for another 2 h. The specimen is
mine the applicability of regulatory limitations prior to use.
removed from the oven, and the sealant is allowed to finish
1.4 This international standard was developed in accor-
curingatroomtemperature,whileinthecompressedcondition.
dance with internationally recognized principles on standard-
The sealant is then removed from the specimen, and the back
ization established in the Decision on Principles for the
face (the face against the sealant backing) is examined. The
Development of International Standards, Guides and Recom-
sealant is slit in half along its length and the size of any voids
mendations issued by the World Trade Organization Technical
estimated.
Barriers to Trade (TBT) Committee.
5. Significance and Use
5.1 This test method is an indicator of a potential sealing
2. Referenced Documents
problem that could occur if a sealant backing is flawed in
2.1 ASTM Standards:
manufacture or transportation to the job site, or abused during
C717 Terminology of Building Seals and Sealants
the installation. If flawed, some sealant backing materials, in
C1193 Guide for Use of Joint Sealants
combination with certain environmental conditions, can
outgas, generating voids in the applied sealant before the
3. Terminology
sealant cures, thereby potentially compromising the cured
3.1 Definitions—Refer toTerminology C717 for the follow-
sealant’s intended performance.
ing terms used in this test method: sealant, cure, sealant
5.2 Voids are also known to be caused by other means and
backing, joint, substrate, non-sag sealant, tooling, and outgas-
under certain conditions such as air entrapment during sealant
sing.
application, trapped air in the substrate releasing into the
uncured sealant, incompatibility of the sealant with the sealant
backing or substrate, or inhospitable installation conditions in
ThistestmethodisunderthejurisdictionofASTMCommitteeC24onBuilding
the field. This test method is limited to identifying the
Seals and Sealants and is the direct responsibility of Subcommittee C24.20 on
outgassing potential of a punctured sealant backing by forma-
General Test Methods.
tion of a void in the soft uncured sealant under conditions of
Current edition approved May 1, 2019. Published May 2019. Originally
approved in 1993. Last previous edition approved in 2014 as C1253–14. DOI: heat and compression.
10.1520/C1253-14R19.
For referenced ASTM standards, visit the ASTM website, www.astm.org, or 6. Apparatus
contact ASTM Customer Service at service@astm.org. For Annual Book of ASTM
6.1 Air Circulating Oven,capableofmaintainingatempera-
Standards volume information, refer to the standard’s Document Summary page on
the ASTM website. ture of 122°F (50°C).
Copyright © ASTM International, 100 Barr Harbor Drive, PO Box C700, West Conshohocken, PA 19428-2959. United States
C1253 − 14 (2019)
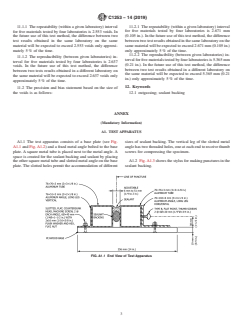
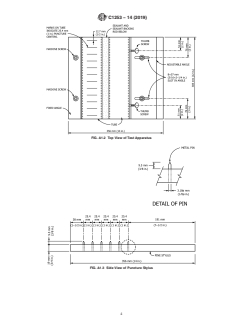
6.2 Test Frame and Stylus, as described in Annex A1. 9.6 Remove the specimens from oven, turn the screws to
compress the joint another 12 ⁄2 % of the original dimension
1 1
7. Test Specimens
[1.6 mm ( ⁄16 in.) for a 12.7-mm ( ⁄2-in.) joint], and place them
back in the oven for another 2 h.
7.1 Sealant backing should be 307.8-mm (12-in.) long and
of a width appropriate for use in 12.7-mm ( ⁄2-in.) wide joints.
9.7 Remove the specimens from the oven and allow the
The proper width will be as specified by the sealant backing
sealant to cure at standard conditions for 2 weeks or for the
manufacturer.
sealant manufacturer’s recommended cure time.
NOTE 1—The test method is specifically for 12.7-mm ( ⁄2-in.) wide
9.8 If a clear sealant was used, bubbles will be evident if
joints and sealant backings used in such joints. The procedure is adapted
they occurred. In all cases, slit the sealant along its entire
easily to either wider or narrower joints if all compression is considered
length at the mid point of the joint width using a sharp razor.
as a percent of the joint width.
9.8.1 If properly performed, the slit will pass through any
voids that have formed. Cut the sealant away from the edge of
8. Conditioning
the substrate (a knife generally works better than a razor).
8.1 Condition all sealant backing and sealants at standard
Remove the two sealant halves from the joint and examine the
conditions in accordance with Terminology C717 for a mini-
size of the voids.
mum of 12 h prior to testing.
10. Report
9. Procedure
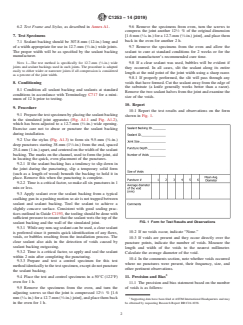
10.1 Report the test results and observations on the form
9.1 Prepare the test specimen by placing the sealant backing
shown in Fig. 1.
in the simulated joint apparatus (Fig. A1.1 and Fig.
...


Questions, Comments and Discussion
Ask us and Technical Secretary will try to provide an answer. You can facilitate discussion about the standard in here.
Loading comments...