ASTM C786/C786M-17
(Test Method)Standard Test Method for Fineness of Hydraulic Cement and Raw Materials by the 300-μm (No. 50), 150-μm (No. 100), and 75-μm (No. 200) Sieves by Wet Methods
Standard Test Method for Fineness of Hydraulic Cement and Raw Materials by the 300-μm (No. 50), 150-μm (No. 100), and 75-μm (No. 200) Sieves by Wet Methods
ABSTRACT
This test method covers wet sieving techniques for determination of fineness of hydraulic cement and raw materials by means of the No. 50, No. 100, and No. 200 sieves. The following apparatus shall be utilized: wet test sieves; spray nozzle; pressure gage; balance; weights; brush; dry test sieves; and NBS SRM No. 1004 (glass bead standard). Dry sieve standardization shall be performed by determining the correction factors and by preparing the standard samples. Wet sieve calibration shall follow and shall utilize the sieve correction factor. The procedure for wet sieving shall include the following: weighing of the sample; recording the weight and transferring the sample quantitatively to a clean dry sieve; wetting the sample thoroughly with a gentle stream of water; removing the sieve from under the nozzle and adjusting the pressure of the spray nozzle; returning the sieve to its position under the nozzle and washing it; moving the sieve in the spray with a circular motion; rinsing the sieve with distilled or deionized water immediately after removing it from the spray; blotting the lower surface of the screen cloth with a damp, clean cloth; drying the sieve and residue in an oven or over a hot plate; cooling the sieve; brushing the residue from the sieve; and weighing the sieve on a balance.
SCOPE
1.1 This test method covers wet sieving techniques for determination of fineness of hydraulic cement and raw materials by means of the 300-μm (No. 50), the 150-μm (No. 100), and the 75-μm (No. 200) sieves.
1.2 The values stated in either SI units or inch-pound units are to be regarded separately as standard. The values stated in each system may not be exact equivalents; therefore, each system shall be used independently of the other. Combining values from the two systems may result in non-conformance with the standard. Values in SI units [or inch-pound units] shall be obtained by measurement in SI units [or inch-pound units] or by appropriate conversion, using the Rules for Conversion and Rounding given in IEEE/ASTM SI 10 of measurements made in other units. Values are stated in SI units when inch-pound units are not used in practice.
1.3 This standard does not purport to address all of the safety concerns, if any, associated with its use. It is the responsibility of the user of this standard to establish appropriate safety, health, and environmental practices and determine the applicability of regulatory limitations prior to use.
1.4 This international standard was developed in accordance with internationally recognized principles on standardization established in the Decision on Principles for the Development of International Standards, Guides and Recommendations issued by the World Trade Organization Technical Barriers to Trade (TBT) Committee.
General Information
- Status
- Published
- Publication Date
- 30-Nov-2017
- Technical Committee
- C01 - Cement
- Drafting Committee
- C01.25 - Fineness
Relations
- Effective Date
- 01-Dec-2017
- Effective Date
- 01-Apr-2024
- Effective Date
- 01-Oct-2023
- Effective Date
- 01-Aug-2020
- Effective Date
- 01-Apr-2020
- Effective Date
- 15-Dec-2019
- Effective Date
- 15-Nov-2019
- Effective Date
- 01-Jun-2019
- Effective Date
- 01-Jan-2019
- Effective Date
- 01-Oct-2018
- Effective Date
- 01-Jul-2018
- Effective Date
- 01-Jan-2018
- Effective Date
- 01-Dec-2017
- Effective Date
- 15-Dec-2016
- Effective Date
- 15-Dec-2015
Overview
ASTM C786/C786M-17 is the standard test method developed by ASTM International for assessing the fineness of hydraulic cement and raw materials. This method specifically uses wet sieving techniques with 300-μm (No. 50), 150-μm (No. 100), and 75-μm (No. 200) sieves. Determining cement fineness is essential for understanding its quality and behavior in mixes, directly impacting key properties such as setting time, strength, and durability. ASTM C786/C786M-17 outlines precise procedures and apparatus requirements to ensure consistent and reliable results, making it a vital standard for cement manufacturers, construction material laboratories, and quality assurance professionals.
Key Topics
- Test Scope: Applies to hydraulic cement and raw materials using wet sieving with No. 50, No. 100, and No. 200 sieves.
- Required Apparatus: Includes wet and dry test sieves, spray nozzle, pressure gauge, balance, weights, brush, and glass bead standards.
- Dual-unit System: Supports both SI and inch-pound units, ensuring international relevance and compatibility.
- Sample Preparation and Sieving Procedures:
- Standardizes sample weights for different sieves.
- Emphasizes quantitative sample transfer, sieving under controlled water pressure, thorough rinsing, blotting, oven or hot plate drying, and residue weighing.
- Sieve Calibration and Standardization: Incorporates correction factors, calibration procedures using standard samples, and recommendations for recalibrating after a set number of uses.
Applications
Implementing ASTM C786/C786M-17 is critical for:
- Cement Manufacturing Quality Control: Verifies the fineness of cement, directly influencing workability and compressive strength of concrete.
- Construction Materials Testing: Ensures raw materials meet project specifications, supporting better durability and performance in structures.
- Laboratory Standardization: Enhances repeatability and comparability of results between laboratories through calibrated procedures and correction factors.
- Regulatory Compliance: Assists in meeting industry codes and international trade requirements where standardized test methods like this are referenced.
Proper assessment of cement fineness using wet sieving is essential to prevent unwanted variability in concrete mixtures and finished construction. The wet method is often preferred for materials prone to agglomeration, where dry sieving may be ineffective or imprecise.
Related Standards
Several ASTM and referenced documents are relevant for laboratories and professionals applying this standard, including:
- ASTM C114 - Test Methods for Chemical Analysis of Hydraulic Cement
- ASTM C125 - Terminology Relating to Concrete and Concrete Aggregates
- ASTM C219 - Terminology Relating to Hydraulic Cement
- ASTM C430 - Test Method for Fineness of Hydraulic Cement by the 45-μm (No. 325) Sieve
- ASTM E11 - Specification for Woven Wire Test Sieve Cloth and Test Sieves
- IEEE/ASTM SI 10 - American National Standard for Use of the International System of Units (SI)
Practical Value
Adhering to ASTM C786/C786M-17 ensures:
- Consistency in test results across manufacturing locations and laboratories
- Accurate measurement of cement fineness for optimized concrete performance
- Reliable quality assurance in construction and infrastructure projects
- Alignment with global trade and regulatory requirements
By following this test method, organizations can significantly reduce risks associated with material inconsistency, support innovation in materials engineering, and maintain compliance with industry best practices. For professionals in the cement and construction industries, knowledge and application of ASTM C786/C786M-17 are indispensable for maintaining the integrity and longevity of civil engineering works.
Buy Documents
ASTM C786/C786M-17 - Standard Test Method for Fineness of Hydraulic Cement and Raw Materials by the 300-μm (No. 50), 150-μm (No. 100), and 75-μm (No. 200) Sieves by Wet Methods
REDLINE ASTM C786/C786M-17 - Standard Test Method for Fineness of Hydraulic Cement and Raw Materials by the 300-μm (No. 50), 150-μm (No. 100), and 75-μm (No. 200) Sieves by Wet Methods
Get Certified
Connect with accredited certification bodies for this standard

ICC Evaluation Service
Building products evaluation and certification.

QAI Laboratories
Building and construction product testing and certification.

Aboma Certification B.V.
Specialized in construction, metal, and transport sectors.
Sponsored listings
Frequently Asked Questions
ASTM C786/C786M-17 is a standard published by ASTM International. Its full title is "Standard Test Method for Fineness of Hydraulic Cement and Raw Materials by the 300-μm (No. 50), 150-μm (No. 100), and 75-μm (No. 200) Sieves by Wet Methods". This standard covers: ABSTRACT This test method covers wet sieving techniques for determination of fineness of hydraulic cement and raw materials by means of the No. 50, No. 100, and No. 200 sieves. The following apparatus shall be utilized: wet test sieves; spray nozzle; pressure gage; balance; weights; brush; dry test sieves; and NBS SRM No. 1004 (glass bead standard). Dry sieve standardization shall be performed by determining the correction factors and by preparing the standard samples. Wet sieve calibration shall follow and shall utilize the sieve correction factor. The procedure for wet sieving shall include the following: weighing of the sample; recording the weight and transferring the sample quantitatively to a clean dry sieve; wetting the sample thoroughly with a gentle stream of water; removing the sieve from under the nozzle and adjusting the pressure of the spray nozzle; returning the sieve to its position under the nozzle and washing it; moving the sieve in the spray with a circular motion; rinsing the sieve with distilled or deionized water immediately after removing it from the spray; blotting the lower surface of the screen cloth with a damp, clean cloth; drying the sieve and residue in an oven or over a hot plate; cooling the sieve; brushing the residue from the sieve; and weighing the sieve on a balance. SCOPE 1.1 This test method covers wet sieving techniques for determination of fineness of hydraulic cement and raw materials by means of the 300-μm (No. 50), the 150-μm (No. 100), and the 75-μm (No. 200) sieves. 1.2 The values stated in either SI units or inch-pound units are to be regarded separately as standard. The values stated in each system may not be exact equivalents; therefore, each system shall be used independently of the other. Combining values from the two systems may result in non-conformance with the standard. Values in SI units [or inch-pound units] shall be obtained by measurement in SI units [or inch-pound units] or by appropriate conversion, using the Rules for Conversion and Rounding given in IEEE/ASTM SI 10 of measurements made in other units. Values are stated in SI units when inch-pound units are not used in practice. 1.3 This standard does not purport to address all of the safety concerns, if any, associated with its use. It is the responsibility of the user of this standard to establish appropriate safety, health, and environmental practices and determine the applicability of regulatory limitations prior to use. 1.4 This international standard was developed in accordance with internationally recognized principles on standardization established in the Decision on Principles for the Development of International Standards, Guides and Recommendations issued by the World Trade Organization Technical Barriers to Trade (TBT) Committee.
ABSTRACT This test method covers wet sieving techniques for determination of fineness of hydraulic cement and raw materials by means of the No. 50, No. 100, and No. 200 sieves. The following apparatus shall be utilized: wet test sieves; spray nozzle; pressure gage; balance; weights; brush; dry test sieves; and NBS SRM No. 1004 (glass bead standard). Dry sieve standardization shall be performed by determining the correction factors and by preparing the standard samples. Wet sieve calibration shall follow and shall utilize the sieve correction factor. The procedure for wet sieving shall include the following: weighing of the sample; recording the weight and transferring the sample quantitatively to a clean dry sieve; wetting the sample thoroughly with a gentle stream of water; removing the sieve from under the nozzle and adjusting the pressure of the spray nozzle; returning the sieve to its position under the nozzle and washing it; moving the sieve in the spray with a circular motion; rinsing the sieve with distilled or deionized water immediately after removing it from the spray; blotting the lower surface of the screen cloth with a damp, clean cloth; drying the sieve and residue in an oven or over a hot plate; cooling the sieve; brushing the residue from the sieve; and weighing the sieve on a balance. SCOPE 1.1 This test method covers wet sieving techniques for determination of fineness of hydraulic cement and raw materials by means of the 300-μm (No. 50), the 150-μm (No. 100), and the 75-μm (No. 200) sieves. 1.2 The values stated in either SI units or inch-pound units are to be regarded separately as standard. The values stated in each system may not be exact equivalents; therefore, each system shall be used independently of the other. Combining values from the two systems may result in non-conformance with the standard. Values in SI units [or inch-pound units] shall be obtained by measurement in SI units [or inch-pound units] or by appropriate conversion, using the Rules for Conversion and Rounding given in IEEE/ASTM SI 10 of measurements made in other units. Values are stated in SI units when inch-pound units are not used in practice. 1.3 This standard does not purport to address all of the safety concerns, if any, associated with its use. It is the responsibility of the user of this standard to establish appropriate safety, health, and environmental practices and determine the applicability of regulatory limitations prior to use. 1.4 This international standard was developed in accordance with internationally recognized principles on standardization established in the Decision on Principles for the Development of International Standards, Guides and Recommendations issued by the World Trade Organization Technical Barriers to Trade (TBT) Committee.
ASTM C786/C786M-17 is classified under the following ICS (International Classification for Standards) categories: 91.100.10 - Cement. Gypsum. Lime. Mortar. The ICS classification helps identify the subject area and facilitates finding related standards.
ASTM C786/C786M-17 has the following relationships with other standards: It is inter standard links to ASTM C786/C786M-10(2016), ASTM C219-24, ASTM C114-23, ASTM C219-20a, ASTM C219-20, ASTM C125-19a, ASTM C219-19a, ASTM C219-19, ASTM C125-19, ASTM C125-18b, ASTM C125-18a, ASTM C125-18, ASTM C430-17, ASTM C125-16, ASTM C125-15b. Understanding these relationships helps ensure you are using the most current and applicable version of the standard.
ASTM C786/C786M-17 is available in PDF format for immediate download after purchase. The document can be added to your cart and obtained through the secure checkout process. Digital delivery ensures instant access to the complete standard document.
Standards Content (Sample)
This international standard was developed in accordance with internationally recognized principles on standardization established in the Decision on Principles for the
Development of International Standards, Guides and Recommendations issued by the World Trade Organization Technical Barriers to Trade (TBT) Committee.
Designation: C786/C786M − 17
Standard Test Method for
Fineness of Hydraulic Cement and Raw Materials by the
300-µm (No. 50), 150-µm (No. 100), and 75-µm (No. 200)
Sieves by Wet Methods
This standard is issued under the fixed designation C786/C786M; the number immediately following the designation indicates the year
of original adoption or, in the case of revision, the year of last revision. A number in parentheses indicates the year of last reapproval.
A superscript epsilon (´) indicates an editorial change since the last revision or reapproval.
1. Scope* C125 Terminology Relating to Concrete and Concrete Ag-
gregates
1.1 This test method covers wet sieving techniques for
C184 Test Method for Fineness of Hydraulic Cement by the
determination of fineness of hydraulic cement and raw mate-
150-µm (No. 100) and 75-µm (No. 200) Sieves (With-
rials by means of the 300-µm (No. 50), the 150-µm (No. 100),
drawn 2002)
and the 75-µm (No. 200) sieves.
C219 Terminology Relating to Hydraulic Cement
1.2 The values stated in either SI units or inch-pound units
C430 Test Method for Fineness of Hydraulic Cement by the
are to be regarded separately as standard. The values stated in
45-µm (No. 325) Sieve
each system may not be exact equivalents; therefore, each
E11 Specification for Woven Wire Test Sieve Cloth and Test
system shall be used independently of the other. Combining
Sieves
values from the two systems may result in non-conformance
IEEE/ASTM SI 10 American National Standard for Use of
with the standard.Values in SI units [or inch-pound units] shall
theInternationalSystemofUnits(SI):TheModernMetric
be obtained by measurement in SI units [or inch-pound units]
System
or by appropriate conversion, using the Rules for Conversion
and Rounding given in IEEE/ASTM SI 10 of measurements
3. Terminology
made in other units. Values are stated in SI units when
3.1 Definitions:
inch-pound units are not used in practice.
3.1.1 For definitions of terms used in this test method, refer
1.3 This standard does not purport to address all of the
to Terminology C125 and C219.
safety concerns, if any, associated with its use. It is the
responsibility of the user of this standard to establish appro-
4. Apparatus
priate safety, health, and environmental practices and deter-
4.1 Wet Test Sieves—Standard 300-µm (No. 50), 150-µm
mine the applicability of regulatory limitations prior to use.
(No. 100), or 75-µm (No. 200) sieve cloth conforming to the
1.4 This international standard was developed in accor-
requirements of Specification E11, for standard sieves shall be
dance with internationally recognized principles on standard-
wovenfromAISIType304wire.Theclothshallbemountedin
ization established in the Decision on Principles for the
the frame without distortion, looseness, or wrinkling. Sieve
Development of International Standards, Guides and Recom-
frames are designated as 76.2 or 101.6-mm [3 or 4-in.]
mendations issued by the World Trade Organization Technical
diameter type, as follows:
Barriers to Trade (TBT) Committee.
Sieves
76 mm 102 mm
2. Referenced Documents
[3-in.] [4-in.]
mm [in.] mm [in.]
2.1 ASTM Standards:
C114 Test Methods for Chemical Analysis of Hydraulic
Diameter of frame 76 ± 6 102±6
Cement
[3.0 ± 0.25] [4.0 ± 0.25]
Depth of sieve from top of frame 83 ± 6 108±6
This test method is under the jurisdiction ofASTM Committee C01 on Cement
[3.25 ± 0.25] [4.25 ± 0.25]
and is the direct responsibility of Subcommittee C01.25 on Fineness.
Current edition approved Dec. 1, 2017. Published December 2017. Originally Overall height 102 ± 6 127±6
[4.0 ± 0.25] [5.0 ± 0.25]
approved in 1974. Last previous edition approved in 2016 as C786/
C786M – 10 (2016). DOI: 10.1520/C0786_C0786M-17.
For referenced ASTM standards, visit the ASTM website, www.astm.org, or
contact ASTM Customer Service at service@astm.org. For Annual Book of ASTM
Standards volume information, refer to the standard’s Document Summary page on The last approved version of this historical standard is referenced on
the ASTM website. www.astm.org.
*A Summary of Changes section appears at the end of this standard
Copyright © ASTM International, 100 Barr Harbor Drive, PO Box C700, West Conshohocken, PA 19428-2959. United States
C786/C786M − 17
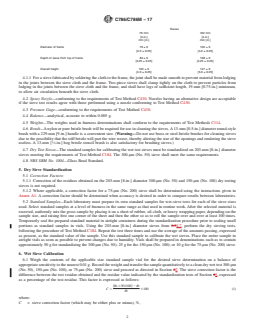
4.1.1 For a sieve fabricated by soldering the cloth to the the average of the amounts passing, expressed as percent, as
frame, the joint shall be made smooth to prevent material from the standard value of the sample. Use this standard sample to
lodging in the joints between the sieve cloth and the frame. calibratethewetsieves.Placetheentiresampleinairtightvials
Two-piece sieves shall clamp tightly on the cloth to prevent as soon as possible to prevent changes due to humidity. Vials
particles from lodging in the joints between the sieve cloth and shall be prepared in denominations such as to contain approxi-
the frame, and shall have legs of sufficient length, 19-mm mately50gforstandardizingthe300-µm(No.50);25gforthe
[0.75-in.] minimum, to allow air circulation beneath the sieve 150-µm (No. 100); or 10 g for the 75-µm (No. 200) sieve.
cloth.
6. Wet Sieve Calibration
4.2 Spray Nozzle—conforming to the requirements of Test
6.1 Weigh the contents of the applicable size standard
MethodC430.Nozzleshavinganalternativedesignareaccept-
sample vial for the desired sieve determination on a balance of
able if the sieve test results agree with those performed using
appropriate sensitivity to the nearest 0.01 g. Record the weight
a nozzle conforming to Test Method C430.
and transfer the sample quantitatively to a clean dry wet test
4.3 Pressure Gage—conforming to the requirements of Test
300-µm (No. 50), 150-µm (No. 100), or 75-µm (No. 200) sieve
Method C430.
and proceed as directed in Section 7. The sieve correction
factor is the difference between the test residue obtained and
4.4 Balance—analytical, accurate to within 0.005 g.
the residue value indicated by the standardization tests of
4.5 Weights—The weights used in fineness determinations
Section 5, expressed as a percentage of the test residue. This
shall conform to the requirements of Test Methods C114.
factor is expressed as follows:
4.6 Brush—A nylon or pure bristle brush will be required
~Rs 3Wt/100! 2 Rt
for use in cleaning the sieves. A 13-mm [0.5-in.] diameter
C 5 3100 (1)
Rt
round-style brush with a 229-mm [9-in.] handle is a convenient
size. (Warning—Do not use brass or steel-bristle brushes for where:
cleaning sieves due to the possibility that the stiff bristle will
C = sieve correction factor (which may be either plus or
part the wire weave, thereby altering the size of the openings
minus), %,
and rendering the sieve useless. A 13-mm [ ⁄2-in.] hog bristle
R = test residue from sample retained on sieve, g,
t
stencil brush is also satisfactory for brushing sieves.)
R = standard residue retained on sieve, %, and
s
W = weight of test sample, g.
t
4.7 Dry Test Sieves—The standard samples for calibrating
the wet test sieves must be standardized on 203-mm [8-in.] 6.1.1 Example of Determination of Wet Sieve Calibration:
diameter sieves meeting the requirements of Test Method
% Residue on 150-µm (No. 100) sieve for = 5.40%
standard sample, R
C184. The 300-µm (No. 50) sieve shall meet the same
s
Residue from test sample, R =1.25g
t
requirements.
Weight of sample, W = 25.5 g
t
4.8 NBS SRM No. 1004—Glass Bead Standard.
~5.40 325.5/100! 2 1.25
Correction factor, C,% 5 (2)
1.25
5. Dry Sieve Standardization
5.1 Correction Factors:
31005610.2
5.1.1 Correction of the residues obtained on the 203-mm NOTE1—Thesievecorrectionisspecifiedasafactortobemultipliedby
theresidueobtained,andthereforetheamounttobeaddedtoorsubtracted
[8-in.] diameter 300-µm (No. 50) and 150-µm (No. 100) dry
from the test residue in any given instance is proportional to the amount
testing sieves is not required.
of the residue.
5.1.2 Whereapplicable,acorrectionfactorfora75-µm(No.
200) sieve shall be determined using the instructions given in 7. Procedure for Wet Sieving
Annex A1. A correction factor should be determined when
7.1 Weigh the sample to
...
This document is not an ASTM standard and is intended only to provide the user of an ASTM standard an indication of what changes have been made to the previous version. Because
it may not be technically possible to adequately depict all changes accurately, ASTM recommends that users consult prior editions as appropriate. In all cases only the current version
of the standard as published by ASTM is to be considered the official document.
Designation: C786/C786M − 10 (Reapproved 2016) C786/C786M − 17
Standard Test Method for
Fineness of Hydraulic Cement and Raw Materials by the
300-μm (No. 50), 150-μm (No. 100), and 75-μm (No. 200)
Sieves by Wet Methods
This standard is issued under the fixed designation C786/C786M; the number immediately following the designation indicates the year
of original adoption or, in the case of revision, the year of last revision. A number in parentheses indicates the year of last reapproval.
A superscript epsilon (´) indicates an editorial change since the last revision or reapproval.
1. Scope*
1.1 This test method covers wet sieving techniques for determination of fineness of hydraulic cement and raw materials by
means of the 300-μm (No. 50), the 150-μm (No. 100), and the 75-μm (No. 200) sieves.
1.2 The values stated in either SI units or inch-pound units are to be regarded separately as standard. The values stated in each
system may not be exact equivalents; therefore, each system shall be used independently of the other. Combining values from the
two systems may result in non-conformance with the standard. Values in SI units [or inch-pound units] shall be obtained by
measurement in SI units [or inch-pound units] or by appropriate conversion, using the Rules for Conversion and Rounding given
in IEEE/ASTM SI 10 of measurements made in other units. Values are stated in SI units when inch-pound units are not used in
practice.
1.3 This standard does not purport to address all of the safety concerns, if any, associated with its use. It is the responsibility
of the user of this standard to establish appropriate safety safety, health, and healthenvironmental practices and determine the
applicability of regulatory limitations prior to use.
1.4 This international standard was developed in accordance with internationally recognized principles on standardization
established in the Decision on Principles for the Development of International Standards, Guides and Recommendations issued
by the World Trade Organization Technical Barriers to Trade (TBT) Committee.
2. Referenced Documents
2.1 ASTM Standards:
C114 Test Methods for Chemical Analysis of Hydraulic Cement
C125 Terminology Relating to Concrete and Concrete Aggregates
C184 Test Method for Fineness of Hydraulic Cement by the 150-μm (No. 100) and 75-μm (No. 200) Sieves (Withdrawn 2002)
C219 Terminology Relating to Hydraulic Cement
C430 Test Method for Fineness of Hydraulic Cement by the 45-μm (No. 325) Sieve
E11 Specification for Woven Wire Test Sieve Cloth and Test Sieves
IEEE/ASTM SI 10 American National Standard for Use of the International System of Units (SI): The Modern Metric System
3. Terminology
3.1 Definitions:
3.1.1 For definitions of terms used in this test method, refer to Terminology C125 and C219.
4. Apparatus
4.1 Wet Test Sieves—Standard 300-μm (No. 50), 150-μm (No. 100), or 75-μm (No. 200) sieve cloth conforming to the
requirements of Specification E11, for standard sieves shall be woven from AISI Type 304 wire. The cloth shall be mounted in
the frame without distortion, looseness, or wrinkling. Sieve frames are designated as 76.2 or 101.6-mm [3 or 4-in.] diameter type,
as follows:
This test method is under the jurisdiction of ASTM Committee C01 on Cement and is the direct responsibility of Subcommittee C01.25 on Fineness.
Current edition approved April 1, 2016Dec. 1, 2017. Published April 2016December 2017. Originally approved in 1974. Last previous edition approved in 20102016 as
C786/C786M – 10.C786/C786M – 10 (2016). DOI: 10.1520/C0786_C0786M-10R16.10.1520/C0786_C0786M-17.
For referenced ASTM standards, visit the ASTM website, www.astm.org, or contact ASTM Customer Service at service@astm.org. For Annual Book of ASTM Standards
volume information, refer to the standard’s Document Summary page on the ASTM website.
The last approved version of this historical standard is referenced on www.astm.org.
*A Summary of Changes section appears at the end of this standard
Copyright © ASTM International, 100 Barr Harbor Drive, PO Box C700, West Conshohocken, PA 19428-2959. United States
C786/C786M − 17
Sieves
76 mm 102 mm
[3-in.] [4-in.]
mm [in.] mm [in.]
Diameter of frame 76 ± 6 102 ± 6
[3.0 ± 0.25] [4.0 ± 0.25]
Depth of sieve from top of frame 83 ± 6 108 ± 6
[3.25 ± 0.25] [4.25 ± 0.25]
Overall height 102 ± 6 127 ± 6
[4.0 ± 0.25] [5.0 ± 0.25]
4.1.1 For a sieve fabricated by soldering the cloth to the frame, the joint shall be made smooth to prevent material from lodging
in the joints between the sieve cloth and the frame. Two-piece sieves shall clamp tightly on the cloth to prevent particles from
lodging in the joints between the sieve cloth and the frame, and shall have legs of sufficient length, 19-mm [0.75-in.] minimum,
to allow air circulation beneath the sieve cloth.
4.2 Spray Nozzle—conforming to the requirements of Test Method C430. Nozzles having an alternative design are acceptable
if the sieve test results agree with those performed using a nozzle conforming to Test Method C430.
4.3 Pressure Gage—conforming to the requirements of Test Method C430.
4.4 Balance—analytical, accurate to within 0.005 g.
4.5 Weights—The weights used in fineness determinations shall conform to the requirements of Test Methods C114.
4.6 Brush—A nylon or pure bristle brush will be required for use in cleaning the sieves. A 13-mm [0.5-in.] diameter round-style
brush with a 229-mm [9-in.] handle is a convenient size. (Warning—Do not use brass or steel-bristle brushes for cleaning sieves
due to the possibility that the stiff bristle will part the wire weave, thereby altering the size of the openings and rendering the sieve
useless. A 13-mm [ ⁄2-in.] hog bristle stencil brush is also satisfactory for brushing sieves.)
4.7 Dry Test Sieves—The standard samples for calibrating the wet test sieves must be standardized on 203-mm [8-in.] diameter
sieves meeting the requirements of Test Method C184. The 300-μm (No. 50) sieve shall meet the same requirements.
4.8 NBS SRM No. 1004—Glass Bead Standard.
5. Dry Sieve Standardization
5.1 Correction Factors:
5.1.1 Correction of the residues obtained on the 203-mm [8-in.] diameter 300-μm (No. 50) and 150-μm (No. 100) dry testing
sieves is not required.
5.1.2 Where applicable, a correction factor for a 75-μm (No. 200) sieve shall be determined using the instructions given in
Annex A1. A correction factor should be determined when accuracy is desired in order to compare results between laboratories.
5.2 Standard Samples—Each laboratory must prepare its own standard samples for wet-sieve tests for each of the sieve sizes
used. Select standard samples at a level of fineness in the same range as that used in routine work. After the selected material is
reserved, uniformly mix the gross sample by placing it on a sheet of rubber, oil cloth, or heavy wrapping paper, depending on the
sample size, and raising first one corner of the sheet and then the other so as to roll the sample over and over at least 100 times.
Temporarily seal the prepared standard material in airtight containers during the standardization procedure prior to sealing small
portions as standard samples in vials. Using the 203-mm [8-in.] diameter sieves from 3.74.7, perform the dry sieving tests,
following the procedure of Test Method C184. Repeat the test three times and use the average of the amounts passing, expressed
as percent, as the standard value of the sample. Use this standard sample to calibrate the wet sieves. Place the entire sample in
airtight vials as soon as possible to prevent changes due to humidity. Vials shall be prepared in denominations such as to contain
approximately 50 g for standardizing the 300-μm (No. 50); 25 g for the 150-μm (No. 100); or 10 g for the 75-μm (No. 200) sieve.
6. Wet Sieve Calibration
6.1 Weigh the contents of the applicable size standard sample vial for the desired sieve determination on a balance of
appropriate sensitivity to the nearest 0.01 g. Record the weight and transfer the sample quantitatively to a clean dry wet test 300-μm
(No. 50), 150-μm (No. 100), or 75-μm (No. 200) sieve and proceed as directed in Section 67. The sieve correction factor is the
difference between the test residue obtained and the residue value indicated by the standardization tests of Secti
...

Questions, Comments and Discussion
Ask us and Technical Secretary will try to provide an answer. You can facilitate discussion about the standard in here.
Loading comments...