ASTM F2421-19a
(Test Method)Standard Test Method for Measurement of Resilient Floor Plank by Dial Gauge
Standard Test Method for Measurement of Resilient Floor Plank by Dial Gauge
SIGNIFICANCE AND USE
4.1 The combination of both dimensional properties and squareness of resilient floor plank is an important consideration because installed flooring may exhibit an objectionable appearance when either or both characteristics deviate from established tolerances. This test method provides a means of determining length and width dimensions along with squareness, by using a single apparatus and procedure.
SCOPE
1.1 This test method establishes the procedures for determination of both dimension (length and width) and squareness of a rectangular resilient floor plank.
1.2 The values stated in inch-pound units are to be regarded as standard. The values given in parentheses are mathematical conversions to SI units that are provided for information only and are not considered standard.
1.3 This standard does not purport to address all of the safety concerns, if any, associated with its use. It is the responsibility of the user of this standard to establish appropriate safety, health, and environmental practices and determine the applicability of regulatory limitations prior to use. Specific precautionary statements are provided in applicable sections of this test method.
1.4 The values stated in inch-pounds units are to be regarded as the standard. The values given in parentheses are for information only.
1.5 This international standard was developed in accordance with internationally recognized principles on standardization established in the Decision on Principles for the Development of International Standards, Guides and Recommendations issued by the World Trade Organization Technical Barriers to Trade (TBT) Committee.
General Information
- Status
- Published
- Publication Date
- 31-Jan-2019
- Technical Committee
- F06 - Resilient Floor Coverings
- Drafting Committee
- F06.20 - Test Methods
Relations
- Effective Date
- 01-Feb-2019
- Effective Date
- 01-Aug-2023
- Effective Date
- 15-Jan-2020
- Effective Date
- 01-Mar-2012
- Effective Date
- 01-Dec-2011
- Effective Date
- 01-Dec-2008
- Effective Date
- 01-Nov-2008
- Effective Date
- 01-Nov-2004
- Effective Date
- 10-Jun-2003
- Effective Date
- 10-Aug-2001
- Effective Date
- 10-Aug-2001
- Effective Date
- 10-Aug-2001
- Effective Date
- 10-Aug-2001
- Effective Date
- 01-Feb-2019
- Effective Date
- 01-Feb-2019
Overview
ASTM F2421-19a is the Standard Test Method for Measurement of Resilient Floor Plank by Dial Gauge. Developed by ASTM International, this method provides clear procedures to determine the dimensions (length and width) and squareness of rectangular resilient floor planks, using dial gauge apparatus. Accurate measurement of these properties is essential for quality control in manufacturing resilient floor coverings, as deviations can lead to misalignment and poor visual appearance once installed.
This standard is widely utilized by manufacturers, quality control labs, and specifiers in the flooring industry to ensure compliance with dimensional tolerances for resilient planks.
Key Topics
Dimensional Verification
The standard guides users on how to precisely measure the length and width of resilient floor planks, which are typically rectangular and may be up to 36 inches (915 mm) in length.Squareness Assessment
Squareness is critical for successful installation and final floor appearance. This test method outlines how to evaluate the angles of planks to verify they meet required tolerances.Test Apparatus
Specifies the use of a specially designed apparatus featuring five dial gauges and two fixed index strips, set up to measure all sides of the plank through sequential positioning and rotation.Sampling and Conditioning
Provides guidance on selecting representative sample planks (in accordance with ANSI/ASQC Z1.4) and proper conditioning of both samples and measurement equipment to ensure environmental consistency.Measurement and Calculation Procedures
Step-by-step instructions are given for calibrating the apparatus, measuring each sample, and calculating deviations in dimension and squareness.Precision and Reporting
Offers recordkeeping requirements, including data collection on plank size, test date, and measured deviations, supporting traceability and quality assurance.
Applications
This standard plays a significant role in the resilient flooring industry:
Quality Control in Production
Flooring manufacturers rely on ASTM F2421-19a to verify each production batch meets stringent dimensional tolerances, minimizing the risk of unsatisfactory installations and claims.Product Certification
Conforming to this standard is often a requirement for product certification and acceptance in regulated or specification-driven markets.New Product Development
Product engineers use this method during R&D to confirm prototype planks conform to intended design parameters for size and squareness.Purchasing and Specification
Purchasing agents and specifiers incorporate this standard into procurement documents to ensure consistency and quality from suppliers.
Related Standards
Several standards are referenced or closely linked with ASTM F2421-19a:
- ASTM F141 - Terminology Relating to Resilient Floor Coverings: Provides essential definitions for terms used in this test method.
- ANSI/ASQC Z1.4 - Sampling Procedures and Tables for Inspection by Attributes: Specifies sampling techniques used in quality control testing.
- Other ASTM Resilient Flooring Standards - Additional standards cover performance, installation, and physical properties of resilient flooring products.
Summary
ASTM F2421-19a provides a unified and reliable methodology for the precise measurement of resilient floor planks by dial gauge. Its implementation ensures products will fit and perform as expected, supporting flooring manufacturers and buyers in delivering consistent quality and reducing the risk of costly installation problems. Using this standard is a key part of best practices in dimension control and flooring product quality assurance.
Buy Documents
ASTM F2421-19a - Standard Test Method for Measurement of Resilient Floor Plank by Dial Gauge
REDLINE ASTM F2421-19a - Standard Test Method for Measurement of Resilient Floor Plank by Dial Gauge
Get Certified
Connect with accredited certification bodies for this standard

Gozdarski inštitut Slovenije
Slovenian Forestry Institute. Forest management certification support, timber testing.
Sponsored listings
Frequently Asked Questions
ASTM F2421-19a is a standard published by ASTM International. Its full title is "Standard Test Method for Measurement of Resilient Floor Plank by Dial Gauge". This standard covers: SIGNIFICANCE AND USE 4.1 The combination of both dimensional properties and squareness of resilient floor plank is an important consideration because installed flooring may exhibit an objectionable appearance when either or both characteristics deviate from established tolerances. This test method provides a means of determining length and width dimensions along with squareness, by using a single apparatus and procedure. SCOPE 1.1 This test method establishes the procedures for determination of both dimension (length and width) and squareness of a rectangular resilient floor plank. 1.2 The values stated in inch-pound units are to be regarded as standard. The values given in parentheses are mathematical conversions to SI units that are provided for information only and are not considered standard. 1.3 This standard does not purport to address all of the safety concerns, if any, associated with its use. It is the responsibility of the user of this standard to establish appropriate safety, health, and environmental practices and determine the applicability of regulatory limitations prior to use. Specific precautionary statements are provided in applicable sections of this test method. 1.4 The values stated in inch-pounds units are to be regarded as the standard. The values given in parentheses are for information only. 1.5 This international standard was developed in accordance with internationally recognized principles on standardization established in the Decision on Principles for the Development of International Standards, Guides and Recommendations issued by the World Trade Organization Technical Barriers to Trade (TBT) Committee.
SIGNIFICANCE AND USE 4.1 The combination of both dimensional properties and squareness of resilient floor plank is an important consideration because installed flooring may exhibit an objectionable appearance when either or both characteristics deviate from established tolerances. This test method provides a means of determining length and width dimensions along with squareness, by using a single apparatus and procedure. SCOPE 1.1 This test method establishes the procedures for determination of both dimension (length and width) and squareness of a rectangular resilient floor plank. 1.2 The values stated in inch-pound units are to be regarded as standard. The values given in parentheses are mathematical conversions to SI units that are provided for information only and are not considered standard. 1.3 This standard does not purport to address all of the safety concerns, if any, associated with its use. It is the responsibility of the user of this standard to establish appropriate safety, health, and environmental practices and determine the applicability of regulatory limitations prior to use. Specific precautionary statements are provided in applicable sections of this test method. 1.4 The values stated in inch-pounds units are to be regarded as the standard. The values given in parentheses are for information only. 1.5 This international standard was developed in accordance with internationally recognized principles on standardization established in the Decision on Principles for the Development of International Standards, Guides and Recommendations issued by the World Trade Organization Technical Barriers to Trade (TBT) Committee.
ASTM F2421-19a is classified under the following ICS (International Classification for Standards) categories: 79.080 - Semi-manufactures of timber. The ICS classification helps identify the subject area and facilitates finding related standards.
ASTM F2421-19a has the following relationships with other standards: It is inter standard links to ASTM F2421-19, ASTM F141-23, ASTM F141-12(2020), ASTM F141-12, ASTM F141-11, ASTM F141-08a, ASTM F141-08, ASTM F141-04, ASTM F141-03, ASTM F141-00B, ASTM F141-00A, ASTM F141-01, ASTM F141-01a, ASTM F3261-20, ASTM F2199-20. Understanding these relationships helps ensure you are using the most current and applicable version of the standard.
ASTM F2421-19a is available in PDF format for immediate download after purchase. The document can be added to your cart and obtained through the secure checkout process. Digital delivery ensures instant access to the complete standard document.
Standards Content (Sample)
This international standard was developed in accordance with internationally recognized principles on standardization established in the Decision on Principles for the
Development of International Standards, Guides and Recommendations issued by the World Trade Organization Technical Barriers to Trade (TBT) Committee.
Designation: F2421 −19a
Standard Test Method for
Measurement of Resilient Floor Plank by Dial Gauge
This standard is issued under the fixed designation F2421; the number immediately following the designation indicates the year of
original adoption or, in the case of revision, the year of last revision. A number in parentheses indicates the year of last reapproval. A
superscript epsilon (´) indicates an editorial change since the last revision or reapproval.
1. Scope 3. Terminology
1.1 This test method establishes the procedures for determi- 3.1 Definitions: For definitions of terms used in this test
nation of both dimension (length and width) and squareness of method, refer to Terminology F141.
a rectangular resilient floor plank. 3.2 resilient floor plank—shape of a modular flooring ele-
ment where the length is generally significantly longer than the
1.2 The values stated in inch-pound units are to be regarded
width, by at least 2/1, L/W (length/width) aspect ratio. Typical
as standard. The values given in parentheses are mathematical
plank maximums for width run ≤18 in. (457.2 mm) and
conversions to SI units that are provided for information only
maximums for length ≤8 ft (2.44 m).
and are not considered standard.
1.3 This standard does not purport to address all of the
4. Significance and Use
safety concerns, if any, associated with its use. It is the
4.1 The combination of both dimensional properties and
responsibility of the user of this standard to establish appro-
squarenessofresilientfloorplankisanimportantconsideration
priate safety, health, and environmental practices and deter-
because installed flooring may exhibit an objectionable appear-
mine the applicability of regulatory limitations prior to use.
ance when either or both characteristics deviate from estab-
Specific precautionary statements are provided in applicable
lished tolerances. This test method provides a means of
sections of this test method.
determining length and width dimensions along with
1.4 The values stated in inch-pounds units are to be re-
squareness, by using a single apparatus and procedure.
garded as the standard. The values given in parentheses are for
information only.
5. Apparatus
1.5 This international standard was developed in accor-
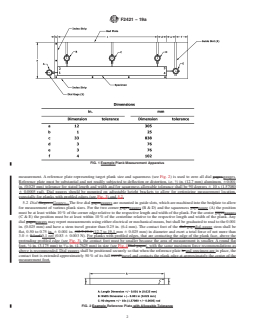
5.1 The example apparatus consists of five dial gauges and
dance with internationally recognized principles on standard-
two reference index strips mounted on a flat bedplate in a
ization established in the Decision on Principles for the
configuration that, by rotation and flipping of the sample,
Development of International Standards, Guides and Recom-
allows the measurement of all four sides of resilient plank
mendations issued by the World Trade Organization Technical
samples. (See Fig. 1). One edge of the bedplate is elevated to
Barriers to Trade (TBT) Committee.
create a test surface, which is offset or tilted 15 6 1 degrees
from horizontal. The offset applies minimal pressure to the test
2. Referenced Documents
specimen against the longer index strip to ensure repeatable
2.1 ASTM Standards:
measurement. A reference plate representing target plank size
F141 Terminology Relating to Resilient Floor Coverings
and squareness (see Fig. 2) is used to zero all dial gauges.
2.2 ANSI Standards:
Referenceplatemustbesubstantialandnotreadilysubjectedto
ANSI/ASQC Z1.4 Sampling Procedures and Tables for In-
deflection or distortion, i.e. ⁄2 in. (12.7 mm) aluminum,
spection by Attributes
60.001 in. (0.025 mm) tolerance for stated length and width
and for squareness allowable tolerance shall be 90 degrees 6
10 s (1.57080 6 0.0005 rad). Dial gauges should be mounted
This test method is under jurisdiction of ASTM F06 Committee on Resilient
on adjustable height brackets to allow for optimizing measure-
Floor Coverings and is the direct responsibility of subcommittee F06.20 on Test
ment location, especially for planks with profiled edges (see
Methods
Fig. 3) and 5.2.
Current edition approved Feb. 1, 2019. Published March 2019. Originally
approved in 2005. Last previous edition approved in 2019 as F2421–19. DOI:
5.2 Dial Gauges—The five dial gauges are mounted in
10.1520/F2421-19A.
guide slots, which are machined into the bedplate to allow for
For referenced ASTM standards, visit the ASTM website, www.astm.org, or
contact ASTM Customer Service at service@astm.org. For Annual Book of ASTM
measurement of various plank sizes. For the two corner gauges
Standards volume information, refer to the standard’s Document Summary page on
(B & D) and the squareness gauge (A) the position must be at
the ASTM website.
least within 10 % of the corner edge relative to the respective
Available from American National Standards Institute (ANSI), 25 W. 43rd St.,
4th Floor, New York, NY 10036, http://www.ansi.org. length and width of the plank. For the center gauges (C & E)
Copyright © ASTM International, 100 Barr Harbor Drive, PO Box C700, West Conshohocken, PA 19428-2959. United States
F2421 − 19a
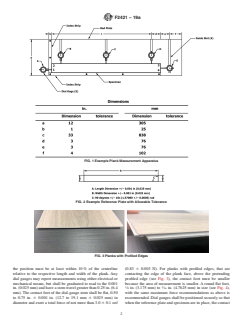
FIG. 1 Example Plank Measurement Apparatus
FIG. 2 Example Reference Plate with Allowable Tolerance
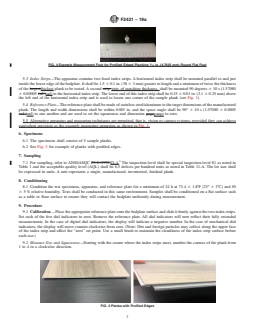
FIG. 3 Planks with Profiled Edges
the position must be at least within 10 % of the centerline (0.83 6 0.003 N). For planks with profiled edges, that are
relative to the respective length and width of the plank. Any contacting the edge of the plank face, above the protruding
dial gauges may report measurements using either electrical or profiled edge (see Fig. 3), the contact foot must be smaller
mechanical means, but shall be graduated to read to the 0.001 because the area of measurement is smaller. A round flat foot,
1 3
in. (0.025 mm) and have a stem travel greater than 0.25 in. (6.4 ⁄8 in. (3.175 mm) to ⁄16 in. (4.7625 mm) in size (see Fig. 4),
mm).The contact foot of the dial-gauge stem shall be flat, 0.50 with the same maximum force recommendations as above is
to 0.75 in. 6 0.001 in. (12.7 to 19.1 mm 6 0.025 mm) in recommended. Dial gauges shall be positioned securely so that
diameter and exert a total force of not more than 3.0 6 0.1 ozf when the reference plate and specimen are in place, the contact
F2421 − 19a
index strips. Set each of the five dial indicators to zero.
Remove the reference plate.All dial indicators will now reflect
their fully extended measurements. In the case of digi
...
This document is not an ASTM standard and is intended only to provide the user of an ASTM standard an indication of what changes have been made to the previous version. Because
it may not be technically possible to adequately depict all changes accurately, ASTM recommends that users consult prior editions as appropriate. In all cases only the current version
of the standard as published by ASTM is to be considered the official document.
Designation: F2421 − 19 F2421 − 19a
Standard Test Method for
Measurement of Resilient Floor Plank by Dial GageGauge
This standard is issued under the fixed designation F2421; the number immediately following the designation indicates the year of
original adoption or, in the case of revision, the year of last revision. A number in parentheses indicates the year of last reapproval. A
superscript epsilon (´) indicates an editorial change since the last revision or reapproval.
1. Scope
1.1 This test method establishes the procedures for determination of both dimension (length and width) and squareness of a
rectangular resilient floor plank. This test method is intended for use with rectangular plank up to 36 in. (915 mm).
1.2 The values stated in inch-pound units are to be regarded as standard. The values given in parentheses are mathematical
conversions to SI units that are provided for information only and are not considered standard.
1.3 This standard does not purport to address all of the safety concerns, if any, associated with its use. It is the responsibility
of the user of this standard to establish appropriate safety, health, and environmental practices and determine the applicability of
regulatory limitations prior to use. Specific precautionary statements are provided in applicable sections of this test method.
1.4 The values stated in inch-pounds units are to be regarded as the standard. The values given in parentheses are for information
only.
1.5 This international standard was developed in accordance with internationally recognized principles on standardization
established in the Decision on Principles for the Development of International Standards, Guides and Recommendations issued
by the World Trade Organization Technical Barriers to Trade (TBT) Committee.
2. Referenced Documents
2.1 ASTM Standards:
F141 Terminology Relating to Resilient Floor Coverings
2.2 ANSI Standards:
ANSI/ASQC Z1.4-1993Z1.4 Sampling Procedures and Tables for Inspection by Attributes
3. Terminology
3.1 Definitions: For definitions of terms used in this test method, refer to Terminology F141.
3.2 resilient floor plank—shape of a modular flooring element where the length is generally significantly longer than the width,
by at least 2/1, L/W (length/width) aspect ratio. Typical plank maximums for width run ≤18 in. (457.2 mm) and maximums for
length ≤8 ft (2.44 m).
4. Significance and Use
4.1 The combination of both dimensional properties and squareness of resilient floor plank is an important consideration
because installed flooring may exhibit an objectionable appearance when either or both characteristics deviate from established
tolerances. This test method provides a means of determining length and width dimensions along with squareness, by using a single
apparatus and procedure.
5. Apparatus
5.1 The apparatusexample shall consistapparatus consists of five dial gagesgauges and two reference index strips mounted on
a flat bedplate in a configuration that, by rotation and flipping of the sample, allows the measurement of all four sides of resilient
plank samples. (See Fig. 1). One edge of the bedplate is elevated to create a test surface, which is offset or tilted 15+/-1 15 6 1
degrees from horizontal. The offset applies minimal pressure to the test specimen against the longer index strip to ensure repeatable
This test method is under jurisdiction of ASTM F06 Committee on Resilient Floor Coverings and is the direct responsibility of subcommittee F06.20 on Test Methods
Current edition approved Jan. 1, 2019Feb. 1, 2019. Published February 2019March 2019. Originally approved in 2005. Last previous edition approved in 20112019 as
F2421–05 (2011). –19. DOI: 10.1520/F2421-19.10.1520/F2421-19A.
For referenced ASTM standards, visit the ASTM website, www.astm.org, or contact ASTM Customer Service at service@astm.org. For Annual Book of ASTM Standards
volume information, refer to the standard’s Document Summary page on the ASTM website.
Available from American National Standards Institute, Institute (ANSI), 25 WestW. 43rd St., 4th Floor, New York, NY 10036.10036, http://www.ansi.org.
Copyright © ASTM International, 100 Barr Harbor Drive, PO Box C700, West Conshohocken, PA 19428-2959. United States
F2421 − 19a
FIG. 1 Example Plank Measurement Apparatus
measurement. A reference plate representing target plank size and squareness (see Fig. 2) is used to zero all dial gages.gauges.
Reference plate must be substantial and not readily subjected to deflection or distortion, i.e. ⁄2 in. (12.7 mm) aluminum, 60.001
in. (0.025 mm) tolerance for stated length and width and for squareness allowable tolerance shall be 90 degrees 6 10 s (1.57080
6 0.0005 rad). Dial gauges should be mounted on adjustable height brackets to allow for optimizing measurement location,
especially for planks with profiled edges (see Fig. 3) and 5.2.
5.2 Dial Gages—Gauges—The five dial gagesgauges are mounted in guide slots, which are machined into the bedplate to allow
for measurement of various plank sizes. For the two corner gagesgauges (B & D) and the squareness gagegauge (A) the position
must be at least within 10 % of the corner edge relative to the respective length and width of the plank. For the center gagesgauges
(C & E) the position must be at least within 10 % of the centerline relative to the respective length and width of the plank. Any
dial gagesgauges may report measurements using either electrical or mechanical means, but shall be graduated to read to the 0.001
in. (0.025 mm) and have a stem travel greater than 0.25 in. (6.4 mm). The contact foot of the dial-gagedial-gauge stem shall be
flat, 0.50 to 0.75 in. 6 0.001 in. (12.7-19.1 (12.7 to 19.1 mm 6 0.025 mm) in diameter and exert a total force of not more than
3.0 6 0.1ozf 0.1 ozf (0.83 6 0.003 N). For planks with profiled edges, that are contacting the edge of the plank face, above the
protruding profiled edge (see Fig. 3), the contact foot must be smaller because the area of measurement is smaller. A round flat
1 3
foot, ⁄8 in. (3.175 mm) to ⁄16 in. (4.7625 mm) in size (see Fig. 4Dial gages), with the same maximum force recommendations as
above is recommended. Dial gauges shall be positioned securely so that when the reference plate is and specimen are in place, the
contact foot is extended approximately 50 % of its full travel.travel and contacts the plank edge at approximately the center of the
measurement foot.
FIG. 2 Example Reference Plate with Allowable Tolerance
F2421 − 19a
FIG. 4 Example Measurement Foot for Pr
...

Questions, Comments and Discussion
Ask us and Technical Secretary will try to provide an answer. You can facilitate discussion about the standard in here.
Loading comments...