ASTM E2425-11
(Test Method)Standard Test Method for Loss Modulus Conformance of Dynamic Mechanical Analyzers
Standard Test Method for Loss Modulus Conformance of Dynamic Mechanical Analyzers
SIGNIFICANCE AND USE
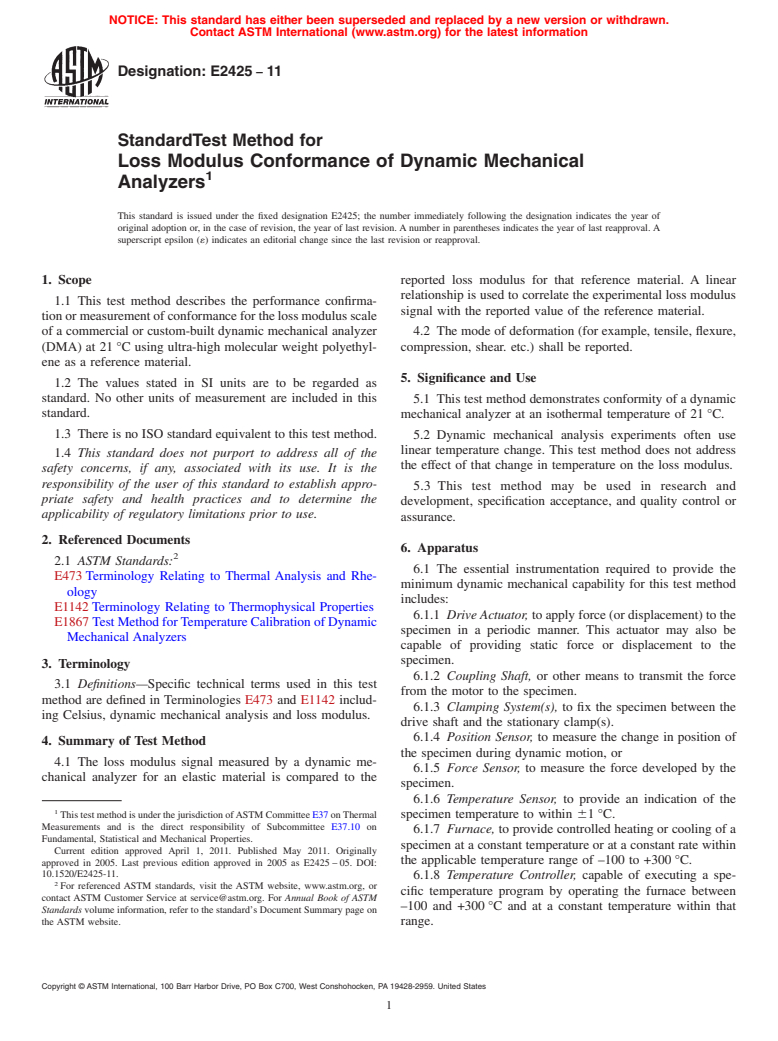
This test method demonstrates conformity of a dynamic mechanical analyzer at an isothermal temperature of 21 °C.
Dynamic mechanical analysis experiments often use linear temperature change. This test method does not address the effect of that change in temperature on the loss modulus.
This test method may be used in research and development, specification acceptance, and quality control or assurance.
SCOPE
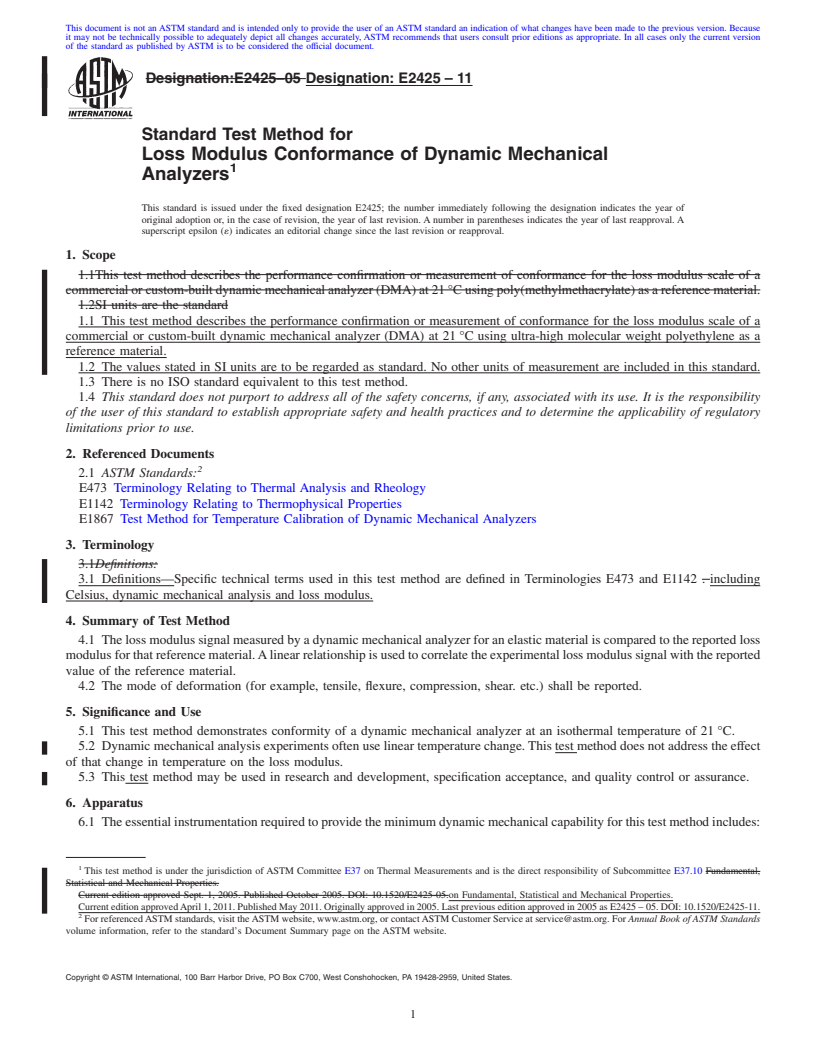
1.1 This test method describes the performance confirmation or measurement of conformance for the loss modulus scale of a commercial or custom-built dynamic mechanical analyzer (DMA) at 21 °C using ultra-high molecular weight polyethylene as a reference material.
1.2 The values stated in SI units are to be regarded as standard. No other units of measurement are included in this standard.
1.3 There is no ISO standard equivalent to this test method.
1.4 This standard does not purport to address all of the safety concerns, if any, associated with its use. It is the responsibility of the user of this standard to establish appropriate safety and health practices and to determine the applicability of regulatory limitations prior to use.
General Information
Relations
Buy Standard
Standards Content (Sample)
NOTICE: This standard has either been superseded and replaced by a new version or withdrawn.
Contact ASTM International (www.astm.org) for the latest information
Designation: E2425 − 11
StandardTest Method for
Loss Modulus Conformance of Dynamic Mechanical
1
Analyzers
This standard is issued under the fixed designation E2425; the number immediately following the designation indicates the year of
original adoption or, in the case of revision, the year of last revision. A number in parentheses indicates the year of last reapproval. A
superscript epsilon (´) indicates an editorial change since the last revision or reapproval.
1. Scope reported loss modulus for that reference material. A linear
relationship is used to correlate the experimental loss modulus
1.1 This test method describes the performance confirma-
signal with the reported value of the reference material.
tionormeasurementofconformanceforthelossmodulusscale
of a commercial or custom-built dynamic mechanical analyzer
4.2 The mode of deformation (for example, tensile, flexure,
(DMA) at 21 °C using ultra-high molecular weight polyethyl- compression, shear. etc.) shall be reported.
ene as a reference material.
5. Significance and Use
1.2 The values stated in SI units are to be regarded as
standard. No other units of measurement are included in this
5.1 This test method demonstrates conformity of a dynamic
standard. mechanical analyzer at an isothermal temperature of 21 °C.
1.3 There is no ISO standard equivalent to this test method.
5.2 Dynamic mechanical analysis experiments often use
linear temperature change. This test method does not address
1.4 This standard does not purport to address all of the
the effect of that change in temperature on the loss modulus.
safety concerns, if any, associated with its use. It is the
responsibility of the user of this standard to establish appro-
5.3 This test method may be used in research and
priate safety and health practices and to determine the
development, specification acceptance, and quality control or
applicability of regulatory limitations prior to use.
assurance.
2. Referenced Documents
6. Apparatus
2
2.1 ASTM Standards:
6.1 The essential instrumentation required to provide the
E473 Terminology Relating to Thermal Analysis and Rhe-
minimum dynamic mechanical capability for this test method
ology
includes:
E1142 Terminology Relating to Thermophysical Properties
6.1.1 Drive Actuator, to apply force (or displacement) to the
E1867 Test Method forTemperature Calibration of Dynamic
specimen in a periodic manner. This actuator may also be
Mechanical Analyzers
capable of providing static force or displacement to the
specimen.
3. Terminology
6.1.2 Coupling Shaft, or other means to transmit the force
3.1 Definitions—Specific technical terms used in this test
from the motor to the specimen.
method are defined in Terminologies E473 and E1142 includ-
6.1.3 Clamping System(s), to fix the specimen between the
ing Celsius, dynamic mechanical analysis and loss modulus.
drive shaft and the stationary clamp(s).
6.1.4 Position Sensor, to measure the change in position of
4. Summary of Test Method
the specimen during dynamic motion, or
4.1 The loss modulus signal measured by a dynamic me-
6.1.5 Force Sensor, to measure the force developed by the
chanical analyzer for an elastic material is compared to the
specimen.
6.1.6 Temperature Sensor, to provide an indication of the
1
This test method is under the jurisdiction ofASTM Committee E37 on Thermal
specimen temperature to within 61 °C.
Measurements and is the direct responsibility of Subcommittee E37.10 on
6.1.7 Furnace, to provide controlled heating or cooling of a
Fundamental, Statistical and Mechanical Properties.
specimen at a constant temperature or at a constant rate within
Current edition approved April 1, 2011. Published May 2011. Originally
the applicable temperature range of –100 to +300 °C.
approved in 2005. Last previous edition approved in 2005 as E2425 – 05. DOI:
10.1520/E2425-11.
6.1.8 Temperature Controller, capable of executing a spe-
2
For referenced ASTM standards, visit the ASTM website, www.astm.org, or
cific temperature program by operating the furnace between
contact ASTM Customer Service at service@astm.org. For Annual Book of ASTM
–100 and +300 °C and at a constant temperature within that
Standards volume information, refer to the standard’s Document Summary page on
the ASTM website. range.
Copyright © ASTM International, 100 Barr Harbor Drive, PO Box C700, West Conshohocken, PA 19428-2959. United States
1
---------------------- Page: 1 ----------------------
E2425 − 11
TABLE 1 Reference Material Loss Modulus
and the temperature shall be isothermal between 20 and 22 °C.
Loss Ensure that the applied strain (or stress) amplitude is within the
Frequency
Temperature Material Modulus
linear viscoelastic region of the sample.
Hz
(°C) (MPa)
21 Ultra-High Molecular Weight Polyethylene 1 62.0
10.4 Record the loss modulus observed by the apparatus as
E .
o
10.5 Re
...
This document is not anASTM standard and is intended only to provide the user of anASTM standard an indication of what changes have been made to the previous version. Because
it may not be technically possible to adequately depict all changes accurately, ASTM recommends that users consult prior editions as appropriate. In all cases only the current version
of the standard as published by ASTM is to be considered the official document.
Designation:E2425–05 Designation:E2425–11
Standard Test Method for
Loss Modulus Conformance of Dynamic Mechanical
1
Analyzers
This standard is issued under the fixed designation E2425; the number immediately following the designation indicates the year of
original adoption or, in the case of revision, the year of last revision.Anumber in parentheses indicates the year of last reapproval.A
superscript epsilon (´) indicates an editorial change since the last revision or reapproval.
1. Scope
1.1This test method describes the performance confirmation or measurement of conformance for the loss modulus scale of a
commercialorcustom-builtdynamicmechanicalanalyzer(DMA)at21°Cusingpoly(methylmethacrylate)asareferencematerial.
1.2SI units are the standard
1.1 This test method describes the performance confirmation or measurement of conformance for the loss modulus scale of a
commercial or custom-built dynamic mechanical analyzer (DMA) at 21°C using ultra-high molecular weight polyethylene as a
reference material.
1.2 The values stated in SI units are to be regarded as standard. No other units of measurement are included in this standard.
1.3 There is no ISO standard equivalent to this test method.
1.4 This standard does not purport to address all of the safety concerns, if any, associated with its use. It is the responsibility
of the user of this standard to establish appropriate safety and health practices and to determine the applicability of regulatory
limitations prior to use.
2. Referenced Documents
2
2.1 ASTM Standards:
E473 Terminology Relating to Thermal Analysis and Rheology
E1142 Terminology Relating to Thermophysical Properties
E1867 Test Method for Temperature Calibration of Dynamic Mechanical Analyzers
3. Terminology
3.1Definitions:
3.1 Definitions—Specific technical terms used in this test method are defined in Terminologies E473 and E1142 . including
Celsius, dynamic mechanical analysis and loss modulus.
4. Summary of Test Method
4.1 Thelossmodulussignalmeasuredbyadynamicmechanicalanalyzerforanelasticmaterialiscomparedtothereportedloss
modulusforthatreferencematerial.Alinearrelationshipisusedtocorrelatetheexperimentallossmodulussignalwiththereported
value of the reference material.
4.2 The mode of deformation (for example, tensile, flexure, compression, shear. etc.) shall be reported.
5. Significance and Use
5.1 This test method demonstrates conformity of a dynamic mechanical analyzer at an isothermal temperature of 21°C.
5.2 Dynamicmechanicalanalysisexperimentsoftenuselineartemperaturechange.Thistestmethoddoesnotaddresstheeffect
of that change in temperature on the loss modulus.
5.3 This test method may be used in research and development, specification acceptance, and quality control or assurance.
6. Apparatus
6.1 Theessentialinstrumentationrequiredtoprovidetheminimumdynamicmechanicalcapabilityforthistestmethodincludes:
1
This test method is under the jurisdiction of ASTM Committee E37 on Thermal Measurements and is the direct responsibility of Subcommittee E37.10 Fundamental,
Statistical and Mechanical Properties.
Current edition approved Sept. 1, 2005. Published October 2005. DOI: 10.1520/E2425-05.on Fundamental, Statistical and Mechanical Properties.
CurrenteditionapprovedApril1,2011.PublishedMay2011.Originallyapprovedin2005.Lastpreviouseditionapprovedin2005asE2425–05.DOI:10.1520/E2425-11.
2
ForreferencedASTMstandards,visittheASTMwebsite,www.astm.org,orcontactASTMCustomerServiceatservice@astm.org.For Annual Book of ASTM Standards
volume information, refer to the standard’s Document Summary page on the ASTM website.
Copyright © ASTM International, 100 Barr Harbor Drive, PO Box C700, West Conshohocken, PA 19428-2959, United States.
1
---------------------- Page: 1 ----------------------
E2425–11
6.1.1 Drive Actuator, to apply force (or displacement) to the specimen in a periodic manner.This actuator may also be capable
of providing static force or displacement to the specimen.
6.1.2 Coupling Shaft, or other means to transmit the force from the motor to the specimen.
6.1.3 Clamping System(s), to fix the specimen between the drive shaft and the stationary clamp(s).
6.1.4 Position Sensor, to measure the change in position of the specimen during dynamic motion, or
6.1.5 Force Sensor, to measure the force developed by the specimen.
6.1.6 Temperature Sensor, to provide an indication of the specimen temperature to within 61°C.
6.1.7 Furnace, to provide controlled heating or cooling of a specimen at a constant temperature or at a constant rate within the
applicable temperature range
...


Questions, Comments and Discussion
Ask us and Technical Secretary will try to provide an answer. You can facilitate discussion about the standard in here.