ASTM C1503-24
(Specification)Standard Specification for Silvered Flat Glass Mirror
Standard Specification for Silvered Flat Glass Mirror
ABSTRACT
This specification covers the requirements for silvered flat glass mirrors of rectangular shape supplied as cut sizes, stock sheets or as lehr ends and to which no further processing (such as edgework or other fabrication) has been done. The quality requirements of silvered annealed monolithic clear and tinted flat glass mirrors up to a certain thickness are also discussed. The mirrors are intended to be used indoors for mirror glazing, for components of decorative accessories or for similar uses. The mirrors are not intended for use in environments where high humidity or airborne corrosion promoters, or both, are consistently present (such as swimming pool areas, ocean-going vessels, chemical laboratories and other corrosive environments). The classification of mirrors are according to the following properties: grades, cut size, stock sheet, lehr end, select quality, glazing quality, color (clear or tinted), and thickness. Different test methods shall be performed in order to determine or measure the following properties: reflectance, silver coating appearance, coating resistance, blemish (point and linear blemishes), dimension, and squareness.
SCOPE
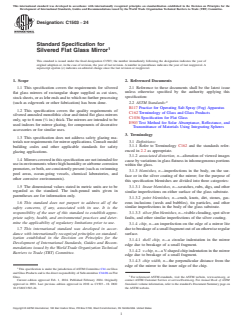
1.1 This specification covers the requirements for silvered flat glass mirrors of rectangular shape supplied as cut sizes, stock sheets, or as lehr ends and to which no further processing (such as edgework or other fabrication) has been done.
1.2 This specification covers the quality requirements of silvered annealed monolithic clear and tinted flat glass mirrors only, up to 6 mm (1/4 in.) thick. The mirrors are intended to be used indoors for mirror glazing, for components of decorative accessories or for similar uses.
1.3 This specification does not address safety glazing materials nor requirements for mirror applications. Consult model building codes and other applicable standards for safety glazing applications.
1.4 Mirrors covered in this specification are not intended for use in environments where high humidity or airborne corrosion promoters, or both, are consistently present (such as swimming pool areas, ocean-going vessels, chemical laboratories, and other corrosive environments).
1.5 The dimensional values stated in metric units are to be regarded as the standard. The inch-pound units given in parentheses are for information only.
1.6 This standard does not purport to address all of the safety concerns, if any, associated with its use. It is the responsibility of the user of this standard to establish appropriate safety, health, and environmental practices and determine the applicability of regulatory limitations prior to use.
1.7 This international standard was developed in accordance with internationally recognized principles on standardization established in the Decision on Principles for the Development of International Standards, Guides and Recommendations issued by the World Trade Organization Technical Barriers to Trade (TBT) Committee.
General Information
- Status
- Published
- Publication Date
- 31-Jan-2024
- Technical Committee
- C14 - Glass and Glass Products
- Drafting Committee
- C14.08 - Flat Glass
Relations
- Effective Date
- 01-Feb-2024
- Effective Date
- 01-Feb-2024
- Effective Date
- 01-Feb-2024
Overview
ASTM C1503-24 is the international standard specification for silvered flat glass mirrors of rectangular shape, as developed by ASTM International. This standard covers the requirements and test methods for quality and classification of silvered annealed monolithic flat glass mirrors, both clear and tinted, up to 6 mm (1/4 in.) thick. The specification addresses mirrors supplied as cut sizes, stock sheets, or lehr ends that have not undergone further fabrication. The mirrors are designed for indoor use such as mirror glazing, architectural applications, and as decorative components but are not suitable for areas exposed to persistent humidity or corrosive environments.
Key Topics
- Classification and Grades:
Silvered mirrors are classified by grade-mirror cut size (final-use size), mirror stock sheet (to be trimmed), and mirror lehr end (for recutting by the user). - Quality Criteria:
Two quality levels are defined:- Select Quality for visually demanding applications (typically available in 6 mm clear only)
- Glazing Quality for general-use situations where minor blemishes or distortions are acceptable
- Color and Thickness Options:
Mirrors may be manufactured from clear, low-iron, or tinted glass, with standard nominal thicknesses ranging from 2.5 mm to 6 mm, supporting various architectural and design requirements. - Performance Requirements:
- Minimum visible light reflectance: 83% for clear/low-iron, or as calculated for tinted glass
- Silver coating must be free from visible blemishes and meet defined resistance criteria
- Strict limitations are placed on point and linear blemishes, edge quality, and chips
- Test Methods:
The standard references detailed procedures for visual inspection, reflectance, coating resistance (using established ASTM practices), and dimensional measurement. - Exclusions:
The specification does not address safety glazing requirements; users must consult applicable building codes for installations requiring safety features.
Applications
ASTM C1503-24 ensures the optimal performance and durability of silvered flat glass mirrors used in:
- Residential mirror glazing in bathrooms, bedrooms, closets, and hallways
- Architectural fit-outs in offices, hotels, and commercial spaces
- Decorative accessories and furniture components such as mirrored doors, panels, or decorative wall features
- Retail display fixtures providing clear, undistorted visual reflection
Use of ASTM C1503-24 in procurement guarantees that mirrors meet consistent quality standards for reflectance, blemish limitations, and edge quality, reducing risk of installation problems and post-installation complaints.
Related Standards
Implementing ASTM C1503-24 may require reference to related standards for comprehensive project compliance:
- ASTM C1036: Specification for Flat Glass, governs the base glass used in mirrors
- ASTM C162: Terminology for Glass and Glass Products, for standardized definitions
- ASTM B117: Practice for Operating Salt Spray (Fog) Apparatus, used for testing coating resistance
- ASTM E903: Test Method for Solar Absorptance, Reflectance, and Transmittance
Consult relevant building codes and safety glazing standards when specifying mirror products for regulated environments or impact-prone installations.
Keywords: silvered flat glass mirror, ASTM C1503, mirror glazing, flat glass, architectural mirror, indoor mirrors, mirror quality, glass coatings, reflectance, blemish limits, glass standards.
Buy Documents
ASTM C1503-24 - Standard Specification for Silvered Flat Glass Mirror
REDLINE ASTM C1503-24 - Standard Specification for Silvered Flat Glass Mirror
Frequently Asked Questions
ASTM C1503-24 is a technical specification published by ASTM International. Its full title is "Standard Specification for Silvered Flat Glass Mirror". This standard covers: ABSTRACT This specification covers the requirements for silvered flat glass mirrors of rectangular shape supplied as cut sizes, stock sheets or as lehr ends and to which no further processing (such as edgework or other fabrication) has been done. The quality requirements of silvered annealed monolithic clear and tinted flat glass mirrors up to a certain thickness are also discussed. The mirrors are intended to be used indoors for mirror glazing, for components of decorative accessories or for similar uses. The mirrors are not intended for use in environments where high humidity or airborne corrosion promoters, or both, are consistently present (such as swimming pool areas, ocean-going vessels, chemical laboratories and other corrosive environments). The classification of mirrors are according to the following properties: grades, cut size, stock sheet, lehr end, select quality, glazing quality, color (clear or tinted), and thickness. Different test methods shall be performed in order to determine or measure the following properties: reflectance, silver coating appearance, coating resistance, blemish (point and linear blemishes), dimension, and squareness. SCOPE 1.1 This specification covers the requirements for silvered flat glass mirrors of rectangular shape supplied as cut sizes, stock sheets, or as lehr ends and to which no further processing (such as edgework or other fabrication) has been done. 1.2 This specification covers the quality requirements of silvered annealed monolithic clear and tinted flat glass mirrors only, up to 6 mm (1/4 in.) thick. The mirrors are intended to be used indoors for mirror glazing, for components of decorative accessories or for similar uses. 1.3 This specification does not address safety glazing materials nor requirements for mirror applications. Consult model building codes and other applicable standards for safety glazing applications. 1.4 Mirrors covered in this specification are not intended for use in environments where high humidity or airborne corrosion promoters, or both, are consistently present (such as swimming pool areas, ocean-going vessels, chemical laboratories, and other corrosive environments). 1.5 The dimensional values stated in metric units are to be regarded as the standard. The inch-pound units given in parentheses are for information only. 1.6 This standard does not purport to address all of the safety concerns, if any, associated with its use. It is the responsibility of the user of this standard to establish appropriate safety, health, and environmental practices and determine the applicability of regulatory limitations prior to use. 1.7 This international standard was developed in accordance with internationally recognized principles on standardization established in the Decision on Principles for the Development of International Standards, Guides and Recommendations issued by the World Trade Organization Technical Barriers to Trade (TBT) Committee.
ABSTRACT This specification covers the requirements for silvered flat glass mirrors of rectangular shape supplied as cut sizes, stock sheets or as lehr ends and to which no further processing (such as edgework or other fabrication) has been done. The quality requirements of silvered annealed monolithic clear and tinted flat glass mirrors up to a certain thickness are also discussed. The mirrors are intended to be used indoors for mirror glazing, for components of decorative accessories or for similar uses. The mirrors are not intended for use in environments where high humidity or airborne corrosion promoters, or both, are consistently present (such as swimming pool areas, ocean-going vessels, chemical laboratories and other corrosive environments). The classification of mirrors are according to the following properties: grades, cut size, stock sheet, lehr end, select quality, glazing quality, color (clear or tinted), and thickness. Different test methods shall be performed in order to determine or measure the following properties: reflectance, silver coating appearance, coating resistance, blemish (point and linear blemishes), dimension, and squareness. SCOPE 1.1 This specification covers the requirements for silvered flat glass mirrors of rectangular shape supplied as cut sizes, stock sheets, or as lehr ends and to which no further processing (such as edgework or other fabrication) has been done. 1.2 This specification covers the quality requirements of silvered annealed monolithic clear and tinted flat glass mirrors only, up to 6 mm (1/4 in.) thick. The mirrors are intended to be used indoors for mirror glazing, for components of decorative accessories or for similar uses. 1.3 This specification does not address safety glazing materials nor requirements for mirror applications. Consult model building codes and other applicable standards for safety glazing applications. 1.4 Mirrors covered in this specification are not intended for use in environments where high humidity or airborne corrosion promoters, or both, are consistently present (such as swimming pool areas, ocean-going vessels, chemical laboratories, and other corrosive environments). 1.5 The dimensional values stated in metric units are to be regarded as the standard. The inch-pound units given in parentheses are for information only. 1.6 This standard does not purport to address all of the safety concerns, if any, associated with its use. It is the responsibility of the user of this standard to establish appropriate safety, health, and environmental practices and determine the applicability of regulatory limitations prior to use. 1.7 This international standard was developed in accordance with internationally recognized principles on standardization established in the Decision on Principles for the Development of International Standards, Guides and Recommendations issued by the World Trade Organization Technical Barriers to Trade (TBT) Committee.
ASTM C1503-24 is classified under the following ICS (International Classification for Standards) categories: 97.140 - Furniture. The ICS classification helps identify the subject area and facilitates finding related standards.
ASTM C1503-24 has the following relationships with other standards: It is inter standard links to ASTM C1503-18, ASTM C1349-17, ASTM C1172-19. Understanding these relationships helps ensure you are using the most current and applicable version of the standard.
ASTM C1503-24 is available in PDF format for immediate download after purchase. The document can be added to your cart and obtained through the secure checkout process. Digital delivery ensures instant access to the complete standard document.
Standards Content (Sample)
This international standard was developed in accordance with internationally recognized principles on standardization established in the Decision on Principles for the
Development of International Standards, Guides and Recommendations issued by the World Trade Organization Technical Barriers to Trade (TBT) Committee.
Designation: C1503 − 24
Standard Specification for
Silvered Flat Glass Mirror
This standard is issued under the fixed designation C1503; the number immediately following the designation indicates the year of
original adoption or, in the case of revision, the year of last revision. A number in parentheses indicates the year of last reapproval. A
superscript epsilon (´) indicates an editorial change since the last revision or reapproval.
1. Scope 2. Referenced Documents
2.1 Reference to these documents shall be the latest issue
1.1 This specification covers the requirements for silvered
unless otherwise specified by the authority applying this
flat glass mirrors of rectangular shape supplied as cut sizes,
specification:
stock sheets, or as lehr ends and to which no further processing
(such as edgework or other fabrication) has been done.
2.2 ASTM Standards:
B117 Practice for Operating Salt Spray (Fog) Apparatus
1.2 This specification covers the quality requirements of
C162 Terminology of Glass and Glass Products
silvered annealed monolithic clear and tinted flat glass mirrors
C1036 Specification for Flat Glass
only, up to 6 mm ( ⁄4 in.) thick. The mirrors are intended to be
E903 Test Method for Solar Absorptance, Reflectance, and
used indoors for mirror glazing, for components of decorative
Transmittance of Materials Using Integrating Spheres
accessories or for similar uses.
3. Terminology
1.3 This specification does not address safety glazing ma-
3.1 Definitions:
terials nor requirements for mirror applications. Consult model
3.1.1 Refer to Terminology C162 and the standards refer-
building codes and other applicable standards for safety
enced in 2.2 as appropriate.
glazing applications.
3.1.2 associated distortion, n—alteration of viewed images
1.4 Mirrors covered in this specification are not intended for
cause by variations in glass flatness in inhomogeneous portions
use in environments where high humidity or airborne corrosion
within the glass.
promoters, or both, are consistently present (such as swimming
3.1.3 blemishes, n—imperfections in the body, on the sur-
pool areas, ocean-going vessels, chemical laboratories, and
face or in the silver coating of the mirror; for the purpose of
other corrosive environments).
this specification blemishes are divided into three categories:
1.5 The dimensional values stated in metric units are to be
3.1.3.1 linear blemishes, n—scratches, rubs, digs, and other
regarded as the standard. The inch-pound units given in
similar imperfections on either surface of the glass substrate.
parentheses are for information only.
3.1.3.2 point blemishes, n—crush, knots, dirt, stones, gas-
eous inclusions (seeds and bubbles), tin particles, and other
1.6 This standard does not purport to address all of the
similar imperfections in the body of the glass substrate.
safety concerns, if any, associated with its use. It is the
responsibility of the user of this standard to establish appro-
3.1.3.3 silver film blemishes, n—visible clouding, spot silver
priate safety, health, and environmental practices and deter-
faults, and other similar imperfections of the silver coating.
mine the applicability of regulatory limitations prior to use.
3.1.4 chip, n—an imperfection on the edge of a mirror lite
1.7 This international standard was developed in accor-
due to breakage of a small fragment out of an otherwise regular
dance with internationally recognized principles on standard- surface.
ization established in the Decision on Principles for the
3.1.4.1 shell chip, n—a circular indentation in the mirror
Development of International Standards, Guides and Recom-
edge due to breakage of a small fragment.
mendations issued by the World Trade Organization Technical
3.1.4.2 v-chip, n—a V-shaped chip indentation in the mirror
Barriers to Trade (TBT) Committee.
edge due to breakage of a small fragment.
3.1.4.3 chip width, n—the perpendicular distance from the
edge of the mirror to the inner edge of the chip.
This specification is under the jurisdiction of ASTM Committee C14 on Glass
and Glass Products and is the direct responsibility of Subcommittee C14.08 on Flat
Glass. For referenced ASTM standards, visit the ASTM website, www.astm.org, or
Current edition approved Feb. 1, 2024. Published February 2024. Originally contact ASTM Customer Service at service@astm.org. For Annual Book of ASTM
approved in 2001. Last previous edition approved in 2018 as C1503 – 18. DOI: Standards volume information, refer to the standard’s Document Summary page on
10.1520/C1503-24. the ASTM website.
Copyright © ASTM International, 100 Barr Harbor Drive, PO Box C700, West Conshohocken, PA 19428-2959. United States
C1503 − 24
3.1.4.4 chip length, n—the distance, parallel to the edge of 4.1.2 Mirror Stock Sheet—Mirrors intended for architectural
the mirror, from one edge of a chip to the other. use and where trimming will be required.
4.1.3 Mirror Lehr End—Mirrors intended for recutting by
3.1.4.5 chip depth, n—the measured distance of a chip from
the user into smaller sizes where it is expected that some
the face of the mirror into the thickness.
material may be lost in cutting due to blemishes and edge
3.1.5 clean cut edge, n—cut edge of mirror without further
quality.
fabrication.
4.2 Qualities—Mirrors furnished under this specification
3.1.6 cluster, n—a group of not less than three point blem-
shall be of the following qualities, as specified.
ishes separated by not more than 50 mm (2 in.).
4.2.1 Mirror Select Quality—(Usually available in 6 mm
3.1.7 crush, n—a lightly pitted area in the glass surface
( ⁄4 in.) clear mirror only.) Recommended or intended or both,
resulting in a dull gray or white appearance over the region.
for use in visually demanding applications requiring minimal
3.1.8 dig, n—deep, short scratch in the glass surface.
distortion and blemishes.
4.2.2 Mirror Glazing Quality—Recommended or intended
3.1.9 dirt, n—a small particle of foreign material imbedded
or both, for general use where limited levels of minor blem-
in the glass surface.
ishes or distortion, or both are acceptable.
3.1.10 edge corrosion, n—change in the color or level of
4.3 Color—The glass substrate may be clear or tinted.
reflectance along the mirror edge as a result of degradation of
4.3.1 Clear Glass Mirrors—Mirrors made with clear (un-
the silver coating from external sources.
tinted) glass. (This does NOT include low-iron glass mirrors.)
3.1.11 edgework, n—fabrication of the mirror edge beyond
4.3.2 Low-Iron Glass Mirrors—Mirrors made with low-iron
the original clean-cut condition.
content glass. Intended for use in applications where increased
3.1.12 flare, n—a protrusion on the edge of a lite of mirror.
light reflectance and glass clarity are required. Not all grades or
3.1.13 gaseous inclusion, n—(also known as seed or bubble)
qualities may be available in low-iron glass mirrors.
a round or elongated bubble at the surface (open) or within the
4.3.3 Tinted Glass Mirrors—Mirrors made with tinted (col-
body thickness leaving a cavity in the mirror.
ored) glass. Intended for use primarily in decorative applica-
tions where diminished light reflectance is not a concern. A
3.1.14 knot, n—an inhomogeneity in the form of a vitreous
variety of tinted glass substrates are available. The specific tint
lump in the mirror.
desired should be specified by the purchaser and is subject to
3.1.15 mirror cut size, n—mirrors intended for final use in
availability. Not all grades or qualities may be available in
the size ordered (that is, mirrors not intended for recutting).
tinted glass mirror.
3.1.16 mirror lehr end, n—mirrors intended for recutting by
NOTE 1—Although usually imperceptible, actual color or shade of clear
the user into smaller sizes where it is expected that some
glass, tinted glass, or low-iron glass substrates may vary from manufac-
material may be lost in cutting due to blemishes and edge
turer to manufacturer and from batch to batch.
quality.
4.4 Thickness—Mirrors are available in the standard nomi-
3.1.17 mirror stock sheet, n—mirrors intended for architec-
nal thicknesses provided in Table 1:
tural use and where trimming will be required.
3.1.18 rub, n—an abrasion of the mirror surface producing a
TABLE 1 Available Nominal Mirror Thickness
frosted appearance.
Nominal Designation Intended use
3.1.19 scratch, n—damage on the glass surface in the form SI Traditional Maximum Recommended
Desig- designation recommended application
of a line caused by the movement of an object across and in
nation surface area
contact with the glass surface.
(mm) per
cut size piece
3.1.20 silver coating, n—the metallic silver coating in a
2.5 single Up to .5 sq. m Utility mirrors where distortion
silvered mirror product.
(5 ft ) and blemishes are not a
major concern
3.1.21 silvered mirror, n—mirror product fabricated through
3.0 double Up to .75 sq. m Mirror components and other
the application of metallic silver and protected by a mirror
or (7.5 ft ) general use applications
backing paint. ⁄8 in.
4.0 ⁄32 in. Up to 1 sq. m Mirror components and other
3.1.22 spot silver fault, n—a small area at which the silver
(10 ft ) general use applications
coating is partially or entirely absent. 5.0 ⁄16 in. Up to 3 sq. m Architectural use and other
(32 ft ) applications where optical
3.1.23 stone, n—a crystalline inclusion in the mirror.
quality is a major concern
6.0 ⁄4 in. Up to 3 sq. m Architectural use and other
3.1.24 visible clouding, n—a frosted appearance in the
(32 ft ) applications where optical
reflected image from a silvered mirror.
quality is a major concern
4. Classification and Intended Use
5. Ordering Information
4.1 Grades—Mirrors furnished under this specification shall
be of the following grades, as specified. 5.1 Purchasers should select the preferred options permitted
4.1.1 Mirror Cut Size—Mirrors intended for final use in the in this specification and include the following information in
size ordered (that is, mirrors not intended for recutting). procurement documents:
C1503 − 24
5.1.1 Title, number, and date of this specification. 6.4 Edge Quality Requirements—Edges shall be clean cut.
5.1.2 Grade of mirror (see 4.1). (Types and qualities of edgework are not within the scope of
5.1.3 Quality of mirror (see 4.2). this specification. Consult manufacturer before specifying.)
5.1.4 Color of mirror (see 4.3). 6.4.1 Shell Chips—Shell chips are permitted in the edges of
5.1.5 Thickness of mirror. clean cut mirror as long as they do not exceed the acceptance
5.1.6 Nominal length and width. criteria shown in Table 6.
6.4.2 V-Chips—Visible V-Chips are not permitted. (See 7.1
5.2 Packaging Requirements—Mirror packaging and pro-
for viewing criteria.)
tection shall be standard manufacturer practice unless other-
wise specified. Consult manufacturer before specifying. 6.5 Dimensional Tolerances:
6.5.1 Thickness—When measured at any point throughout
6. Requirements
the sheet, tolerances for thickness (including uniformity of
thickness) of mirrors shall be in accordance with Table 2.
6.1 Reflectance Requirements—When measured in accor-
6.5.2 Length and Width—When measured in accordance
dance with Test Method 7.2, reflectance shall not be less than
the following: with Test Method 7.4, tolerances for length and width of
mirrors shall be in accordance with Table 2.
6.1.1 For clear and low-iron glass mirrors—minimum vis-
6.5.3 Squareness—When measured in accordance with Test
ible light reflected = 83 %.
Method 7.5, tolerances for squareness of mirrors shall be in
6.1.2 For tinted glass mirrors—minimum visible light re-
accordance with Table 2.
flected = (T) (where T = the visible light transmission value
for the glass substrate in its unsilvered state).
6.6 Distortion Requirements—Limited levels of distortion
are inherent in flat glass mirrors and are permitted, provided
6.2 Coating Requirements:
that the glass used in manufacturing the mirrors conforms to
6.2.1 Appearance of Silver Coating—When inspected in
the following limits.
accordance with Test Method 7.1.3, the silver coating shall be
6.6.1 Distortion Limits for Mirror Select Quality Mirrors—
free of visible silver coating blemishes.
Glass used in the manufacture of Mirror Select Quality mirrors
6.2.2 Coating Resistance Requirements—When tested in
shall conform to the allowable distortion limits and inspection
accordance with Test Method 7.3 mirrors shall meet the
procedure cited in Specification C1036 for Q1 quality glass.
requirements shown in Table 7.
6.6.2 Distortion Limits for Mirror Glazing Quality
6.3 Blemish Limits—Blemishes, other than visible blem-
Mirrors—Glass used in the manufacture of Mirror Glazing
ishes in the silver coating, are permitted within the following
Quality mirrors shall conform to the allowable distortion limits
limits.
and inspection procedure cited in Specification C1036 for Q2
6.3.1 Blemish Limits for Mirror Cut Size and Mirror Stock
quality glass.
Sheet Grades:
6.7 Fabrication Requirements—Mirrors may be further fab-
6.3
...
This document is not an ASTM standard and is intended only to provide the user of an ASTM standard an indication of what changes have been made to the previous version. Because
it may not be technically possible to adequately depict all changes accurately, ASTM recommends that users consult prior editions as appropriate. In all cases only the current version
of the standard as published by ASTM is to be considered the official document.
Designation: C1503 − 18 C1503 − 24
Standard Specification for
Silvered Flat Glass Mirror
This standard is issued under the fixed designation C1503; the number immediately following the designation indicates the year of
original adoption or, in the case of revision, the year of last revision. A number in parentheses indicates the year of last reapproval. A
superscript epsilon (´) indicates an editorial change since the last revision or reapproval.
1. Scope
1.1 This specification covers the requirements for silvered flat glass mirrors of rectangular shape supplied as cut sizes, stock sheets,
or as lehr ends and to which no further processing (such as edgework or other fabrication) has been done.
1.2 This specification covers the quality requirements of silvered annealed monolithic clear and tinted flat glass mirrors only, up
to 6 mm ( ⁄4 in.) thick. The mirrors are intended to be used indoors for mirror glazing, for components of decorative accessories
or for similar uses.
1.3 This specification does not address safety glazing materials nor requirements for mirror applications. Consult model building
codes and other applicable standards for safety glazing applications.
1.4 Mirrors covered in this specification are not intended for use in environments where high humidity or airborne corrosion
promoters, or both, are consistently present (such as swimming pool areas, ocean-going vessels, chemical laboratories, and other
corrosive environments).
1.5 The dimensional values stated in metric units are to be regarded as the standard. The inch-pound units given in parentheses
are for information only.
1.6 This standard does not purport to address all of the safety concerns, if any, associated with its use. It is the responsibility
of the user of this standard to establish appropriate safety, health, and environmental practices and determine the applicability of
regulatory limitations prior to use.
1.7 This international standard was developed in accordance with internationally recognized principles on standardization
established in the Decision on Principles for the Development of International Standards, Guides and Recommendations issued
by the World Trade Organization Technical Barriers to Trade (TBT) Committee.
2. Referenced Documents
2.1 Reference to these documents shall be the latest issue unless otherwise specified by the authority applying this specification:
2.2 ASTM Standards:
B117 Practice for Operating Salt Spray (Fog) Apparatus
C162 Terminology of Glass and Glass Products
This specification is under the jurisdiction of ASTM Committee C14 on Glass and Glass Products and is the direct responsibility of Subcommittee C14.08 on Flat Glass.
Current edition approved Aug. 1, 2018Feb. 1, 2024. Published August 2018February 2024. Originally approved in 2001. Last previous edition approved in 20132018 as
C1503 – 08 (2013).C1503 – 18. DOI: 10.1520/C1503-18.10.1520/C1503-24.
For referenced ASTM standards, visit the ASTM website, www.astm.org, or contact ASTM Customer Service at service@astm.org. For Annual Book of ASTM Standards
volume information, refer to the standard’s Document Summary page on the ASTM website.
Copyright © ASTM International, 100 Barr Harbor Drive, PO Box C700, West Conshohocken, PA 19428-2959. United States
C1503 − 24
C1036 Specification for Flat Glass
E903 Test Method for Solar Absorptance, Reflectance, and Transmittance of Materials Using Integrating Spheres
3. Terminology
3.1 Definitions:
3.1.1 Refer to Terminology C162 and the standards referenced in 2.2 as appropriate.
3.1.2 associated distortion, n—alteration of viewed images cause by variations in glass flatness in inhomogeneous portions within
the glass.
3.1.3 blemishes, n—imperfections in the body, on the surface or in the silver coating of the mirror; for the purpose of this
specification blemishes are divided into three categories:
3.1.3.1 linear blemishes, n—scratches, rubs, digs, and other similar imperfections on either surface of the glass substrate.
3.1.3.2 point blemishes, n—crush, knots, dirt, stones, gaseous inclusions (seeds and bubbles), tin particles, and other similar
imperfections in the body of the glass substrate.
3.1.3.3 silver film blemishes, n—visible clouding, spot silver faults, and other similar imperfections of the silver coating.
3.1.4 chip, n—an imperfection on the edge of a mirror lite due to breakage of a small fragment out of an otherwise regular surface.
3.1.4.1 shell chip, n—a circular indentation in the mirror edge due to breakage of a small fragment.
3.1.4.2 v-chip, n—a V-shaped chip indentation in the mirror edge due to breakage of a small fragment.
3.1.4.3 chip width, n—the perpendicular distance from the edge of the mirror to the inner edge of the chip.
3.1.4.4 chip length, n—the distance, parallel to the edge of the mirror, from one edge of a chip to the other.
3.1.4.5 chip depth, n—the measured distance of a chip from the face of the mirror into the thickness.
3.1.5 clean cut edge, n—cut edge of mirror without further fabrication.
3.1.6 cluster, n—a group of not less than three point blemishes separated by not more than 50 mm (2 in.).
3.1.7 crush, n—a lightly pitted area in the glass surface resulting in a dull gray or white appearance over the region.
3.1.8 dig, n—deep, short scratch in the glass surface.
3.1.9 dirt, n—a small particle of foreign material imbedded in the glass surface.
3.1.10 edge corrosion, n—change in the color or level of reflectance along the mirror edge as a result of degradation of the silver
coating from external sources.
3.1.11 edgework, n—fabrication of the mirror edge beyond the original clean-cut condition.
3.1.12 flare, n—a protrusion on the edge of a lite of mirror.
3.1.13 gaseous inclusion, n—(also known as seed or bubble) a round or elongated bubble at the surface (open) or within the body
thickness leaving a cavity in the mirror.
3.1.14 knot, n—an inhomogeneity in the form of a vitreous lump in the mirror.
3.1.15 mirror cut size, n—mirrors intended for final use in the size ordered (that is, mirrors not intended for recutting).
3.1.16 mirror lehr end, n—mirrors intended for recutting by the user into smaller sizes where it is expected that some material may
be lost in cutting due to blemishes and edge quality.
C1503 − 24
3.1.17 mirror stock sheet, n—mirrors intended for architectural use and where trimming will be required.
3.1.18 rub, n—an abrasion of the mirror surface producing a frosted appearance.
3.1.19 scratch, n—damage on the glass surface in the form of a line caused by the movement of an object across and in contact
with the glass surface.
3.1.20 silver coating, n—the metallic silver coating in a silvered mirror product.
3.1.21 silvered mirror, n—mirror product fabricated through the application of metallic silver and protected by a mirror backing
paint.
3.1.22 spot silver fault, n—a small area at which the silver coating is partially or entirely absent.
3.1.23 stone, n—a crystalline inclusion in the mirror.
3.1.24 visible clouding, n—a frosted appearance in the reflected image from a silvered mirror.
4. Classification and Intended Use
4.1 Grades—Mirrors furnished under this specification shall be of the following grades, as specified.
4.1.1 Mirror Cut Size—Mirrors intended for final use in the size ordered (that is, mirrors not intended for recutting).
4.1.2 Mirror Stock Sheet—Mirrors intended for architectural use and where trimming will be required.
4.1.3 Mirror Lehr End—Mirrors intended for recutting by the user into smaller sizes where it is expected that some material may
be lost in cutting due to blemishes and edge quality.
4.2 Qualities—Mirrors furnished under this specification shall be of the following qualities, as specified.
4.2.1 Mirror Select Quality—(Usually available in 6 mm ( ⁄4 in.) clear mirror only.) Recommended or intended or both, for use
in visually demanding applications requiring minimal distortion and blemishes.
4.2.2 Mirror Glazing Quality—Recommended or intended or both, for general use where limited levels of minor blemishes or
distortion, or both are acceptable.
4.3 Color—The glass substrate may be clear or tinted.
4.3.1 Clear Glass Mirrors—Mirrors made with clear (untinted) glass. (This does NOT include low-iron glass mirrors.)
4.3.2 Low-Iron Glass Mirrors—Mirrors made with low-iron content glass. Intended for use in applications where increased light
reflectance and glass clarity are required. Not all grades or qualities may be available in low-iron glass mirrors.
4.3.3 Tinted Glass Mirrors—Mirrors made with tinted (colored) glass. Intended for use primarily in decorative applications where
diminished light reflectance is not a concern. A variety of tinted glass substrates are available. The specific tint desired should be
specified by the purchaser and is subject to availability. Not all grades or qualities may be available in tinted glass mirror.
NOTE 1—Although usually imperceptible, actual color or shade of clear glass, tinted glass, or low-iron glass substrates may vary from manufacturer to
manufacturer and from batch to batch.
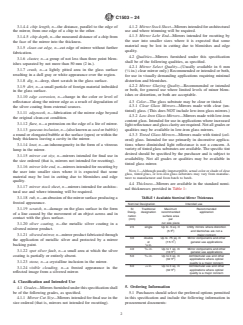
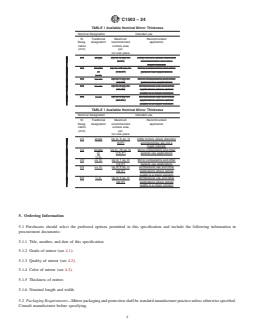
4.4 Thickness—Mirrors are available in the standard nominal thicknesses provided in Table 1:
C1503 − 24
TABLE 1 Available Nominal Mirror Thickness
Nominal Designation Intended use
SI Traditional Maximum Recommended
Desig- designation recommended application
nation surface area
(mm) per
cut size piece
2.5 single Up to .5 sq. m. Utility mirrors where distortion
(5 ft ) and blemishes are not a
major concern
3.0 double Up to .75 sq. m. Mirror components and other
or (7.5 ft ) general use applications
⁄8 in.
4.0 ⁄32 in. Up to 1 sq. m. Mirror components and other
(10 ft ) general use applications
5.0 ⁄16 in. Up to 3 sq. m. Architectural use and other
(32 ft ) applications where optical
quality is a major concern
6.0 ⁄4 in. Up to 3 sq. m. Architectural use and other
(32 ft .) applications where optical
quality is a major concern
TABLE 1 Available Nominal Mirror Thickness
Nominal Designation Intended use
SI Traditional Maximum Recommended
Desig- designation recommended application
nation surface area
(mm) per
cut size piece
2.5 single Up to .5 sq. m Utility mirrors where distortion
(5 ft ) and blemishes are not a
major concern
3.0 double Up to .75 sq. m Mirror components and other
or (7.5 ft ) general use applications
⁄8 in.
4.0 ⁄32 in. Up to 1 sq. m Mirror components and other
(10 ft ) general use applications
5.0 ⁄16 in. Up to 3 sq. m Architectural use and other
(32 ft ) applications where optical
quality is a major concern
6.0 ⁄4 in. Up to 3 sq. m Architectural use and other
(32 ft ) applications where optical
quality is a major concern
5. Ordering Information
5.1 Purchasers should select the preferred options permitted in this specification and include the following information in
procurement documents:
5.1.1 Title, number, and date of this specification.
5.1.2 Grade of mirror (see 4.1).
5.1.3 Quality of mirror (see 4.2).
5.1.4 Color of mirror (see 4.3).
5.1.5 Thickness of mirror.
5.1.6 Nominal length and width.
5.2 Packaging Requirements—Mirror packaging and protection shall be standard manufacturer practice unless otherwise specified.
Consult manufacturer before specifying.
C1503 − 24
6. Requirements
6.1 Reflectance Requirements—When measured in accordance with Test Method 7.2, reflectance shall not be less than the
following:
6.1.1 For clear and low-iron glass mirrors—minimum visible light reflected = 83 %.
6.1.2 For tinted glass mirrors—minimum visible light reflected = (T) (where T = the visible light transmission value for the glass
substrate in its unsilvered state).
6.2 Coating Requirements:
6.2.1 Appearance of Silver Coating—When inspected in accordance with Test Method 7.1.3, the silver coating shall be free of
visible silver coating blemishes.
6.2.2 Coating Resistance Requirements—When tested in accordance with Test Method 7.3 mirrors shall meet the requirements
shown in Table 7.
6.3 Blemish Limits—Blemishes, other than visible blemishes in the silver coating, are permitted within the following limits.
6.3.1 Blemish Limits for Mirror Cut Size and Mirror Stock Sheet Grades:
6.3.1.1 Linear Blemish Limits—When inspected in accordance with Test Method 7.1.2 linear blemishes shall be within the limits
shown in Table 5.
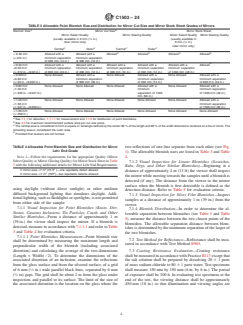
6.3.1.2 Point Blemish Limits—When inspected in accordance with Test Method 7.1.1 point blemishes shall be within the limits
shown in Table 3.
6.3.2 Blemish Limits for Mirror Lehr End Grade:
6.3.2.1 Linear Blemish Limits—When tested in accordance with Test Method 7.1.2 mirrors shall meet the quality requirements
shown in Table 5.
6.3.2.2 Point Blemish Limits—When tested in accordance with Test Method 7.1.1 mirrors shall meet the quality requirements
shown in Tables 3 and 4.
6.4 Edge Quality Requirements—Edges shall be clean cut. (Types and qualities of edgework are not within the scope of this
specification. Consult manufacturer before specifying.)
6.4.1 Shell Chips—Shell chips are permitted in the edges of clean cut mirror as long as they do not exceed the acceptance criteria
shown in Table 6.
6.4.2 V-Chips—Visible V-Chips are not permitted. (See 7.1 for viewing criteria.)
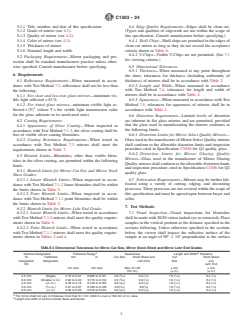
TABLE 2 Dimensional Tolerances for Mirror Cut Size, Mirror Stock Sheet and Mirror Lehr End Grades
A B
Nominal Designation Thickness Range Squareness Length and Width Toler
...
Questions, Comments and Discussion
Ask us and Technical Secretary will try to provide an answer. You can facilitate discussion about the standard in here.
Loading comments...