ASTM F788-13(2018)
(Specification)Standard Specification for Surface Discontinuities of Bolts, Screws, and Studs, Inch and Metric Series
Standard Specification for Surface Discontinuities of Bolts, Screws, and Studs, Inch and Metric Series
ABSTRACT
This specification establishes allowable limits for the various types of surface discontinuities that may occur during the manufacture and processing of bolts, screws, and studs, including heat-treated machine screws, tapping screws, and sems. Types of surface discontinuities are: crack; burst; seam; fold; thread lap; void; tool marks; and gouge and nick. These surface discontinuities shall be inspected in accordance with the specified requirements.
SCOPE
1.1 This specification establishes allowable limits for the various types of surface discontinuities that may occur during the manufacture and processing of bolts, screws, and studs, including heat-treated machine screws, tapping screws, and sems (the washers of screw-washer assemblies are excluded). This specification covers metric series products with nominal diameters of 4 mm and larger and with specified minimum tensile strengths of 420 MPa and higher; and inch series products with nominal diameters of No. 5 (0.1250 in.) and larger and with specified minimum tensile strengths of 60 000 psi and higher.
1.2 When the engineering requirements of the application necessitate control of surface discontinuities on bolts, screws, or studs, the purchaser shall specify conformance to ASTM Specification F788, in the original inquiry and purchase order.
1.2.1 When the engineering requirements of the application necessitate that surface discontinuities on bolts, screws, and studs be controlled within limits closer than those specified in this specification, the purchaser shall specify the applicable limits in the original inquiry and purchase order.
1.3 The allowable limits established in this specification for metric bolts, screws, and studs with nominal diameters from 4 to 24 mm inclusive, are essentially identical with requirements given in ISO 6157/I. There are no ISO standards for surface discontinuities on any inch-series products.
1.4 The values stated in either SI units or inch-pound units are to be regarded separately as standard. The values stated in each system may not be exact equivalents; therefore, each system shall be used independently of the other. Combining values from the two systems may result in non-conformance with the standard.
1.5 This international standard was developed in accordance with internationally recognized principles on standardization established in the Decision on Principles for the Development of International Standards, Guides and Recommendations issued by the World Trade Organization Technical Barriers to Trade (TBT) Committee.
General Information
Relations
Buy Standard
Standards Content (Sample)
NOTICE: This standard has either been superseded and replaced by a new version or withdrawn.
Contact ASTM International (www.astm.org) for the latest information
Designation:F788 −13 (Reapproved 2018)
Standard Specification for
Surface Discontinuities of Bolts, Screws, and Studs, Inch
and Metric Series
ThisstandardisissuedunderthefixeddesignationF788;thenumberimmediatelyfollowingthedesignationindicatestheyearoforiginal
adoptionor,inthecaseofrevision,theyearoflastrevision.Anumberinparenthesesindicatestheyearoflastreapproval.Asuperscript
epsilon (´) indicates an editorial change since the last revision or reapproval.
This standard has been approved for use by agencies of the U.S. Department of Defense.
1. Scope* ization established in the Decision on Principles for the
Development of International Standards, Guides and Recom-
1.1 This specification establishes allowable limits for the
mendations issued by the World Trade Organization Technical
various types of surface discontinuities that may occur during
Barriers to Trade (TBT) Committee.
the manufacture and processing of bolts, screws, and studs,
including heat-treated machine screws, tapping screws, and
2. Referenced Documents
sems (the washers of screw-washer assemblies are excluded).
This specification covers metric series products with nominal 2.1 ASTM Standards:
diameters of 4 mm and larger and with specified minimum E340Practice for Macroetching Metals and Alloys
tensile strengths of 420 MPa and higher; and inch series F1470Practice for Fastener Sampling for Specified Me-
products with nominal diameters of No. 5 (0.1250 in.) and chanical Properties and Performance Inspection
larger and with specified minimum tensile strengths of 60000 F1789Terminology for F16 Mechanical Fasteners
psi and higher.
2.2 ISO Standard:
ISO6157⁄IFasteners, Surface Discontinuities on Bolts,
1.2 When the engineering requirements of the application
Screws and Studs
necessitate control of surface discontinuities on bolts, screws,
or studs, the purchaser shall specify conformance to ASTM
3. Ordering Information
Specification F788, in the original inquiry and purchase order.
1.2.1 When the engineering requirements of the application
3.1 Orders for bolts, screws, and studs requiring disconti-
necessitate that surface discontinuities on bolts, screws, and
nuity control shall include the following:
studs be controlled within limits closer than those specified in
3.1.1 ASTM designation and date of issue of this specifica-
this specification, the purchaser shall specify the applicable
tion.
limits in the original inquiry and purchase order.
3.1.2 Special requirements, for example, closer discontinu-
ity limits (1.2.1) and inspection sampling plan (6.2).
1.3 The allowable limits established in this specification for
metric bolts, screws, and studs with nominal diameters from 4
4. Types of Surface Discontinuities (see Terminology
to 24 mm inclusive, are essentially identical with requirements
given in ISO6157⁄I. There are no ISO standards for surface F1789 for definitions not provided)
discontinuities on any inch-series products.
4.1 Crack
1.4 The values stated in either SI units or inch-pound units 4.1.1 Quench Cracks—Typical quench cracks are shown in
Fig. 1. Limits are specified in 5.2.
are to be regarded separately as standard. The values stated in
4.1.2 Forging Cracks—Typical forging cracks are shown in
each system may not be exact equivalents; therefore, each
Fig. 2. Limits are specified in 5.3.
system shall be used independently of the other. Combining
values from the two systems may result in non-conformance
4.2 Burst—Typical bursts are shown in Fig. 3. Limits are
with the standard.
specified in 5.4.
1.5 This international standard was developed in accor-
dance with internationally recognized principles on standard-
For referenced ASTM standards, visit the ASTM website, www.astm.org, or
This specification is under the jurisdiction of ASTM Committee F16 on contact ASTM Customer Service at service@astm.org. For Annual Book of ASTM
Fasteners and is the direct responsibility of Subcommittee F16.93 on Quality Standards volume information, refer to the standard’s Document Summary page on
Assurance Provisions for Fasteners. the ASTM website.
Current edition approved Sept. 1, 2018. Published September 2018. Originally Available from International Organization for Standardization (ISO), ISO
approved in 1982. Last previous edition approved in 2013 as F788–13. DOI: Central Secretariat, BIBC II, Chemin de Blandonnet 8, CP 401, 1214 Vernier,
10.1520/F0788-13R18. Geneva, Switzerland, http://www.iso.org.
*A Summary of Changes section appears at the end of this standard
Copyright © ASTM International, 100 Barr Harbor Drive, PO Box C700, West Conshohocken, PA 19428-2959. United States
F788−13 (2018)
FIG. 1 Typical Quench Cracks
5. Allowable Limits
5.1 Letter Definitions—Throughout the following
requirements, D designates the nominal size (basic major
diameter of thread) of bolts, screws, and studs, except for
productswithshoulders,inwhichcase Ddesignatesthelargest
shoulder diameter; and Dc designates flange diameter (speci-
fied maximum) or head diameter (specified maximum) of
circular head products. For metric series products, D and Dc
are in millimetres; for inch-series products, D and Dc are in
FIG. 2 Typical Forging Cracks
inches.
4.2.1 Shear Burst—A shear burst is an open break in the
5.2 Quench Cracks—Quench cracks of any depth, any
metal located at approximately a 45° angle to the product axis.
length, or in any location are not permitted.
Shearburstsoccurmostfrequentlyattheperipheryofproducts
having flanged or circular heads. Shear bursts may also occur
5.3 Forging Cracks—Forging cracks on the top of the head
on the sides of hex-head products. Typical shear bursts are of bolts and screws are permitted, provided that (a) no crack
shown in Fig. 3. Limits are specified in 5.4.
shall have a length exceeding 1.0 D, and ( b) no crack shall
have a width or depth exceeding 0.04 D. See Note 1.
4.3 Seam—Typical seams are shown in Fig. 4. Limits are
specified in 5.5.
NOTE 1—Forging cracks within the limits of this specification may be
unsightly, but do not affect the mechanical properties or functional
4.4 Fold—Typical folds are shown in Fig. 5 a, b, and c.
requirements of the bolt.
Limits are specified in 5.6.
5.4 Bursts and Shear Bursts (see Note 2):
4.5 Thread Lap—Limits are specified in Supplementary
5.4.1 Forhex-headboltsandscrews,burstsandshearbursts
Requirement S.1.1.
are permitted, provided that: (1) no burst or shear burst in the
4.6 Void—A void is a shallow pocket or hollow on the
flats extends into the crown (chamfer) circle on the top of the
surface of a bolt or screw due to nonfilling of metal during
head or into the underhead bearing circle, (2) no burst or shear
forging. Voids are produced by marks or impressions of chips
burst located at the intersection of two wrenching flats reduces
(shearburrs)orbyrustformationontherawmaterial.Theyare
the width across corners below its specified minimum, and (3)
not planished during forging. Typical voids are shown in Fig.
no burst or shear burst has a width or depth greater than .06D
6. Limits are specified in 5.7.
but not to exceed .062 in. (1.6 mm).
4.7 Tool Marks—Tool marks are longitudinal or circumfer-
5.4.2 For flange bolts and screws and products with circular
ential grooves of shallow depth produced by the movement of
heads, bursts and shear bursts at the periphery of the flange or
manufacturing tools over the surface of the bolt or screw.
head are permitted, provided that: (1) not more than one burst
Typical tool marks are shown in Fig. 7. Limits are specified in
or shear burst has a width greater than 0.04 Dc, and (2) the
5.8.
width of the one burst or shear burst that exceeds a width of
0.04 Dc does not have a width greater than 0.08 Dc.
4.8 Gouge and Nick—an indentation on the surface of a
fastener produced by impact with another fastener, or from 5.4.3 For indented head bolts and screws, bursts and shear
processing equipment during manufacture, handling or trans- bursts in the raised periphery of the indented head are
port. permitted,providedthat:(1)noburstorshearbursthasawidth
F788−13 (2018)
FIG. 3 Typical Bursts and Shear Bursts
FIG. 4 Typical Seams
FIG. 5 Typical Folds
maybeunsightly,butdonotaffectthemechanicalpropertiesorfunctional
greater than 0.06 D, and (2) no burst or shear burst has a depth
requirements of the bolt.
extending below the indented portion.
5.5 Seams:
NOTE 2—Bursts and shear bursts within the limits of this specification
F788−13 (2018)
5.6 Folds:
5.6.1 Folds located at interior corners that are at or below
the underhead bearing surface, for example, at the junction of
head to shank, are not permitted, except for cloverleaf folds
occurring at the intersection of non-circular shoulders with
head b
...
This document is not an ASTM standard and is intended only to provide the user of an ASTM standard an indication of what changes have been made to the previous version. Because
it may not be technically possible to adequately depict all changes accurately, ASTM recommends that users consult prior editions as appropriate. In all cases only the current version
of the standard as published by ASTM is to be considered the official document.
Designation: F788 − 13 F788 − 13 (Reapproved 2018)
Standard Specification for
Surface Discontinuities of Bolts, Screws, and Studs, Inch
and Metric Series
This standard is issued under the fixed designation F788; the number immediately following the designation indicates the year of original
adoption or, in the case of revision, the year of last revision. A number in parentheses indicates the year of last reapproval. A superscript
epsilon (´) indicates an editorial change since the last revision or reapproval.
This standard has been approved for use by agencies of the U.S. Department of Defense.
1. Scope*
1.1 This specification establishes allowable limits for the various types of surface discontinuities that may occur during the
manufacture and processing of bolts, screws, and studs, including heat-treated machine screws, tapping screws, and sems (the
washers of screw-washer assemblies are excluded). This specification covers metric series products with nominal diameters of 4
mm and larger and with specified minimum tensile strengths of 420 MPa and higher; and inch series products with nominal
diameters of No. 5 (0.1250 in.) and larger and with specified minimum tensile strengths of 60 000 psi and higher.
1.2 When the engineering requirements of the application necessitate control of surface discontinuities on bolts, screws, or
studs, the purchaser shall specify conformance to ASTM Specification F788, in the original inquiry and purchase order.
1.2.1 When the engineering requirements of the application necessitate that surface discontinuities on bolts, screws, and studs
be controlled within limits closer than those specified in this specification, the purchaser shall specify the applicable limits in the
original inquiry and purchase order.
1.3 The allowable limits established in this specification for metric bolts, screws, and studs with nominal diameters from 4 to
24 mm inclusive, are essentially identical with requirements given in ISO 6157 ⁄I. There are no ISO standards for surface
discontinuities on any inch-series products.
1.4 The values stated in either SI units or inch-pound units are to be regarded separately as standard. The values stated in each
system may not be exact equivalents; therefore, each system shall be used independently of the other. Combining values from the
two systems may result in non-conformance with the standard.
1.5 This international standard was developed in accordance with internationally recognized principles on standardization
established in the Decision on Principles for the Development of International Standards, Guides and Recommendations issued
by the World Trade Organization Technical Barriers to Trade (TBT) Committee.
2. Referenced Documents
2.1 ASTM Standards:
E340 Practice for Macroetching Metals and Alloys
F1470 Practice for Fastener Sampling for Specified Mechanical Properties and Performance Inspection
F1789 Terminology for F16 Mechanical Fasteners
2.2 ISO Standard:
ISO 6157 ⁄I Fasteners, Surface Discontinuities on Bolts, Screws and Studs
3. Ordering Information
3.1 Orders for bolts, screws, and studs requiring discontinuity control shall include the following:
3.1.1 ASTM designation and date of issue of this specification.
3.1.2 Special requirements, for example, closer discontinuity limits (1.2.1) and inspection sampling plan (6.2).
This specification is under the jurisdiction of ASTM Committee F16 on Fasteners and is the direct responsibility of Subcommittee F16.93 on Quality Assurance
Provisions for Fasteners.
Current edition approved April 1, 2013Sept. 1, 2018. Published April 2013September 2018. Originally approved in 1982. Last previous edition approved in 20122013 as
F788 – 12.F788 – 13. DOI: 10.1520/F0788-13.10.1520/F0788-13R18.
For referenced ASTM standards, visit the ASTM website, www.astm.org, or contact ASTM Customer Service at service@astm.org. For Annual Book of ASTM Standards
volume information, refer to the standard’s Document Summary page on the ASTM website.
Available from American National Standards Institute (ANSI), 25 W. 43rd St., 4th Floor, New York, NY 10036, http://www.ansi.org.International Organization for
Standardization (ISO), ISO Central Secretariat, BIBC II, Chemin de Blandonnet 8, CP 401, 1214 Vernier, Geneva, Switzerland, http://www.iso.org.
*A Summary of Changes section appears at the end of this standard
Copyright © ASTM International, 100 Barr Harbor Drive, PO Box C700, West Conshohocken, PA 19428-2959. United States
F788 − 13 (2018)
4. Types of Surface Discontinuities (see Terminology F1789 for definitions not provided)
4.1 Crack
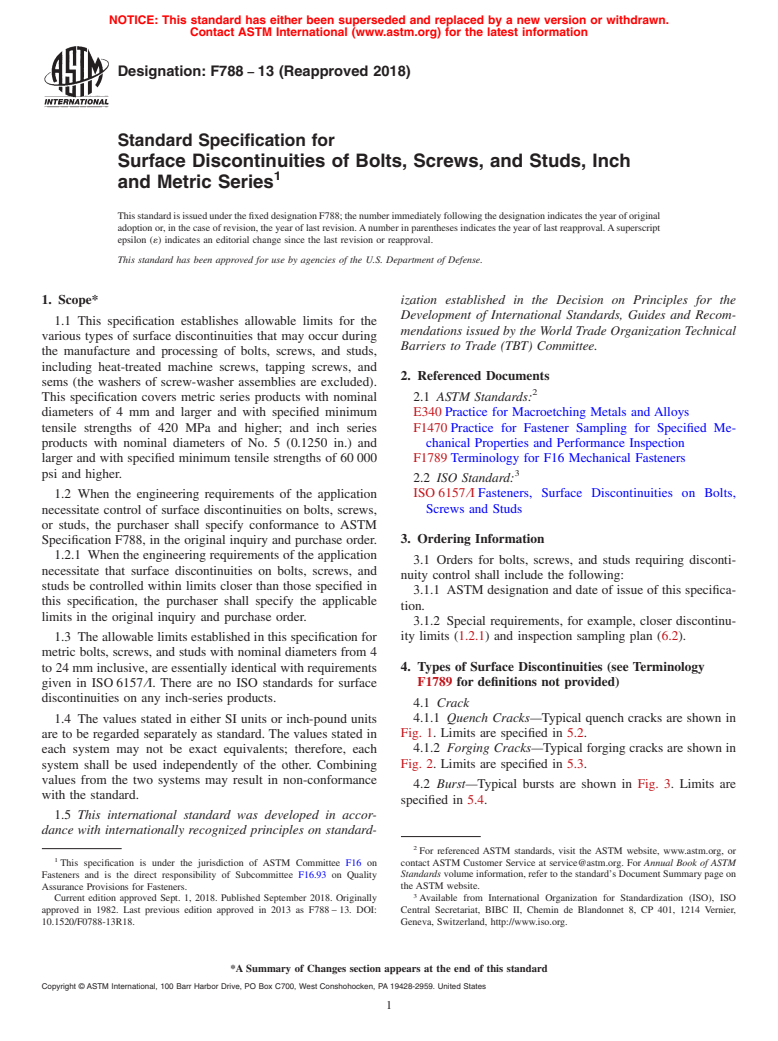
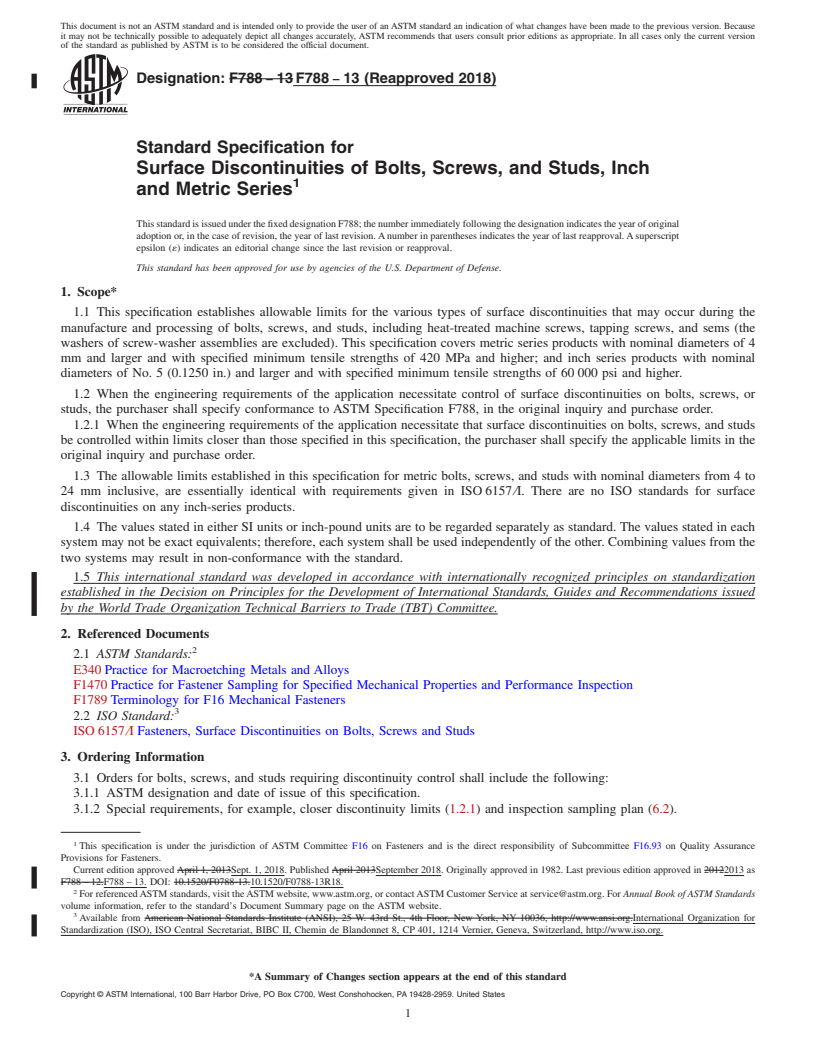
4.1.1 Quench Cracks—Typical quench cracks are shown in Fig. 1. Limits are specified in 5.2.
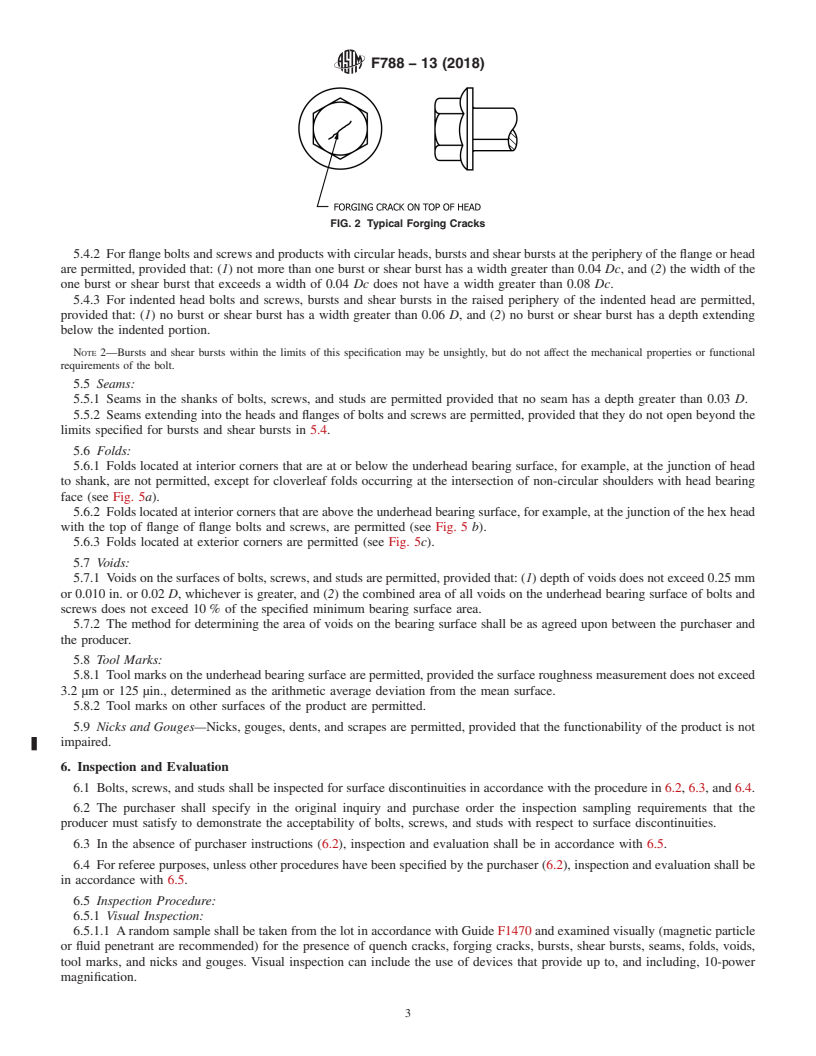
4.1.2 Forging Cracks—Typical forging cracks are shown in Fig. 2. Limits are specified in 5.3.
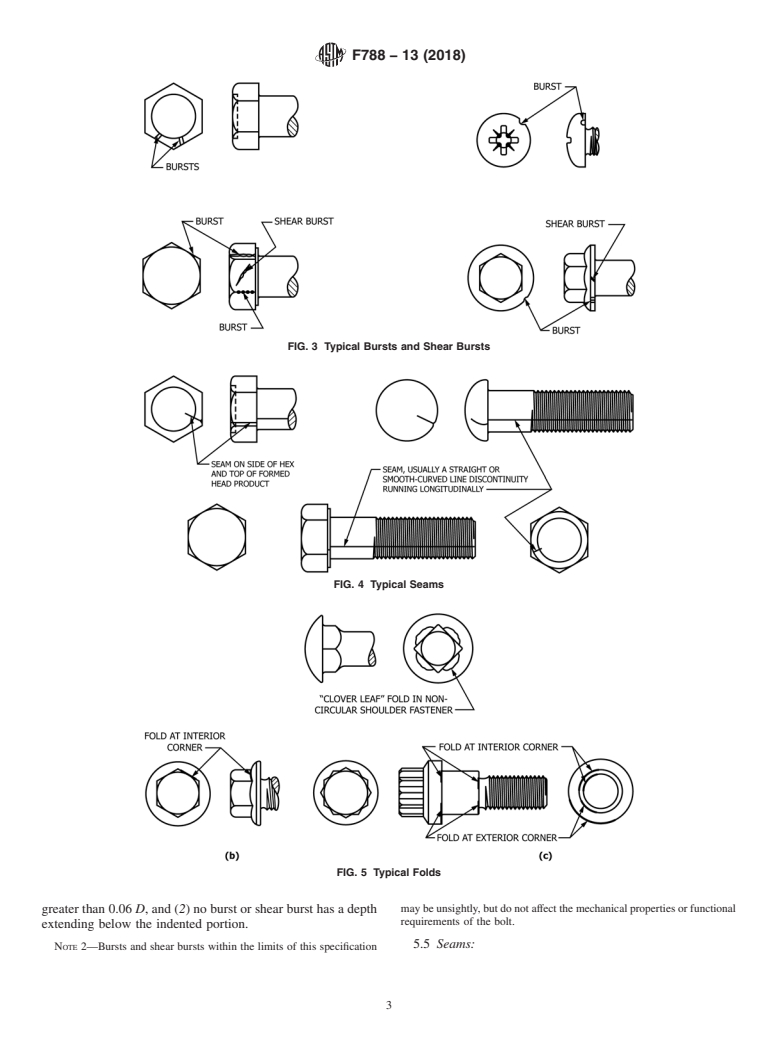
4.2 Burst—Typical bursts are shown in Fig. 3. Limits are specified in 5.4.
4.2.1 Shear Burst—A shear burst is an open break in the metal located at approximately a 45° angle to the product axis. Shear
bursts occur most frequently at the periphery of products having flanged or circular heads. Shear bursts may also occur on the sides
of hex-head products. Typical shear bursts are shown in Fig. 3. Limits are specified in 5.4.
4.3 Seam—Typical seams are shown in Fig. 4. Limits are specified in 5.5.
4.4 Fold—Typical folds are shown in Fig. 5 a,b, and c. Limits are specified in 5.6.
4.5 Thread Lap—Limits are specified in Supplementary Requirement S.1.1.
4.6 Void—A void is a shallow pocket or hollow on the surface of a bolt or screw due to nonfilling of metal during forging. Voids
are produced by marks or impressions of chips (shear burrs) or by rust formation on the raw material. They are not planished during
forging. Typical voids are shown in Fig. 6. Limits are specified in 5.7.
4.7 Tool Marks—Tool marks are longitudinal or circumferential grooves of shallow depth produced by the movement of
manufacturing tools over the surface of the bolt or screw. Typical tool marks are shown in Fig. 7. Limits are specified in 5.8.
4.8 Gouge and Nick—an indentation on the surface of a fastener produced by impact with another fastener, or from processing
equipment during manufacture, handling or transport.
5. Allowable Limits
5.1 Letter Definitions—Throughout the following requirements, D designates the nominal size (basic major diameter of thread)
of bolts, screws, and studs, except for products with shoulders, in which case D designates the largest shoulder diameter; and Dc
designates flange diameter (specified maximum) or head diameter (specified maximum) of circular head products. For metric series
products, D and Dc are in millimetres; for inch-series products, D and Dc are in inches.
5.2 Quench Cracks—Quench cracks of any depth, any length, or in any location are not permitted.
5.3 Forging Cracks—Forging cracks on the top of the head of bolts and screws are permitted, provided that (a) no crack shall
have a length exceeding 1.0 D, and ( b) no crack shall have a width or depth exceeding 0.04 D. See Note 1.
NOTE 1—Forging cracks within the limits of this specification may be unsightly, but do not affect the mechanical properties or functional requirements
of the bolt.
5.4 Bursts and Shear Bursts (see Note 2):
5.4.1 For hex-head bolts and screws, bursts and shear bursts are permitted, provided that: (1) no burst or shear burst in the flats
extends into the crown (chamfer) circle on the top of the head or into the underhead bearing circle, (2) no burst or shear burst
located at the intersection of two wrenching flats reduces the width across corners below its specified minimum, and (3) no burst
or shear burst has a width or depth greater than .06D but not to exceed .062 in. (1.6 mm).
FIG. 1 Typical Quench Cracks
F788 − 13 (2018)
FIG. 2 Typical Forging Cracks
5.4.2 For flange bolts and screws and products with circular heads, bursts and shear bursts at the periphery of the flange or head
are permitted, provided that: (1) not more than one burst or shear burst has a width greater than 0.04 Dc, and (2) the width of the
one burst or shear burst that exceeds a width of 0.04 Dc does not have a width greater than 0.08 Dc.
5.4.3 For indented head bolts and screws, bursts and shear bursts in the raised periphery of the indented head are permitted,
provided that: (1) no burst or shear burst has a width greater than 0.06 D, and (2) no burst or shear burst has a depth extending
below the indented portion.
NOTE 2—Bursts and shear bursts within the limits of this specification may be unsightly, but do not affect the mechanical properties or functional
requirements of the bolt.
5.5 Seams:
5.5.1 Seams in the shanks of bolts, screws, and studs are permitted provided that no seam has a depth greater than 0.03 D.
5.5.2 Seams extending into the heads and flanges of bolts and screws are permitted, provided that they do not
...


Questions, Comments and Discussion
Ask us and Technical Secretary will try to provide an answer. You can facilitate discussion about the standard in here.