ASTM A580/A580M-16
(Specification)Standard Specification for Stainless Steel Wire
Standard Specification for Stainless Steel Wire
ABSTRACT
This specification covers stainless steel wire, except the free-machining types. It includes round, square, octagon, hexagon, and shape wire in coils only for the more commonly used types of stainless steels for general corrosion resistance and high-temperature service. The steel specimens shall undergo the following conditions: (1) annealed as a final heat treatment; (2) cold worked to higher strength; (3) heat treated to an intermediate temper; or (4) heat treated to a hard temper by austenitizing, quenching, and tempering at a relatively low temperature. The materials shall be cold drawn, annealed, and pickled. The steel wires shall conform to the required chemical compositions of carbon, manganese, phosphorus, sulfur, silicon, chromium, nickel, molybdenum, nitrogen, and other elements such as niobium , vanadium, copper, tantalum, titanium and cobalt. Mechanical test shall be performed wherein in the steel specimens shall conform to the required values of tensile strength, yield strength, and elongation. The martensitic grades shall conform to the required values of hardness after heat treatment.
SCOPE
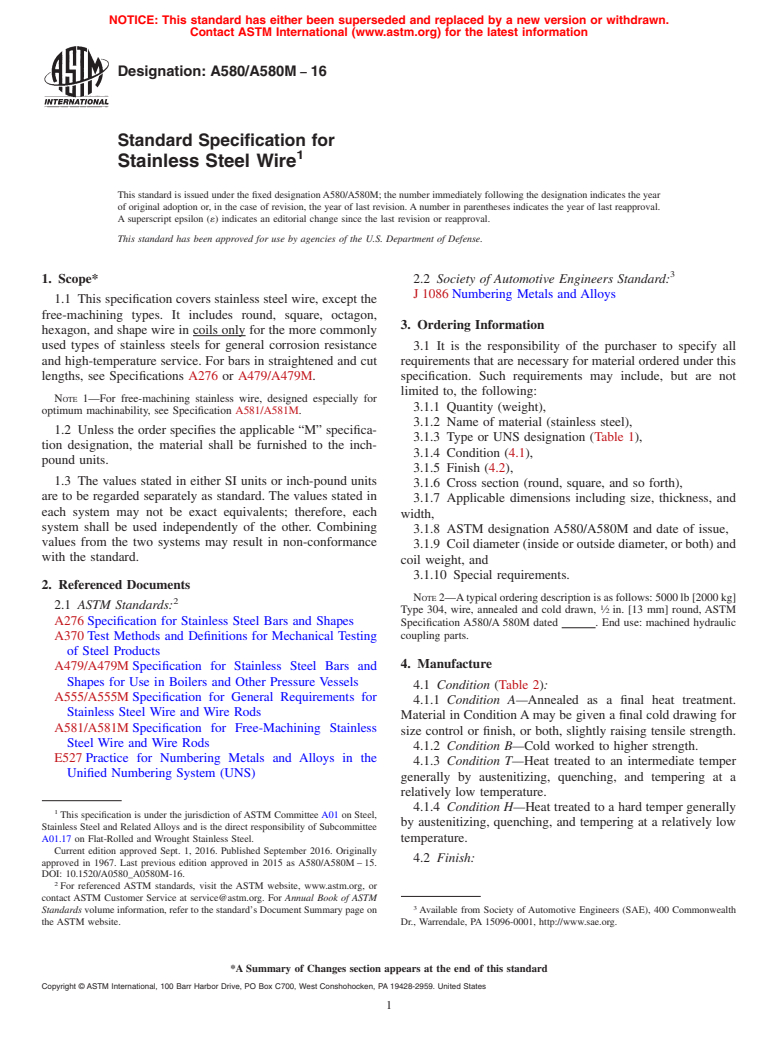
1.1 This specification covers stainless steel wire, except the free-machining types. It includes round, square, octagon, hexagon, and shape wire in coils only for the more commonly used types of stainless steels for general corrosion resistance and high-temperature service. For bars in straightened and cut lengths, see Specifications A276 or A479/A479M.
Note 1: For free-machining stainless wire, designed especially for optimum machinability, see Specification A581/A581M.
1.2 Unless the order specifies the applicable “M” specification designation, the material shall be furnished to the inch-pound units.
1.3 The values stated in either SI units or inch-pound units are to be regarded separately as standard. The values stated in each system may not be exact equivalents; therefore, each system shall be used independently of the other. Combining values from the two systems may result in non-conformance with the standard.
General Information
Relations
Buy Standard
Standards Content (Sample)
NOTICE: This standard has either been superseded and replaced by a new version or withdrawn.
Contact ASTM International (www.astm.org) for the latest information
Designation:A580/A580M −16
Standard Specification for
1
Stainless Steel Wire
This standard is issued under the fixed designationA580/A580M; the number immediately following the designation indicates the year
of original adoption or, in the case of revision, the year of last revision. A number in parentheses indicates the year of last reapproval.
A superscript epsilon (´) indicates an editorial change since the last revision or reapproval.
This standard has been approved for use by agencies of the U.S. Department of Defense.
3
1. Scope* 2.2 Society of Automotive Engineers Standard:
J 1086 Numbering Metals and Alloys
1.1 This specification covers stainless steel wire, except the
free-machining types. It includes round, square, octagon,
3. Ordering Information
hexagon, and shape wire in coils only for the more commonly
used types of stainless steels for general corrosion resistance 3.1 It is the responsibility of the purchaser to specify all
and high-temperature service. For bars in straightened and cut
requirements that are necessary for material ordered under this
lengths, see Specifications A276 or A479/A479M. specification. Such requirements may include, but are not
limited to, the following:
NOTE 1—For free-machining stainless wire, designed especially for
3.1.1 Quantity (weight),
optimum machinability, see Specification A581/A581M.
3.1.2 Name of material (stainless steel),
1.2 Unless the order specifies the applicable “M” specifica-
3.1.3 Type or UNS designation (Table 1),
tion designation, the material shall be furnished to the inch-
3.1.4 Condition (4.1),
pound units.
3.1.5 Finish (4.2),
1.3 The values stated in either SI units or inch-pound units
3.1.6 Cross section (round, square, and so forth),
are to be regarded separately as standard. The values stated in
3.1.7 Applicable dimensions including size, thickness, and
each system may not be exact equivalents; therefore, each
width,
system shall be used independently of the other. Combining
3.1.8 ASTM designation A580/A580M and date of issue,
values from the two systems may result in non-conformance
3.1.9 Coil diameter (inside or outside diameter, or both) and
with the standard.
coil weight, and
3.1.10 Special requirements.
2. Referenced Documents
NOTE2—Atypicalorderingdescriptionisasfollows:5000lb[2000kg]
2
2.1 ASTM Standards:
1
Type 304, wire, annealed and cold drawn, ⁄2 in. [13 mm] round, ASTM
A276 Specification for Stainless Steel Bars and Shapes
Specification A580/A 580M dated . End use: machined hydraulic
coupling parts.
A370 Test Methods and Definitions for Mechanical Testing
of Steel Products
4. Manufacture
A479/A479M Specification for Stainless Steel Bars and
Shapes for Use in Boilers and Other Pressure Vessels
4.1 Condition (Table 2):
A555/A555M Specification for General Requirements for
4.1.1 Condition A—Annealed as a final heat treatment.
Stainless Steel Wire and Wire Rods
Material in ConditionAmay be given a final cold drawing for
A581/A581M Specification for Free-Machining Stainless
size control or finish, or both, slightly raising tensile strength.
Steel Wire and Wire Rods
4.1.2 Condition B—Cold worked to higher strength.
E527 Practice for Numbering Metals and Alloys in the
4.1.3 Condition T—Heat treated to an intermediate temper
Unified Numbering System (UNS)
generally by austenitizing, quenching, and tempering at a
relatively low temperature.
4.1.4 Condition H—Heat treated to a hard temper generally
1
This specification is under the jurisdiction of ASTM Committee A01 on Steel,
by austenitizing, quenching, and tempering at a relatively low
Stainless Steel and Related Alloys and is the direct responsibility of Subcommittee
A01.17 on Flat-Rolled and Wrought Stainless Steel. temperature.
Current edition approved Sept. 1, 2016. Published September 2016. Originally
4.2 Finish:
approved in 1967. Last previous edition approved in 2015 as A580/A580M – 15.
DOI: 10.1520/A0580_A0580M-16.
2
For referenced ASTM standards, visit the ASTM website, www.astm.org, or
contact ASTM Customer Service at service@astm.org. For Annual Book of ASTM
3
Standards volume information, refer to the standard’s Document Summary page on Available from Society of Automotive Engineers (SAE), 400 Commonwealth
the ASTM website. Dr., Warrendale, PA 15096-0001, http://www.sae.org.
*A Summary of Changes section appears at the end of this standard
Copyright © ASTM International, 100 Barr Harbor Drive, PO Box C700, West Conshohocken, PA 19428-2959. United States
1
---------------------- Page: 1 ----------------------
A580/A580M−16
A
TABLE 1 Chemical Requirements
Composition, %
UNS
Desig- Type
Manga-
B Carbon Phosphorus Sulfur Silicon Chromium Nickel Molybdenum Nitrogen Other Elements
nation
nese
Austenitic Grades
N08926 . . . 0.020 2.00 0.030 0.010 0.50 19.0–21.0 24.0–26.0 6.0–7.0 0.15–0.25 Cu 0.50–1.50
N08367 . . . 0.030 2.00 0.040 0.
...
This document is not an ASTM standard and is intended only to provide the user of an ASTM standard an indication of what changes have been made to the previous version. Because
it may not be technically possible to adequately depict all changes accurately, ASTM recommends that users consult prior editions as appropriate. In all cases only the current version
of the standard as published by ASTM is to be considered the official document.
Designation: A580/A580M − 15 A580/A580M − 16
Standard Specification for
1
Stainless Steel Wire
This standard is issued under the fixed designation A580/A580M; the number immediately following the designation indicates the year
of original adoption or, in the case of revision, the year of last revision. A number in parentheses indicates the year of last reapproval.
A superscript epsilon (´) indicates an editorial change since the last revision or reapproval.
This standard has been approved for use by agencies of the U.S. Department of Defense.
1. Scope*
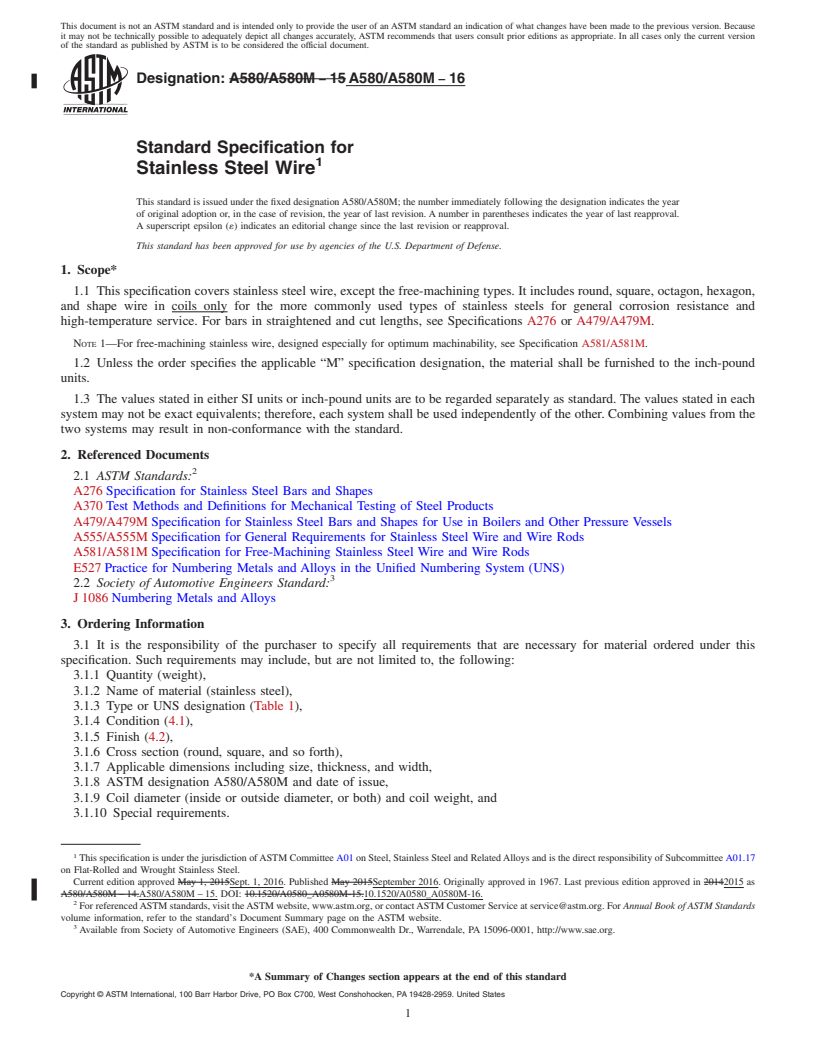
1.1 This specification covers stainless steel wire, except the free-machining types. It includes round, square, octagon, hexagon,
and shape wire in coils only for the more commonly used types of stainless steels for general corrosion resistance and
high-temperature service. For bars in straightened and cut lengths, see Specifications A276 or A479/A479M.
NOTE 1—For free-machining stainless wire, designed especially for optimum machinability, see Specification A581/A581M.
1.2 Unless the order specifies the applicable “M” specification designation, the material shall be furnished to the inch-pound
units.
1.3 The values stated in either SI units or inch-pound units are to be regarded separately as standard. The values stated in each
system may not be exact equivalents; therefore, each system shall be used independently of the other. Combining values from the
two systems may result in non-conformance with the standard.
2. Referenced Documents
2
2.1 ASTM Standards:
A276 Specification for Stainless Steel Bars and Shapes
A370 Test Methods and Definitions for Mechanical Testing of Steel Products
A479/A479M Specification for Stainless Steel Bars and Shapes for Use in Boilers and Other Pressure Vessels
A555/A555M Specification for General Requirements for Stainless Steel Wire and Wire Rods
A581/A581M Specification for Free-Machining Stainless Steel Wire and Wire Rods
E527 Practice for Numbering Metals and Alloys in the Unified Numbering System (UNS)
3
2.2 Society of Automotive Engineers Standard:
J 1086 Numbering Metals and Alloys
3. Ordering Information
3.1 It is the responsibility of the purchaser to specify all requirements that are necessary for material ordered under this
specification. Such requirements may include, but are not limited to, the following:
3.1.1 Quantity (weight),
3.1.2 Name of material (stainless steel),
3.1.3 Type or UNS designation (Table 1),
3.1.4 Condition (4.1),
3.1.5 Finish (4.2),
3.1.6 Cross section (round, square, and so forth),
3.1.7 Applicable dimensions including size, thickness, and width,
3.1.8 ASTM designation A580/A580M and date of issue,
3.1.9 Coil diameter (inside or outside diameter, or both) and coil weight, and
3.1.10 Special requirements.
1
This specification is under the jurisdiction of ASTM Committee A01 on Steel, Stainless Steel and Related Alloys and is the direct responsibility of Subcommittee A01.17
on Flat-Rolled and Wrought Stainless Steel.
Current edition approved May 1, 2015Sept. 1, 2016. Published May 2015September 2016. Originally approved in 1967. Last previous edition approved in 20142015 as
A580/A580M – 14.A580/A580M – 15. DOI: 10.1520/A0580_A0580M-15.10.1520/A0580_A0580M-16.
2
For referenced ASTM standards, visit the ASTM website, www.astm.org, or contact ASTM Customer Service at service@astm.org. For Annual Book of ASTM Standards
volume information, refer to the standard’s Document Summary page on the ASTM website.
3
Available from Society of Automotive Engineers (SAE), 400 Commonwealth Dr., Warrendale, PA 15096-0001, http://www.sae.org.
*A Summary of Changes section appears at the end of this standard
Copyright © ASTM International, 100 Barr Harbor Drive, PO Box C700, West Conshohocken, PA 19428-2959. United States
1
---------------------- Page: 1 ----------------------
A580/A580M − 16
A
TABLE 1 Chemical Requirements
Composition, %
UNS
Phos- Sul-
Desig- Type
Manga-
B Carbon,Carbon Phosphorus SulfurSilicon,Silicon Chromium Nickel Molybdenum Nitrogen Other Elements
nation
nese,nese
phorus, fur,
Austenitic Grades
N08926 . . . 0.020 2.00 0.030 0.010 0.50 19.0–21.0 24.0–26.0 6.0–7.0 0.15–0.25 Cu 0.50–1.50
N08367 . . . 0.030 2.00 0.040 0.030 1.00 20.0–22.0 23.5–25.5 6.0–7.0 0.18–0.25 Cu 0.75 max
N08700 . . . 0.040 2.00 0.040 0.030 1.00 19.0–23.0 24.0–26.0 4.3–5.0 . . . Cu 0.50 max
Cb 8xC-0.40
S20161 . . . 0.15 4.0–6.0 0.040 0.040 3.0–4.0 15.0–18.0 4.0–6.0 . . . 0.08–0.20 . . .
S20910 XM-19 0.06 4.0–6.0 0.040 0.030 1.00 20.5–23.5 11.5–13.5 1.50–3.00 0.20–0.40 Cb 0.10–0.30
V 0.10–0.30
S21400 XM-
...


Questions, Comments and Discussion
Ask us and Technical Secretary will try to provide an answer. You can facilitate discussion about the standard in here.