ASTM C743-87(2018)
(Test Method)Standard Test Method for Continuity of Porcelain Enamel Coatings
Standard Test Method for Continuity of Porcelain Enamel Coatings
ABSTRACT
This test method provides for easy detection of discontinuities and areas of light coverage that are not readily seen by visual inspection on corrosion protective porcelain enamel coatings. These two issues limit the protection to the metal substrate. Apparatus includes a nondestructive coating thickness gage, either an ac or a dc high-voltage discharge test instrument with a continuously variable output voltage, and a mesh wire gauze test probe. This test uses porcelain enameled glass coating specimens of any size which should be removed from an edge or the back of a specimen and then properly conditioned as specified. If the probe is wider than the specimen, the specimen edges should be masked using electrical insulating tape.
SCOPE
1.1 Porcelain enamel coatings are applied to metals to provide protection from corrosion as well as to enhance their appearance. This test method permits the easy detection of discontinuities and areas of light coverage, not readily seen by visual inspection, which limit the protection to the substrate. Somewhat similar tests applicable to the thicker glass coatings used for chemical reaction vessels are found in Test Methods C536 and C537.
1.2 Values stated in SI units are to be regarded as the standard. Inch-pound units are provided for information only.
1.3 This standard does not purport to address all of the safety concerns, if any, associated with its use. It is the responsibility of the user of this standard to establish appropriate safety, health, and environmental practices and determine the applicability of regulatory limitations prior to use.
1.4 This international standard was developed in accordance with internationally recognized principles on standardization established in the Decision on Principles for the Development of International Standards, Guides and Recommendations issued by the World Trade Organization Technical Barriers to Trade (TBT) Committee.
General Information
- Status
- Published
- Publication Date
- 30-Sep-2018
- Technical Committee
- B08 - Metallic and Inorganic Coatings
- Drafting Committee
- B08.12 - Materials for Porcelain Enamel and Ceramic-Metal Systems
Relations
- Effective Date
- 01-Oct-2018
- Effective Date
- 01-May-2014
- Effective Date
- 01-May-2014
- Effective Date
- 15-Apr-2009
- Effective Date
- 01-Aug-2004
- Effective Date
- 01-Aug-2004
- Effective Date
- 01-Aug-2004
- Effective Date
- 01-Jan-1998
- Effective Date
- 01-Jan-1998
- Referred By
ASTM C286-22 - Standard Terminology Relating to Porcelain Enamel and Ceramic-Metal Systems - Effective Date
- 01-Oct-2018
Overview
ASTM C743-87(2018), titled Standard Test Method for Continuity of Porcelain Enamel Coatings, establishes a reliable procedure for detecting discontinuities and areas of light coverage in porcelain enamel coatings applied to metallic substrates. Porcelain enamel coatings provide essential corrosion protection and aesthetic enhancement for metal products. This standard guides manufacturers and quality assurance professionals in identifying defects that may compromise a coating's protective function, ensuring the performance and longevity of enameled surfaces.
The test method defines apparatus, specimen preparation, test procedures, and reporting requirements for evaluating the continuity of porcelain enamel coatings using a nondestructive high-voltage technique. By identifying imperfections not detectable by visual inspection, the standard contributes to improved quality control and product reliability.
Key Topics
Purpose of the Test
The main goal is to detect pinholes, discontinuities, and insufficiently applied areas in corrosion-protective porcelain enamel coatings. These flaws can limit the effective protection of the underlying metal.Testing Apparatus
The required apparatus includes:- A nondestructive coating thickness gauge
- A high-voltage discharge test instrument (AC or DC) with a variable output voltage
- A mesh wire gauze test probe
Test Procedures
- Specimen preparation involves cleaning, conditioning, and edge masking when needed.
- Enamel thickness is measured at several points on each specimen.
- Probe voltage is carefully selected based on enamel thickness and desired sensitivity.
- Defects are detected by observing sparks or signals when the probe passes over coating discontinuities.
Reporting Requirements Detailed documentation is required, including coating thickness, test voltages, methods, equipment used, and description of any discontinuities found.
Safety and Compliance
The standard emphasizes that users must establish appropriate safety procedures and comply with applicable regulations.
Applications
This ASTM standard is widely used in industries manufacturing or utilizing porcelain enameled metal products, such as:
Appliance Manufacturing:
Ensuring the integrity of enameled surfaces on ovens, washers, and other household appliances where corrosion resistance is crucial.Architectural and Building Materials:
Inspecting enameled panels and fixtures to verify the absence of protective failures that could lead to premature wear.Chemical Processing Equipment:
Evaluating tanks and vessels lined with porcelain enamel to prevent chemical attack and maintain containment safety.Quality Control Laboratories:
Providing a standardized, nondestructive method for routine inspection during production or acceptance testing.
Adopting ASTM C743-87(2018) in a quality management system helps manufacturers reduce the risk of product failure, improve durability, and meet customer expectations for corrosion-resistant products.
Related Standards
- ASTM C536 - Test Method for Continuity of Coatings in Glassed Steel Equipment by Electrical Testing
- ASTM C537 - Test Method for Reliability of Glass Coatings on Glassed Steel Reaction Equipment by High Voltage
- ISO and Other International Standards - Many organizations develop complementary or similar methods for enamel and coating continuity testing.
Manufacturers and laboratories following ASTM C743-87(2018) benefit from globally harmonized best practices for verifying the continuity and integrity of porcelain enamel coatings, in alignment with World Trade Organization (WTO) principles on international standards.
Keywords: porcelain enamel coatings, continuity testing, nondestructive testing, high-voltage discharge, coating quality control, ASTM C743, corrosion protection, defect detection, enamel thickness.
Buy Documents
ASTM C743-87(2018) - Standard Test Method for Continuity of Porcelain Enamel Coatings
Get Certified
Connect with accredited certification bodies for this standard

National Aerospace and Defense Contractors Accreditation Program (NADCAP)
Global cooperative program for special process quality in aerospace.

CARES (UK Certification Authority for Reinforcing Steels)
UK certification for reinforcing steels and construction.

DVS-ZERT GmbH
German welding certification society.
Sponsored listings
Frequently Asked Questions
ASTM C743-87(2018) is a standard published by ASTM International. Its full title is "Standard Test Method for Continuity of Porcelain Enamel Coatings". This standard covers: ABSTRACT This test method provides for easy detection of discontinuities and areas of light coverage that are not readily seen by visual inspection on corrosion protective porcelain enamel coatings. These two issues limit the protection to the metal substrate. Apparatus includes a nondestructive coating thickness gage, either an ac or a dc high-voltage discharge test instrument with a continuously variable output voltage, and a mesh wire gauze test probe. This test uses porcelain enameled glass coating specimens of any size which should be removed from an edge or the back of a specimen and then properly conditioned as specified. If the probe is wider than the specimen, the specimen edges should be masked using electrical insulating tape. SCOPE 1.1 Porcelain enamel coatings are applied to metals to provide protection from corrosion as well as to enhance their appearance. This test method permits the easy detection of discontinuities and areas of light coverage, not readily seen by visual inspection, which limit the protection to the substrate. Somewhat similar tests applicable to the thicker glass coatings used for chemical reaction vessels are found in Test Methods C536 and C537. 1.2 Values stated in SI units are to be regarded as the standard. Inch-pound units are provided for information only. 1.3 This standard does not purport to address all of the safety concerns, if any, associated with its use. It is the responsibility of the user of this standard to establish appropriate safety, health, and environmental practices and determine the applicability of regulatory limitations prior to use. 1.4 This international standard was developed in accordance with internationally recognized principles on standardization established in the Decision on Principles for the Development of International Standards, Guides and Recommendations issued by the World Trade Organization Technical Barriers to Trade (TBT) Committee.
ABSTRACT This test method provides for easy detection of discontinuities and areas of light coverage that are not readily seen by visual inspection on corrosion protective porcelain enamel coatings. These two issues limit the protection to the metal substrate. Apparatus includes a nondestructive coating thickness gage, either an ac or a dc high-voltage discharge test instrument with a continuously variable output voltage, and a mesh wire gauze test probe. This test uses porcelain enameled glass coating specimens of any size which should be removed from an edge or the back of a specimen and then properly conditioned as specified. If the probe is wider than the specimen, the specimen edges should be masked using electrical insulating tape. SCOPE 1.1 Porcelain enamel coatings are applied to metals to provide protection from corrosion as well as to enhance their appearance. This test method permits the easy detection of discontinuities and areas of light coverage, not readily seen by visual inspection, which limit the protection to the substrate. Somewhat similar tests applicable to the thicker glass coatings used for chemical reaction vessels are found in Test Methods C536 and C537. 1.2 Values stated in SI units are to be regarded as the standard. Inch-pound units are provided for information only. 1.3 This standard does not purport to address all of the safety concerns, if any, associated with its use. It is the responsibility of the user of this standard to establish appropriate safety, health, and environmental practices and determine the applicability of regulatory limitations prior to use. 1.4 This international standard was developed in accordance with internationally recognized principles on standardization established in the Decision on Principles for the Development of International Standards, Guides and Recommendations issued by the World Trade Organization Technical Barriers to Trade (TBT) Committee.
ASTM C743-87(2018) is classified under the following ICS (International Classification for Standards) categories: 25.220.50 - Enamels. The ICS classification helps identify the subject area and facilitates finding related standards.
ASTM C743-87(2018) has the following relationships with other standards: It is inter standard links to ASTM C743-87(2014)e1, ASTM C536-83(2014)e1, ASTM C537-87(2014)e1, ASTM C536-83(2009), ASTM C536-83(2004)e1, ASTM C537-87(2004)e1, ASTM C537-87(2009), ASTM C536-83(1998), ASTM C537-87(1998), ASTM C286-22. Understanding these relationships helps ensure you are using the most current and applicable version of the standard.
ASTM C743-87(2018) is available in PDF format for immediate download after purchase. The document can be added to your cart and obtained through the secure checkout process. Digital delivery ensures instant access to the complete standard document.
Standards Content (Sample)
This international standard was developed in accordance with internationally recognized principles on standardization established in the Decision on Principles for the
Development of International Standards, Guides and Recommendations issued by the World Trade Organization Technical Barriers to Trade (TBT) Committee.
Designation: C743 − 87 (Reapproved 2018)
Standard Test Method for
Continuity of Porcelain Enamel Coatings
This standard is issued under the fixed designation C743; the number immediately following the designation indicates the year of
original adoption or, in the case of revision, the year of last revision. A number in parentheses indicates the year of last reapproval. A
superscript epsilon (´) indicates an editorial change since the last revision or reapproval.
INTRODUCTION
This test provides a means to evaluate a porcelain enamel coating for pinholes, discontinuities, and
insufficient application to better assess the ability of the coating to protect the substrate.
1. Scope 3. Terminology
1.1 Porcelain enamel coatings are applied to metals to
3.1 air-gap voltage—voltage needed to arc through a defect
provide protection from corrosion as well as to enhance their that is open to both the surface of the porcelain enamel and the
appearance. This test method permits the easy detection of
metal substrate. The length of the air gap is estimated by
discontinuities and areas of light coverage, not readily seen by measuring the enamel thickness.
visual inspection, which limit the protection to the substrate.
3.2 overvoltage—difference between an applied test voltage
Somewhat similar tests applicable to the thicker glass coatings
and the air-gap voltage for the porcelain enamel being tested.
used for chemical reaction vessels are found in Test Methods
3.3 RMS voltage—root mean square voltage, or “average”
C536 and C537.
voltage, shown on ac test meters.
1.2 Values stated in SI units are to be regarded as the
standard. Inch-pound units are provided for information only. 3.4 peak voltage—for ac meters, the voltage that will
discharge across the air gap or across a defect. The peak
1.3 This standard does not purport to address all of the
voltage is the RMS voltage multiplied by 1.414.
safety concerns, if any, associated with its use. It is the
responsibility of the user of this standard to establish appro-
4. Apparatus
priate safety, health, and environmental practices and deter-
mine the applicability of regulatory limitations prior to use.
4.1 Anondestructive coating thickness gage with a range of
1.4 This international standard was developed in accor-
at least 0 to 0.5 mm in 0.03 mm increments (0 to 20 mils in 1.0
dance with internationally recognized principles on standard-
mil increments).
ization established in the Decision on Principles for the
4.2 Either an ac or a dc high-voltage discharge test instru-
Development of International Standards, Guides and Recom-
ment with a continuously variable output voltage over the
mendations issued by the World Trade Organization Technical
range of at least 0 to 4 kV as indicated on a built-in voltmeter.
Barriers to Trade (TBT) Committee.
Theinstrumentshallbecapableofbeingsetto0.1kVandshall
have an insulated cable and probe and a means for indicating
2. Referenced Documents
(light, meter, or bell) a voltage discharge. Before use in this
2.1 ASTM Standards:
test, the high-voltage discharge test instrument shall be cali-
C536 Test Method for Continuity of Coatings in Glassed
brated in accordance with the procedure set forth in AnnexA1.
Steel Equipment by Electrical Testing
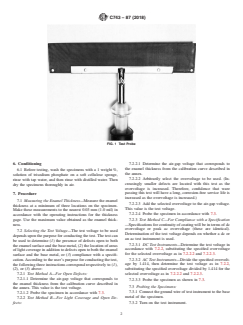
4.3 A test probe constructed of 100 mesh wire gauze as
C537 Test Method for Reliability of Glass Coatings on
Glassed Steel Reaction Equipment by High Voltage illustrated in Fig. 1.
5. Test Specimens
ThistestmethodisunderthejurisdictionofASTMCommitteeB08onMetallic
and Inorganic Coatings and is the direct responsibility of Subcommittee B08.12 on
5.1 Porcelain enameled specimens of any size may be used
Materials for Porcelain Enamel and Ceramic-Metal Systems.
in this test. The enamel shall be removed from an edge or the
Current edition approved Oct. 1, 2018. Published October 2018. Originally
ɛ1
backofthespecimentoprovideanelectricalgroundforthetest
approved in 1973. Last previous edition approved in 2014 as C743 – 87 (2014) .
DOI: 10.1520/C0743-87R18.
instrument. If the probe is wider than the specimen, the edges
For referenced ASTM standards, visit the ASTM website, www.astm.org, or
of the specimen shall be masked with electrical insulating tape
contact ASTM Customer Service at service@astm.org. For Annual Book of ASTM
to prevent discharges from occurring at the edges where
Standards volume information, refer to the standard’s Document Summary page on
the ASTM website. porcelain coverage may be light.
Copyright © ASTM International, 100 Barr Harbor Drive, PO Box C700, West Conshohocken, PA 19428-2959. United States
C743 − 87 (2018)
FIG. 1 Test Probe
6. Conditioning 7.2.2.1 Determine the air-gap voltage that corresponds to
the enamel thickness from the calibration curve described in
6.1 Before testing, wash the specimens with a 1 weight %,
the annex.
solution of trisodium phosphate on a soft cellulose sponge,
7.2.2.2 Arbitrarily select the overvoltage to be used. (In-
rinse with tap water, and then rinse with distilled water. Then
creasingly smaller defects are located with this test as the
dry the specimens thoroughly in air.
overvoltage is increased. Therefore, confidence that ware
passing this test will have a long, corrosion-free service life is
7. Procedure
increased as the overvoltage is increased.)
7.1 Measuring the Enamel Thickness—Measure the enamel
7.2.2.3 Add the selected overvoltage to the air-gap voltage.
thickness at a minimum of three locations on the specimen.
This value is the test voltage.
Make these measurements to the nearest 0.03 mm (1.0 mil) in
7.2.2.4 Probe the specimen in accordance with 7.3.
accordance with the operating instructions for the thickness
gage. Use the maximum value obtained as the enamel thick- 7.2.3 Test Method C—For Compliance with a Specification
ness. —Specifications for continuity of coating will be in terms of dc
overvoltage or peak ac overvoltage (these are identical).
7.2 Selecting the Test Voltage—The test voltage to be used
Determination of the test voltage depends on whether a dc or
depends upon the purpose for conducting the test. The test can
an ac test instrument is used.
be used to determine (1) the presence of defects open to both
7.2.3.1 DC Test Instruments—Determine the test voltage in
the enamel surface and the base metal, (2) the location of areas
accordance with 7.2.2, substituting the specified overvoltage
of light coverage in addition to defects open to both the enamel
for the selected overvoltage as in 7.2.2.2 and 7.2.2.3.
surface and the base metal, or (3) compliance with a specifi-
7.2.3.2 AC Test Instruments—Divide the specified overvolt-
cation.According to the user’s purpose for con
...


Questions, Comments and Discussion
Ask us and Technical Secretary will try to provide an answer. You can facilitate discussion about the standard in here.
Loading comments...