ASTM D1042-12
(Test Method)Standard Test Method for Linear Dimensional Changes of Plastics Caused by Exposure to Heat and Moisture
Standard Test Method for Linear Dimensional Changes of Plastics Caused by Exposure to Heat and Moisture
SIGNIFICANCE AND USE
4.1 This test method is intended only as a convenient test method for measurement of linear dimensional changes in plastics subjected to defined conditions of test as outlined in Sections 7 and 8.
SCOPE
1.1 This test method is designed to provide a means for measuring in plastic specimens the dimensional changes such as shrinkage or expansion, developed under specific heat and water conditionings.
1.2 The values stated in SI units are to be regarded as standard. The values given in parentheses are mathematical conversions to inch-pound units that are provided for information only and are not considered standard.
1.3 This standard does not purport to address all of the safety concerns, if any, associated with its use. It is the responsibility of the user of this standard to establish appropriate safety and health practices and determine the applicability of regulatory limitations prior to use.Note 1—There is no known ISO equivalent to this standard.
General Information
Relations
Buy Standard
Standards Content (Sample)
NOTICE: This standard has either been superseded and replaced by a new version or withdrawn.
Contact ASTM International (www.astm.org) for the latest information
Designation: D1042 − 12
Standard Test Method for
Linear Dimensional Changes of Plastics Caused by
1
Exposure to Heat and Moisture
This standard is issued under the fixed designation D1042; the number immediately following the designation indicates the year of
original adoption or, in the case of revision, the year of last revision.Anumber in parentheses indicates the year of last reapproval.A
superscript epsilon (´) indicates an editorial change since the last revision or reapproval.
1. Scope* 5. Apparatus
1.1 This test method is designed to provide a means for
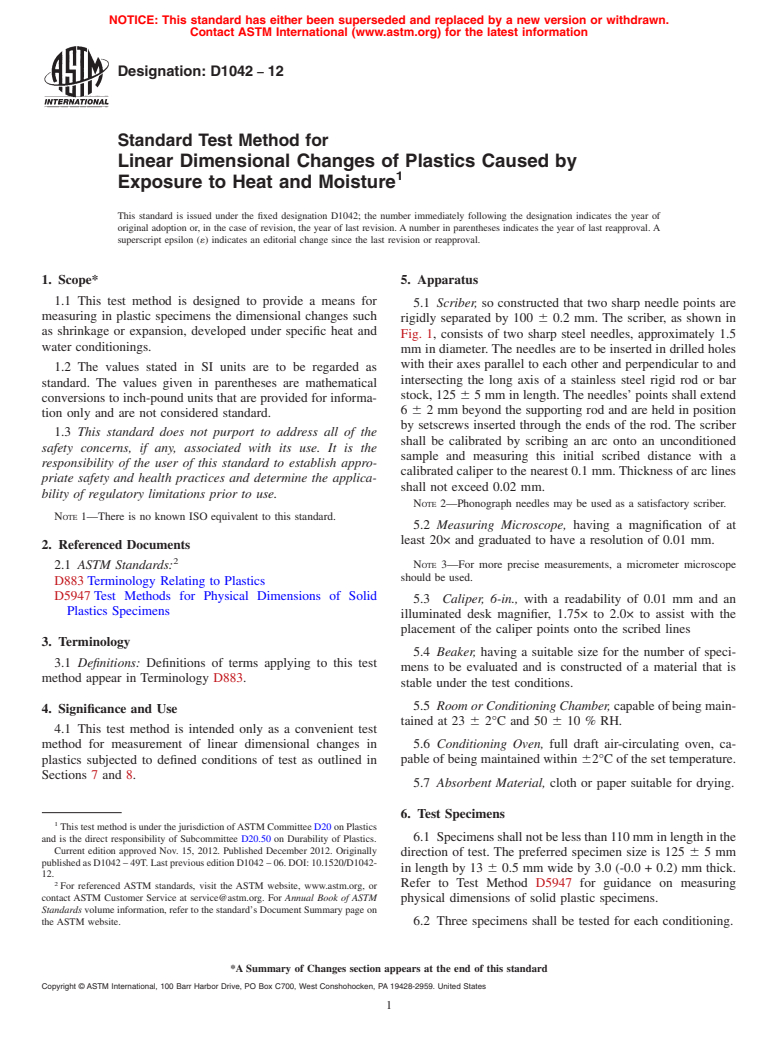
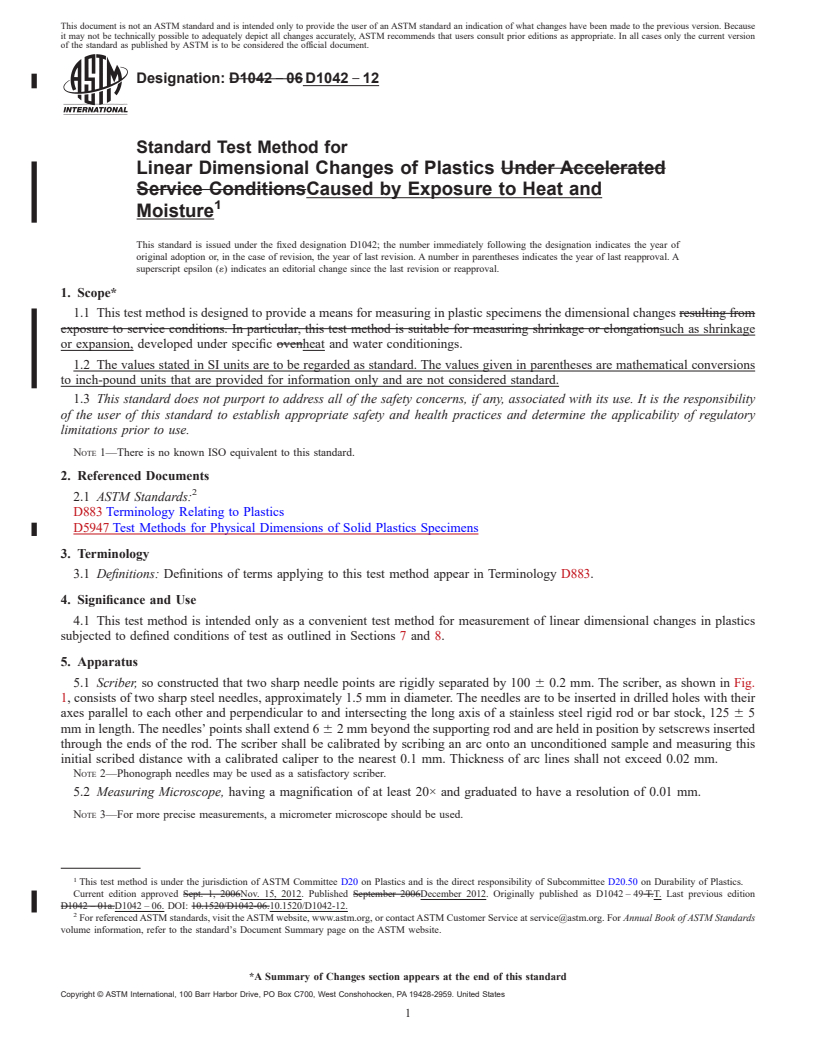
5.1 Scriber, so constructed that two sharp needle points are
measuring in plastic specimens the dimensional changes such
rigidly separated by 100 6 0.2 mm. The scriber, as shown in
as shrinkage or expansion, developed under specific heat and
Fig. 1, consists of two sharp steel needles, approximately 1.5
water conditionings.
mm in diameter. The needles are to be inserted in drilled holes
with their axes parallel to each other and perpendicular to and
1.2 The values stated in SI units are to be regarded as
intersecting the long axis of a stainless steel rigid rod or bar
standard. The values given in parentheses are mathematical
stock, 125 6 5 mm in length. The needles’ points shall extend
conversions to inch-pound units that are provided for informa-
6 6 2 mm beyond the supporting rod and are held in position
tion only and are not considered standard.
by setscrews inserted through the ends of the rod. The scriber
1.3 This standard does not purport to address all of the
shall be calibrated by scribing an arc onto an unconditioned
safety concerns, if any, associated with its use. It is the
sample and measuring this initial scribed distance with a
responsibility of the user of this standard to establish appro-
calibrated caliper to the nearest 0.1 mm.Thickness of arc lines
priate safety and health practices and determine the applica-
shall not exceed 0.02 mm.
bility of regulatory limitations prior to use.
NOTE 2—Phonograph needles may be used as a satisfactory scriber.
NOTE 1—There is no known ISO equivalent to this standard.
5.2 Measuring Microscope, having a magnification of at
least 20× and graduated to have a resolution of 0.01 mm.
2. Referenced Documents
2
NOTE 3—For more precise measurements, a micrometer microscope
2.1 ASTM Standards:
should be used.
D883Terminology Relating to Plastics
D5947Test Methods for Physical Dimensions of Solid
5.3 Caliper, 6-in., with a readability of 0.01 mm and an
Plastics Specimens
illuminated desk magnifier, 1.75× to 2.0× to assist with the
placement of the caliper points onto the scribed lines
3. Terminology
5.4 Beaker, having a suitable size for the number of speci-
3.1 Definitions: Definitions of terms applying to this test
mens to be evaluated and is constructed of a material that is
method appear in Terminology D883.
stable under the test conditions.
5.5 Room or Conditioning Chamber,capableofbeingmain-
4. Significance and Use
tained at 23 6 2°C and 50 6 10 % RH.
4.1 This test method is intended only as a convenient test
method for measurement of linear dimensional changes in 5.6 Conditioning Oven, full draft air-circulating oven, ca-
plastics subjected to defined conditions of test as outlined in pable of being maintained within 62°C of the set temperature.
Sections 7 and 8.
5.7 Absorbent Material, cloth or paper suitable for drying.
6. Test Specimens
1
This test method is under the jurisdiction ofASTM Committee D20 on Plastics
and is the direct responsibility of Subcommittee D20.50 on Durability of Plastics. 6.1 Specimensshallnotbelessthan110mminlengthinthe
Current edition approved Nov. 15, 2012. Published December 2012. Originally
direction of test. The preferred specimen size is 125 65mm
publishedasD1042–49T.LastpreviouseditionD1042–06.DOI:10.1520/D1042-
in length by 13 6 0.5 mm wide by 3.0 (-0.0 + 0.2) mm thick.
12.
2 Refer to Test Method D5947 for guidance on measuring
For referenced ASTM standards, visit the ASTM website, www.astm.org, or
contact ASTM Customer Service at service@astm.org. For Annual Book of ASTM
physical dimensions of solid plastic specimens.
Standards volume information, refer to the standard’s Document Summary page on
the ASTM website. 6.2 Three specimens shall be tested for each conditioning.
*A Summary of Changes section appears at the end of this standard
Copyright © ASTM International, 100 Barr Harbor Drive, PO Box C700, West Conshohocken, PA 19428-2959. United States
1
---------------------- Page: 1 ----------------------
D1042 − 12
FIG. 1 Scriber
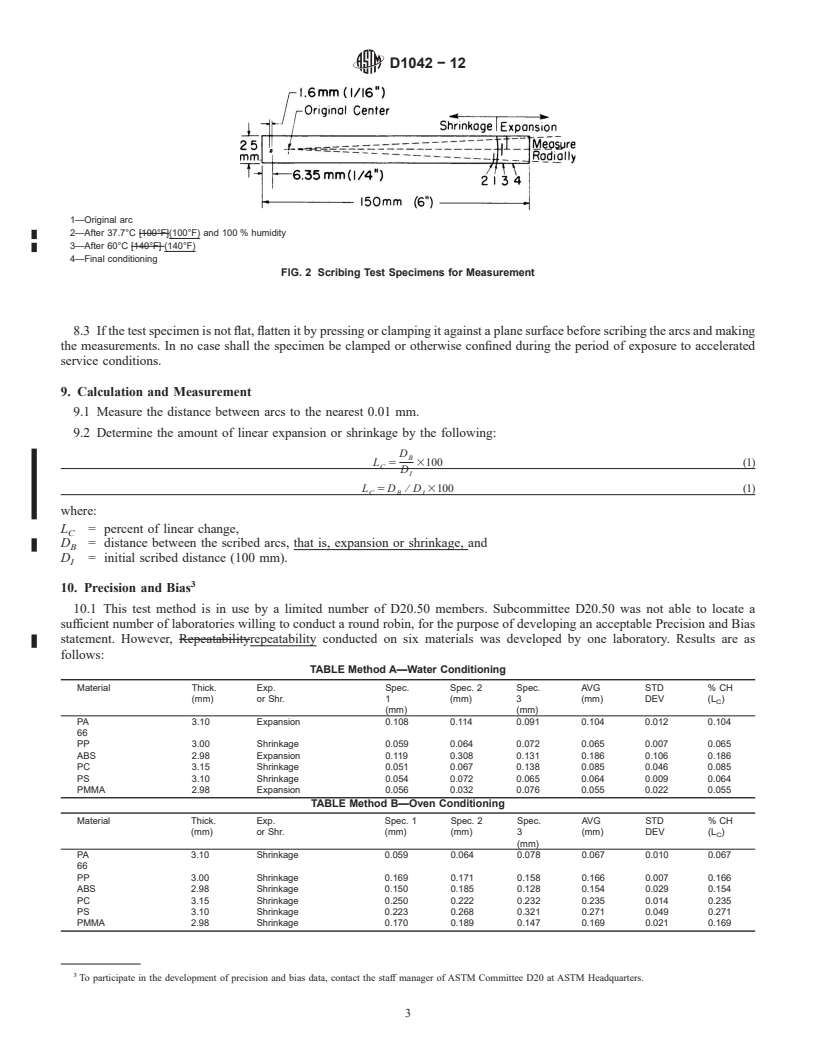
1—Original arc
2—After 37.7°C (100°F) and 100 % humidity
6.3 Individual specimens shall be positioned vertically in
3—After 60°C (140°F)
the specified environment.
4—Final conditioning
FIG. 2 Scribing Test Specimens for Measurement
NOTE 4—A wire hook inserted in a hole drilled in one e
...
This document is not an ASTM standard and is intended only to provide the user of an ASTM standard an indication of what changes have been made to the previous version. Because
it may not be technically possible to adequately depict all changes accurately, ASTM recommends that users consult prior editions as appropriate. In all cases only the current version
of the standard as published by ASTM is to be considered the official document.
Designation: D1042 − 06 D1042 − 12
Standard Test Method for
Linear Dimensional Changes of Plastics Under Accelerated
Service ConditionsCaused by Exposure to Heat and
1
Moisture
This standard is issued under the fixed designation D1042; the number immediately following the designation indicates the year of
original adoption or, in the case of revision, the year of last revision. A number in parentheses indicates the year of last reapproval. A
superscript epsilon (´) indicates an editorial change since the last revision or reapproval.
1. Scope*
1.1 This test method is designed to provide a means for measuring in plastic specimens the dimensional changes resulting from
exposure to service conditions. In particular, this test method is suitable for measuring shrinkage or elongationsuch as shrinkage
or expansion, developed under specific ovenheat and water conditionings.
1.2 The values stated in SI units are to be regarded as standard. The values given in parentheses are mathematical conversions
to inch-pound units that are provided for information only and are not considered standard.
1.3 This standard does not purport to address all of the safety concerns, if any, associated with its use. It is the responsibility
of the user of this standard to establish appropriate safety and health practices and determine the applicability of regulatory
limitations prior to use.
NOTE 1—There is no known ISO equivalent to this standard.
2. Referenced Documents
2
2.1 ASTM Standards:
D883 Terminology Relating to Plastics
D5947 Test Methods for Physical Dimensions of Solid Plastics Specimens
3. Terminology
3.1 Definitions: Definitions of terms applying to this test method appear in Terminology D883.
4. Significance and Use
4.1 This test method is intended only as a convenient test method for measurement of linear dimensional changes in plastics
subjected to defined conditions of test as outlined in Sections 7 and 8.
5. Apparatus
5.1 Scriber, so constructed that two sharp needle points are rigidly separated by 100 6 0.2 mm. The scriber, as shown in Fig.
1, consists of two sharp steel needles, approximately 1.5 mm in diameter. The needles are to be inserted in drilled holes with their
axes parallel to each other and perpendicular to and intersecting the long axis of a stainless steel rigid rod or bar stock, 125 6 5
mm in length. The needles’ points shall extend 6 6 2 mm beyond the supporting rod and are held in position by setscrews inserted
through the ends of the rod. The scriber shall be calibrated by scribing an arc onto an unconditioned sample and measuring this
initial scribed distance with a calibrated caliper to the nearest 0.1 mm. Thickness of arc lines shall not exceed 0.02 mm.
NOTE 2—Phonograph needles may be used as a satisfactory scriber.
5.2 Measuring Microscope, having a magnification of at least 20× and graduated to have a resolution of 0.01 mm.
NOTE 3—For more precise measurements, a micrometer microscope should be used.
1
This test method is under the jurisdiction of ASTM Committee D20 on Plastics and is the direct responsibility of Subcommittee D20.50 on Durability of Plastics.
Current edition approved Sept. 1, 2006Nov. 15, 2012. Published September 2006December 2012. Originally published as D1042 – 49 T.T. Last previous edition
D1042 – 01a.D1042 – 06. DOI: 10.1520/D1042-06.10.1520/D1042-12.
2
For referenced ASTM standards, visit the ASTM website, www.astm.org, or contact ASTM Customer Service at service@astm.org. For Annual Book of ASTM Standards
volume information, refer to the standard’s Document Summary page on the ASTM website.
*A Summary of Changes section appears at the end of this standard
Copyright © ASTM International, 100 Barr Harbor Drive, PO Box C700, West Conshohocken, PA 19428-2959. United States
1
---------------------- Page: 1 ----------------------
D1042 − 12
FIG. 1 Scriber
5.3 Caliper, 6-in., with a readability of 0.01 mm and an illuminated desk magnifier, 1.75× to 2.0× to assist with the placement
of the caliper points onto the scribed lines
5.4 Beaker, having a suitable size for the number of specimens to be evaluated and is constructed of a material that is stable
under the test conditions.
5.5 Room or Conditioning Chamber, capable of being maintained at 23 6 2°C and 50 6 5 % 10 % RH.
5.6 Conditioning Oven, full draft air-circulating oven, capable of being maintained within 62°C of the set temperature.
5.7 Absorbent Material, cloth or paper suitable for drying.
6. Test Specimens
6.1 Specimens shall not be less than 110 mm in length in the direction of test. The
...


Questions, Comments and Discussion
Ask us and Technical Secretary will try to provide an answer. You can facilitate discussion about the standard in here.