ASTM A1047/A1047M-05(2023)
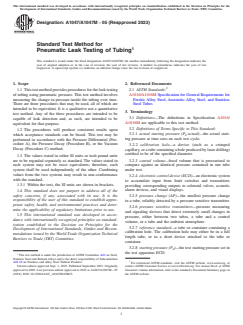
(Test Method)Standard Test Method for Pneumatic Leak Testing of Tubing
Standard Test Method for Pneumatic Leak Testing of Tubing
SIGNIFICANCE AND USE
5.1 When permitted by a specification or the order, this test method may be used for detecting leaks in tubing in lieu of the air underwater pressure test.
SCOPE
1.1 This test method provides procedures for the leak testing of tubing using pneumatic pressure. This test method involves measuring the change in pressure inside the tubing over time. There are three procedures that may be used, all of which are intended to be equivalent. It is a qualitative not a quantitative test method. Any of the three procedures are intended to be capable of leak detection and, as such, are intended to be equivalent for that purpose.
1.2 The procedures will produce consistent results upon which acceptance standards can be based. This test may be performed in accordance with the Pressure Differential (Procedure A), the Pressure Decay (Procedure B), or the Vacuum Decay (Procedure C) method.
1.3 The values stated in either SI units or inch-pound units are to be regarded separately as standard. The values stated in each system may not be exact equivalents; therefore, each system shall be used independently of the other. Combining values from the two systems may result in non-conformance with the standard.
1.3.1 Within the text, the SI units are shown in brackets.
1.4 This standard does not purport to address all of the safety concerns, if any, associated with its use. It is the responsibility of the user of this standard to establish appropriate safety, health, and environmental practices and determine the applicability of regulatory limitations prior to use.
1.5 This international standard was developed in accordance with internationally recognized principles on standardization established in the Decision on Principles for the Development of International Standards, Guides and Recommendations issued by the World Trade Organization Technical Barriers to Trade (TBT) Committee.
General Information
- Status
- Published
- Publication Date
- 31-Aug-2023
- Technical Committee
- A01 - Steel, Stainless Steel and Related Alloys
- Drafting Committee
- A01.10 - Stainless and Alloy Steel Tubular Products
Relations
- Effective Date
- 01-Nov-2023
- Effective Date
- 01-Sep-2018
- Effective Date
- 01-Mar-2018
- Effective Date
- 01-Sep-2017
- Effective Date
- 15-Mar-2017
- Effective Date
- 01-Mar-2014
- Effective Date
- 01-Mar-2014
- Effective Date
- 01-Apr-2013
- Effective Date
- 15-May-2011
- Effective Date
- 01-Apr-2011
- Effective Date
- 01-Oct-2010
- Effective Date
- 01-Oct-2008
- Effective Date
- 01-Jul-2004
- Effective Date
- 01-Apr-2004
- Effective Date
- 10-Jun-2002
Overview
ASTM A1047/A1047M-05(2023) is the internationally recognized standard test method for pneumatic leak testing of tubing, developed by ASTM International. This standard specifies qualitative procedures to detect leaks in various metal tubes using pneumatic (air or gas) pressure. Designed as a flexible alternative to the traditional air underwater pressure test, this method helps ensure the quality and integrity of tubing products in a range of industrial applications.
The test measures the change in internal pressure over time, which indicates the presence of leaks. It supports three equivalent procedures-Pressure Differential, Pressure Decay, and Vacuum Decay-allowing users to choose the most suitable method based on equipment, tube characteristics, and requirements.
Key Topics
- Leak Detection Methods: The standard describes three main leak testing procedures:
- Pressure Differential (Procedure A): Compares pressure drop between a test tube and a control sample.
- Pressure Decay (Procedure B): Measures the rate of pressure loss from a tube.
- Vacuum Decay (Procedure C): Assesses the rate at which air re-enters an evacuated tube.
- Test Apparatus: Use of automated electronic control devices, sensitive pressure transducers, calibration holes, and timing systems to ensure reliable, repeatable testing.
- Units of Measure: Both SI (metric) and inch-pound (imperial) units are separately accepted, but they must not be combined in a single application.
- Calibration and Precision: Attention to apparatus calibration, reference standards, and test result validation ensures ongoing test consistency.
- Safety Practices: Users must establish and observe appropriate safety, health, and environmental protocols due to the use of high-pressure air.
Applications
ASTM A1047/A1047M-05(2023) is widely used for non-destructive leak detection in industrial tubing across various sectors, including:
- Metallurgical Manufacturing: Ensuring the integrity of ferritic, austenitic, and stainless steel tubes before shipment or installation.
- Power Generation: Testing critical tubing components in boilers, heat exchangers, and condensers for leak-tight service.
- Chemical and Petrochemical Industries: Verifying process tubing for vacuum and pressure systems where leaks can result in safety or environmental hazards.
- Pharmaceutical and Food Processing: Leak testing stainless steel tubes that must meet stringent hygiene and cleanliness requirements.
- Automotive and Aerospace: Quality control for fluid transfer tubing where pneumatic leak integrity is critical.
This standard is especially valuable when specification or purchase requirements call for pneumatic testing as an alternative to immersion methods, offering a robust way to confirm that tubing meets performance and safety standards.
Related Standards
For comprehensive quality assurance in tubing, users may also refer to these relevant ASTM standards:
- ASTM A1016/A1016M: General requirements for ferritic and austenitic alloy steel and stainless steel tubes.
- Other ASTM Steel Tubing Standards: For specific composition, mechanical properties, and dimensional tolerances depending on the tubing type and application.
- International Guidelines: Developed in alignment with principles set by the World Trade Organization Technical Barriers to Trade (TBT) Committee.
By following the procedures in ASTM A1047/A1047M-05(2023), organizations can ensure that tubing installations are leak-tight, reliable, and compliant with recognized global standards.
Keywords: ASTM A1047, pneumatic leak testing, tubing, leak detection, pressure decay, vacuum decay, pressure differential, steel tubes, industrial tubes testing, calibration, non-destructive testing.
Buy Documents
ASTM A1047/A1047M-05(2023) - Standard Test Method for Pneumatic Leak Testing of Tubing
Get Certified
Connect with accredited certification bodies for this standard

Institut za varilstvo d.o.o. (Welding Institute)
Slovenia's leading welding institute since 1952. ISO 3834, EN 1090, pressure equipment certification, NDT personnel, welder qualification. Only IIW Au
Sponsored listings
Frequently Asked Questions
ASTM A1047/A1047M-05(2023) is a standard published by ASTM International. Its full title is "Standard Test Method for Pneumatic Leak Testing of Tubing". This standard covers: SIGNIFICANCE AND USE 5.1 When permitted by a specification or the order, this test method may be used for detecting leaks in tubing in lieu of the air underwater pressure test. SCOPE 1.1 This test method provides procedures for the leak testing of tubing using pneumatic pressure. This test method involves measuring the change in pressure inside the tubing over time. There are three procedures that may be used, all of which are intended to be equivalent. It is a qualitative not a quantitative test method. Any of the three procedures are intended to be capable of leak detection and, as such, are intended to be equivalent for that purpose. 1.2 The procedures will produce consistent results upon which acceptance standards can be based. This test may be performed in accordance with the Pressure Differential (Procedure A), the Pressure Decay (Procedure B), or the Vacuum Decay (Procedure C) method. 1.3 The values stated in either SI units or inch-pound units are to be regarded separately as standard. The values stated in each system may not be exact equivalents; therefore, each system shall be used independently of the other. Combining values from the two systems may result in non-conformance with the standard. 1.3.1 Within the text, the SI units are shown in brackets. 1.4 This standard does not purport to address all of the safety concerns, if any, associated with its use. It is the responsibility of the user of this standard to establish appropriate safety, health, and environmental practices and determine the applicability of regulatory limitations prior to use. 1.5 This international standard was developed in accordance with internationally recognized principles on standardization established in the Decision on Principles for the Development of International Standards, Guides and Recommendations issued by the World Trade Organization Technical Barriers to Trade (TBT) Committee.
SIGNIFICANCE AND USE 5.1 When permitted by a specification or the order, this test method may be used for detecting leaks in tubing in lieu of the air underwater pressure test. SCOPE 1.1 This test method provides procedures for the leak testing of tubing using pneumatic pressure. This test method involves measuring the change in pressure inside the tubing over time. There are three procedures that may be used, all of which are intended to be equivalent. It is a qualitative not a quantitative test method. Any of the three procedures are intended to be capable of leak detection and, as such, are intended to be equivalent for that purpose. 1.2 The procedures will produce consistent results upon which acceptance standards can be based. This test may be performed in accordance with the Pressure Differential (Procedure A), the Pressure Decay (Procedure B), or the Vacuum Decay (Procedure C) method. 1.3 The values stated in either SI units or inch-pound units are to be regarded separately as standard. The values stated in each system may not be exact equivalents; therefore, each system shall be used independently of the other. Combining values from the two systems may result in non-conformance with the standard. 1.3.1 Within the text, the SI units are shown in brackets. 1.4 This standard does not purport to address all of the safety concerns, if any, associated with its use. It is the responsibility of the user of this standard to establish appropriate safety, health, and environmental practices and determine the applicability of regulatory limitations prior to use. 1.5 This international standard was developed in accordance with internationally recognized principles on standardization established in the Decision on Principles for the Development of International Standards, Guides and Recommendations issued by the World Trade Organization Technical Barriers to Trade (TBT) Committee.
ASTM A1047/A1047M-05(2023) is classified under the following ICS (International Classification for Standards) categories: 23.040.99 - Other pipeline components. The ICS classification helps identify the subject area and facilitates finding related standards.
ASTM A1047/A1047M-05(2023) has the following relationships with other standards: It is inter standard links to ASTM A1016/A1016M-23, ASTM A1016/A1016M-18a, ASTM A1016/A1016M-18, ASTM A1016/A1016M-17a, ASTM A1016/A1016M-17, ASTM A1016/A1016M-14e1, ASTM A1016/A1016M-14, ASTM A1016/A1016M-13, ASTM A1016/A1016M-11a, ASTM A1016/A1016M-11, ASTM A1016/A1016M-10, ASTM A1016/A1016M-08, ASTM A1016/A1016M-04a, ASTM A1016/A1016M-04, ASTM A1016/A1016M-02a. Understanding these relationships helps ensure you are using the most current and applicable version of the standard.
ASTM A1047/A1047M-05(2023) is available in PDF format for immediate download after purchase. The document can be added to your cart and obtained through the secure checkout process. Digital delivery ensures instant access to the complete standard document.
Standards Content (Sample)
This international standard was developed in accordance with internationally recognized principles on standardization established in the Decision on Principles for the
Development of International Standards, Guides and Recommendations issued by the World Trade Organization Technical Barriers to Trade (TBT) Committee.
Designation: A1047/A1047M − 05 (Reapproved 2023)
Standard Test Method for
Pneumatic Leak Testing of Tubing
This standard is issued under the fixed designation A1047/A1047M; the number immediately following the designation indicates the
year of original adoption or, in the case of revision, the year of last revision. A number in parentheses indicates the year of last
reapproval. A superscript epsilon (´) indicates an editorial change since the last revision or reapproval.
1. Scope 2. Referenced Documents
2.1 ASTM Standards:
1.1 This test method provides procedures for the leak testing
of tubing using pneumatic pressure. This test method involves A1016/A1016M Specification for General Requirements for
Ferritic Alloy Steel, Austenitic Alloy Steel, and Stainless
measuring the change in pressure inside the tubing over time.
There are three procedures that may be used, all of which are Steel Tubes
intended to be equivalent. It is a qualitative not a quantitative
3. Terminology
test method. Any of the three procedures are intended to be
3.1 Definitions—The definitions in Specification A1016/
capable of leak detection and, as such, are intended to be
A1016M are applicable to this test method.
equivalent for that purpose.
3.2 Definitions of Terms Specific to This Standard:
1.2 The procedures will produce consistent results upon
3.2.1 actual starting pressure (P actual)—the actual start-
which acceptance standards can be based. This test may be 0
ing pressure at time zero on each test cycle.
performed in accordance with the Pressure Differential (Pro-
cedure A), the Pressure Decay (Procedure B), or the Vacuum
3.2.2 calibration hole—a device (such as a crimped
Decay (Procedure C) method.
capillary, or a tube containing a hole produced by laser drilling)
certified to be of the specified diameter.
1.3 The values stated in either SI units or inch-pound units
are to be regarded separately as standard. The values stated in 3.2.3 control volume—fixed volume that is pressurized to
compare against an identical pressure contained in one tube
each system may not be exact equivalents; therefore, each
system shall be used independently of the other. Combining under test.
values from the two systems may result in non-conformance
3.2.4 electronic control device (ECD)—an electronic system
with the standard.
to accumulate input from limit switches and transmitters
1.3.1 Within the text, the SI units are shown in brackets.
providing corresponding outputs to solenoid valves, acoustic
alarm devices, and visual displays.
1.4 This standard does not purport to address all of the
safety concerns, if any, associated with its use. It is the
3.2.5 pressure change (ΔP)—the smallest pressure change
responsibility of the user of this standard to establish appro-
in a tube, reliably detected by a pressure sensitive transmitter.
priate safety, health, and environmental practices and deter-
3.2.6 pressure sensitive transmitters—pressure measuring
mine the applicability of regulatory limitations prior to use.
and signaling devices that detect extremely small changes in
1.5 This international standard was developed in accor-
pressure, either between two tubes, a tube and a control
dance with internationally recognized principles on standard-
volume, or a tube and the ambient atmosphere.
ization established in the Decision on Principles for the
3.2.7 reference standard—a tube or container containing a
Development of International Standards, Guides and Recom-
calibration hole. The calibration hole may either be in a full
mendations issued by the World Trade Organization Technical
length tube, or in a short device attached to the tube or
Barriers to Trade (TBT) Committee.
container.
3.2.8 starting pressure (P )—the test starting pressure set in
the test apparatus ECD.
This test method is under the jurisdiction of ASTM Committee A01 on Steel,
Stainless Steel and Related Alloys and is the direct responsibility of Subcommittee
A01.10 on Stainless and Alloy Steel Tubular Products. For referenced ASTM standards, visit the ASTM website, www.astm.org, or
Current edition approved Sept. 1, 2023. Published September 2023. Originally contact ASTM Customer Service at service@astm.org. For Annual Book of ASTM
approved in 2005. Last previous edition approved in 2019 as A1047/A1047M – 05 Standards volume information, refer to the standard’s Document Summary page on
(2019). DOI: 10.1520/A1047_A1047M-05R23. the ASTM website.
Copyright © ASTM International, 100 Barr Harbor Drive, PO Box C700, West Conshohocken, PA 19428-2959. United States
A1047/A1047M − 05 (2023)
3.2.9 theoretical hole—a hole that will pass air at a theo- Pressure Change (ΔP), and test time. Test time is dependent
retical rate as defined by the equations given in Appendix X1.2. upon starting pressure, allowed pressure change, tube internal
volume, hole diameter, and is calculated using the equation in
3.2.10 threshold pressure (P )—test ending pressure limit
T
Appendix X1. Actual test time may be longer than the
after the allowed test time; the pressure value that must be
calculated value and shall be adjusted as necessary for the
crossed to determine reject status. P = P actual – ΔP for
T 0
apparatus to cross the threshold pressure and cause the system
pressure decay, and P = P actual + ΔP for vacuum decay.
T 0
to automatically shut down.
4. Summary of Test Method
8.2 Verify that all failure lights are illuminated during the
4.1 Procedure A, Pressure Differential, measures the drop in
calibration.
pressure over time as a result of air escaping from inside one
8.3 Unless otherwise specified, apparatus calibration shall
tube when compared to another tube at an identical pressure, or
be made at twelve month intervals maximum.
one tube against a control volume at identical pressure. (See
8.4 Recalibrate the test apparatus prior to use whenever any
Refs (1) and (2).)
pressure sensing component is replaced or modified.
4.2 Procedure B, Pressure Decay, measures the drop in
8.5 Calibrate the calibration hole at twelve month intervals
pressure over time as a result of air escaping from the tube.
maximum. It is recommended that the device containing the
4.3 Procedure C, Vacuum Decay, involves evacuating the
calibration hole be stored in an inert atmosphere and cleaned
tubing to suitably low pressure and measuring the increase in
with high pressure nitrogen.
pressure caused by gas entering the tubing.
8.6 Calibrate all pressure gauges and pressure transducers at
5. Significance and Use
twelve month intervals maximum.
5.1 When permitted by a specification or the order, this test
8.7 Unless otherwise agreed to by producer and purchaser,
method may be used for detecting leaks in tubing in lieu of the
the minimum calibration hole size in the reference standard
air underwater pressure test.
shall be 0.003-in. diameter. Calibration with smaller holes may
not be repeatable due to fouling and plugging. (See Ref (3).)
6. Apparatus
6.1 An electronic control device (ECD) controls all opera-
9. Procedure
tions of the test method by accepting inputs from limit switches
9.1 Perform pneumatic leak testing after all process
and transmitters, and by providing corresponding pass/fail
operations, including cold work, heat treatment, and straight-
outputs to solenoid valves, acoustic alarm devices, and visual
ening.
displays. The pass/fail determination is achieved by a compari-
son of the data input from pressure transducers with a standard
9.2 Clean and dry the tubes before testing. Remove loose
accept/reject criterion measured over the set test time. scale from the inside and outside surfaces of the tubes.
6.2 The test apparatus may have the capability for single- or
9.3 Actual test time is calculated in accordance with the
multi-tube testing. It shall be designed to detect a small parameters of the test using the appropriate equation in X1.2.
predetermined pressure change during the testing cycle. It is
9.4 Test Cycle for Procedure A, Pressure Differential:
intended that the apparatus be fully automated and equipped
9.4.1 Pressurize the tubes in pairs, or a single tube and a
with suitable instrumentation for the purpose of the test. This
known control volume, to a pressure greater than 33 psia with
instrumentation may include, but is not limited to the follow-
clean and dry compressed air.
ing:
9.4.2 Allow the system to stabilize and measure the actual
6.2.1 Internal transducers for calibration tests,
Starting Pressure (P actual). P actual must be within 10 % of
0 0
6.2.2 Diffe
...


Questions, Comments and Discussion
Ask us and Technical Secretary will try to provide an answer. You can facilitate discussion about the standard in here.
Loading comments...