ASTM E376-19
(Practice)Standard Practice for Measuring Coating Thickness by Magnetic-Field or Eddy Current (Electromagnetic) Testing Methods
Standard Practice for Measuring Coating Thickness by Magnetic-Field or Eddy Current (Electromagnetic) Testing Methods
SIGNIFICANCE AND USE
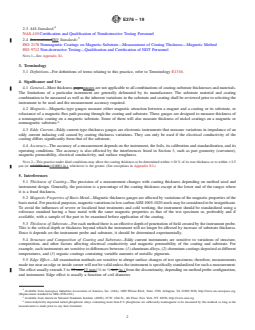
4.1 General—Most thickness gauges are not applicable to all combinations of coating-substrate thicknesses and materials. The limitations of a particular instrument are generally delineated by its manufacturer. The substrate material and coating combination to be measured as well as the inherent variations in the substrate and coating shall be reviewed prior to selecting the instrument to be used and the measurement accuracy required.
4.2 Magnetic—Magnetic-type gauges measure either magnetic attraction between a magnet and a coating or its substrate, or reluctance of a magnetic flux path passing through the coating and substrate. These gauges are designed to measure thickness of a nonmagnetic coating on a magnetic substrate. Some of them will also measure thickness of nickel coatings on a magnetic or nonmagnetic substrate.6
4.3 Eddy Current—Eddy current-type thickness gauges are electronic instruments that measure variations in impedance of an eddy current inducing coil caused by coating thickness variations. They can only be used if the electrical conductivity of the coating differs significantly from that of the substrate.
4.4 Accuracy—The accuracy of a measurement depends on the instrument, the foils, its calibration and standardization, and its operating conditions. The accuracy is also affected by the interferences listed in Section 5, such as part geometry (curvature), magnetic permeability, electrical conductivity, and surface roughness.
Note 2: This practice under ideal conditions may allow the coating thickness to be determined within ±10 % of its true thickness or to within ±2.5 μm (or ±0.0001 in.), whichever is the greater. (See exceptions in Appendix X2.)
SCOPE
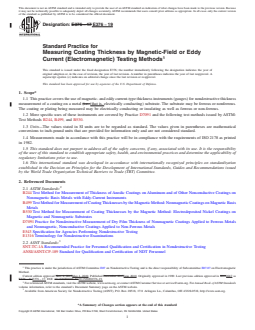
1.1 This practice covers the use of magnetic- and eddy current-type thickness instruments (gauges) for nondestructive thickness measurement of a coating on a metal (that is, electrically conducting) substrate. The substrate may be ferrous or nonferrous. The coating or plating being measured may be electrically conducting or insulating as well as ferrous or non-ferrous.
1.2 More specific uses of these instruments are covered by Practice D7091 and the following test methods issued by ASTM: Test Methods B244, B499, and B530.
1.3 Units—The values stated in SI units are to be regarded as standard. The values given in parentheses are mathematical conversions to inch-pound units that are provided for information only and are not considered standard.
1.4 Measurements made in accordance with this practice will be in compliance with the requirements of ISO 2178 as printed in 1982.
1.5 This standard does not purport to address all of the safety concerns, if any, associated with its use. It is the responsibility of the user of this standard to establish appropriate safety, health, and environmental practices and determine the applicability of regulatory limitations prior to use.
1.6 This international standard was developed in accordance with internationally recognized principles on standardization established in the Decision on Principles for the Development of International Standards, Guides and Recommendations issued by the World Trade Organization Technical Barriers to Trade (TBT) Committee.
General Information
- Status
- Published
- Publication Date
- 30-Apr-2019
- Technical Committee
- E07 - Nondestructive Testing
- Drafting Committee
- E07.07 - Electromagnetic Method
Relations
- Effective Date
- 01-May-2019
- Effective Date
- 01-Feb-2024
- Effective Date
- 01-Dec-2019
- Effective Date
- 01-Mar-2019
- Effective Date
- 01-Jan-2018
- Effective Date
- 15-Jun-2017
- Effective Date
- 01-Feb-2017
- Effective Date
- 01-Aug-2016
- Effective Date
- 01-Feb-2016
- Effective Date
- 01-Dec-2015
- Effective Date
- 01-Sep-2015
- Effective Date
- 01-Jun-2014
- Effective Date
- 01-Jun-2014
- Effective Date
- 01-Dec-2013
- Effective Date
- 15-Jun-2013
Overview
ASTM E376-19 is the internationally recognized standard practice for measuring coating thickness on metal substrates using magnetic-field or eddy current (electromagnetic) testing methods. Developed by ASTM International, this standard outlines procedures for nondestructive testing (NDT) of coating thickness on both ferrous and nonferrous metals. It provides guidance on instrument selection, calibration, measurement procedures, and factors affecting measurement accuracy, ensuring repeatable and reliable thickness measurements for quality assurance, compliance, and process control.
Key Topics
- Measurement Methods: This standard covers the two principal methods for coating thickness measurement:
- Magnetic Field Gauges: Used for measuring nonmagnetic coatings (e.g., paint, enamel, zinc) on magnetic substrates such as steel. Some instruments also measure nickel coatings on various substrates.
- Eddy Current Gauges: Suitable for coatings where the electrical conductivity of the coating differs significantly from the substrate. Common examples include anodized aluminum and nonconductive coatings on nonmagnetic bases.
- Instrument and Substrate Selection: The instrument must match the coating-substrate system to ensure accurate results. Consider substrate material (ferrous/nonferrous), coating type, and instrument limitations as specified by the manufacturer.
- Calibration and Standardization: Regular calibration using foils (shims) or coated reference standards is essential. Reference standards should closely bracket the actual coating thickness and match the magnetic or electrical properties of the test samples.
- Measurement Accuracy: Accuracy is influenced by instrument design, calibration frequency, part geometry, magnetic permeability, electrical conductivity, surface roughness, and other interferences such as edge effects, curvature, and residual magnetism.
- Personnel and Agency Qualification: Recommends qualification of NDT personnel and agencies according to nationally or internationally recognized standards (e.g., ANSI/ASNT-CP-189, SNT-TC-1A, NAS-410, ISO 9712).
Applications
- Quality Control: Ensures that coatings on industrial products such as automotive components, appliances, and structural steel are within specified thickness ranges for performance and durability.
- Process Monitoring: Assists in monitoring and controlling coating operations, including painting, galvanizing, plating, and anodizing.
- Inspection and Maintenance: Verifies coating integrity for corrosion protection on new and in-service assets (pipelines, bridge structures, tanks, machinery) to meet regulatory and safety requirements.
- Regulatory Compliance: Measurements conducted according to ASTM E376-19 support conformity to industry and international standards, such as ISO 2178.
- Documentation: Establishes uniform reporting criteria for examination data, including operator information, calibration methods, material identification, and measurement results.
Related Standards
- ASTM D7091: Practice for nondestructive measurement of dry film thickness of nonmagnetic coatings applied to ferrous metals and nonmagnetic, nonconductive coatings applied to nonferrous metals.
- ASTM B244: Test method for eddy-current measurement of anodic coatings on aluminum and other nonconductive coatings on nonmagnetic metals.
- ASTM B499, B530: Magnetic method test methods for coating thicknesses, including specific provisions for nickel coatings.
- ASTM E543: Specification for qualifying agencies performing nondestructive testing.
- ISO 2178: Nonmagnetic coatings on magnetic substrates - measurement by magnetic method.
- ISO 9712: Qualification and certification of NDT personnel.
- SNT-TC-1A / ANSI/ASNT-CP-189 / NAS-410: Standards for NDT personnel training, qualification, and certification.
Keywords: coating thickness measurement, magnetic field testing, eddy current testing, nondestructive testing, ASTM E376-19, quality control, coating inspection, industrial coatings, calibration, substrate compatibility, ISO 2178 compliance.
Buy Documents
ASTM E376-19 - Standard Practice for Measuring Coating Thickness by Magnetic-Field or Eddy Current (Electromagnetic) Testing Methods
REDLINE ASTM E376-19 - Standard Practice for Measuring Coating Thickness by Magnetic-Field or Eddy Current (Electromagnetic) Testing Methods
Get Certified
Connect with accredited certification bodies for this standard

BSMI (Bureau of Standards, Metrology and Inspection)
Taiwan's standards and inspection authority.
Sponsored listings
Frequently Asked Questions
ASTM E376-19 is a standard published by ASTM International. Its full title is "Standard Practice for Measuring Coating Thickness by Magnetic-Field or Eddy Current (Electromagnetic) Testing Methods". This standard covers: SIGNIFICANCE AND USE 4.1 General—Most thickness gauges are not applicable to all combinations of coating-substrate thicknesses and materials. The limitations of a particular instrument are generally delineated by its manufacturer. The substrate material and coating combination to be measured as well as the inherent variations in the substrate and coating shall be reviewed prior to selecting the instrument to be used and the measurement accuracy required. 4.2 Magnetic—Magnetic-type gauges measure either magnetic attraction between a magnet and a coating or its substrate, or reluctance of a magnetic flux path passing through the coating and substrate. These gauges are designed to measure thickness of a nonmagnetic coating on a magnetic substrate. Some of them will also measure thickness of nickel coatings on a magnetic or nonmagnetic substrate.6 4.3 Eddy Current—Eddy current-type thickness gauges are electronic instruments that measure variations in impedance of an eddy current inducing coil caused by coating thickness variations. They can only be used if the electrical conductivity of the coating differs significantly from that of the substrate. 4.4 Accuracy—The accuracy of a measurement depends on the instrument, the foils, its calibration and standardization, and its operating conditions. The accuracy is also affected by the interferences listed in Section 5, such as part geometry (curvature), magnetic permeability, electrical conductivity, and surface roughness. Note 2: This practice under ideal conditions may allow the coating thickness to be determined within ±10 % of its true thickness or to within ±2.5 μm (or ±0.0001 in.), whichever is the greater. (See exceptions in Appendix X2.) SCOPE 1.1 This practice covers the use of magnetic- and eddy current-type thickness instruments (gauges) for nondestructive thickness measurement of a coating on a metal (that is, electrically conducting) substrate. The substrate may be ferrous or nonferrous. The coating or plating being measured may be electrically conducting or insulating as well as ferrous or non-ferrous. 1.2 More specific uses of these instruments are covered by Practice D7091 and the following test methods issued by ASTM: Test Methods B244, B499, and B530. 1.3 Units—The values stated in SI units are to be regarded as standard. The values given in parentheses are mathematical conversions to inch-pound units that are provided for information only and are not considered standard. 1.4 Measurements made in accordance with this practice will be in compliance with the requirements of ISO 2178 as printed in 1982. 1.5 This standard does not purport to address all of the safety concerns, if any, associated with its use. It is the responsibility of the user of this standard to establish appropriate safety, health, and environmental practices and determine the applicability of regulatory limitations prior to use. 1.6 This international standard was developed in accordance with internationally recognized principles on standardization established in the Decision on Principles for the Development of International Standards, Guides and Recommendations issued by the World Trade Organization Technical Barriers to Trade (TBT) Committee.
SIGNIFICANCE AND USE 4.1 General—Most thickness gauges are not applicable to all combinations of coating-substrate thicknesses and materials. The limitations of a particular instrument are generally delineated by its manufacturer. The substrate material and coating combination to be measured as well as the inherent variations in the substrate and coating shall be reviewed prior to selecting the instrument to be used and the measurement accuracy required. 4.2 Magnetic—Magnetic-type gauges measure either magnetic attraction between a magnet and a coating or its substrate, or reluctance of a magnetic flux path passing through the coating and substrate. These gauges are designed to measure thickness of a nonmagnetic coating on a magnetic substrate. Some of them will also measure thickness of nickel coatings on a magnetic or nonmagnetic substrate.6 4.3 Eddy Current—Eddy current-type thickness gauges are electronic instruments that measure variations in impedance of an eddy current inducing coil caused by coating thickness variations. They can only be used if the electrical conductivity of the coating differs significantly from that of the substrate. 4.4 Accuracy—The accuracy of a measurement depends on the instrument, the foils, its calibration and standardization, and its operating conditions. The accuracy is also affected by the interferences listed in Section 5, such as part geometry (curvature), magnetic permeability, electrical conductivity, and surface roughness. Note 2: This practice under ideal conditions may allow the coating thickness to be determined within ±10 % of its true thickness or to within ±2.5 μm (or ±0.0001 in.), whichever is the greater. (See exceptions in Appendix X2.) SCOPE 1.1 This practice covers the use of magnetic- and eddy current-type thickness instruments (gauges) for nondestructive thickness measurement of a coating on a metal (that is, electrically conducting) substrate. The substrate may be ferrous or nonferrous. The coating or plating being measured may be electrically conducting or insulating as well as ferrous or non-ferrous. 1.2 More specific uses of these instruments are covered by Practice D7091 and the following test methods issued by ASTM: Test Methods B244, B499, and B530. 1.3 Units—The values stated in SI units are to be regarded as standard. The values given in parentheses are mathematical conversions to inch-pound units that are provided for information only and are not considered standard. 1.4 Measurements made in accordance with this practice will be in compliance with the requirements of ISO 2178 as printed in 1982. 1.5 This standard does not purport to address all of the safety concerns, if any, associated with its use. It is the responsibility of the user of this standard to establish appropriate safety, health, and environmental practices and determine the applicability of regulatory limitations prior to use. 1.6 This international standard was developed in accordance with internationally recognized principles on standardization established in the Decision on Principles for the Development of International Standards, Guides and Recommendations issued by the World Trade Organization Technical Barriers to Trade (TBT) Committee.
ASTM E376-19 is classified under the following ICS (International Classification for Standards) categories: 17.040.20 - Properties of surfaces. The ICS classification helps identify the subject area and facilitates finding related standards.
ASTM E376-19 has the following relationships with other standards: It is inter standard links to ASTM E376-17, ASTM E1316-24, ASTM E1316-19b, ASTM E1316-19, ASTM E1316-18, ASTM E1316-17a, ASTM E1316-17, ASTM E1316-16a, ASTM E1316-16, ASTM E1316-15a, ASTM E1316-15, ASTM E1316-14e1, ASTM E1316-14, ASTM E1316-13d, ASTM E1316-13c. Understanding these relationships helps ensure you are using the most current and applicable version of the standard.
ASTM E376-19 is available in PDF format for immediate download after purchase. The document can be added to your cart and obtained through the secure checkout process. Digital delivery ensures instant access to the complete standard document.
Standards Content (Sample)
This international standard was developed in accordance with internationally recognized principles on standardization established in the Decision on Principles for the
Development of International Standards, Guides and Recommendations issued by the World Trade Organization Technical Barriers to Trade (TBT) Committee.
Designation: E376 − 19
Standard Practice for
Measuring Coating Thickness by Magnetic-Field or Eddy
Current (Electromagnetic) Testing Methods
This standard is issued under the fixed designation E376; the number immediately following the designation indicates the year of
original adoption or, in the case of revision, the year of last revision. A number in parentheses indicates the year of last reapproval. A
superscript epsilon (´) indicates an editorial change since the last revision or reapproval.
This standard has been approved for use by agencies of the U.S. Department of Defense.
1. Scope* 2. Referenced Documents
1.1 This practice covers the use of magnetic- and eddy
2.1 ASTM Standards:
current-type thickness instruments (gauges) for nondestructive
B244 Test Method for Measurement of Thickness ofAnodic
thickness measurement of a coating on a metal (that is,
Coatings on Aluminum and of Other Nonconductive
electricallyconducting)substrate.Thesubstratemaybeferrous
Coatings on Nonmagnetic Basis Metals with Eddy-
or nonferrous. The coating or plating being measured may be
Current Instruments
electrically conducting or insulating as well as ferrous or
B499 Test Method for Measurement of Coating Thicknesses
non-ferrous.
by the Magnetic Method: Nonmagnetic Coatings on
Magnetic Basis Metals
1.2 More specific uses of these instruments are covered by
B530 Test Method for Measurement of Coating Thicknesses
Practice D7091 and the following test methods issued by
ASTM: Test Methods B244, B499, and B530. by the Magnetic Method: Electrodeposited Nickel Coat-
ings on Magnetic and Nonmagnetic Substrates
1.3 Units—The values stated in SI units are to be regarded
D7091 Practice for Nondestructive Measurement of Dry
as standard. The values given in parentheses are mathematical
Film Thickness of Nonmagnetic Coatings Applied to
conversions to inch-pound units that are provided for informa-
Ferrous Metals and Nonmagnetic, Nonconductive Coat-
tion only and are not considered standard.
ings Applied to Non-Ferrous Metals
1.4 Measurements made in accordance with this practice
E543 Specification forAgencies Performing Nondestructive
will be in compliance with the requirements of ISO 2178 as
Testing
printed in 1982.
E1316 Terminology for Nondestructive Examinations
1.5 This standard does not purport to address all of the
2.2 ASNT Standards:
safety concerns, if any, associated with its use. It is the
SNT-TC-1A Recommended Practice for Personnel Qualifi-
responsibility of the user of this standard to establish appro-
cation and Certification in Nondestructive Testing
priate safety, health, and environmental practices and deter-
ANSI/ASNT-CP-189 Standard for Qualification and Certifi-
mine the applicability of regulatory limitations prior to use.
cation of NDT Personnel
1.6 This international standard was developed in accor-
2.3 AIA Standard:
dance with internationally recognized principles on standard-
NAS-410 Certification and Qualification of Nondestructive
ization established in the Decision on Principles for the
Testing Personnel
Development of International Standards, Guides and Recom-
mendations issued by the World Trade Organization Technical
Barriers to Trade (TBT) Committee.
For referenced ASTM standards, visit the ASTM website, www.astm.org, or
contact ASTM Customer Service at service@astm.org. For Annual Book of ASTM
Standards volume information, refer to the standard’s Document Summary page on
This practice is under the jurisdiction of ASTM Committee E07 on Nonde- the ASTM website.
structive Testing and is the direct responsibility of Subcommittee E07.07 on AvailablefromAmericanSocietyforNondestructiveTesting(ASNT),P.O.Box
Electromagnetic Method. 28518, 1711 Arlingate Ln., Columbus, OH 43228-0518, http://www.asnt.org.
Current edition approved May 1, 2019. Published June 2019. Originally Available fromAerospace IndustriesAssociation ofAmerica, Inc. (AIA), 1000
approved in 1989. Last previous edition approved in 2017 as E376 – 17. DOI: WilsonBlvd.,Suite1700,Arlington,VA22209-3928,http://www.aia-aerospace.org.
10.1520/E0376-19. (Replacement standard for MIL-STD-410.)
*A Summary of Changes section appears at the end of this standard
Copyright © ASTM International, 100 Barr Harbor Drive, PO Box C700, West Conshohocken, PA 19428-2959. United States
E376 − 19
2.4 ISO Standards: ties of the basis metal. For practical purposes, magnetic
ISO 2178 Nonmagnetic Coatings on Magnetic Substrate— variations in low-carbon AISI 1005-1020 steels may be con-
Measurement of Coating Thickness—Magnetic Method sidered to be insignificant. To avoid the influences of severe or
ISO 9712 Non-destructive Testing—Qualification and Cer- localized heat treatments and cold working, the instrument
tification of NDT Personnel should be standardized using a reference standard having a
base metal with the same magnetic properties as that of the test
NOTE 1—See Appendix X1.
specimen or, preferably and if available, with a sample of the
part to be examined before application of the coating.
3. Terminology
5.3 Thickness of Substrate—For each method there is an
3.1 Definitions—For definitions of terms relating to this
effective depth of penetration of field created by the instrument
practice, refer to Terminology E1316.
probe. This is the critical depth or thickness beyond which the
4. Significance and Use instrument will no longer be affected by increase of substrate
thickness. Since it depends on the instrument probe and
4.1 General—Most thickness gauges are not applicable to
substrate, it should be determined experimentally.
all combinations of coating-substrate thicknesses and materi-
als. The limitations of a particular instrument are generally 5.4 Structure and Composition of Coating and Substrate—
Eddy current instruments are sensitive to variations of
delineated by its manufacturer. The substrate material and
coating combination to be measured as well as the inherent structure, composition, and other factors affecting electrical
conductivity and magnetic permeability of the coating and
variations in the substrate and coating shall be reviewed prior
substrate. For example, such instruments are sensitive to
to selecting the instrument to be used and the measurement
differences between: (1) aluminum alloys, (2) chromium coat-
accuracy required.
ings deposited at different temperatures, and (3) organic
4.2 Magnetic—Magnetic-type gauges measure either mag-
coatings containing variable amounts of metallic pigments.
neticattractionbetweenamagnetandacoatingoritssubstrate,
5.5 Edge Effect—All examination methods are sensitive to
or reluctance of a magnetic flux path passing through the
abrupt surface changes of test specimens; therefore, measure-
coating and substrate. These gauges are designed to measure
ments made too near an edge or inside corner will not be valid
thickness of a nonmagnetic coating on a magnetic substrate.
unless the instrument is specifically standardized for such a
Someofthemwillalsomeasurethicknessofnickelcoatingson
6 1
measurement. The effect usually extends 3 to 13 mm ( ⁄8 to
a magnetic or nonmagnetic substrate.
⁄2 in.) from the discontinuity, depending on method probe
4.3 Eddy Current—Eddy current-type thickness gauges are
configuration, and instrument. Edge effect is usually a function
electronic instruments that measure variations in impedance of
of coil diameter.
an eddy current inducing coil caused by coating thickness
5.6 Curvature of Examination Surface—Thickness mea-
variations. They can only be used if the electrical conductivity
surements are sensitive to curvature of the specimen. This
of the coating differs significantly from that of the substrate.
sensitivity varies considerably between instruments and be-
4.4 Accuracy—The accuracy of a measurement depends on
comes more pronounced with increasing curvature.
the instrument, the foils, its calibration and standardization,
5.7 Smoothness of Surface, Including That of Base Metal—
and its operating conditions. The accuracy is also affected by
Since a rough surface may make single measurements
the interferences listed in Section 5, such as part geometry
inaccurate, a greater number of measurements will provide an
(curvature), magnetic permeability, electrical conductivity, and
average value that is more truly representative of the overall
surface roughness.
coating thickness. Roughness also may cause certain instru-
NOTE 2—This practice under ideal conditions may allow the coating
ments to read high since their probes may rest on peaks.
thickness to be determined within 610 % of its true thickness or to within
5.8 Direction of Rolling of Base Metal—Instruments with
62.5 µm (or 60.0001 in.), whichever is the greater. (See exceptions in
Appendix X2.)
two pole pieces may be sensitive to direction of rolling of the
base metal; that is, gauge readings may change depending on
5. Interferences
alignmentofpolepieceswithsurfaceofspecimenorpartunder
5.1 Thickness of Coating—The precision of a measurement
examination.
changes with coating thickness depending on method used and
5.9 Residual Magnetism in Base Metal—Residual magne-
instrument design. Generally, the precision is a percentage of
tism in base metal may affect readings of magnetic- and eddy
the coating thickness except at the lower end of the ranges
current-type instruments.
where it is a fixed thickness.
5.10 Stray Magnetic Fields—Strong magnetic fields, as
5.2 Magnetic Properties of Basis Metal—Magnetic thick-
from arc welding, can seriously interfere with operations of
ness gauges are affected by variations of the magnetic proper-
certain thickness gauges.
5.11 Cleanness of Probe and Test Surface—Measurements
are sensitive to foreign material that prevents intimate contact
Available fromAmerican National Standards Institute (ANSI), 25 W. 43rd St.,
4th Floor, New York, NY 10036, http://www.ansi.org.
between probe and coating surface.
Autocatalyticallydepositednickel-phosphorusalloyscontainingmorethan8 %
5.12 Pressure of Probe—Instrument readings can be sensi-
phosphorus are sufficiently nonmagnetic to be measured by this method, as long as
the measurement is made prior to any heat treatment. tive to pressure with which probe is applied to test surface.
E376 − 19
5.13 Probe Position—Some magnetic-type gauges are sen- 6.9 Reexamination of Repaired/Reworked Items—
sitive to position of probe relative to the earth. For example, Reexamination of repaired/reworked items is not addressed in
operationofgaugeinahorizontalorupside-downpositionmay this standard and if required shall be specified in the contrac-
require a new standardization or may be impossible. tual agreement.
5.14 Temperature—Eddy current instruments may be af-
7. Calibration and Standardization
fected by temperature variations.
7.1 Eachinstrumentshouldbecalibratedinaccordancewith
the manufacturer’s instructions and standardized before use by
6. Basis of Application
employingsuitablethicknessstandards.Standardizationshould
6.1 The following items are subject to contractual agree-
be checked at frequent intervals during use. Attention should
ment between the parties using or referencing this standard.
be given to Section 5 and Section 8.
6.2 Personnel Qualification
7.2 Reference standards of uniform thickness are available
6.2.1 If specified in the contractual agreement, personnel
in either of two types, foil or coated substrate, as supplied or
performing examinations to this standard shall be qualified in recommendedbythemanufactureroftheinstrument.Thereare
accordance with a nationally or internationally recognized
instances, however, where reference standards are made by
NDT personnel qualification practice or standard such as other than instrument manufacturers.
ANSI/ASNT-CP-189, SNT-TC-1A, NAS-410, ISO 9712, or a
7.2.1 Standardization Foils (Shims)—Standardization foil is
similar document and certified by the employer or certifying placed on the surface of uncoated base metal when standard-
agency, as applicable. The practice or standard used and its
izing the instrument. Foils are advantageous for standardizing
applicable revision shall be identified in the contractual agree- on curved surfaces and are often m
...
This document is not an ASTM standard and is intended only to provide the user of an ASTM standard an indication of what changes have been made to the previous version. Because
it may not be technically possible to adequately depict all changes accurately, ASTM recommends that users consult prior editions as appropriate. In all cases only the current version
of the standard as published by ASTM is to be considered the official document.
Designation: E376 − 17 E376 − 19
Standard Practice for
Measuring Coating Thickness by Magnetic-Field or Eddy
Current (Electromagnetic) Testing Methods
This standard is issued under the fixed designation E376; the number immediately following the designation indicates the year of
original adoption or, in the case of revision, the year of last revision. A number in parentheses indicates the year of last reapproval. A
superscript epsilon (´) indicates an editorial change since the last revision or reapproval.
This standard has been approved for use by agencies of the U.S. Department of Defense.
1. Scope*
1.1 This practice covers the use of magnetic- and eddy current-type thickness instruments (gauges) for nondestructive thickness
measurement of a coating on a metal (i.e. (that is, electrically conducting) substrate. The substrate may be ferrous or nonferrous.
The coating or plating being measured may be electrically conducting or insulating as well as ferrous or non-ferrous.
1.2 More specific uses of these instruments are covered by Practice D7091 and the following test methods issued by ASTM:
Test Methods B244, B499, and B530.
1.3 Units—The values stated in SI units are to be regarded as standard. The values given in parentheses are mathematical
conversions to inch-pound units that are provided for information only and are not considered standard.
1.4 Measurements made in accordance with this practice will be in compliance with the requirements of ISO 2178 as printed
in 1982.
1.5 This standard does not purport to address all of the safety concerns, if any, associated with its use. It is the responsibility
of the user of this standard to establish appropriate safety, health, and environmental practices and determine the applicability of
regulatory limitations prior to use.
1.6 This international standard was developed in accordance with internationally recognized principles on standardization
established in the Decision on Principles for the Development of International Standards, Guides and Recommendations issued
by the World Trade Organization Technical Barriers to Trade (TBT) Committee.
2. Referenced Documents
2.1 ASTM Standards:
B244 Test Method for Measurement of Thickness of Anodic Coatings on Aluminum and of Other Nonconductive Coatings on
Nonmagnetic Basis Metals with Eddy-Current Instruments
B499 Test Method for Measurement of Coating Thicknesses by the Magnetic Method: Nonmagnetic Coatings on Magnetic Basis
Metals
B530 Test Method for Measurement of Coating Thicknesses by the Magnetic Method: Electrodeposited Nickel Coatings on
Magnetic and Nonmagnetic Substrates
D7091 Practice for Nondestructive Measurement of Dry Film Thickness of Nonmagnetic Coatings Applied to Ferrous Metals
and Nonmagnetic, Nonconductive Coatings Applied to Non-Ferrous Metals
E543 Specification for Agencies Performing Nondestructive Testing
E1316 Terminology for Nondestructive Examinations
2.2 ASNT Standards:
SNT-TC-1A Recommended Practice for Personnel Qualification and Certification in Nondestructive Testing
ANSI/ASNT-CP-189 Standard for Qualification and Certification of NDT Personnel
This practice is under the jurisdiction of ASTM Committee E07 on Nondestructive Testing and is the direct responsibility of Subcommittee E07.07 on Electromagnetic
Method.
Current edition approved Nov. 1, 2017May 1, 2019. Published December 2017June 2019. Originally approved in 1989. Last previous edition approved in 20112017 as
E376 – 11.E376 – 17. DOI: 10.1520/E0376-17.10.1520/E0376-19.
For referenced ASTM standards, visit the ASTM website, www.astm.org, or contact ASTM Customer Service at service@astm.org. For Annual Book of ASTM Standards
volume information, refer to the standard’s Document Summary page on the ASTM website.
Available from American Society for Nondestructive Testing (ASNT), P.O. Box 28518, 1711 Arlingate Ln., Columbus, OH 43228-0518, http://www.asnt.org.
*A Summary of Changes section appears at the end of this standard
Copyright © ASTM International, 100 Barr Harbor Drive, PO Box C700, West Conshohocken, PA 19428-2959. United States
E376 − 19
2.3 AIA Standard:
NAS-410 Certification and Qualification of Nondestructive Testing Personnel
2.4 InternationalISO Standards:
ISO 2178 Nonmagnetic Coatings on Magnetic Substrate—Measurement of Coating Thickness—Magnetic Method
ISO 9712 Non-destructive Testing—Qualification and Certification of NDT Personnel
NOTE 1—See Appendix X1.
3. Terminology
3.1 Definitions—For definitions of terms relating to this practice, refer to Terminology E1316.
4. Significance and Use
4.1 General—Most thickness gagesgauges are not applicable to all combinations of coating-substrate thicknesses and materials.
The limitations of a particular instrument are generally delineated by its manufacturer. The substrate material and coating
combination to be measured as well as the inherent variations in the substrate and coating shall be reviewed prior to selecting the
instrument to be used and the measurement accuracy required.
4.2 Magnetic—Magnetic-type gauges measure either magnetic attraction between a magnet and a coating or its substrate, or
reluctance of a magnetic flux path passing through the coating and substrate. These gauges are designed to measure thickness of
a nonmagnetic coating on a magnetic substrate. Some of them will also measure thickness of nickel coatings on a magnetic or
nonmagnetic substrate.
4.3 Eddy Current—Eddy current-type thickness gauges are electronic instruments that measure variations in impedance of an
eddy current inducing coil caused by coating thickness variations. They can only be used if the electrical conductivity of the
coating differs significantly from that of the substrate.
4.4 Accuracy—The accuracy of a measurement depends on the instrument, the foils, its calibration and standardization, and its
operating conditions. The accuracy is also affected by the interferences listed in Section 5, such as part geometry (curvature),
magnetic permeability, electrical conductivity, and surface roughness.
NOTE 2—This practice under ideal conditions may allow the coating thickness to be determined within 610 % of its true thickness or to within 62.5
μm (or 60.0001-in.),60.0001 in.), whichever is the greater. (See exceptions in Appendix X2.)
5. Interferences
5.1 Thickness of Coating—The precision of a measurement changes with coating thickness depending on method used and
instrument design. Generally, the precision is a percentage of the coating thickness except at the lower end of the ranges where
it is a fixed thickness.
5.2 Magnetic Properties of Basis Metal—Magnetic thickness gauges are affected by variations of the magnetic properties of the
basis metal. For practical purposes, magnetic variations in low-carbon AISI 1005-1020 steels may be considered to be insignificant.
To avoid the influences of severe or localized heat treatments and cold working, the instrument should be standardized using a
reference standard having a base metal with the same magnetic properties as that of the test specimen or, preferably and if
available, with a sample of the part to be examined before application of the coating.
5.3 Thickness of Substrate—For each method there is an effective depth of penetration of field created by the instrument probe.
This is the critical depth or thickness beyond which the instrument will no longer be affected by increase of substrate thickness.
Since it depends on the instrument probe and substrate, it should be determined experimentally.
5.4 Structure and Composition of Coating and Substrate—Eddy current instruments are sensitive to variations of structure,
composition, and other factors affecting electrical conductivity and magnetic permeability of the coating and substrate. For
example, such instruments are sensitive to differences between: (1) aluminum alloys, (2) chromium coatings deposited at different
temperatures, and (3) organic coatings containing variable amounts of metallic pigments.
5.5 Edge Effect—All examination methods are sensitive to abrupt surface changes of test specimens; therefore, measurements
made too near an edge or inside corner will not be valid unless the instrument is specifically standardized for such a measurement.
1 1
The effect usually extends 3 to 13 mm 13 mm ( ⁄8 to ⁄2 in.) in.) from the discontinuity, depending on method probe configuration,
and instrument. Edge effect is usually a function of coil diameter.
Available from Aerospace Industries Association of America, Inc. (AIA), 1000 Wilson Blvd., Suite 1700, Arlington, VA 22209-3928, http://www.aia-aerospace.org.
(Replacement standard for MIL-STD-410.)
Available from American National Standards Institute (ANSI), 25 W. 43rd St., 4th Floor, New York, NY 10036, http://www.ansi.org.
Autocatalytically deposited nickel-phosphorus alloys containing more than 8 % phosphorus are sufficiently nonmagnetic to be measured by this method, as long as the
measurement is made prior to any heat treatment.
E376 − 19
5.6 Curvature of Examination Surface—Thickness measurements are sensitive to curvature of the specimen. This sensitivity
varies considerably between instruments and becomes more pronounced with increasing curvature.
5.7 Smoothness of Surface, Including That of Base Metal—Since a rough surface may make single measurements inaccurate,
a greater number of measurements will provide an average value that is more truly representative of the overall coating thickness.
Roughness also may cause certain instruments to read high since their probes may rest on peaks.
5.8 Direction of Rolling of Base Metal—Instruments with two pole pieces may be sensitive to direction of rolling of the base
metal; that is, gauge readings may change depending on alignment of pole pieces with surface of specimen or part under
examination.
5.9 Residual Magnetism in Base Metal—Residual magnetism in base metal may affect readings of magnetic- and eddy
current-type instruments.
5.10 Stray Magnetic Fields—Strong magnetic fields, as from arc welding, can seriously interfere with operations of certain
thickness gauges.
5.11 Cleanness of Probe and Test Surface—Measurements are sensitive to foreign material that prevents intimate contact
between probe and coating surface.
5.12 Pressure of Probe—Instrument readings can be sensitive to pressure with which probe is applied to test surface.
5.13 Probe Position—Some magnetic-type gauges are sensitive to position of probe relative to the earth. For example, operation
of gauge in a horizontal or upside-down position may require a new standardization or may be impossible.
5.14 Temperature—Eddy current instruments may be affected by temperature variations.
6. Basis of Application
6.1 The following items are subject to contractual agreement between the parties using or referencing this standard.
6.2 Personnel Qualification
6.2.1 For direct reading instruments or if If specified in the contractual agreement, personnel performing examinations to this
standard shall be qualified in accordance with a nationally or internationally recognized NDT personnel qualification practice or
standard such as ANSI/ASNT-CP-189, SNT-TC-1A, NAS-410, ISO 9712, or a similar document and certified by the employer or
certifying agency, as applicable. The practice or standard used and its applicable revision shall be identified in the contractual
agreement between the using parties.
NOTE 3—Note that NAS-410 does not require personnel certification when using direct read instruments.
6.2.2 Qualification and certification for personnel may be reduced when the following conditions are met:
6.2.2.1 The examination will be limited to operating equipment that displays the results in thickness units.
6.2.2.2 A specific procedure is used that is approved by a certified Level III in accordance with 6.2.1.
6.2.2.3 Documentation of training and examination is performed to ensure that personnel are qualified. Qualified personnel are
those who have demonstrated, by passing written and practical proficiency tests, that they possess the skills and job knowledge
necessary to ensure acceptable workmanship.
6.3 Qualification of Nondestructive Testing Agencies—If specified in the contractual agreement, NDT agencies shall be qualified
and evaluated as specified in Specification E543. The applicable edition of Specification E543 shall be specified in the contractual
agreement.
6.4 Procedures and Techniques—The pr
...
Questions, Comments and Discussion
Ask us and Technical Secretary will try to provide an answer. You can facilitate discussion about the standard in here.
Loading comments...