ISO 19603:2016
(Main)Fine ceramics (advanced ceramics, advanced technical ceramics) — Test method for determining elastic modulus and bending strength of thick ceramic coatings
Fine ceramics (advanced ceramics, advanced technical ceramics) — Test method for determining elastic modulus and bending strength of thick ceramic coatings
ISO 19603:2016 specifies a testing method for determining the elastic modulus and bending strength of thick ceramic coatings at ambient temperature by three-point bending tests. Procedures for test piece preparation, test modes and load rates, data collection and reporting are given. ISO 19603:2016 applies to thick, brittle coatings on metal or ceramic substrates. This test method can be used for material research, quality control, characterization and design data-generation purposes.
Céramiques techniques — Méthode d'essai relative à la détermination du module élastique et de la résistance en flexion des revêtements de céramique épais
General Information
- Status
- Published
- Publication Date
- 30-Oct-2016
- Technical Committee
- ISO/TC 206 - Fine ceramics
- Drafting Committee
- ISO/TC 206/WG 10 - Coatings
- Current Stage
- 9093 - International Standard confirmed
- Start Date
- 06-Jun-2022
- Completion Date
- 12-Feb-2026
Overview
ISO 19603:2016 specifies a standardized test method for determining the elastic modulus and bending strength of thick ceramic coatings (fine/advanced ceramics) on metal or ceramic substrates using three-point bending at ambient temperature. The standard defines test-piece preparation, test modes and load rates, data acquisition, calculations and reporting for reliable characterization of thick ceramic coatings (coating thickness > 20 µm; thickness ratio h/H > 1/100).
Key topics and requirements
- Test principle: a relative method where coating properties are deduced by comparing deformation and fracture of coated test pieces with the substrate (substrate modulus must be known or measured).
- Three-point bending: prescribed geometry and mounting, with single-face, two-face or around-coating configurations supported.
- Test-piece dimensions: rectangular sections (example baseline 36 mm × 4 mm × 2 mm or larger with same proportions); minimum coating thickness and thickness ratio requirements specified.
- Loading conditions: constant crosshead speed (standard recommends 0.5 mm/min) and use of a calibrated testing machine in line with ISO 7500-1.
- Measurement accuracy:
- Force-measuring and recording error ≤ 1 %
- Data acquisition frequency minimum 15 Hz (recommended response ~50 Hz)
- Dimensional instruments: Vernier caliper per ISO 3611, optical microscope (≈1000×) for coating thickness, electronic micrometer (precision ~0.001 mm, resolution 0.0005 mm)
- Sample quantity: minimum 6 test pieces; ~30 recommended for statistical analyses such as Weibull strength characterization.
- Calculations and reporting: procedures for deriving elastic modulus from load/deflection increments and for calculating coating bending strength from critical fracture load are specified, together with statistical reporting (mean, standard deviation, uncertainty).
Practical applications and users
ISO 19603:2016 is useful for:
- Materials researchers characterizing new ceramic coatings
- Quality control labs validating coating process consistency
- Coating manufacturers optimizing thickness and mechanical performance
- Design and reliability engineers using coating elastic modulus and bending strength as input for component design and failure analysis
- Failure analysis teams investigating coating cracking under bending loads
Keywords: fine ceramics, advanced ceramics, ceramic coatings, elastic modulus, bending strength, three-point bending, ISO 19603:2016, coating characterization, quality control, Weibull analysis.
Related standards
- ISO 7500-1 - calibration/verification of testing machines (force system)
- ISO 3611 - dimensional measuring equipment (micrometers)
- ISO/TC 206 (committee responsible for fine ceramics)
Frequently Asked Questions
ISO 19603:2016 is a standard published by the International Organization for Standardization (ISO). Its full title is "Fine ceramics (advanced ceramics, advanced technical ceramics) — Test method for determining elastic modulus and bending strength of thick ceramic coatings". This standard covers: ISO 19603:2016 specifies a testing method for determining the elastic modulus and bending strength of thick ceramic coatings at ambient temperature by three-point bending tests. Procedures for test piece preparation, test modes and load rates, data collection and reporting are given. ISO 19603:2016 applies to thick, brittle coatings on metal or ceramic substrates. This test method can be used for material research, quality control, characterization and design data-generation purposes.
ISO 19603:2016 specifies a testing method for determining the elastic modulus and bending strength of thick ceramic coatings at ambient temperature by three-point bending tests. Procedures for test piece preparation, test modes and load rates, data collection and reporting are given. ISO 19603:2016 applies to thick, brittle coatings on metal or ceramic substrates. This test method can be used for material research, quality control, characterization and design data-generation purposes.
ISO 19603:2016 is classified under the following ICS (International Classification for Standards) categories: 81.060.30 - Advanced ceramics. The ICS classification helps identify the subject area and facilitates finding related standards.
ISO 19603:2016 is available in PDF format for immediate download after purchase. The document can be added to your cart and obtained through the secure checkout process. Digital delivery ensures instant access to the complete standard document.
Standards Content (Sample)
INTERNATIONAL ISO
STANDARD 19603
First edition
2016-11-01
Fine ceramics (advanced ceramics,
advanced technical ceramics) —
Test method for determining elastic
modulus and bending strength of thick
ceramic coatings
Céramiques techniques — Méthode d’essai relative à la détermination
du module élastique et de la résistance en flexion des revêtements de
céramique épais
Reference number
©
ISO 2016
© ISO 2016, Published in Switzerland
All rights reserved. Unless otherwise specified, no part of this publication may be reproduced or utilized otherwise in any form
or by any means, electronic or mechanical, including photocopying, or posting on the internet or an intranet, without prior
written permission. Permission can be requested from either ISO at the address below or ISO’s member body in the country of
the requester.
ISO copyright office
Ch. de Blandonnet 8 • CP 401
CH-1214 Vernier, Geneva, Switzerland
Tel. +41 22 749 01 11
Fax +41 22 749 09 47
copyright@iso.org
www.iso.org
ii © ISO 2016 – All rights reserved
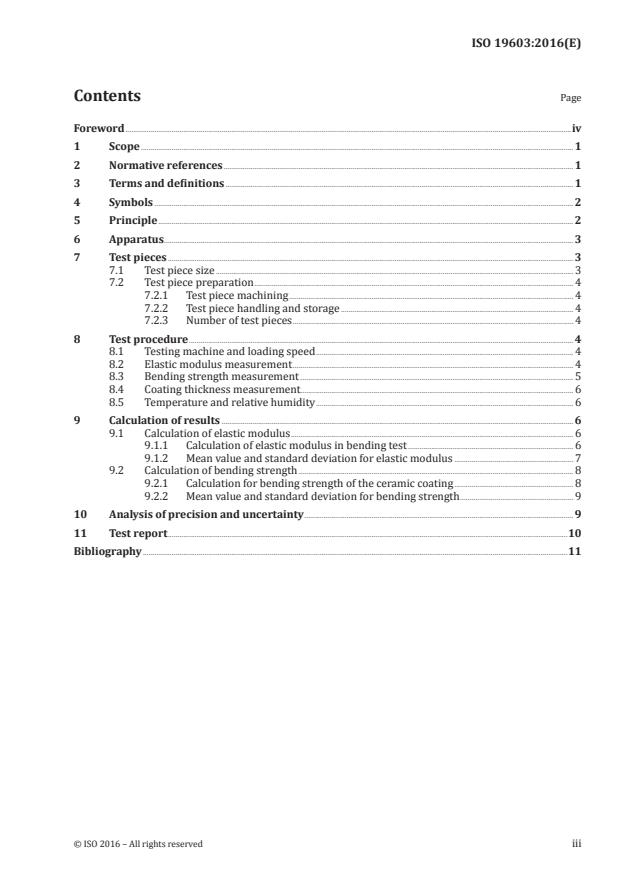
Contents Page
Foreword .iv
1 Scope . 1
2 Normative references . 1
3 Terms and definitions . 1
4 Symbols . 2
5 Principle . 2
6 Apparatus . 3
7 Test pieces . 3
7.1 Test piece size . 3
7.2 Test piece preparation . 4
7.2.1 Test piece machining . 4
7.2.2 Test piece handling and storage . 4
7.2.3 Number of test pieces . 4
8 Test procedure . 4
8.1 Testing machine and loading speed . 4
8.2 Elastic modulus measurement . 4
8.3 Bending strength measurement . 5
8.4 Coating thickness measurement. 6
8.5 Temperature and relative humidity . 6
9 Calculation of results . 6
9.1 Calculation of elastic modulus . 6
9.1.1 Calculation of elastic modulus in bending test . 6
9.1.2 Mean value and standard deviation for elastic modulus . 7
9.2 Calculation of bending strength . 8
9.2.1 Calculation for bending strength of the ceramic coating . 8
9.2.2 Mean value and standard deviation for bending strength . 9
10 Analysis of precision and uncertainty . 9
11 Test report .10
Bibliography .11
Foreword
ISO (the International Organization for Standardization) is a worldwide federation of national standards
bodies (ISO member bodies). The work of preparing International Standards is normally carried out
through ISO technical committees. Each member body interested in a subject for which a technical
committee has been established has the right to be represented on that committee. International
organizations, governmental and non-governmental, in liaison with ISO, also take part in the work.
ISO collaborates closely with the International Electrotechnical Commission (IEC) on all matters of
electrotechnical standardization.
The procedures used to develop this document and those intended for its further maintenance are
described in the ISO/IEC Directives, Part 1. In particular the different approval criteria needed for the
different types of ISO documents should be noted. This document was drafted in accordance with the
editorial rules of the ISO/IEC Directives, Part 2 (see www.iso.org/directives).
Attention is drawn to the possibility that some of the elements of this document may be the subject of
patent rights. ISO shall not be held responsible for identifying any or all such patent rights. Details of
any patent rights identified during the development of the document will be in the Introduction and/or
on the ISO list of patent declarations received (see www.iso.org/patents).
Any trade name used in this document is information given for the convenience of users and does not
constitute an endorsement.
For an explanation on the meaning of ISO specific terms and expressions related to conformity assessment,
as well as information about ISO’s adherence to the World Trade Organization (WTO) principles in the
Technical Barriers to Trade (TBT) see the following URL: www.iso.org/iso/foreword.html.
The committee responsible for this document is ISO/TC 206, Fine ceramics.
iv © ISO 2016 – All rights reserved
INTERNATIONAL STANDARD ISO 19603:2016(E)
Fine ceramics (advanced ceramics, advanced technical
ceramics) — Test method for determining elastic modulus
and bending strength of thick ceramic coatings
1 Scope
This document specifies a testing method for determining the elastic modulus and bending strength of
thick ceramic coatings at ambient temperature by three-point bending tests. Procedures for test piece
preparation, test modes and load rates, data collection and reporting are given.
This document applies to thick, brittle coatings on metal or ceramic substrates. This test method can
be used for material research, quality control, characterization and design data-generation purposes.
2 Normative references
The following documents are referred to in the text in such a way that some or all of their content
constitutes requirements of this document. For dated references, only the edition cited applies. For
undated references, the latest edition of the referenced document (including any amendments) applies.
ISO 3611, Geometrical product specifications (GPS) — Dimensional measuring equipment: Micrometers for
external measurements — Design and metrological characteristics
ISO 7500-1, Metallic materials — Calibration and verification of static uniaxial testing machines — Part 1:
Tension/compression testing machines — Calibration and verification of the force-measuring system
3 Terms and definitions
For the purposes of this document, the following terms and definitions apply.
ISO and IEC maintain terminological databases for use in standardization at the following addresses:
— IEC Electropedia: available at http://www.electropedia.org/
— ISO Online browsing platform: available at http://www.iso.org/obp
3.1
elastic modulus
ratio of stress to strain
Note 1 to entry: Also known as Young’s modulus.
3.2
bending strength
maximum tensile stress at fracture under bending load
3.3
modulus ratio
ratio of the coating modulus to the substrate modulus
3.4
thickness ratio
ratio of the coating thickness to the substrate thickness
3.5
deflection ratio
ratio of the deflection increment of uncoated substrate to the deflection increment of coated test piece
under a given load increment for three-point bending test
4 Symbols
For the purposes of this document, the symbols and designations given in Table 1 apply.
Table 1 — Symbols and designations
Symbol Designation Unit References
Figure 1
H Thickness of substrate mm
Formula (1)
h Thickness of coating mm Figure 1
B Width of test piece mm Figure 1
P Peak load N Figure 2
Formula (1)
L Span of test piece mm
Formula (5)
E Elastic modulus GPa Formula (1)
E Elastic modulus of coating GPa Formula (2)
c
E Elastic modulus of substrate GPa Formula (2)
s
Ratio of the elastic modulus of the coating to that of the Formula (2)
α
substrate Formula (5)
f Deflection mm Formula (1)
σ Bending strength of coating MPa Formula (5)
c
P Critical fracture load N Formula (5)
c
y Distance from the tensile surface to the neutral axis mm Formula (5)
c
I Moment of inertia of the test pieces mm Formula (5)
ΔP Load increment N Formula (1)
Δf Deflection increment mm Formula (1)
Formula (3)
Formula (4)
n Effective test number numerical
Formula (6)
Formula (7)
Formula (6)
Mean value of bending strength MPa
σ
Formula (7)
Formula (6)
σ Bending strength of the ith test piece MPa
i
Formula (7)
Formula (3)
Mean value of elastic modulus GPa
E
Formula (4)
Formula (3)
E Elastic modulus of the ith test piece GPa
i
Formula (4)
s Standard deviation of measured elastic modulus GPa Formula (4)
e
s Standard deviation of measured bending strength MPa Formula (7)
σ
5 Principle
The elastic modulus and bending strength of thick ceramic coatings on metal or ceramic substrates
can be evaluated using three-point bending tests. The elastic modulus of the coating is deduced by
comparing the deformation of a coated test piece and of the uncoated substrate under identical loads.
A precondition of this method is that the elastic modulus of the substrate is known or can be measured
2 © ISO 2016 – All rights reserved
before or after the test. The bending strength of the coating is determined using the critical load for
cracking in the coating and the sample size. This indirect test method is called the relative method.
6 Apparatus
6.1 Testing machine
A suitable testing machine capable of applying a uniform crosshead speed and compliant with ISO 7500-1
shall be used. The loading speed should be constant. The measuring error shall be 1 % or lower.
6.2 Data acquisition
Record the applied load as a function of crosshead displacement or testing time in order to determine
the maximum applied load.
An analog chart recorder or digital data collection system should be used. The error of the recording
system shall be 1 % or lower. The minimum data collection frequency shall be 15 Hz, and a response
frequency of 50 Hz is deemed adequate.
6.3 Dimensional measuring devices
The dimensions of the test piece shall be measured using a Vernier caliper complying with ISO 3611 and
with a precision of 0,02 mm or better, or other calibrated measuring device providing the same or better
measurement accuracy. Coating thickness shall be measured by using a calibrated optical microscope
with magnification of 1 000 times or better. Sample displacement shall be measured using a calibrated
electronic micrometer with a precision of at least 0,001 mm and resolution of 0,000 5 mm or better, or
other measuring device providing the same or better measurement accuracy. All calibrations shall be
traceable to national standards.
7 Test pieces
7.1 Test piece size
In order to simplify the preparation of test piece
...


Questions, Comments and Discussion
Ask us and Technical Secretary will try to provide an answer. You can facilitate discussion about the standard in here.
Loading comments...