ISO 6621-5:2005
(Main)Internal combustion engines — Piston rings — Part 5: Quality requirements
Internal combustion engines — Piston rings — Part 5: Quality requirements
ISO 6621-5:2005 specifies those quality aspects of piston rings that are capable of definition but not normally found on a drawing specification. It covers the following: single-piece piston rings of grey cast iron or steel; multi-piece piston rings (oil control rings) consisting of cast iron parts and spring components; single-piece and multi-piece oil control rings of steel, i.e. oil control rings in the form of strip steel components or steel segments (rails) with spring expander components.
Moteurs à combustion interne — Segments de piston — Partie 5: Exigences de qualité
General Information
- Status
- Withdrawn
- Publication Date
- 09-Oct-2005
- Withdrawal Date
- 09-Oct-2005
- Technical Committee
- ISO/TC 22 - Road vehicles
- Drafting Committee
- ISO/TC 22 - Road vehicles
- Current Stage
- 9599 - Withdrawal of International Standard
- Start Date
- 13-Sep-2013
- Completion Date
- 12-Feb-2026
Relations
- Consolidated By
ISO 17575-3:2016 - Electronic fee collection — Application interface definition for autonomous systems — Part 3: Context data - Effective Date
- 06-Jun-2022
- Effective Date
- 17-Oct-2009
- Effective Date
- 15-Apr-2008
Get Certified
Connect with accredited certification bodies for this standard

TÜV Rheinland
TÜV Rheinland is a leading international provider of technical services.

TÜV SÜD
TÜV SÜD is a trusted partner of choice for safety, security and sustainability solutions.

AIAG (Automotive Industry Action Group)
American automotive industry standards and training.
Sponsored listings
Frequently Asked Questions
ISO 6621-5:2005 is a standard published by the International Organization for Standardization (ISO). Its full title is "Internal combustion engines — Piston rings — Part 5: Quality requirements". This standard covers: ISO 6621-5:2005 specifies those quality aspects of piston rings that are capable of definition but not normally found on a drawing specification. It covers the following: single-piece piston rings of grey cast iron or steel; multi-piece piston rings (oil control rings) consisting of cast iron parts and spring components; single-piece and multi-piece oil control rings of steel, i.e. oil control rings in the form of strip steel components or steel segments (rails) with spring expander components.
ISO 6621-5:2005 specifies those quality aspects of piston rings that are capable of definition but not normally found on a drawing specification. It covers the following: single-piece piston rings of grey cast iron or steel; multi-piece piston rings (oil control rings) consisting of cast iron parts and spring components; single-piece and multi-piece oil control rings of steel, i.e. oil control rings in the form of strip steel components or steel segments (rails) with spring expander components.
ISO 6621-5:2005 is classified under the following ICS (International Classification for Standards) categories: 43.060.10 - Engine block and internal components. The ICS classification helps identify the subject area and facilitates finding related standards.
ISO 6621-5:2005 has the following relationships with other standards: It is inter standard links to ISO 17575-3:2016, ISO 6621-5:2013, ISO 6621-5:1988. Understanding these relationships helps ensure you are using the most current and applicable version of the standard.
ISO 6621-5:2005 is available in PDF format for immediate download after purchase. The document can be added to your cart and obtained through the secure checkout process. Digital delivery ensures instant access to the complete standard document.
Standards Content (Sample)
INTERNATIONAL ISO
STANDARD 6621-5
Second edition
2005-10-01
Internal combustion engines — Piston
rings —
Part 5:
Quality requirements
Moteurs à combustion interne — Segments de piston —
Partie 5: Exigences de qualité
Reference number
©
ISO 2005
PDF disclaimer
This PDF file may contain embedded typefaces. In accordance with Adobe's licensing policy, this file may be printed or viewed but
shall not be edited unless the typefaces which are embedded are licensed to and installed on the computer performing the editing. In
downloading this file, parties accept therein the responsibility of not infringing Adobe's licensing policy. The ISO Central Secretariat
accepts no liability in this area.
Adobe is a trademark of Adobe Systems Incorporated.
Details of the software products used to create this PDF file can be found in the General Info relative to the file; the PDF-creation
parameters were optimized for printing. Every care has been taken to ensure that the file is suitable for use by ISO member bodies. In
the unlikely event that a problem relating to it is found, please inform the Central Secretariat at the address given below.
© ISO 2005
All rights reserved. Unless otherwise specified, no part of this publication may be reproduced or utilized in any form or by any means,
electronic or mechanical, including photocopying and microfilm, without permission in writing from either ISO at the address below or
ISO's member body in the country of the requester.
ISO copyright office
Case postale 56 • CH-1211 Geneva 20
Tel. + 41 22 749 01 11
Fax + 41 22 749 09 47
E-mail copyright@iso.org
Web www.iso.org
Published in Switzerland
ii © ISO 2005 – All rights reserved
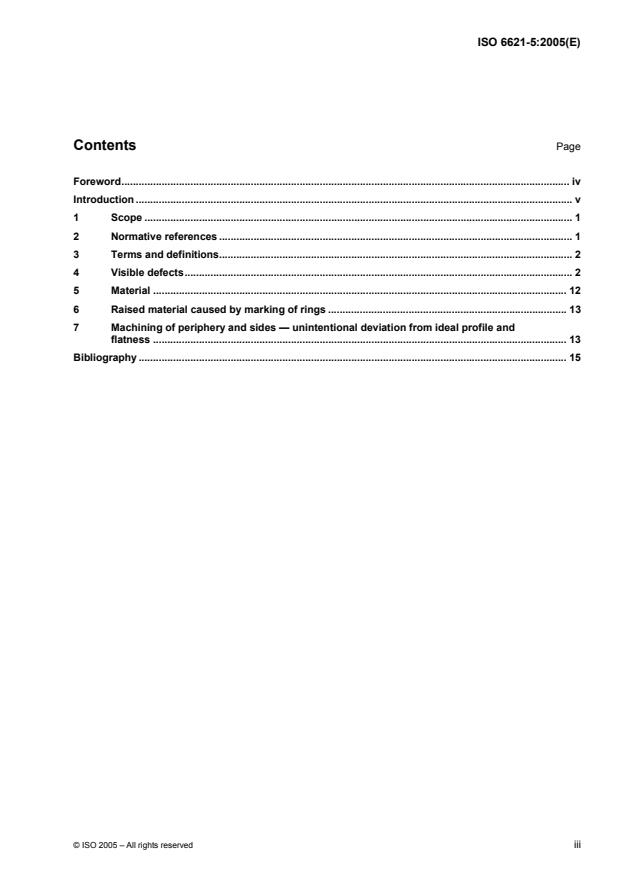
Contents Page
Foreword. iv
Introduction . v
1 Scope . 1
2 Normative references . 1
3 Terms and definitions. 2
4 Visible defects. 2
5 Material . 12
6 Raised material caused by marking of rings . 13
7 Machining of periphery and sides — unintentional deviation from ideal profile and
flatness . 13
Bibliography . 15
Foreword
ISO (the International Organization for Standardization) is a worldwide federation of national standards bodies
(ISO member bodies). The work of preparing International Standards is normally carried out through ISO
technical committees. Each member body interested in a subject for which a technical committee has been
established has the right to be represented on that committee. International organizations, governmental and
non-governmental, in liaison with ISO, also take part in the work. ISO collaborates closely with the
International Electrotechnical Commission (IEC) on all matters of electrotechnical standardization.
International Standards are drafted in accordance with the rules given in the ISO/IEC Directives, Part 2.
The main task of technical committees is to prepare International Standards. Draft International Standards
adopted by the technical committees are circulated to the member bodies for voting. Publication as an
International Standard requires approval by at least 75 % of the member bodies casting a vote.
Attention is drawn to the possibility that some of the elements of this document may be the subject of patent
rights. ISO shall not be held responsible for identifying any or all such patent rights.
ISO 6621-5 was prepared by Technical Committee ISO/TC 22, Road vehicles.
This second edition cancels and replaces the first edition (ISO 6621-5:1988), which has been technically
revised.
ISO 6621 consists of the following parts, under the general title Internal combustion engines — Piston rings:
⎯ Part 1: Vocabulary
⎯ Part 2: Inspection measuring principles
⎯ Part 3: Material specifications
⎯ Part 4: General specifications
⎯ Part 5: Quality requirements
iv © ISO 2005 – All rights reserved
Introduction
ISO 6621 is one of a number of series of International Standards dealing with piston rings for reciprocating
[1]
internal combustion engines. Others are ISO 6621 , ISO 6622, ISO 6623, ISO 6624, ISO 6625, ISO 6626
and ISO 6627 (see Bibliography for details).
The common features and dimensional tables presented in this part of ISO 6621 constitute a broad range of
variables, and the designer, in selecting a particular ring type, should bear in mind the conditions under which
it will be required to operate. The designer also refers to the specifications and requirements of ISO 6621-3
and ISO 6621-4 before completing his selection.
The difficulty of trying to define in absolute terms the quality attainable in normal commercial manufacture of
piston rings is well known. In this part of ISO 6621, the commonly encountered aspects of quality in terms of
casting defects and other departures from ideal are quantified. Many minor defects are clearly quite
acceptable; other defects because of size or number are inadmissible.
INTERNATIONAL STANDARD ISO 6621-5:2005(E)
Internal combustion engines — Piston rings —
Part 5:
Quality requirements
1 Scope
This part of ISO 6621 specifies those quality aspects that are capable of definition but not normally found on a
drawing specification.
It covers the following:
⎯ single-piece piston rings of grey cast iron or steel;
⎯ multi-piece piston rings (oil control rings) consisting of cast iron parts and spring components;
⎯ single-piece and multi-piece oil control rings of steel, i.e. oil control rings in the form of strip steel
components or steel segments (rails) with spring expander components.
In addition to specifying certain of the limits of acceptance relating to inspection measuring principles (covered
by ISO 6621-2), this part of ISO 6621 also covers those features for which no recognized quantitative
measurement procedures exist and which are only checked visually with normal eyesight (spectacles if worn
normally) and without magnification. Such features (superficial defects) are additional to the standard
tolerances of ring width, radial wall thickness and closed gap.
This part of ISO 6621 does not establish acceptable quality levels (AQL), it being left to manufacturer and
client to decide the appropriate levels jointly. In this case, the recommendations of ISO 2859 are followed.
This part of ISO 6621 specifies the quality requirements of piston rings for both reciprocating internal
combustion engines and compressors working under analogous conditions. It is applicable to all such rings of
a diameter u 200 mm.
2 Normative references
The following referenced documents are indispensable for the application of this document. For dated
references, only the edition cited applies. For undated references, the latest edition of the referenced
document (including any amendments) applies.
ISO 6621-1, Internal combustion engines — Piston rings — Part 1: Vocabulary
ISO 6621-3, Internal combustion engines — Piston rings — Part 3: Material specifications
ISO 6621-4, Internal combustion engines — Piston rings — Part 4: General specifications
ISO 6622-1, Internal combustion engines — Piston rings — Part 1: Rectangular rings made of cast iron
ISO 6622-2, Internal combustion engines — Piston rings — Part 2: Rectangular rings made of steel
ISO 6623, Internal combustion engines — Piston rings — Scraper rings made of cast iron
ISO 6624-1, Internal combustion engines — Piston rings — Part 1: Keystone rings made of cast iron
ISO 6624-2, Internal combustion engines — Piston rings — Part 2: Half keystone rings made of cast iron
ISO 6624-3, Internal combustion engines — Piston rings — Part 3: Keystone rings made of steel
ISO 6624-4, Internal combustion engines — Piston rings — Part 4: Half keystone rings made of steel
ISO 6625, Internal combustion engines — Piston rings — Oil control rings
ISO 6626, Internal combustion engines — Piston rings — Coil-spring-loaded oil control rings
ISO 6626-2, Internal combustion engines — Piston rings — Part 2: Coil-spring-loaded oil control rings of
narrow width made of cast iron
ISO 6627, Internal combustion engine — Piston rings — Expander/segment oil control rings
3 Terms and definitions
The terminology used in this part of ISO 6621 is as given in ISO 6621-1.
4 Visible defects
4.1 General
Visible defects are divided into two principle classes as described in 4.2 to 4.5.
The first class covers those defects frequently found in castings and includes such defects as porosity, sand
inclusions, cavities, etc.
The second class of defect covers mechanical abrasions which may occur during forming, machining or
handling of the rings, and includes scratches, dents, chipping, burrs and cracks.
Inspection of piston rings for such defects is generally carried out visually, without magnification, by inspectors
having normal eyesight, corrected if necessary.
It is not intended that every ring be rigorously inspected for size and distribution of defects, but rather that the
values given in the tables and text be used as a general guide. However, in case of doubt, the values given
should be used as the means of judging the quality of the rings.
4.2 Pores, cavities and sand inclusions
Such defects are permissible on uncoated surfaces and edges provided that the values given in Table 1 for
size, number and spacing are not exceeded.
2 © ISO 2005 – All rights reserved
Table 1 — Permissible values of size, number and spacing of pores, cavities and sand inclusions
Dimensions in millimetres
Nominal Defect size Number of defects Spacing of
c
diameter per ring max. defects min.
max.
d
on peripheral on other on peripheral on other
a a b
surface surfaces edges edges
30 u d < 60 0,1 0,3 0,1 0,1 2 4
60 u d < 100 0,15 0,5 0,1 0,2 4 4
100 u d < 150 0,2 0,5 0,1 0,3 6 8
150 u d u 200 0,2 0,8 0,1 0,4 8 8
a
The defects should not be closer to an edge than one-half of the maximum permissible size of the defect, with a minimum of 0,2.
b
Does not apply to inside gap edges of piston rings with internal notch.
c
Spacing includes defects on adjacent or opposite surfaces.
4.3 Scratches, indentations, depressions and cracks
4.3.1 Scratches
Isolated scratches are permissible provided that:
⎯ no burrs are produced exceeding the permissible values given in 4.4.1.1;
⎯ on turned peripheral surfaces, they are not deeper than the tool marks;
⎯ on non-turned peripheral surfaces, they are not deeper than 0,004 mm;
⎯ on the side faces, they are not deeper than 0,01 mm;
⎯ on other surfaces, they are not deeper than 0,06 mm.
4.3.2 Indentations, depressions
Indentations and depressions are permissible provided that:
⎯ the values given in Table 1 for number and spacing of defects are met;
⎯ no burrs are produced exceeding the permissible values given in 4.4.1.1;
⎯ they do not exceed the values for size and depth given in Table 2.
Rings of a plated/coated/nitrided type shall not have indentations or depressions on the periphery.
NOTE Indentations arising from hardness measurements on the side faces are acceptable provided that they do not
exceed the limits given in Tables 2 and 11.
4.3.3 Cracks
No cracks are permissible.
See also 4.5.4 for chromium-plated peripheral surfaces and 4.5.6 for nitrided surfaces.
Table 2 — Permissible size of indentations and depressions
Dimensions in millimetres
Nominal diameter Defect size Depth
d max. max.
On peripheral surface On side face
30 u d < 100
0,3 0,6
10 % of corresponding max.
defect size
100 u d u 200
0,5 1
4.4 Edges
4.4.1 Edge configuration
All edges of the piston ring shall be sharp; ideally, they should be free from burrs and from ragged edges,
whether arising from crumbling of material or from deburring. Such conditions are almost impossible to
achieve regularly in volume production and hence both burrs and removal of edge material is permitted up to
the maximum sizes given in 4.4.1.1 and 4.4.1.2.
4.4.1.1 Burrs
Burrs are permitted up to the maximum values given in Table 3. The orientation and direction of burrs shall
relate to the functional surfaces of the piston ring; any burr present should point in the direction of sliding
motion of the ring and not normal to the direction of sliding.
Any burrs remaining on the edges of rings should be firmly attached, forming an integral part of the edge.
Table 3 — Permissible size of burrs for all sizes of ring
Dimensions in millimetres
Maximum size of burr
Cast iron & steel Expander/segment oil control rings
Burrs on edges adjacent to:
single & 2 piece
Expander Plated segment Nitrided segment
rings
Peripheral surface 0,006 0,01 0,004 0,004
Side faces 0,006 0,01 0,02 0,01
Butt ends (gap surface) 0,04 0,1 0,1 0,04
The outside groove face (oil rings) 0,2 — — —
The inside surface and the ends of
0,5 0,5 0,1 0,1
the slots (oil rings)
All other surfaces 0,1 0,1 0,1 0,1
4.4.1.2 Edge material removal
To eliminate protruding burrs in any direction, it is permissible to remove material from the edges to the values
given in Table 4.
4 © ISO 2005 – All rights reserved
Table 4 — Edge material removal in deburr operations
Dimensions in millimetres
Location of edge Removal of material
max.
On peripheral edges 0,08
a
On peripheral edges of the gap 0,15
0,5 in circumferential direction
On inside edges of the gap
0,25 in radial direction
On other edges 0,25
a
Does not apply to rings which have specified gap edge chamfers.
4.4.2 Chipping and similar defects on peripheral edges, peripheral edges at the gap, outside gap
corners and on peripheral chamfers
Chipping and similar defects are permitted at these points provided that:
⎯ they are free of loosely adhering particles;
⎯ no burrs are produced exceeding the values permitted in 4.4.1.1;
⎯ they do not exceed half the width of any witness land on, for example, taper-faced rings;
⎯ they do not exceed the values
...


Questions, Comments and Discussion
Ask us and Technical Secretary will try to provide an answer. You can facilitate discussion about the standard in here.
Loading comments...