ISO 19740:2018
(Main)Optics and photonics — Optical materials and components — Test method for homogeneity of infrared optical materials
Optics and photonics — Optical materials and components — Test method for homogeneity of infrared optical materials
This document specifies the principle, apparatus, condition, sample, procedure and data processing of measuring homogeneity of infrared optical materials. It is applicable to the determination of homogeneity of infrared optical materials, such as infrared optical glass, infrared crystals and infrared ceramics, which are opaque to visible wavelengths and whose transmission optical spectra are beyond 0,78 µm.
Optique et photonique — Matériaux et composants optiques — Méthodes d’essai pour déterminer l’homogénéité des matériaux optiques infrarouges
General Information
- Status
- Published
- Publication Date
- 07-May-2018
- Technical Committee
- ISO/TC 172/SC 3 - Optical materials and components
- Drafting Committee
- ISO/TC 172/SC 3/WG 3 - Characterization of IR materials
- Current Stage
- 9093 - International Standard confirmed
- Start Date
- 10-Nov-2023
- Completion Date
- 12-Feb-2026
Overview
ISO 19740:2018 defines a standardized test method for homogeneity of infrared optical materials. It specifies the principle, apparatus, environmental conditions, sample types, measurement procedures and data processing required to determine refractive-index homogeneity for materials that are opaque in visible light and transmit beyond 0.78 µm - for example infrared optical glass, infrared crystals and infrared ceramics. The standard covers both wedge-shaped and plane-parallel samples and provides methods to calculate PV and standard-deviation homogeneity metrics.
Key topics and technical requirements
- Measurement principle
- Two main methods: four-step method (wedge-shaped samples) and two-step method (plane-parallel samples). Both use infrared interferometry to derive refractive-index error distribution.
- Apparatus and optics
- Infrared interferometer, reference flat, standard mirror, precision stage, image sensor and data-processing system arranged on a vibration-isolated platform.
- Example light sources within the document: diode lasers (~1.55 µm), He–Ne (3.39 µm), CO lasers (10.6 µm) and quantum cascade lasers (QCLs). Beam aperture should cover the sample or use sub-aperture stitching.
- Reference flat and standard mirror surface deviation: ≤ 0.05 λ (λ = 0.633 µm). Apertures generally larger than the sample.
- Environmental and measurement conditions
- Temperature around 22 °C ± 5 °C with stability better than ±0.2 °C (see Annex B).
- Relative humidity ≤ 70 %.
- Vibration isolation and controlled airflow required.
- Sample preparation
- Wedge-shaped and plane-parallel geometries, with polished surfaces per procedures in Clause 7.
- Thickness measurement equipment with uncertainty ≤ 0.01 mm.
- Data processing and results
- Calculation of PV value (Δn_PV) and standard deviation (Δn_STD) of refractive index distribution, measurement uncertainty and expanded uncertainty (Clauses 9–11).
- Reporting
- Required test report contents are specified (Clause 12 and Annex D).
Applications and users
ISO 19740 is practical for:
- Manufacturers of IR lenses and windows performing quality control and acceptance testing.
- Optical materials suppliers assessing homogeneity of infrared glass, crystals and ceramics.
- Metrology and inspection laboratories validating refractive-index uniformity.
- R&D teams and optical engineers designing high-performance IR systems (thermal imaging, spectroscopy, aerospace, defense) where refractive-index variation affects wavefront quality.
Typical users: optical engineers, materials scientists, QA managers, and laboratory metrologists.
Related standards
- ISO 10110-7 - Preparation of drawings for optical elements - Surface imperfections
- ISO 10110-8 - Preparation of drawings for optical elements - Surface texture; roughness and waviness
Keywords: ISO 19740, homogeneity, infrared optical materials, infrared interferometer, refractive index, PV value, standard deviation, test method, infrared glass, infrared crystals, infrared ceramics.
Frequently Asked Questions
ISO 19740:2018 is a standard published by the International Organization for Standardization (ISO). Its full title is "Optics and photonics — Optical materials and components — Test method for homogeneity of infrared optical materials". This standard covers: This document specifies the principle, apparatus, condition, sample, procedure and data processing of measuring homogeneity of infrared optical materials. It is applicable to the determination of homogeneity of infrared optical materials, such as infrared optical glass, infrared crystals and infrared ceramics, which are opaque to visible wavelengths and whose transmission optical spectra are beyond 0,78 µm.
This document specifies the principle, apparatus, condition, sample, procedure and data processing of measuring homogeneity of infrared optical materials. It is applicable to the determination of homogeneity of infrared optical materials, such as infrared optical glass, infrared crystals and infrared ceramics, which are opaque to visible wavelengths and whose transmission optical spectra are beyond 0,78 µm.
ISO 19740:2018 is classified under the following ICS (International Classification for Standards) categories: 37.020 - Optical equipment. The ICS classification helps identify the subject area and facilitates finding related standards.
ISO 19740:2018 is available in PDF format for immediate download after purchase. The document can be added to your cart and obtained through the secure checkout process. Digital delivery ensures instant access to the complete standard document.
Standards Content (Sample)
INTERNATIONAL ISO
STANDARD 19740
First edition
2018-05
Optics and photonics — Optical
materials and components — Test
method for homogeneity of infrared
optical materials
Optique et photonique — Matériaux et composants optiques —
Méthodes d’essai pour déterminer l’homogénéité des matériaux
optiques infrarouges
Reference number
©
ISO 2018
© ISO 2018
All rights reserved. Unless otherwise specified, or required in the context of its implementation, no part of this publication may
be reproduced or utilized otherwise in any form or by any means, electronic or mechanical, including photocopying, or posting
on the internet or an intranet, without prior written permission. Permission can be requested from either ISO at the address
below or ISO’s member body in the country of the requester.
ISO copyright office
CP 401 • Ch. de Blandonnet 8
CH-1214 Vernier, Geneva
Phone: +41 22 749 01 11
Fax: +41 22 749 09 47
Email: copyright@iso.org
Website: www.iso.org
Published in Switzerland
ii © ISO 2018 – All rights reserved
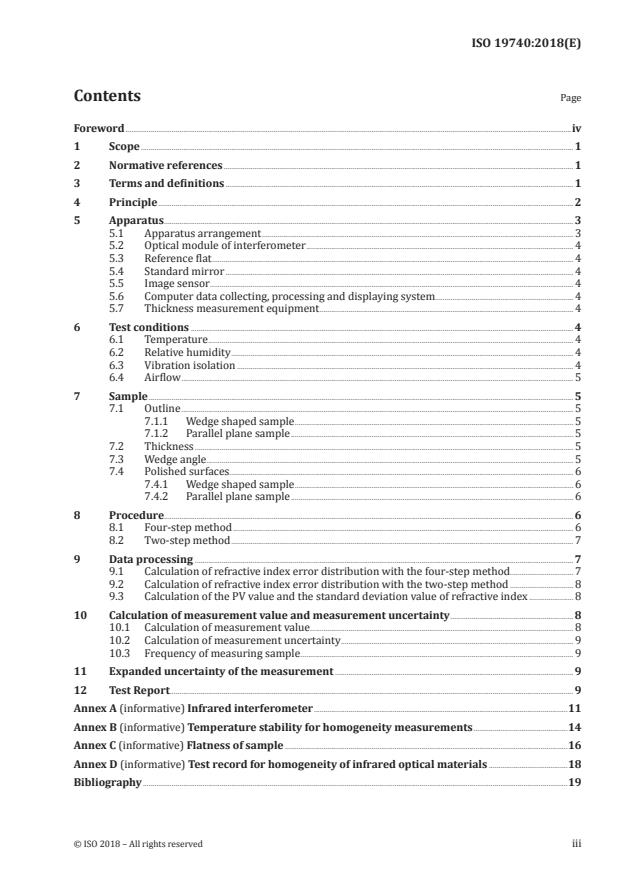
Contents Page
Foreword .iv
1 Scope . 1
2 Normative references . 1
3 Terms and definitions . 1
4 Principle . 2
5 Apparatus . 3
5.1 Apparatus arrangement . 3
5.2 Optical module of interferometer . 4
5.3 Reference flat . 4
5.4 Standard mirror . 4
5.5 Image sensor . 4
5.6 Computer data collecting, processing and displaying system. 4
5.7 Thickness measurement equipment . 4
6 Test conditions . 4
6.1 Temperature . 4
6.2 Relative humidity . 4
6.3 Vibration isolation . 4
6.4 Airflow . 5
7 Sample . 5
7.1 Outline . 5
7.1.1 Wedge shaped sample . 5
7.1.2 Parallel plane sample . 5
7.2 Thickness . 5
7.3 Wedge angle. 5
7.4 Polished surfaces. 6
7.4.1 Wedge shaped sample . 6
7.4.2 Parallel plane sample . 6
8 Procedure. 6
8.1 Four-step method . 6
8.2 Two-step method . 7
9 Data processing . 7
9.1 Calculation of refractive index error distribution with the four-step method. 7
9.2 Calculation of refractive index error distribution with the two-step method . 8
9.3 Calculation of the PV value and the standard deviation value of refractive index . 8
10 Calculation of measurement value and measurement uncertainty .8
10.1 Calculation of measurement value . 8
10.2 Calculation of measurement uncertainty . 9
10.3 Frequency of measuring sample . 9
11 Expanded uncertainty of the measurement . 9
12 Test Report . 9
Annex A (informative) Infrared interferometer .11
Annex B (informative) Temperature stability for homogeneity measurements .14
Annex C (informative) Flatness of sample .16
Annex D (informative) Test record for homogeneity of infrared optical materials .18
Bibliography .19
Foreword
ISO (the International Organization for Standardization) is a worldwide federation of national standards
bodies (ISO member bodies). The work of preparing International Standards is normally carried out
through ISO technical committees. Each member body interested in a subject for which a technical
committee has been established has the right to be represented on that committee. International
organizations, governmental and non-governmental, in liaison with ISO, also take part in the work.
ISO collaborates closely with the International Electrotechnical Commission (IEC) on all matters of
electrotechnical standardization.
The procedures used to develop this document and those intended for its further maintenance are
described in the ISO/IEC Directives, Part 1. In particular the different approval criteria needed for the
different types of ISO documents should be noted. This document was drafted in accordance with the
editorial rules of the ISO/IEC Directives, Part 2 (see www .iso .org/directives).
Attention is drawn to the possibility that some of the elements of this document may be the subject of
patent rights. ISO shall not be held responsible for identifying any or all such patent rights. Details of
any patent rights identified during the development of the document will be in the Introduction and/or
on the ISO list of patent declarations received (see www .iso .org/patents).
Any trade name used in this document is information given for the convenience of users and does not
constitute an endorsement.
For an explanation on the voluntary nature of standards, the meaning of ISO specific terms and
expressions related to conformity assessment, as well as information about ISO's adherence to the
World Trade Organization (WTO) principles in the Technical Barriers to Trade (TBT) see the following
URL: www .iso .org/iso/foreword .html.
This document was prepared by Technical Committee ISO/TC 172, Optics and photonics, Subcommittee
SC 3, Optical materials and components.
iv © ISO 2018 – All rights reserved
INTERNATIONAL STANDARD ISO 19740:2018(E)
Optics and photonics — Optical materials and components
— Test method for homogeneity of infrared optical
materials
1 Scope
This document specifies the principle, apparatus, condition, sample, procedure and data processing of
measuring homogeneity of infrared optical materials.
It is applicable to the determination of homogeneity of infrared optical materials, such as infrared
optical glass, infrared crystals and infrared ceramics, which are opaque to visible wavelengths and
whose transmission optical spectra are beyond 0,78 µm.
2 Normative references
The following documents are referred to in the text in such a way that some or all of their content
constitutes requirements of this document. For dated references, only the edition cited applies. For
undated references, the latest edition of the referenced document (including any amendments) applies.
ISO 10110-7, Optics and photonics — Preparation of drawings for optical elements and systems — Part 7:
Surface imperfections
ISO 10110-8, Optics and photonics — Preparation of drawings for optical elements and systems — Part 8:
Surface texture; roughness and waviness
3 Terms and definitions
For the purposes of this document, the following terms and definitions apply.
ISO and IEC maintain terminological databases for use in standardization at the following addresses:
— ISO Online browsing platform: available at https: //www .iso .org/obp
— IEC Electropedia: available at http: //www .electropedia .org/
3.1
peak-to-valley value of refractive index
PV value
∆n
PV
difference between the maximum and the minimum values of refractive index distribution of an
infrared optical material in its cross-sectional area of the definition area
3.2
standard deviation value of refractive index
∆n
STD
value which is expressed with the square root of the sum of the squares of the differences of both the
distribution values and the average value of refractive index of an infrared optical material divided by
the sampling number of the distribution
3.3
homogeneity
gradual variation of the refractive index distribution within an optical element in the prescribed
direction (mostly perpendicular to optical path) and within the prescribed cross-section
3.4
homogeneity value
level of inconsistency of the refractive index distribution of an infrared optical material in the
prescribed direction (mostly perpendicular to optical path) and within the prescribed cross-sectional
area and per unit thickness of infrared optical materials, which is expressed in the PV value and the
standard deviation value of refractive index (3.2)
4 Principle
For a wedge-shaped sample, measure with a digitalized infrared interferometer the wavefront
interferograms of the front surface and the rear surface of the sample. Then measure the interferogram
of the wavefront going forth and back through the sample in a double pass configuration. Repeat the
double pass measurement without the sample in the measurement. Calculate the PV value and the
standard deviation value of infrared refractive index (simply called four-step method).
For a plane parallel plate sample, separately measure the wavefront interferograms in a double pass
configuration with and without the sample in the test cavity. Calculate the PV value and the standard
deviation value of infrared refractive index (simply called two-step method). The schematic diagram of
the measurement of homogeneity is shown in Figure 1.
2 © ISO 2018 – All rights reserved
Key
W wavefront of the incident light, in µm
i
W wavefront error of interferogram resulting from interference between the wavefront reflected by the flat
surface A and the wavefront reflected by the front surface B of the sample, in µm
W wavefront error of interferogram resulting from interference between the wavefront reflected by the flat
surface A and the wavefront reflected by the rear surface C of the sample, in µm
W wavefront error of interferogram resulting from interference between the wavefront reflected by the flat
surface A and the wavefront transmitted through the sample and reflected back from standard mirror D and
then transmitted through the sample again, in µm
W wavefront error of interferogram resulting from interference between the wavefront reflected by the flat
surface A and the wavefront reflected back from standard mirror D in absence of the sample (so-called empty
cavity measurement), in µm
1 thermostatic chamber
2 interferogram analysis device
3 infrared interferometer (including an image sensor)
4 infrared reference flat
5 standard mirror
6 sample
7 precise adjustment stage
8 vibration isolation platform
Figure 1 — Schematic diagram of the measurement of infrared material homogeneity
5 Apparatus
5.1 Apparatus arrangement
The measurement apparatus, which consists of an infrared interferometer, an infrared reference flat,
precision adjustment stage, a standard mirror and an interferogram analysis device to collect data,
to process data and to display data are arranged according to Figure 1. The apparatus shall be placed
onto a vibration isolation platform. Examples of infrared interferometers are given in Annex A. The
infrared interferometers may include various kinds of phase-shifting methods which can guarantee
measurement accuracy, such as piezoelectrical ceramic phase-shifting or Fourier transform phase-
shifting.
5.2 Optical module of interferometer
The radiation spectrum of interferometer should be within the spectral range of transmission of
optical materials. Generally, this should be a DL (Diode Laser) light source with an output wavelength of
1,55 µm, a He-Ne laser light source with an output wavelength of 3,39 µm, a CO laser light source with
an output wavelength of 10,6 µm or QCLs (Quantum Cascade Lasers). The aperture of the output beam
should be more than that of the sample. Alternatively use additional optics to change the diameter
of the output optical beam or employ a sufficient aperture stitching algorithm for sub-aperture
measurements.
5.3 Reference flat
The surface formation deviation should not be more than 0,05 λ (λ = 0,633 µm) and its aperture should
generally be more than that of the sample.
5.4 Standard mirror
The surface formation deviation should not be more than 0,05 λ (λ = 0,633 µm) and its aperture should
be more than that of the sample.
5.5 Image sensor
The working wavelength band of an infrared image sensor should be within the transmission spectrum
of the sample measurement. The corresponding object spatial resolution of the image sensor should be
high enough to guarantee the measurement accuracy.
5.6 Computer data collecting, processing and displaying system
The computer data collecting, processing and displaying system should have a software that is able to
collect the interferograms of the measurement wavefronts and calculate the PV value and the standard
deviation value of refractive index.
5.7 Thickness measurement equipment
The thickness measurement equipment shall have an uncertainty not more than 0,01 mm.
6 Test conditions
6.1 Temperature
The environmental temperature of the measurement should be 22 °C ± 5 °C, with the temperature
tolerance being not more than ±0,2 °C. See Annex B.
6.2 Relative humidity
The environmental relative humidity of the measurement should not be more than 70 %.
6.3 Vibration isolation
The vibration isolation device to be used shall be capable of eliminating the effect of the vibration from
the outside to the interferometer and the sample. It should be provided for performing high accuracy
measurements. It is recommended as the technical parameters of the vibration isolation device that the
vibration isolation frequency of the device should be less than 1,2 Hz −2,0 Hz in the horizontal direction,
1,2 Hz −2,0 Hz in the vertical direction and its amplitude should be less than 1,2 µm.
4 © ISO 2018 – All
...


Questions, Comments and Discussion
Ask us and Technical Secretary will try to provide an answer. You can facilitate discussion about the standard in here.
Loading comments...