ISO 7884-5:1987
(Main)Glass — Viscosity and viscometric fixed points — Part 5: Determination of working point by sinking bar viscometer
Glass — Viscosity and viscometric fixed points — Part 5: Determination of working point by sinking bar viscometer
The specified method is suitable for characterizing the low-viscosity range of glass working: A vertically positioned narrow metal rod, i.e. the bar, is allowed to sink under its own weight into the melt. From the rate of sinking the dynamic viscosity is calculated. The teoretical basis relation and the apparatus including method of measurements are described.
Verre — Viscosité et points viscosimétriques fixes — Partie 5: Détermination de la température de travail à l'aide d'un viscosimètre à enfoncement de barreau
General Information
- Status
- Published
- Publication Date
- 25-Nov-1987
- Technical Committee
- ISO/TC 48 - Laboratory equipment
- Drafting Committee
- ISO/TC 48 - Laboratory equipment
- Current Stage
- 9060 - Close of review
- Completion Date
- 04-Jun-2031
Overview
ISO 7884-5:1987 - "Glass - Viscosity and viscometric fixed points - Part 5: Determination of working point by sinking bar viscometer" specifies a standardized method to determine the working point of glass using a sinking-bar viscometer. The working point is defined as the temperature at which a glass melt reaches an equilibrium viscosity of 10^4 dPa·s. The method is optimized for the low-viscosity range of glass processing (about 10^3 to 10^4.5 dPa·s) and relates the bar’s sinking rate in a melt to the melt’s dynamic viscosity.
Key topics and technical requirements
- Purpose: Rapid, reproducible determination of the glass working point for viscosity–temperature characterization.
- Principle: A narrow vertical metal rod (sinking bar) sinks under its own weight into the melt; the sinking rate is used to calculate dynamic viscosity from a calibrated relation.
- Specified geometry and materials:
- Sinking bar: platinum–rhodium alloy, diameter 0.5 mm, mass 0.902 g (length ≈ 240–245 mm), hemispherical ends.
- Depth of sink: nominal I = 20 mm for routine measurements.
- Crucible: inner diameter ≥ 23 mm, depth 30–40 mm; platinum or non-porous refractory recommended.
- Furnace: electrically heated tube furnace to ~1 200 °C, with ±3 °C uniform zone over the crucible.
- Temperature measurement: Type S (platinum–10% rhodium/platinum) thermocouples recommended; measurement thermocouple should dip ~1 mm into the melt.
- Calibration: Use a reference glass of similar composition at known viscosity (10^4 dPa·s) to determine the bar constant K; repeat after apparatus changes.
- Precision: repeatability ≈ 3 °C (same operator/apparatus); reproducibility ≈ 8 °C (different operators/apparatus).
- Practical procedure: hold bar above melt, detect contact (ammeter), release, time sinking to 20 mm (stopwatch 0.1 s), interpolate if necessary over ≤30 °C interval.
Applications and users
- Practical applications:
- Determining the working point for process control in glass forming and shaping.
- Rapid characterization of viscosity–temperature relations during glass R&D.
- Quality control and batch comparisons in production environments.
- Calibration and validation of viscometric equipment.
- Typical users:
- Glass manufacturers, process engineers, laboratory technicians, materials scientists, and instrument manufacturers for viscometers and high-temperature furnaces.
Related standards
- ISO 7884 series (Parts 1–8) - comprehensive methods and principles for glass viscosity and viscometric fixed points (Part 1: principles; Part 2: rotation viscometers; Part 3: fibre elongation; Part 4: beam bending; Part 6: softening point; Part 7 & 8: annealing/strain and transformation temperatures).
- IEC Publication 584-1 - thermocouple type specifications (Type S) referenced for temperature measurement.
Keywords: ISO 7884-5, sinking bar viscometer, working point, glass viscosity, viscometric fixed points, dynamic viscosity, glass processing.
Frequently Asked Questions
ISO 7884-5:1987 is a standard published by the International Organization for Standardization (ISO). Its full title is "Glass — Viscosity and viscometric fixed points — Part 5: Determination of working point by sinking bar viscometer". This standard covers: The specified method is suitable for characterizing the low-viscosity range of glass working: A vertically positioned narrow metal rod, i.e. the bar, is allowed to sink under its own weight into the melt. From the rate of sinking the dynamic viscosity is calculated. The teoretical basis relation and the apparatus including method of measurements are described.
The specified method is suitable for characterizing the low-viscosity range of glass working: A vertically positioned narrow metal rod, i.e. the bar, is allowed to sink under its own weight into the melt. From the rate of sinking the dynamic viscosity is calculated. The teoretical basis relation and the apparatus including method of measurements are described.
ISO 7884-5:1987 is classified under the following ICS (International Classification for Standards) categories: 81.040.01 - Glass in general. The ICS classification helps identify the subject area and facilitates finding related standards.
ISO 7884-5:1987 is available in PDF format for immediate download after purchase. The document can be added to your cart and obtained through the secure checkout process. Digital delivery ensures instant access to the complete standard document.
Standards Content (Sample)
ISO
INTERNATIONAL STANDARD
7884-5
First edition
1987-12-15
INTERNATIONAL ORGANIZATION FOR STANDARDIZATION
ORGANISATION INTERNATIONALE DE NORMALISATION
MEXAYHAPOAHAH OPTAHM3A~MR fl0 CTAH~APTM3A~MM
Glass - Vikosity and viscometric fixed Points -
Part 5 :
Determination of working Point by sinking bar viscometer
Reference number
ISO 7884-5 : 1987 (E)
Foreword
ISO (the International Organization for Standardization) is a worldwide federation of
national Standards bodies (ISO member bedies). The work of preparing International
Standards is normally carried out through ISO technical committees. Esch member
body interested in a subject for which a technical committee has been established has
the right to be represented on that committee. International organizations, govern-
mental and non-governmental, in liaison with ISO, also take part in the work.
Draft International Standards adopted by the technical committees are circulated to
the member bodies for approval before their acceptance as International Standards by
the ISO Council. They are approved in accordance with ISO procedures requiring at
least 75 % approval by the member bodies voting.
International Standard ISO 7884-5 was prepared by Technical Committee ISO/TC 48,
Laboratory glassware and related apparatus.
Users should note that all International Standards undergo revision from time to time
and that any reference made herein to any other International Standard implies its
latest edition, unless otherwise stated.
International Organkation for Standardkation, 1987
Printed in Switzerland
1s0 7884-5 : 1987 (E)
INTERNATIONAL STANDARD
Viscosity and viscometric fixed Points -
Glass -
Part 5 :
Determination of working Point by sinking bar viscometer
3 Reference
0 lntroduction
IEC Publication 584-1, Thermocouples - Part 7 : Reference
International Standard ISO 7884, Glass - Wscosity and
tables.
viscometric fixed Points, consists of the following separate
Parts :
4 Definitions
Part 1 : Principles for defermining viscosity and viscometric
fixed poin ts.
For the purposes of this part of ISO 7884, the following defini-
tions apply.
Part 2 : Determination of viscosity by rotation viscometers.
Part 3 : Determination o f viscosity b y fibre elonga tion
4.1 working Point : Temperature at which the melt of usual
viscome ter.
silicate glasses possesses an equilibrium viscosity of
104 dpa-s*.
Part 4 : Determination of viscosity by beam bending.
Part 5 : Determination o f working poin t b y sinking bar
4.2 sinking bar temperature : Working Point as deter-
viscometer.
mined by means of the sinking bar method.
Part 6 : Determination of softening Point.
4.3 sinking bar method : Simple procedure for determining
Part 7 : Determination of annealing Point and strain Point by
rapidly the viscosity within a range of about 103J to 104,s dPa.s
beam bending.
as explained in clause 5.
o f (dila tometric) transforma tion
Part 8 : Determination
tempera ture.
5 Principle
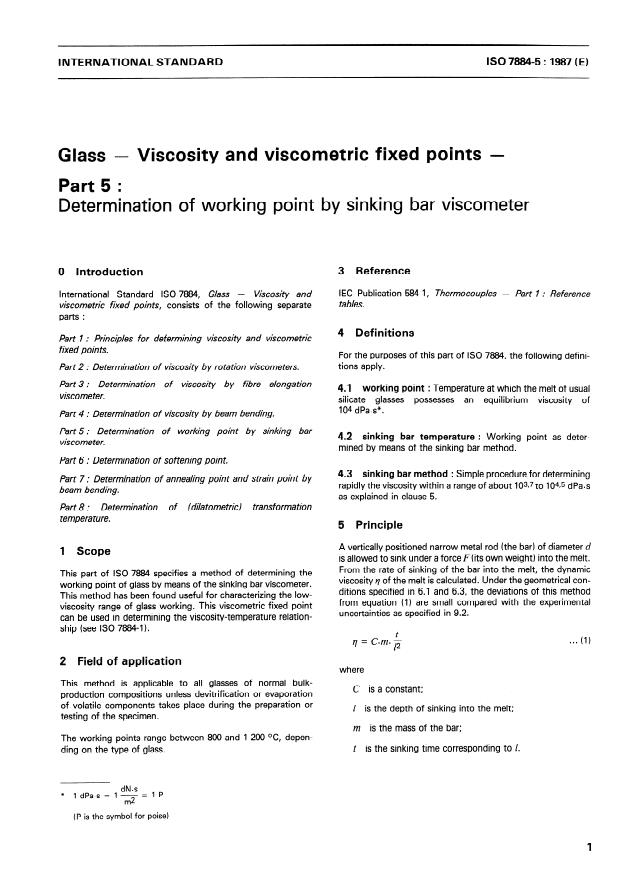
A vertically positioned narrow metal rod (the bar) of diameter d
1 Scope
is allowed to sink under a forte F (its own weight) into the melt.
From the rate of sinking of the bar into the melt, the dynamic
This part of ISO 7884 specifies a method of determining the
viscosity q of the melt is calculated. Under the geometrical con-
working Point of glass by means of the sinking bar viscometer.
ditions specified in 6.1 and 6.3, the deviations of this method
This method has been found useful for characterizing the low-
from equation (1) are small compared with the experimental
viscosity range of glass working. This viscometric fixed Point
uncertainties as specified in 9.2.
tan be used in determining the viscosity-temperature relation-
ship (sec ISO 7884-1).
t
. . . (1)
= Cm. 12
fl
2 Field of application
where
This method is applicable to all glasses of normal bulk-
C is a constant;
production compositions unless devitrification or evaporation
of volatile components takes place during the preparation or
I is the depth of sinking into the melt;
testing of the specimen.
m is the mass of the bar;
The working Points range between 800 and 1 200 OC, depen-
t is the sinking time corresponding to 1.
ding on the type of glass.
dN-s
* 1 dPa.s = 17 = 1 P
(P is the Symbol for Poise)
ISO 7884-5 : 1987 (El
The wires shall have a sufficient length within the furnace (with
If fixed values of the depth I and the mass m are specified, a
respect to heat conduction along the wires). Platinum-metal-
constant K for the bar may be defined according to
sheathed thermocouples should be preferred.
equation (2) :
. . . (2)
= K.t
fl
6.4.2 Control thermocouples should be located as close as
possible to the furnace windings for fast response. The
In this part of ISO 7884, the depth of sinking and the mass of
measurement thermocouple is placed near the wall of the cruci-
the bar are specified as I = 20 mm and m = 0,902 g, respec-
ble, dipping about 1 mm into the melt (sec figure 1). In accor-
tively.
dance with ISO 7884-1 the measurement thermocouple shall be
calibrated and the calibration checked regularly.
NOTE - The buoyancy acting upon the immersed part of the bar is
taken into account for the density of the reference glass used for
6.4.3 The electrical output of the thermocouples shall be
calibration (sec 6.1). The buoyancy correction for other values of glass
density is neglected. determined at zero current by means of potentiometers or high-
resistance electronie amplifiers having a sensitivity of 10 WV or
better. Precautions shall be taken that the ice-bath for the cold
junction is maintained at 0 OC throughout the test. If the
6 Apparatus
temperature measuring equipment is fitted with automatic cold
junction compensation, the ice-bath may be omitted.
6.1 Sinking bar
Bar made from platinum-rhodium alloy with a mass fraction of 6.5 Timer
rhodium between 0,2 and 0,3, with diameter 0,5 mm and mass
0,902 g (corresponding to a length between 240 and 245 mm The sinking time shall be measured by means of a stopwatch
depending upon the density of the platinum-rhodium alloy having scale intervals of 0,l s, or by an equivalent
timer.
used). The ends of the bar shall be hemispherical.
6.6 Other equipment
NOTE - With such a bar, for a viscosity of 104 dPa.s the time for
sinking to a depth of 20 mm is 60 s. This corresponds to a bar constant
necessary.
The following equipment is
K of about 140 to 170 dPas/s.
a) Clamp for handling and holding the bar.
For routine measurements it is convenient to have available
several bars made from the same batch of the alloy. Used bars
b) Ammeter for indicating the Position when the bar tip
shall be gently cleaned of adherent glass residues by sudden
touches the su rface of the melt.
heating and chilling, or by dissolving the glass in hydrofluoric
acid. Afterwards they shall be straightened before re-use.
c) Mirror scale for parallax-free reading for measuring the
depth of sinking of the bar; a groove should be ground in
6.2 Furnace
the mirror scale for gently guiding the upper end of the bar
with minimum friction.
Electrically heated tube furnace capable of achieving
temperatures up to 1 200 OC. The length of the heated tube
b
...


Questions, Comments and Discussion
Ask us and Technical Secretary will try to provide an answer. You can facilitate discussion about the standard in here.
Loading comments...