ISO 21283:2018
(Main)Iron ores — Determination of specific surface area — Test method using air-permeability apparatus (Blaine)
Iron ores — Determination of specific surface area — Test method using air-permeability apparatus (Blaine)
ISO 21283:2018 specifies a method to determine the fineness of iron ores in terms of specific surface area, using the manual Blaine air-permeability apparatus. ISO 21283:2018 is applicable to pellet feeds in the range of 400 cm2/g to 2 500 cm2/g of specific surface area.
Minerais de fer — Détermination de l'aire spécifique — Méthode d'essai utilisant un perméamètre (Blaine)
General Information
- Status
- Published
- Publication Date
- 20-Mar-2018
- Technical Committee
- ISO/TC 102/SC 3 - Physical testing
- Drafting Committee
- ISO/TC 102/SC 3 - Physical testing
- Current Stage
- 9093 - International Standard confirmed
- Start Date
- 21-Jun-2023
- Completion Date
- 12-Feb-2026
Relations
- Effective Date
- 06-Jun-2022
Overview
ISO 21283:2018 describes a standardized test method for determining the specific surface area (Blaine surface area, BSA) of iron ores, using the manual Blaine air‑permeability apparatus. The method applies to pellet feeds with a specific surface area in the range 400 cm2/g to 2 500 cm2/g. It provides a validated laboratory procedure for measuring fineness by drawing ambient air through a compressed bed of sample and relating airflow to surface area.
Key topics and requirements
- Principle: Air is drawn through a compacted test portion; the airflow rate and pressure drop are used to calculate Blaine specific area (BSA).
- Scope: Applicable to iron ore pellet feeds (merchant pellet feed materials) within the specified BSA range.
- Sampling & sample prep: Follows ISO 3082 sampling guidance; oven‑dry test samples at 105 °C ± 5 °C to constant mass, disaggregate and sieve (minus 1.0 mm and 0.150 mm fractions), and prepare at least four test portions.
- Apparatus: Manual Blaine permeability cell assembly including permeability cell, perforated disc, plunger, manometer (U‑tube), filter paper, timer, precision balance (0.001 g), thermometer, funnel and caliper. The standard gives specifications and tolerances for key parts.
- Calibration: Determine the equipment constant (K) using a certified reference material (CRM) with known density, porosity and specific surface. Cell volume can be measured by caliper or (if used) mercury - with explicit safety warnings about mercury handling.
- Procedure & calculations: Details for compacting test beds, timing permeability tests, calculating Blaine specific area (BSA), repeatability criteria and acceptance of results.
- Safety note: The document cautions about hazardous materials and safe laboratory practice when performing tests.
Applications and users
ISO 21283:2018 is used for:
- Quality control in mining, pellet production and beneficiation plants.
- Contract specifications and commercial trading of pellet feed where BSA is a contractual attribute.
- Research and development on iron ore grind/fineness and pelletization behaviour. Typical users include laboratory technicians, metallurgical QA/QC teams, pellet producers, mine laboratories, trade inspectors and standards organizations.
Related standards
- ISO 3082 - Iron ores: Sampling and sample preparation procedures
- ISO 11323 - Iron ore and direct reduced iron: Vocabulary
- ISO 12154 - Density determination by gas pycnometry (skeleton density)
Keywords: ISO 21283:2018, Blaine, specific surface area, iron ores, pellet feed, air‑permeability apparatus, permeability cell, calibration, CRM, BSA.
Get Certified
Connect with accredited certification bodies for this standard

Bureau Veritas Chile
Bureau Veritas certification services in Chile.

Bureau Veritas Peru
Bureau Veritas certification services in Peru.

BVQI Peru
Bureau Veritas certification in Peru.
Sponsored listings
Frequently Asked Questions
ISO 21283:2018 is a standard published by the International Organization for Standardization (ISO). Its full title is "Iron ores — Determination of specific surface area — Test method using air-permeability apparatus (Blaine)". This standard covers: ISO 21283:2018 specifies a method to determine the fineness of iron ores in terms of specific surface area, using the manual Blaine air-permeability apparatus. ISO 21283:2018 is applicable to pellet feeds in the range of 400 cm2/g to 2 500 cm2/g of specific surface area.
ISO 21283:2018 specifies a method to determine the fineness of iron ores in terms of specific surface area, using the manual Blaine air-permeability apparatus. ISO 21283:2018 is applicable to pellet feeds in the range of 400 cm2/g to 2 500 cm2/g of specific surface area.
ISO 21283:2018 is classified under the following ICS (International Classification for Standards) categories: 73.060.10 - Iron ores. The ICS classification helps identify the subject area and facilitates finding related standards.
ISO 21283:2018 has the following relationships with other standards: It is inter standard links to ISO 21805:2023. Understanding these relationships helps ensure you are using the most current and applicable version of the standard.
ISO 21283:2018 is available in PDF format for immediate download after purchase. The document can be added to your cart and obtained through the secure checkout process. Digital delivery ensures instant access to the complete standard document.
Standards Content (Sample)
INTERNATIONAL ISO
STANDARD 21283
First edition
2018-03
Iron ores — Determination of specific
surface area — Test method using air-
permeability apparatus (Blaine)
Minerais de fer — Détermination de l'aire spécifique — Méthode
d'essai utilisant un perméamètre (Blaine)
Reference number
©
ISO 2018
© ISO 2018
All rights reserved. Unless otherwise specified, or required in the context of its implementation, no part of this publication may
be reproduced or utilized otherwise in any form or by any means, electronic or mechanical, including photocopying, or posting
on the internet or an intranet, without prior written permission. Permission can be requested from either ISO at the address
below or ISO’s member body in the country of the requester.
ISO copyright office
CP 401 • Ch. de Blandonnet 8
CH-1214 Vernier, Geneva
Phone: +41 22 749 01 11
Fax: +41 22 749 09 47
Email: copyright@iso.org
Website: www.iso.org
Published in Switzerland
ii © ISO 2018 – All rights reserved
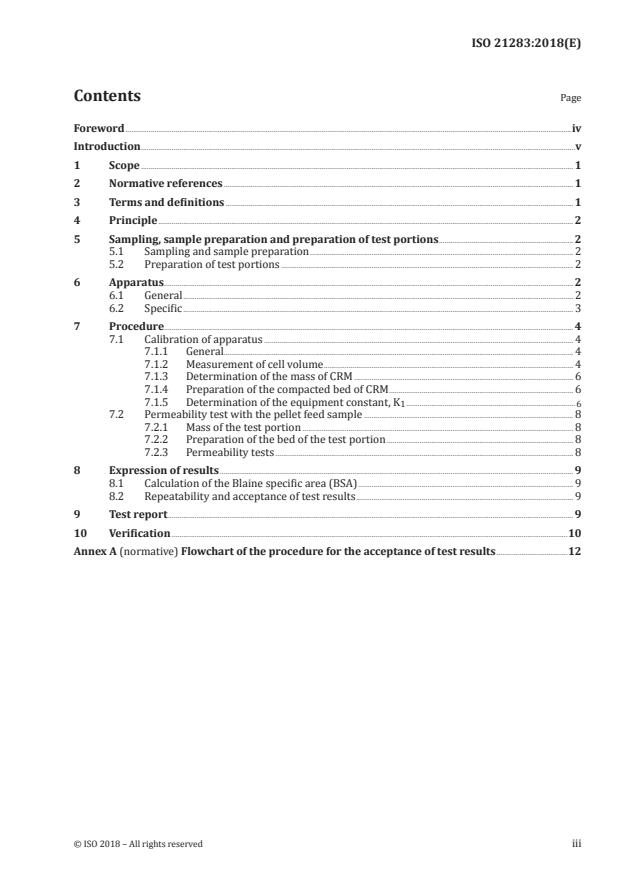
Contents Page
Foreword .iv
Introduction .v
1 Scope . 1
2 Normative references . 1
3 Terms and definitions . 1
4 Principle . 2
5 Sampling, sample preparation and preparation of test portions .2
5.1 Sampling and sample preparation . 2
5.2 Preparation of test portions . 2
6 Apparatus . 2
6.1 General . 2
6.2 Specific . 3
7 Procedure. 4
7.1 Calibration of apparatus . 4
7.1.1 General. 4
7.1.2 Measurement of cell volume . 4
7.1.3 Determination of the mass of CRM . 6
7.1.4 Preparation of the compacted bed of CRM . 6
7.1.5 Determination of the equipment constant, K .
1 6
7.2 Permeability test with the pellet feed sample . 8
7.2.1 Mass of the test portion . 8
7.2.2 Preparation of the bed of the test portion . 8
7.2.3 Permeability tests . 8
8 Expression of results . 9
8.1 Calculation of the Blaine specific area (BSA) . 9
8.2 Repeatability and acceptance of test results . 9
9 Test report . 9
10 Verification .10
Annex A (normative) Flowchart of the procedure for the acceptance of test results .12
Foreword
ISO (the International Organization for Standardization) is a worldwide federation of national standards
bodies (ISO member bodies). The work of preparing International Standards is normally carried out
through ISO technical committees. Each member body interested in a subject for which a technical
committee has been established has the right to be represented on that committee. International
organizations, governmental and non-governmental, in liaison with ISO, also take part in the work.
ISO collaborates closely with the International Electrotechnical Commission (IEC) on all matters of
electrotechnical standardization.
The procedures used to develop this document and those intended for its further maintenance are
described in the ISO/IEC Directives, Part 1. In particular the different approval criteria needed for the
different types of ISO documents should be noted. This document was drafted in accordance with the
editorial rules of the ISO/IEC Directives, Part 2 (see www .iso .org/ directives).
Attention is drawn to the possibility that some of the elements of this document may be the subject of
patent rights. ISO shall not be held responsible for identifying any or all such patent rights. Details of
any patent rights identified during the development of the document will be in the Introduction and/or
on the ISO list of patent declarations received (see www .iso .org/ patents).
Any trade name used in this document is information given for the convenience of users and does not
constitute an endorsement.
For an explanation on the voluntary nature of standards, the meaning of ISO specific terms and
expressions related to conformity assessment, as well as information about ISO's adherence to the
World Trade Organization (WTO) principles in the Technical Barriers to Trade (TBT) see the following
URL: www .iso .org/ iso/ foreword .html.
This document was prepared by Technical Committee ISO/TC 102, Iron ore and direct reduced iron,
Subcommittee SC 3, Physical testing.
iv © ISO 2018 – All rights reserved
Introduction
The international trade in pellet feeds as a merchant commodity is increasing rapidly and their specific
surface is one of the most important specifications required in commercial contracts. This has led to
the need for the development of an international test method to measure the specific surface area of
pellet feeds.
This document concerns one of a number of test methods that have been developed to measure various
characteristics of iron ores. This method was developed to provide a uniform procedure, validated by
collaborative testing, to facilitate comparisons of tests made in different laboratories.
This document can be used to provide test results as part of a production quality control system, as a
basis of a contract, or as part of a research project.
NOTE Automated test methods may be used provided that preliminary test results give similar results to
the manual method within the repeatability, r, specified in 8.2.
INTERNATIONAL STANDARD ISO 21283:2018(E)
Iron ores — Determination of specific surface area — Test
method using air-permeability apparatus (Blaine)
CAUTION — This document can involve the use of hazardous materials, operations and
equipment. This document does not purport to address all of the safety issues associated with
its use. It is the responsibility of the user of this document to establish appropriate safety and
health practices prior to its use.
1 Scope
This document specifies a method to determine the fineness of iron ores in terms of specific surface
area, using the manual Blaine air-permeability apparatus.
2 2
This document is applicable to pellet feeds in the range of 400 cm /g to 2 500 cm /g of specific
surface area.
2 Normative references
The following documents are referred to in the text in such a way that some or all of their content
constitutes requirements of this document. For dated references, only the edition cited applies. For
undated references, the latest edition of the referenced document (including any amendments) applies.
ISO 3082, Iron ores — Sampling and sample preparation procedures
ISO 11323, Iron ore and direct reduced iron — Vocabulary
ISO 12154, Determination of density by volumetric displacement — Skeleton density by gas pycnometry
3 Terms and definitions
For the purposes of this document, the terms and definitions given in ISO 11323 and the following apply.
ISO and IEC maintain terminological databases for use in standardization at the following addresses:
— IEC Electropedia: available at http:// www .electropedia .org/
— ISO Online browsing platform: available at https:// www .iso .org/ obp
3.1
Blaine surface area
BSA
whole area of surface of pellet feed particles per mass unit
Note 1 to entry: Generally expressed as cm /g.
3.2
pellet feed
iron ore fines traded for pellet production
Note 1 to entry: Usually containing at least 80 % under 0,150 mm.
3.3
skeleton density
ratio between sample mass and the volume of the sample including the volume of closed pores (if
present) but excluding the volumes of open pores as well as that of void spaces between particles within
the bulk sample
3.4
bed porosity
ratio of the volume of voids in the bed to the bulk volume of the bed sample
4 Principle
Ambient air is drawn through a compressed test portion of known porosity. The specific surface area of
the pellet feed is determined based on the rate of airflow through the test portion.
5 Sampling, sample preparation and preparation of test portions
5.1 Sampling and sample preparation
Sampling of a lot and preparation of a test sample shall be in accordance with ISO 3082.
A test sample of at least 300 g, on a dry basis, of the material shall be obtained.
5.2 Preparation of test portions
Oven-dry the test sample to constant mass at 105 °C ± 5 °C. Cool it to room temperature.
NOTE 1 Constant mass is achieved when the difference in mass between two subsequent measurements
becomes less than 0,05 % of the initial mass of the test sample.
Disaggregate the whole test sample by sieving it on a 1,0 mm sieve or the nearest aperture. Obtain
about 50 g of the minus 1,0 mm material. This is the partial test sample. Disaggregate it on a 0,150 mm
sieve. Mix and homogenize the material retained and passing on the 0,150 mm sieve.
NOTE 2 Manual methods of division recommended in ISO 3082, such as riffling, can be applied to obtain the
test portions.
The mass of each test portion shall be calculated in accordance with 7.2.1.
At least four test portions shall be obtained from the partial test sample. Take several increments using
a non-magnetic spatula and weigh to the nearest 0,01 g.
6 Apparatus
6.1 General
The test apparatus shall comprise the following:
a) ordinary laboratory equipment, such as oven, hand tools, time control device and safety equipment;
b) permeability cell;
c) disk;
d) plunger;
e) filter paper;
f) manometer;
2 © ISO 2018 – All rights reserved
g) timer;
h) caliper rule;
i) weighing device.
Figure 1 shows an example of a manual Blaine air-permeability apparatus.
6.2 Specific
6.2.1 Permeability cell, a tube made of non-scaling metal with internal diameter of 12,70 mm ± 0,10 mm.
The ending of the external tube wall shall have a width of 0,81 µm. A ledge of 0,5 mm to 1,0 mm width
for supporting the perforated disc (6.2.2) shall be firmly fixed in the tube internal wall so that its upper
surface is 55 mm ± 10 mm distant from the tube upper end. The lower portion of the external wall of
the tube shall be standard-taper male coupling to form an airtight fit with the upper end (taper female
coupling) of the manometer. The upper end of the tube shall be externally fitted with a prominent collar.
6.2.2 Perforated disc, made of non-scaling metal with thickness of 0,9 mm ± 0,1 mm, diameter 0,1 mm
less than the cell internal diameter and with 30 to 40 holes of 1,0 mm in diameter equally distributed
over its area. When placed on the cell ledge the disc shall fit the inside of the cell and its surfaces firmly.
The downward side of the disc shall be marked.
6.2.3 Plunger, a compact straight cylinder made of non-scaling metal, with diameter 0,1 mm less than
the cell internal diameter, with an air vent slot of a width of 3,0 mm ± 0,3 mm on one of its sides and a
collar on the top end. The cylinder length shall be such that when the plunger is placed in the cell and its
collar brought in contact with the top of the cell, the distance between the base of the cylinder and the
top of the perforated disc shall be 15 mm ± 1 mm.
6.2.4 Manometer, a transparent glass U-tube with outside diameter of 9 mm, vertically mounted,
having one of its arms with a side outlet at 250 mm to 305 mm above the bottom of the manometer
provided with a positive airtight valve or clamp 50 mm distant from the manometer arm. The top end of
the arm to which this side outlet is connected shall be a standard-taper female coupling to receive and
form an airtight connection with standard-taper male coupling of the permeability cell base. This arm
shall have four midpoint lines etched around the tube: the lowest at 125 mm to 145 mm below the side
outlet tie-in, and the others at 15 mm ± 1 mm, 70 mm ± 1 mm, and 110 mm ± 1 mm above the lowest line.
The manometer shall be filled to the lowest line level with a non-volatile, non-corrosive, non-hygroscopic
liquid of low viscosity and density and free of debris (e.g. a light grade mineral oil). To lift the oil column
the air from the manometer can be evacuated using, normally, a flexible tube with a rubber pear that
shall be connected to the free end of the side outlet. Alternatively, the oil column can be lifted by pushing
the air in the other branch of the manometer using a pressure device, such as a syringe.
6.2.5 Filter paper, medium-texture, circular, with smooth edges, with the same diameter as the inside
of the cell.
6.2.6 Timer, capable of being rea
...


Questions, Comments and Discussion
Ask us and Technical Secretary will try to provide an answer. You can facilitate discussion about the standard in here.
Loading comments...