ISO 5636-6:2015
(Main)Paper and board — Determination of air permeance (medium range) — Part 6: Oken method
Paper and board — Determination of air permeance (medium range) — Part 6: Oken method
ISO 5636-6:2015 specifies the Oken method for determining the air permeance and air resistance of paper and board. There is no limitation on the measuring range of air permeance or air resistance of papers and boards. It is unsuitable for rough-surfaced materials, which cannot be securely clamped to avoid leakage.
Papier et carton — Détermination de la perméabilité à l'air (plage de valeurs moyennes) — Partie 6: Méthode Oken
General Information
- Status
- Published
- Publication Date
- 07-May-2015
- Technical Committee
- ISO/TC 6/SC 2 - Test methods and quality specifications for paper and board
- Current Stage
- 9093 - International Standard confirmed
- Start Date
- 24-Mar-2026
- Completion Date
- 28-Mar-2026
Relations
- Referred By
EN ISO 5270:2022 - Pulps - Laboratory sheets - Determination of physical properties (ISO 5270:2022) - Effective Date
- 09-Feb-2026
Overview
ISO 5636-6:2015 specifies the Oken method for determining the air permeance and air resistance of paper and board. The standard defines the test principle, apparatus (water-column and electronic sensor Oken testers), sampling, conditioning, calibration and test procedure, and how to express results. It covers a wide measuring range for medium-range permeance and resistance but is unsuitable for rough-surfaced materials that cannot be securely clamped.
Keywords: ISO 5636-6:2015, Oken method, air permeance, air resistance, paper and board testing, Oken tester.
Key topics and technical requirements
- Test principle: A test piece is clamped under a circular gasket; air flows through a controlled capillary into the space between capillary and specimen. The resulting pressure is measured and converted to air permeance or air resistance.
- Apparatus types:
- Water-column Oken tester: uses a water-column manometer and a constant-pressure chamber maintained at about 4.90 kPa (≈500 mmH2O); includes a capillary (≈0.4 mm inner diameter, ~54 mm length adjusted for calibration) and specific gasket dimensions.
- Electronic sensor Oken tester: replaces the water-column with an electronic pressure sensor, amplifier and digital display.
- Gasket and measurement area: standard gasket geometry and hardness are specified to ensure a reproducible measurement area and prevent leakage.
- Sampling & conditioning: sampling per ISO 186; conditioning per ISO 187; test pieces prepared in the same atmosphere as conditioning.
- Test piece count & sides: at least 10 test pieces (commonly five measurements with each side up); report means for both sides and overall.
- Calibration & leakage checks: zero-pressure verification, capillary adjustment, and leak tests using impermeable sheets are required.
- Result units: air permeance reported as micrometres per pascal second (μm/(Pa·s) or ml/(m·Pa·s)); air resistance as seconds per 100 ml (s/100 ml).
- Annexes: includes measurement principle relations (Oken vs Gurley) and precision data.
Applications and who uses it
- Paper and board manufacturers use ISO 5636-6 for quality control of porosity related to printing, coating, converting and packaging performance.
- Converters and printers assess air flow properties that affect ink transfer, drying and runnability.
- R&D and materials labs characterize new substrates and compare permeance between grades.
- Test houses and certification bodies perform standardized, repeatable assessments for specifications and compliance.
Practical considerations: choose the water-column or electronic Oken tester based on throughput and precision needs; avoid testing highly textured or rough materials that cannot be clamped without leakage.
Related standards
- ISO 5636 series (other methods): Part 3 (Bendtsen), Part 4 (Sheffield), Part 5 (Gurley)
- ISO 186 (sampling), ISO 187 (conditioning), ISO 48 (rubber hardness)
- Annexes in ISO 5636-6: measurement principle and precision data for method comparison and uncertainty assessment
This standard is essential for consistent, repeatable measurement of air permeance and resistance in paper and board using the Oken tester.
Get Certified
Connect with accredited certification bodies for this standard

Control Union Certifications
Global certification for agriculture and sustainability.

Gozdarski inštitut Slovenije
Slovenian Forestry Institute. Forest management certification support, timber testing.
Sponsored listings
Frequently Asked Questions
ISO 5636-6:2015 is a standard published by the International Organization for Standardization (ISO). Its full title is "Paper and board — Determination of air permeance (medium range) — Part 6: Oken method". This standard covers: ISO 5636-6:2015 specifies the Oken method for determining the air permeance and air resistance of paper and board. There is no limitation on the measuring range of air permeance or air resistance of papers and boards. It is unsuitable for rough-surfaced materials, which cannot be securely clamped to avoid leakage.
ISO 5636-6:2015 specifies the Oken method for determining the air permeance and air resistance of paper and board. There is no limitation on the measuring range of air permeance or air resistance of papers and boards. It is unsuitable for rough-surfaced materials, which cannot be securely clamped to avoid leakage.
ISO 5636-6:2015 is classified under the following ICS (International Classification for Standards) categories: 85.060 - Paper and board. The ICS classification helps identify the subject area and facilitates finding related standards.
ISO 5636-6:2015 has the following relationships with other standards: It is inter standard links to EN ISO 5270:2022. Understanding these relationships helps ensure you are using the most current and applicable version of the standard.
ISO 5636-6:2015 is available in PDF format for immediate download after purchase. The document can be added to your cart and obtained through the secure checkout process. Digital delivery ensures instant access to the complete standard document.
Standards Content (Sample)
INTERNATIONAL ISO
STANDARD 5636-6
First edition
2015-05-01
Paper and board — Determination of
air permeance (medium range) —
Part 6:
Oken method
Papier et carton — Détermination de la perméabilité à l’air (plage de
valeurs moyennes) —
Partie 6: Méthode Oken
Reference number
©
ISO 2015
© ISO 2015, Published in Switzerland
All rights reserved. Unless otherwise specified, no part of this publication may be reproduced or utilized otherwise in any form
or by any means, electronic or mechanical, including photocopying, or posting on the internet or an intranet, without prior
written permission. Permission can be requested from either ISO at the address below or ISO’s member body in the country of
the requester.
ISO copyright office
Ch. de Blandonnet 8 • CP 401
CH-1214 Vernier, Geneva, Switzerland
Tel. +41 22 749 01 11
Fax +41 22 749 09 47
copyright@iso.org
www.iso.org
ii © ISO 2015 – All rights reserved
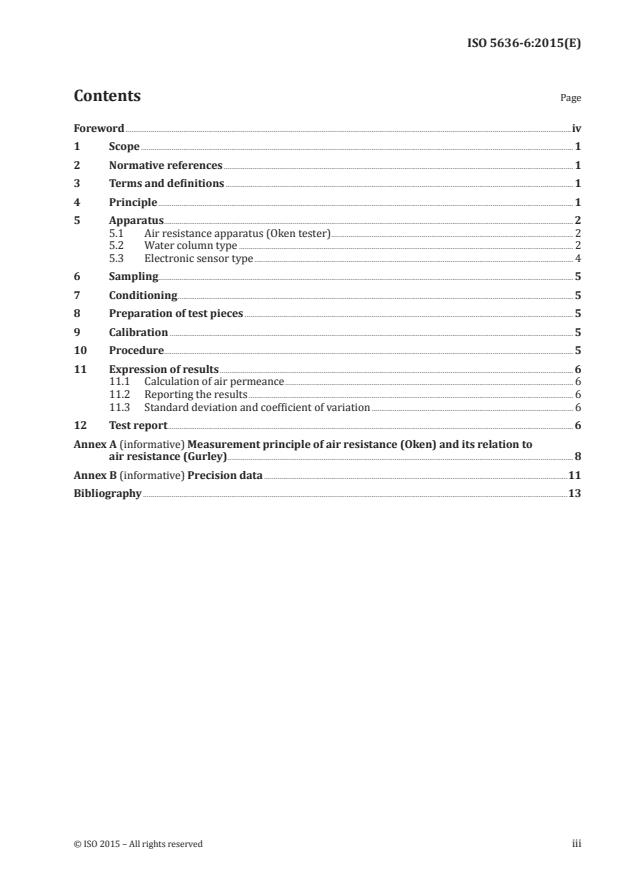
Contents Page
Foreword .iv
1 Scope . 1
2 Normative references . 1
3 Terms and definitions . 1
4 Principle . 1
5 Apparatus . 2
5.1 Air resistance apparatus (Oken tester) . 2
5.2 Water column type . 2
5.3 Electronic sensor type . 4
6 Sampling . 5
7 Conditioning . 5
8 Preparation of test pieces . 5
9 Calibration . 5
10 Procedure. 5
11 Expression of results . 6
11.1 Calculation of air permeance . 6
11.2 Reporting the results . 6
11.3 Standard deviation and coefficient of variation . 6
12 Test report . 6
Annex A (informative) Measurement principle of air resistance (Oken) and its relation to
air resistance (Gurley) . 8
Annex B (informative) Precision data .11
Bibliography .13
Foreword
ISO (the International Organization for Standardization) is a worldwide federation of national standards
bodies (ISO member bodies). The work of preparing International Standards is normally carried out
through ISO technical committees. Each member body interested in a subject for which a technical
committee has been established has the right to be represented on that committee. International
organizations, governmental and non-governmental, in liaison with ISO, also take part in the work.
ISO collaborates closely with the International Electrotechnical Commission (IEC) on all matters of
electrotechnical standardization.
The procedures used to develop this document and those intended for its further maintenance are
described in the ISO/IEC Directives, Part 1. In particular the different approval criteria needed for the
different types of ISO documents should be noted. This document was drafted in accordance with the
editorial rules of the ISO/IEC Directives, Part 2 (see www.iso.org/directives).
Attention is drawn to the possibility that some of the elements of this document may be the subject of
patent rights. ISO shall not be held responsible for identifying any or all such patent rights. Details of
any patent rights identified during the development of the document will be in the Introduction and/or
on the ISO list of patent declarations received (see www.iso.org/patents).
Any trade name used in this document is information given for the convenience of users and does not
constitute an endorsement.
For an explanation on the meaning of ISO specific terms and expressions related to conformity
assessment, as well as information about ISO’s adherence to the WTO principles in the Technical Barriers
to Trade (TBT) see the following URL: Foreword - Supplementary information
The committee responsible for this document is ISO/TC 6, Paper, board and pulps, Subcommittee SC 2,
Test methods and quality specifications for paper and board.
ISO 5636 consists of the following parts, under the general title Paper and board — Determination of air
permeance (medium range):
— Part 3: Bendtsen method
— Part 4: Sheffield method
— Part 5: Gurley method
— Part 6: Oken method
NOTE 1 Part 1: General method will be withdrawn after parts 3, 4, and 5 have been revised and published, as it
was considered redundant.
NOTE 2 Part 2: Schopper method was withdrawn in 2006 as it was considered obsolete.
iv © ISO 2015 – All rights reserved
INTERNATIONAL STANDARD ISO 5636-6:2015(E)
Paper and board — Determination of air permeance
(medium range) —
Part 6:
Oken method
1 Scope
This part of ISO 5636 specifies the Oken method for determining the air permeance and air resistance
of paper and board. There is no limitation on the measuring range of air permeance or air resistance of
papers and boards. It is unsuitable for rough-surfaced materials, which cannot be securely clamped to
avoid leakage.
2 Normative references
The following documents, in whole or in part, are normatively referenced in this document and are
indispensable for its application. For dated references, only the edition cited applies. For undated
references, the latest edition of the referenced document (including any amendments) applies.
ISO 48, Rubber, vulcanized or thermoplastic — Determination of hardness (hardness between 10 IRHD and
100 IRHD)
ISO 186, Paper and board — Sampling to determine average quality
ISO 187, Paper, board and pulps — Standard atmosphere for conditioning and testing and procedure for
monitoring the atmosphere and conditioning of samples
3 Terms and definitions
For the purposes of this document, the following terms and definitions apply.
3.1
air permeance
mean air flow rate through unit area under unit pressure difference in unit time, under specified
conditions
Note 1 to entry: Air permeance is expressed in micrometres per pascal second [1 ml/(m Pa · s) = 1 μm/(Pa · s)].
Note 2 to entry: This property is called air permeance and not air permeability because it is reported as a sheet
property and is not normalized with respect to thickness to give a material property per unit thickness.
3.2
air resistance
time required for a specific volume of air under unit pressure to pass through unit area
Note 1 to entry: Air resistance is expressed in seconds per 100 millilitres (s/100 ml).
4 Principle
A test piece is clamped between a circular gasket and an annular flat surface of known dimensions. The
absolute pressure on one side of the test piece is equivalent to atmospheric pressure. The air pressure
on the inlet side of a narrow capillary of controlled dimensions is maintained at a constant value above
atmospheric pressure. The air passes through the capillary and then the test piece. The air pressure
between the capillary and test piece depends on the permeance of the test piece. It is measured and
converted to air permeance.
5 Apparatus
5.1 Air resistance apparatus (Oken tester)
Use either the water column type described in 5.2 or the electronic sensor type described in 5.3.
5.2 Water column type
5.2.1 The water column type (see Figure 1), consists of an air compressor (5.2.1.2), filter water column
regulator (5.2.1.3), capillary (5.2.1.3), water column manometer (5.2.1.4), measuring head (5.2.1.1), and
scale plate (5.2.1.4).
5.2.1.1 The measuring head, consists of clamping plates and a rubber gasket. The clamping plates are
at the base of the apparatus and connected to the pressure measuring chamber by a tube. The equipment
shall have a means of tightening the clamping plates together which might be a capstan (jackscrew)
arrangement or a pneumatic system. The recommended clamping force is (180 ± 30) N. This mechanism
provides a technique to give uniform loading and thus minimize the operator influence on the test. A
controlled clamping force is the preferred method of clamping the test piece.
A rubber gasket is inserted concentrically into a groove in the upper surface of the lower clamping plate
to prevent leakage of air between the surface of the paper and the clamping plate. The gasket consists
of a thin, elastic, non-oxidizing material, having a smooth surface, rectangular cross section, a thickness
of 1,5 mm to 2,0 mm, and a hardness of (50 ± 10) IRHD (international rubber hardness degrees) in
accordance with ISO 48. The inside diameter of the gasket is (28,3 ± 0,3) mm and the outside diameter
is (34,5 ± 0,5) mm.
The aperture of the gasket is concentrically aligned with the aperture in the clamping plates. To align and
protect the gasket in use, it is cemented to a groove machined in the lower clamping plate. The groove
is concentric with the aperture in the opposing plate, has an internal diameter of (28,60 ± 0,15) mm
and an outside diameter of (35,5 ± 0,5) mm. The depth of the groove with a square bottom shall be
(0,5 ± 0,1) mm less than the thickness of the gasket when mounted. The gasket, when mounted inside
the concentric groove, defines the measurement area (642 mm area). The gasket should be changed at
regular intervals.
5.2.1.2 The air compressor and regulator, supply compressed and filtered air. The air is controlled to
approximately 10 kPa by the air regulator.
5.2.1.3 The filter water column regulator and capillary, provide a constant pressure. The filter
water column regulator consists of a water tank with an internal diameter of approximately 100 mm and
a height of approximately 700 mm and a constant pressure chamber with a side tube. The open end of the
side tube is (500 ± 0,5) mm below the water surface.
The air at approximately 10 kPa introduced into the constant pressure chamber is controlled to
(4,90 ± 0,01) kPa [(500 ± 1) mmH O] and transferred to the pressure measuring chamber through the
capillary.
The capillary consists of a narrow tube made of stainless material with an inner diameter of approximately
0,4 mm and a length of approximately 54 mm. The capillary length shall be strictly adjusted so that
the time required for the passage of 100 ml of air through the capillary under a pressure difference of
1,23 kPa is equal to 100 s (see A.2 for adjustment of the capillary length).
2 © ISO 2015 – All rights reserved
5.2.1.4 The water column manometer and scale plate, comprise the pressure measurement system.
The water column manometer is connected to the water tank at a depth greater than 500 mm below
the surface of the water in the water tank by a pipe with a diameter large enough (with a minimum of
3 mm) to allow water to transfer smoothly between the manometer and water tank. The manometer is
connected to the measuring head and capillary. The scale plate for reading air resistance is marked in the
units of seconds per 100 millilitres. The scale shall cover the range 0 s to 5 000 s with a scale reading of 0
at a pressure drop of zero (0 mmH O), a scale reading of 100 s/100 ml at the midpoint 250 mm below the
surface level in the tank and infinity (∞) at a pressure of 4,90 kPa (500 mmH O).
NOTE High or low air resistance types of Oken tester with different capillary dimensions or measurement
areas are available for shorter measurement time or higher precision. However, these types of Oken tester are out
of the scope of this part of ISO 5636.
Key
1 air compressor 8 scale plate
2 filter 9 test piece
3 regulator 10 measuring head
4 filter water column regulator/constant pressure chamber 11 example of scale plate
5 capillary p approximately 10 kPa
6 water column manometer/pressure measuring chamber p 4,90 kPa
7 water tank
Figure 1 — Diagram of water column type Oken tester
5.3 Electronic sensor type
5.3.1 The electronic sensor type (see Figure 2), consists of a measuring head (5.3.1.1), air compressor
(5.3.1.2), filter, regulator (5.3.1.2), capillary (5.3.1.3), pressure sensor (5.3.1.4), sensor amplifier (5.3.1.4),
and digital display (5.3.1.4).
5.3.1.1 The measuring head, consists of clamping plates and a rubber gasket. The structure is the
same as the measuring head (5.2.1.1) for the water column type.
5.3.1.2 The air compressor and regulator, are the same as the air supply system (5.2.1.2). The
regulator controls air directly to (4,90 ± 0,01) kPa [(500 ± 1) mmH O].
5.3.1.3 The constant pressure chamber and capillary, are the same as those for the w
...


Questions, Comments and Discussion
Ask us and Technical Secretary will try to provide an answer. You can facilitate discussion about the standard in here.
Loading comments...