ISO 15341:2014
(Main)Graphic technology — Method for radius determination of printing cylinders
Graphic technology — Method for radius determination of printing cylinders
ISO 15341:2014 defines a method for measuring the external radius of printing cylinders, specifies critical parameters and operational instructions and provides recommendations for instrument design.
Technologie graphique — Méthode de mesure du rayon de cylindres d'impression
General Information
- Status
- Published
- Publication Date
- 30-Nov-2014
- Technical Committee
- ISO/TC 130 - Graphic technology
- Drafting Committee
- ISO/TC 130/WG 4 - Media and materials
- Current Stage
- 9093 - International Standard confirmed
- Start Date
- 11-Sep-2025
- Completion Date
- 12-Feb-2026
Overview - ISO 15341:2014 (Graphic technology)
ISO 15341:2014 specifies a reproducible method for radius determination of printing cylinders used in graphic technology. The standard defines the measurement principle, critical parameters, calibration, and operational procedures for reliably measuring the external radius of cylinders and sleeves (notably mid-web flexographic sleeves). It also provides recommendations for instrument design and includes normative and informative annexes for specific applications and technical drawings.
Key technical topics and requirements
- Measurement principle: A mechanical frame with two flat active surfaces set at a precise frame angle supports a high‑precision indicator. The indicator measures a distance h that is converted to the cylinder radius R using a formula based on the frame angle.
- Device design: Critical parameters (frame angle, active surface dimensions, centre-of-mass position, total weight, indicator movement range, calibration-ring diameter) are listed; application-specific aims/tolerances are given in Annex A.
- Indicator requirements: Precision ≥ 0.001 mm, accuracy ≥ 0.003 mm, measuring force < 1.8 N, operating temperature 10 °C–40 °C, and a flat hard-metal tip Ø 6.5 mm.
- Materials & surfaces: Active surfaces require surface finish Ra ≥ 0.8 µm (ISO 4287) and abrasion/corrosion protection equivalent to ≥ 1 100 HV30 (ISO 6507-1); electroless nickel plating (≈15 μm) is an example. Thermal expansion limits and mass tolerances are specified per annex.
- Calibration & procedure: A calibration tool (ring) approximating the mid-range diameter is used. For out‑of‑roundness assessment, at least three measurements are recommended, rotating the cylinder by 60° between readings.
- Annexes: Annex A (normative) targets mid-web flexographic sleeves (repeat ranges and tolerances); Annex B (informative) supplies technical drawings and component suggestions.
Practical applications and who uses this standard
ISO 15341:2014 is intended for:
- Flexographic sleeve manufacturers and suppliers (ensuring sleeve dimensional consistency)
- Printing press OEMs and maintenance teams (cylinder/sleeve verification)
- Quality control and metrology labs in packaging and web-printing operations
- Converters and prepress shops concerned with print repeat accuracy and registration
Benefits include operator‑independent measurements, improved repeatability and traceability compared with handheld micrometers, and a standardized approach for detecting radius variation and out‑of‑roundness that can affect print quality and packaging fit.
Related standards
Normative references include:
- ISO 1101 (geometrical tolerancing)
- ISO 4287 (surface texture - profile method)
- ISO 6507-1 (Vickers hardness test)
- ISO 12637-1 (graphic technology vocabulary)
Keywords: ISO 15341:2014, radius determination, printing cylinders, flexographic sleeves, measurement device, calibration, graphic technology, cylinder radius measurement, out-of-roundness.
Frequently Asked Questions
ISO 15341:2014 is a standard published by the International Organization for Standardization (ISO). Its full title is "Graphic technology — Method for radius determination of printing cylinders". This standard covers: ISO 15341:2014 defines a method for measuring the external radius of printing cylinders, specifies critical parameters and operational instructions and provides recommendations for instrument design.
ISO 15341:2014 defines a method for measuring the external radius of printing cylinders, specifies critical parameters and operational instructions and provides recommendations for instrument design.
ISO 15341:2014 is classified under the following ICS (International Classification for Standards) categories: 37.100.10 - Reproduction equipment. The ICS classification helps identify the subject area and facilitates finding related standards.
ISO 15341:2014 is available in PDF format for immediate download after purchase. The document can be added to your cart and obtained through the secure checkout process. Digital delivery ensures instant access to the complete standard document.
Standards Content (Sample)
INTERNATIONAL ISO
STANDARD 15341
First edition
2014-12-01
Graphic technology — Method for
radius determination of printing
cylinders
Technologie graphique — Méthode de mesure du rayon de cylindres
d’impression
Reference number
©
ISO 2014
© ISO 2014
All rights reserved. Unless otherwise specified, no part of this publication may be reproduced or utilized otherwise in any form
or by any means, electronic or mechanical, including photocopying, or posting on the internet or an intranet, without prior
written permission. Permission can be requested from either ISO at the address below or ISO’s member body in the country of
the requester.
ISO copyright office
Case postale 56 • CH-1211 Geneva 20
Tel. + 41 22 749 01 11
Fax + 41 22 749 09 47
E-mail copyright@iso.org
Web www.iso.org
Published in Switzerland
ii © ISO 2014 – All rights reserved
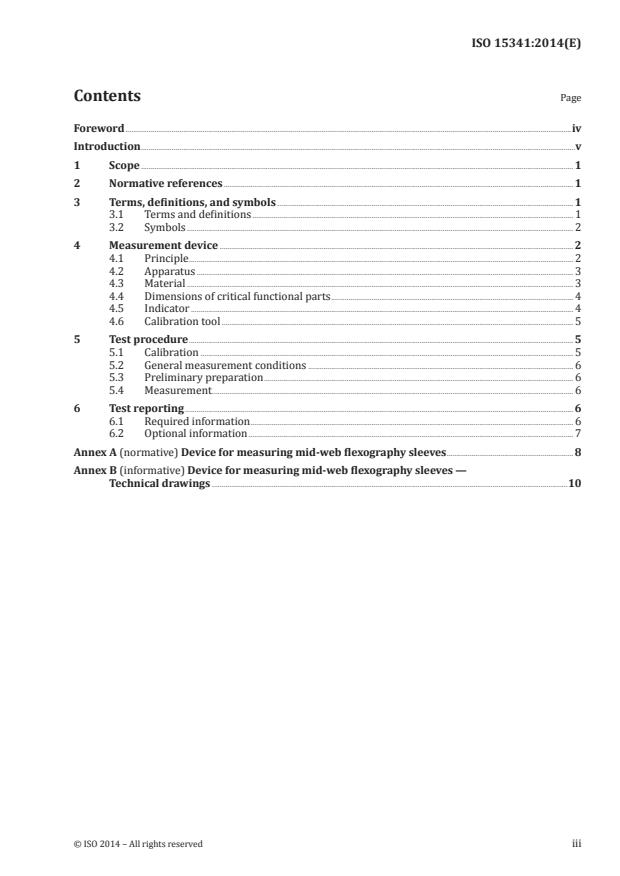
Contents Page
Foreword .iv
Introduction .v
1 Scope . 1
2 Normative references . 1
3 Terms, definitions, and symbols . 1
3.1 Terms and definitions . 1
3.2 Symbols . 2
4 Measurement device . 2
4.1 Principle . 2
4.2 Apparatus . 3
4.3 Material . 3
4.4 Dimensions of critical functional parts . 4
4.5 Indicator . 4
4.6 Calibration tool . 5
5 Test procedure . 5
5.1 Calibration . 5
5.2 General measurement conditions . 6
5.3 Preliminary preparation . 6
5.4 Measurement . 6
6 Test reporting . 6
6.1 Required information . 6
6.2 Optional information . 7
Annex A (normative) Device for measuring mid-web flexography sleeves .8
Annex B (informative) Device for measuring mid-web flexography sleeves —
Technical drawings .10
Foreword
ISO (the International Organization for Standardization) is a worldwide federation of national standards
bodies (ISO member bodies). The work of preparing International Standards is normally carried out
through ISO technical committees. Each member body interested in a subject for which a technical
committee has been established has the right to be represented on that committee. International
organizations, governmental and non-governmental, in liaison with ISO, also take part in the work.
ISO collaborates closely with the International Electrotechnical Commission (IEC) on all matters of
electrotechnical standardization.
The procedures used to develop this document and those intended for its further maintenance are
described in the ISO/IEC Directives, Part 1. In particular the different approval criteria needed for the
different types of ISO documents should be noted. This document was drafted in accordance with the
editorial rules of the ISO/IEC Directives, Part 2 (see www.iso.org/directives).
Attention is drawn to the possibility that some of the elements of this document may be the subject of
patent rights. ISO shall not be held responsible for identifying any or all such patent rights. Details of
any patent rights identified during the development of the document will be in the Introduction and/or
on the ISO list of patent declarations received (see www.iso.org/patents).
Any trade name used in this document is information given for the convenience of users and does not
constitute an endorsement.
For an explanation on the meaning of ISO specific terms and expressions related to conformity
assessment, as well as information about ISO’s adherence to the WTO principles in the Technical Barriers
to Trade (TBT) see the following URL: Foreword - Supplementary information
The committee responsible for this document is ISO/TC 130, Graphic technology.
iv © ISO 2014 – All rights reserved
Introduction
Although the external radius of the cylinders used in offset presses is fixed by the design of the printing
press, there are applications in flexography and gravure printing where the diameter of individual
cylinders is critical for the final result and has to be determined. This International Standard provides a
recommended device and procedure to accomplish such measurements.
The body of this International Standard describes the operational principles and general requirements,
including all relevant parameters necessary for the functional design. Different areas of application
are covered in different annexes. For each particular application, a normative annex contains the set
of critical parameters and a corresponding informative annex contains a set of technical drawings
to be utilized in the creation of a suitable device. Functional variables are defined in the body of this
International Standard and the aims and tolerances for each targeted application are given in the
applicable normative annex.
Standard hand-held micrometers have traditionally been used for checking and determining the
radius of printing cylinders. Because the micrometer positioning on a cylinder surface is normally
carried out by a human operator, problems with poor repeatability, low precision, and weak reliability
of the measurements have been reported. The test method and subsequent device(s) described in the
present International Standard represent a cost-efficient, reliable, and operator-independent means of
determining the radius of printing cylinders.
The normative annex included in this International Standard defines a particular methodology for
measuring the external radius of flexographic printing sleeves and the informative annex provides
guidance for the physical design of the instrument.
Sleeves are the structural, mechanical, and dimensional base of a printing forme for different web
printing methods. Flexographic printing plates are assembled/mounted on the surface of a sleeve to
create a printing forme. Dimensional variations of a sleeve radius can lead to length variations of the
printed matter that can have a direct impact on the final appearance of prints. Dimensional variations
of a sleeve radius can also have an impact on other functional properties (e.g. in the case of packaging).
INTERNATIONAL STANDARD ISO 15341:2014(E)
Graphic technology — Method for radius determination of
printing cylinders
1 Scope
This International Standard defines a method for measuring the external radius of printing cylinders,
specifies critical parameters and operational instructions and provides recommendations for instrument
design.
2 Normative references
The following documents, in whole or in part, are normatively referenced in this document and are
indispensable for its application. For dated references, only the edition cited applies. For undated
references, the latest edition of the referenced document (including any amendments) applies.
ISO 1101:2004, Geometrical product specifications (GPS) — Geometrical tolerancing — Tolerances of form,
orientation, location and run-out
ISO 4287, Geometrical Product Specifications (GPS) — Surface texture: Profile method — Terms, definitions
and surface texture parameters
ISO 6507-1:2004, Metallic metarials — Vickers hardness test — Part 1: Test method
ISO 12637-1, Graphic technology — Vocabulary — Part 1: Fundamental terms
3 Terms, definitions, and symbols
3.1 Terms and definitions
For the purposes of this document, the terms and definitions given in ISO 12637-1 and the following
apply.
3.1.1
flexographic printing
forme-based process/method using flexible relief formes where the raised inked areas reproduce
images onto a substrate using low viscosity inks
3.1.2
sleeve
seamless tube used to fasten printing plates to rapidly change printing forme on a press
3.1.3
mandrel
cylindrical shaft equipped with a mechanism that allows a sleeve to be securely attached
3.1.4
repeat
circumference of the external surface of a printing forme when installed for printing
Note 1 to entry: Sleeves are commonly designated by their repeat.
3.1.5
printing cylinder
rotating carrying component of a printing forme structure
Note 1 to entry: A printing cylinder can either be a sleeve on a mandrel or a solid cylinder.
3.2 Symbols
For the purposes of this document, the following symbols apply.
−1
α thermal expansion coefficient (K )
4 Measurement device
4.1 Principle
The measuring device is formed by a mechanical frame supporting two flat surfaces arranged at a
precise angle, as illustrated in Figure 1. A standard high-precision indicator (micrometer) is mounted
at the intersection of the two planes created by the previously defined surfaces, as shown in Figure 1.
The device positioning on a cylinder surface is an action physically independent of the measuring using
a dedicated frame for positioning. The cylinder radius, R, in contact with the measuring tool surface is
always at a right angle to the plane. This geometric arrangement allows for the measurement to always
be performed perpendicularly to the tangent of the cylinder surface.
θ
Key
η frame angle
R radius of the cylinder
h measured distance
Figure 1 — Operational principle and 3D rendering (example of a device with a 60° angle)
2 © ISO 2014 – All rights reserved
When the device is correctly calibrated, the measured distance, h, is a measure of the cylinder radius
and can be converted using a suitable formula based on the frame angle. In practice, the measured
distance, h, can be used to estimate the cylinder radius since the equality is only true if the cylinder is
perfectly round. This feature makes the device sensitive to the cylinder shape, allowing for capture of
deviations from a perfect round. For measurement of out-of-roundness, it is recommended to take at
least three measurements, rotating the cylinder by 60° between measurements.
4.2 Apparatus
Table 1 defines the critical parameters necessary for the construction of an apparatus. Aims and
tolerances for specific applications are provided in the annexes.
NOTE 1 It is intended that future editions of this International Standard will contain specific applications
beyond that included in Annex A.
Table 1 — Critical parameters
Parameter Unit
Frame angle °
−1
Thermal expansion coefficient, α K
Total weight of assembled apparatus kg
Total width of the frame active surfaces mm
Edge radius of the frame active surfaces mm
a
Position of the apparatus centre of mass mm
Indicator spindle movement range mm
Calibration tool (ring) diameter mm
a
Located along the spindle axis, distance measured from the top of the frame.
Annex A provides information for measurement of mid-web flexographic sleeves.
NOTE 2 Annex A lists the critical parameters for a particular application, measuring mid-web flexography
sleeves having a repeat between 490 mm (radius of 77,986 mm) and 740 mm (radius of 117,775 mm).
The device shall contain a mechanism capable of assuring that, during operation, both contact lines
generated between the printing cylinder surface and the frame surfaces are parallel to the cylinder
longitudinal central axis to ensure a correct reading of the distance. The same or a complementary
mechanism
...


Questions, Comments and Discussion
Ask us and Technical Secretary will try to provide an answer. You can facilitate discussion about the standard in here.
Loading comments...